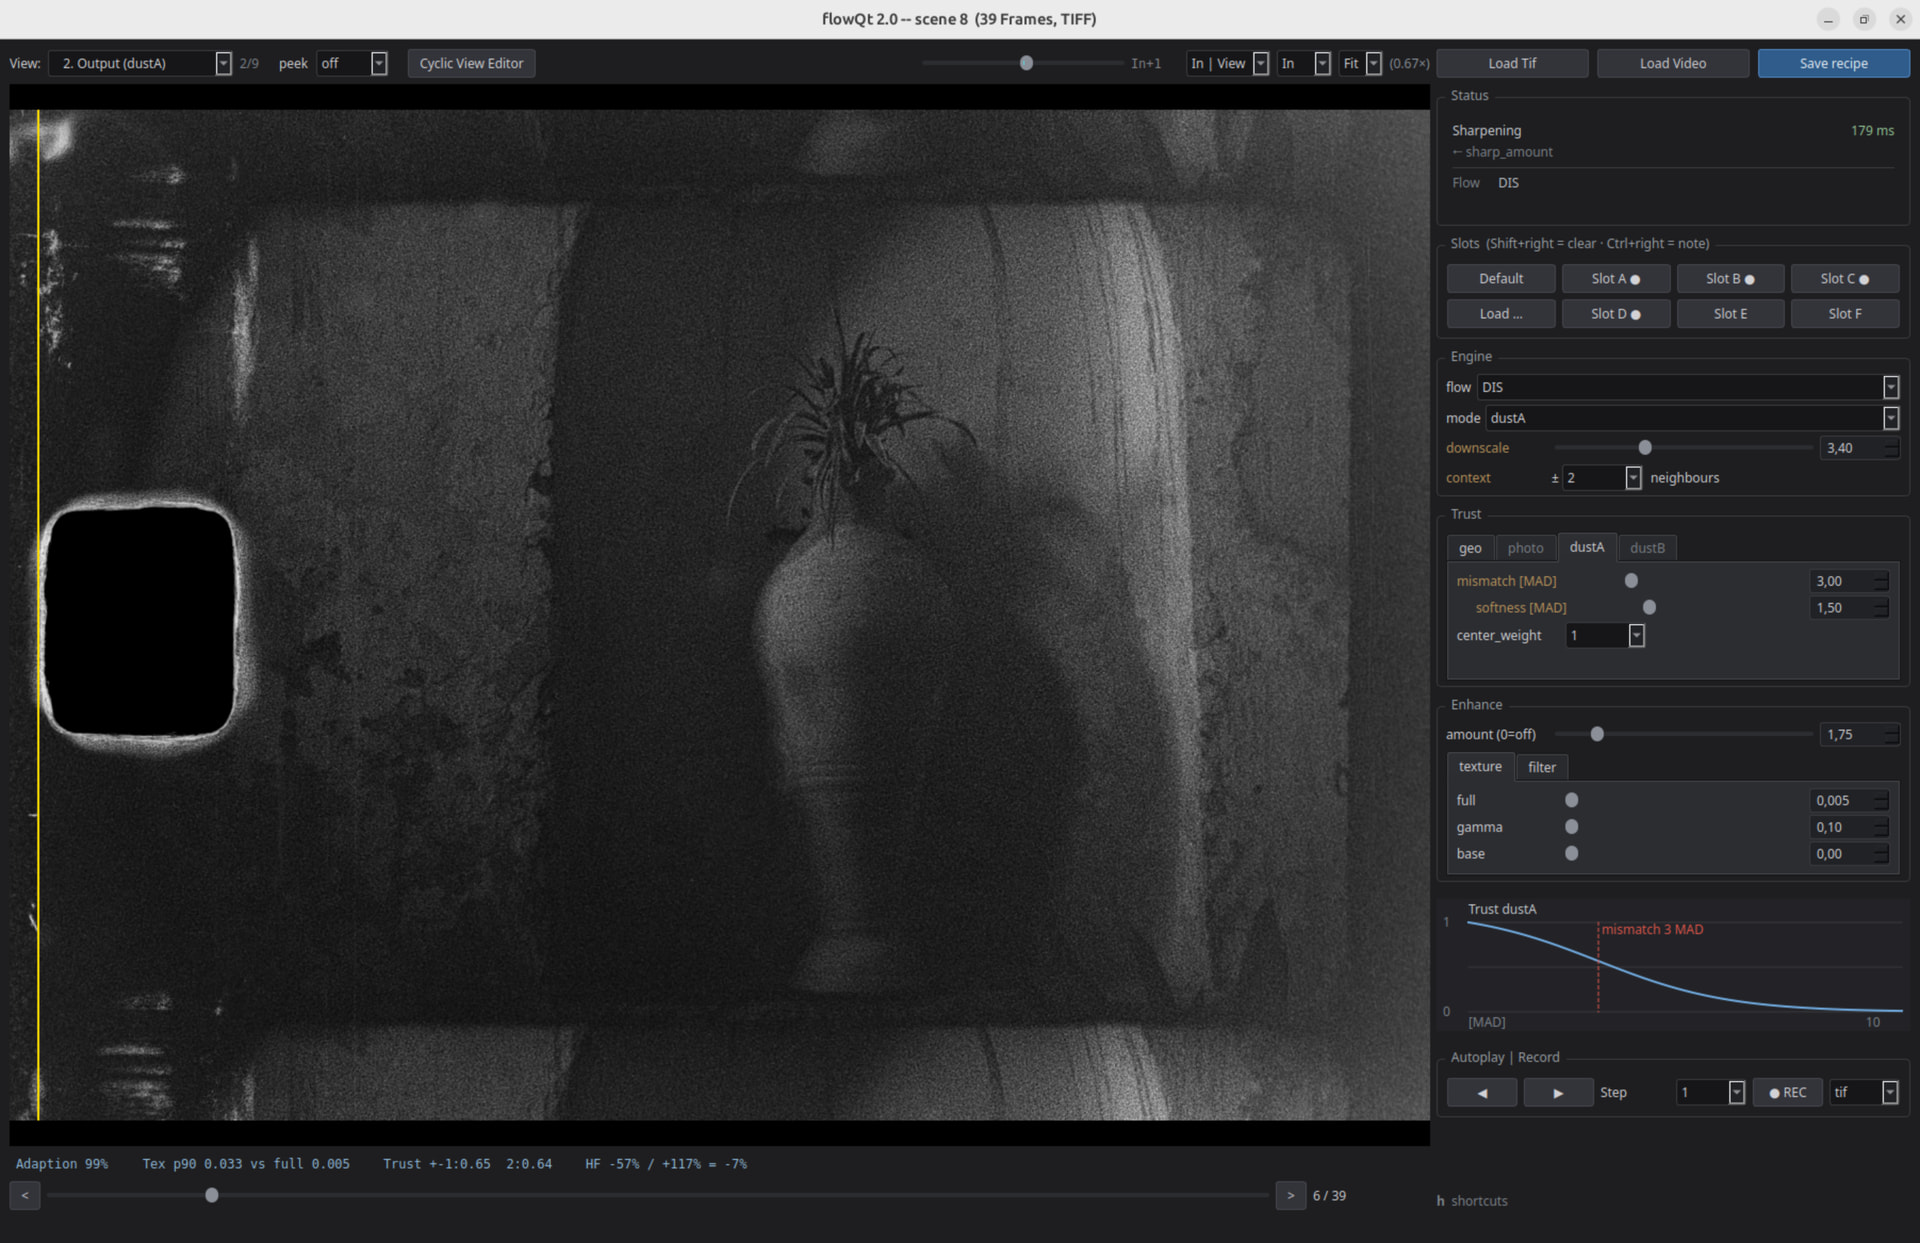
Over the past months I have been building a degraining tool for my own Super-8 scans, and it has reached the point where it might be useful to someone else. It is on GitHub now, GPL-3.0:
The software should run on any PC with a Python interpreter - if it has a CUDA-enabled graphics card, it will be faster.
There are two programs in the repo:
flowQt - a GUI-program that lets you set various parameters for scene-specific processing
cineFlow - a batch processor that applies them to a whole folder of scenes
It was tested under Windows 11, WSL2 and an older Linux Mint distribution.
Small update pushed. The manual has a new chapter on how the Enhance stage decides where to work — the texture measurement, the histogram behind key t, and what full, gamma and base actually do to the curve. That was the part where the documentation was thinnest.
Also fixed: file paths with non-ASCII characters. Snapshots (key p, a PNG of the current view) would silently fail to write on Windows whenever the path contained an umlaut — or anything else outside the local code page. Reading and writing now go through Python, so anything outside ASCII works now.
Thanks to Pablo (@PM490 ) for the first independent install report — good to know it goes through on a machine other than mine.
@cpixip, thanks again for sharing your work. Your contributions to the community always move the needle.
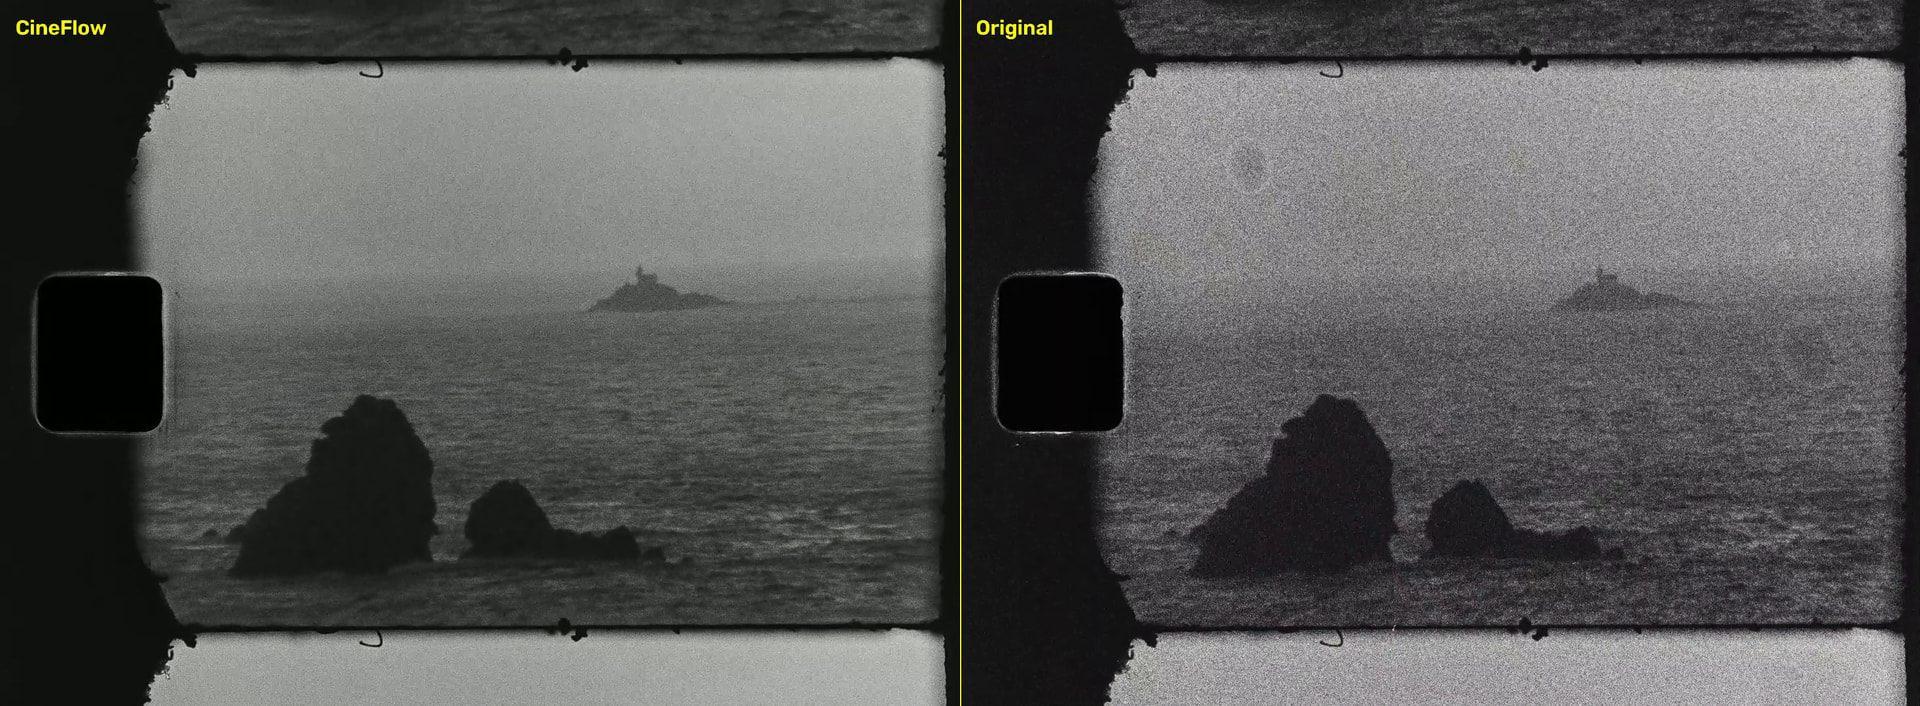
Here is a scene scanned with Tingopix at full HQ sensor resolution, and processed with cineFlow looking to improve resolution without fully removing the film-grain-look. I am sure that cineFlow can do more (once I get better at the controls).
This was CPU processed, as my old GTX1060 does not have enough memory to handle full resolution.
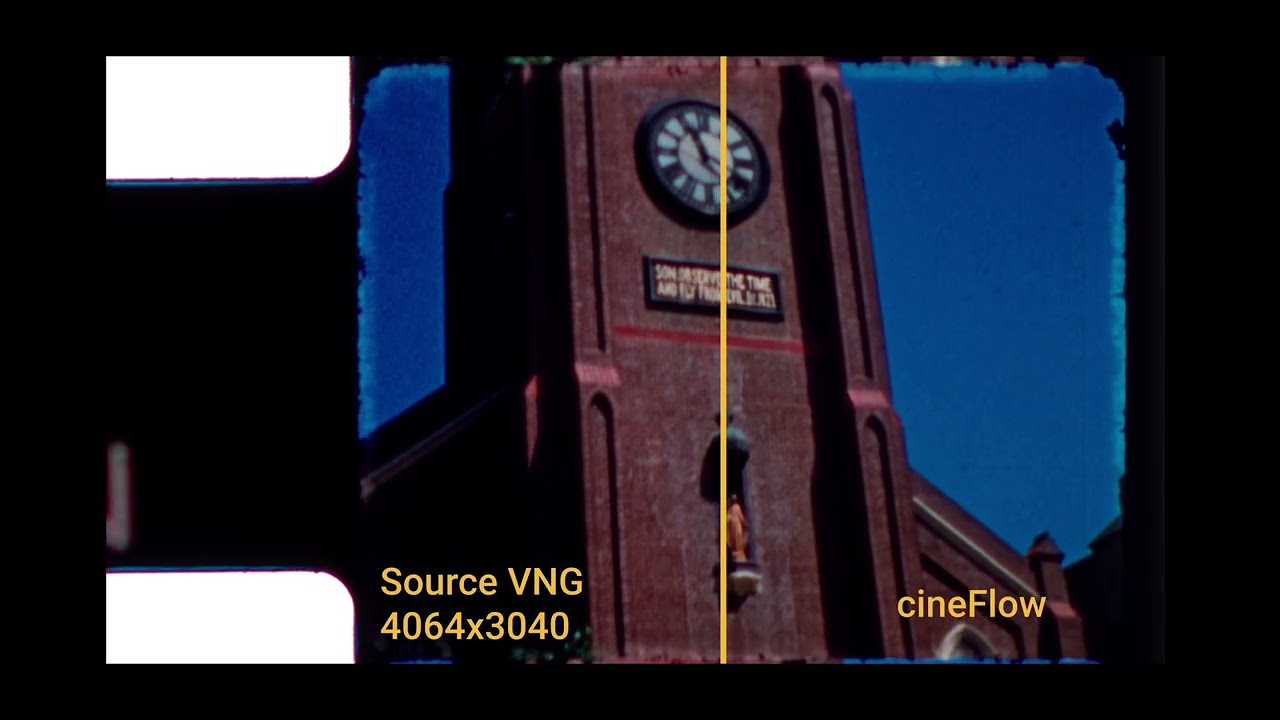
Here’s a collection of examples to show you what you can expect:
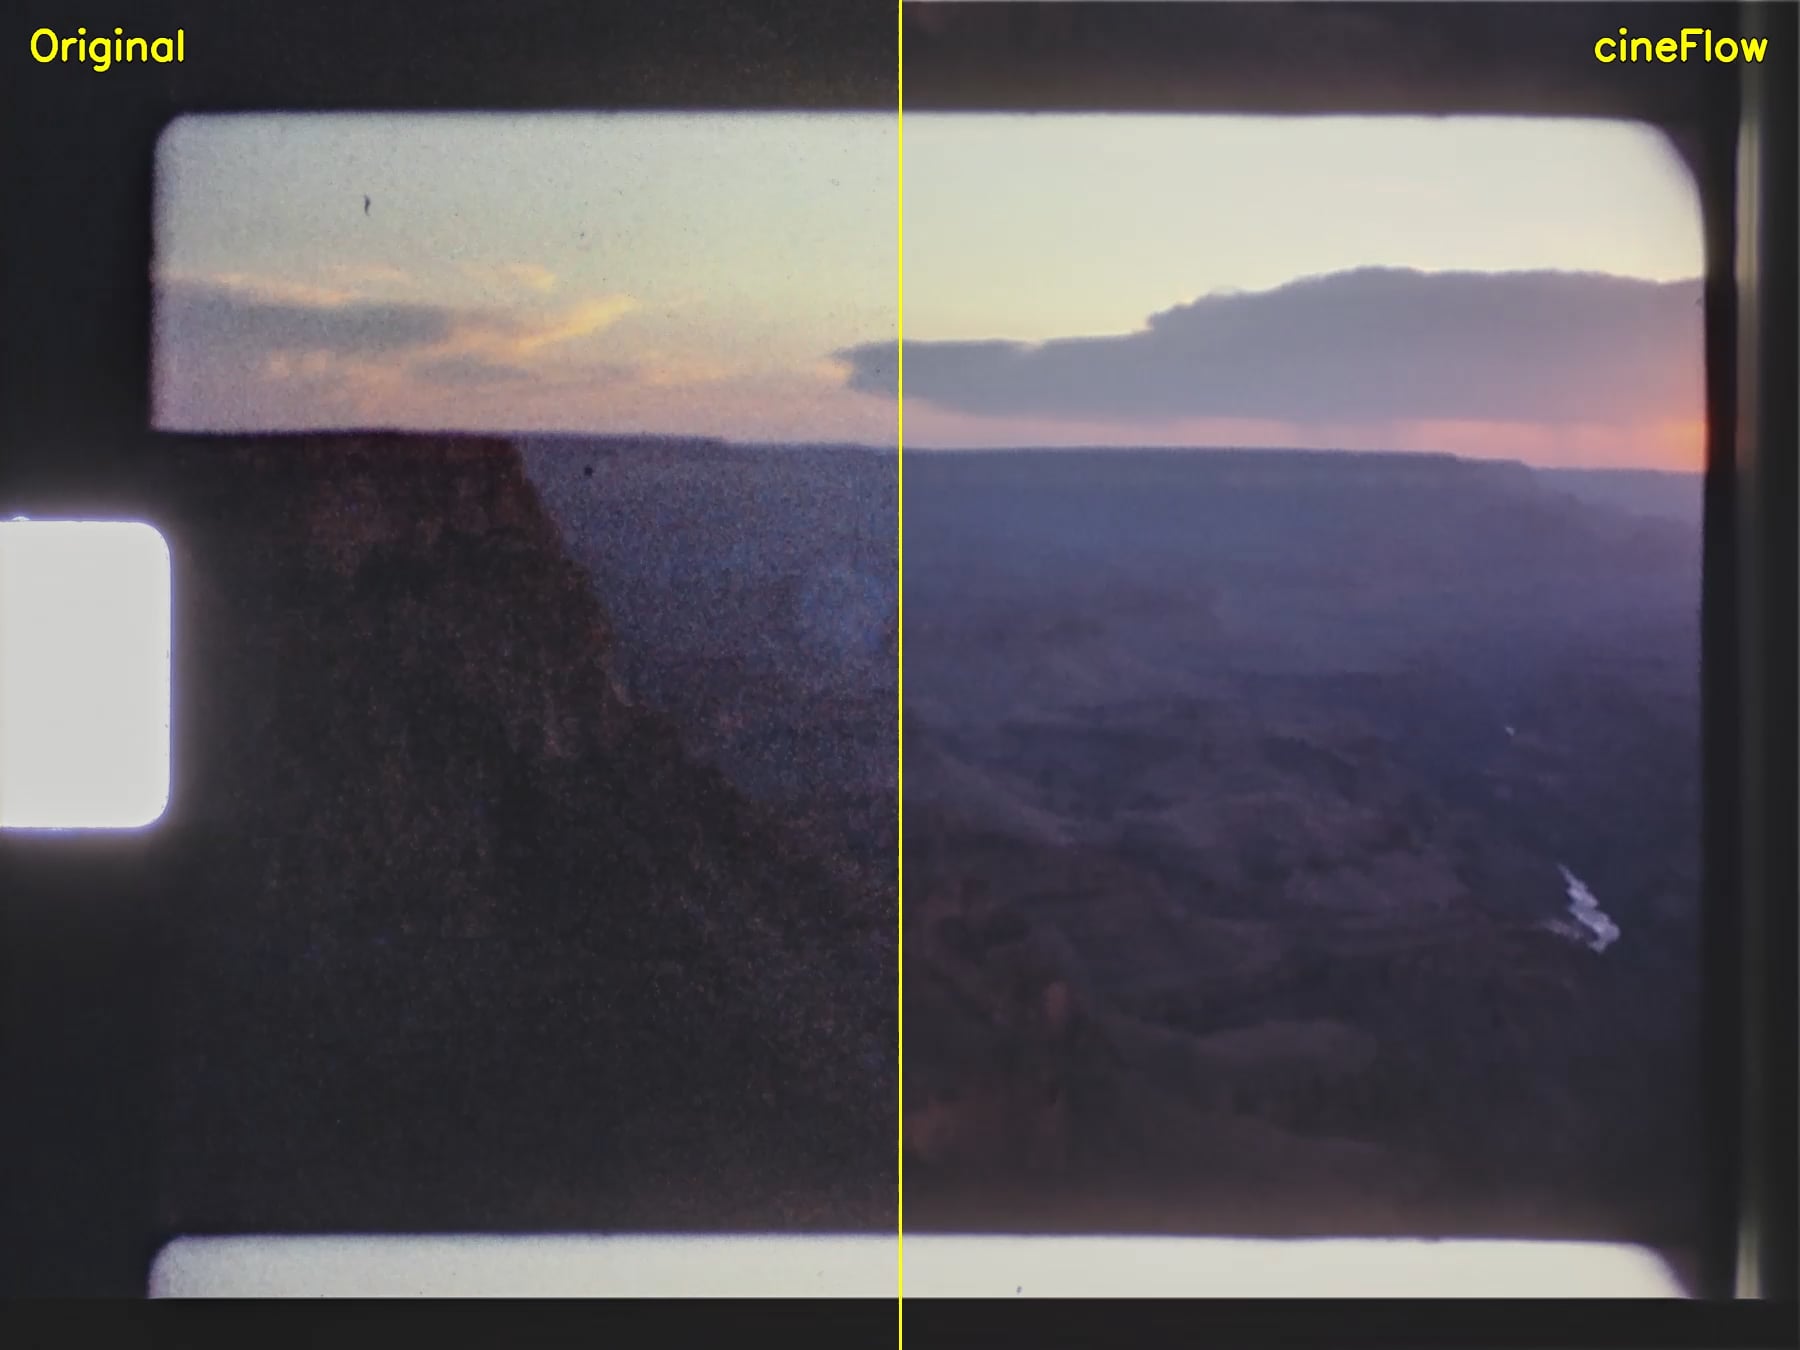
Left: raw scan. Right: processed.
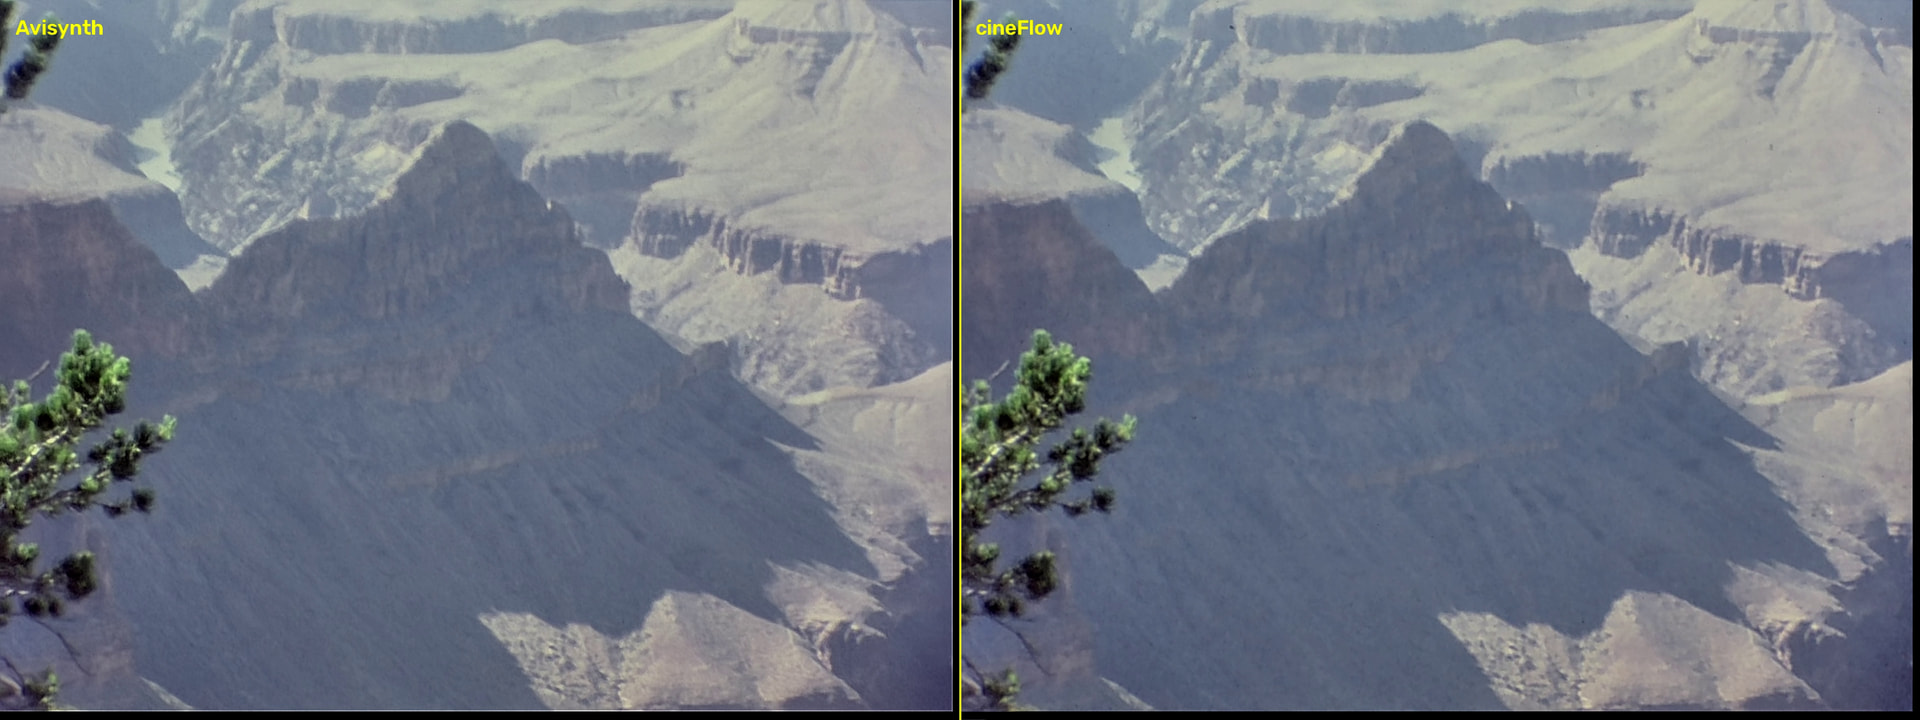
Grand Canyon — heavy noise in the shadows. Two factors combine here: the K25 latent image sat for over a year before development, and the scene itself has a very high contrast range.
Fast Birds — many small, fast-moving objects against an almost textureless background. Notoriously difficult material: averaging over time without tracking the motion properly gives you smearing or double contours.
Yellowstone — fast-moving diffuse objects (a waterfall) and transparent spray. Image content that strictly speaking has no unambiguous correspondence between two frames at all.
Las Vegas — wide contrast range and rapidly changing lights. Not an easy one.
Rooftops Seattle — a different film stock: Ektachrome, nicely faded over the years. Different emulsion, different grain.
All footage is Super-8, scanned including the perforation and frame edges — nothing cropped or cleaned up beforehand.
A note added: the sections listed above use different parameter sets, optimized via the GUI flowQt for the material at hand. All scenes within a section use the same settings.
The example reel above was not stabilized at all. So no, generally. But: it helps, as the motion-estimation becomes easier.
Well, my previous algorithms were based on avisynth-libraries (in fact, you can see examples in older forum posts here at Kinograph). These are however not the classical Temporal-Denoiser-Scripts available on the internet. In fact, I have a set of 5 specialized scripts for certain situations.
But, working within the avisynth-context is really challenging, especially because of poor or non-existing documentation of function parameters. The optimal setting of these parameters determine mostly the quality of the result. So in the end, I decided to create my own software with the key element of a GUI, where you can set all parameters interactively (sort of). And I developed my own algorithm for the task at hand.
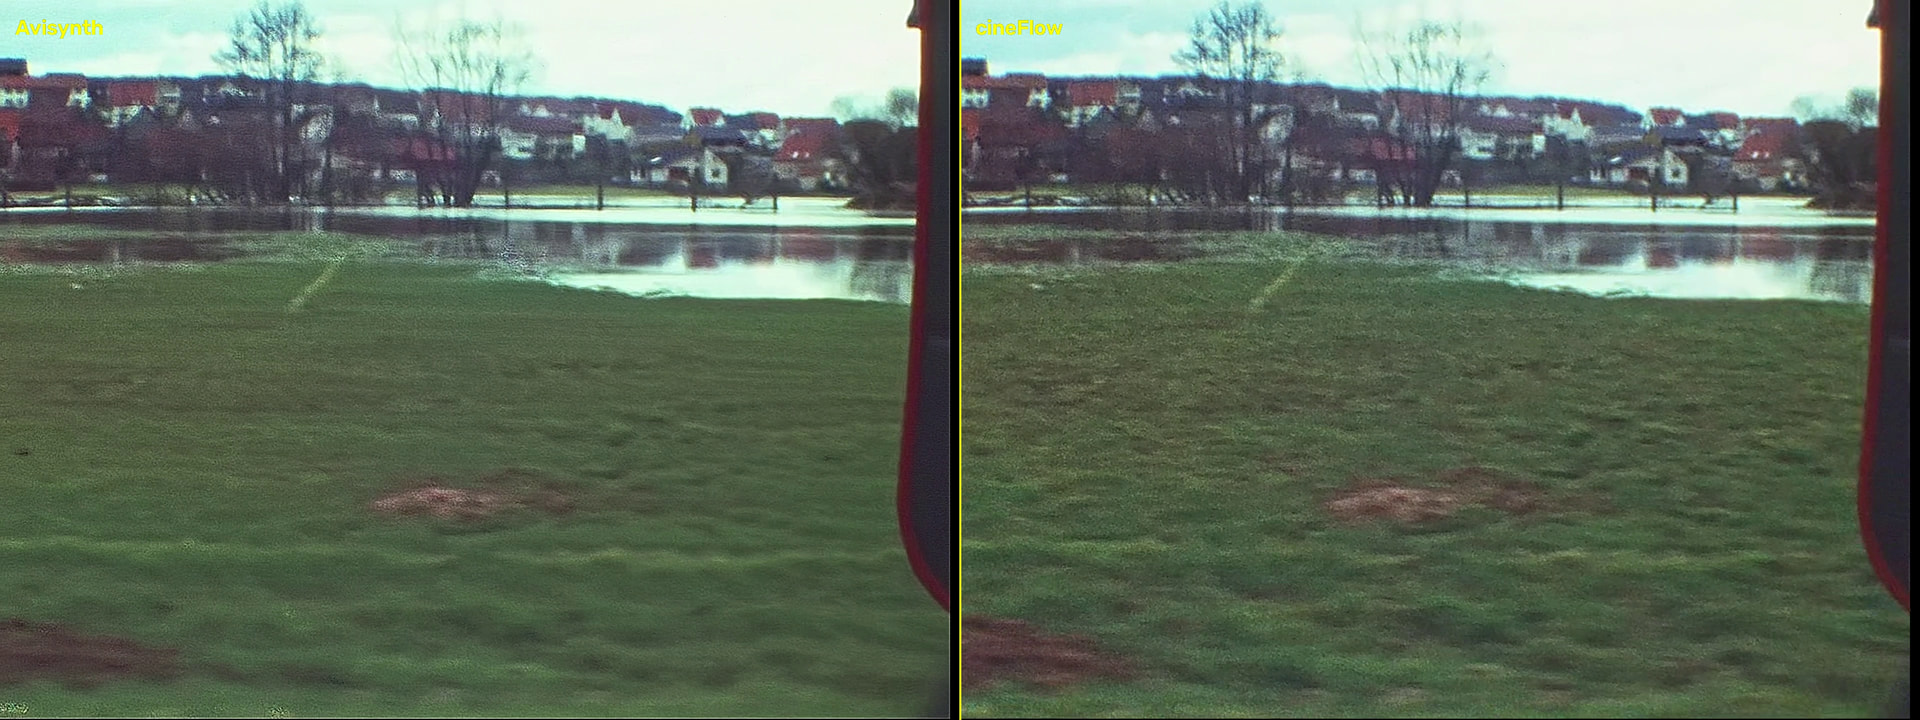
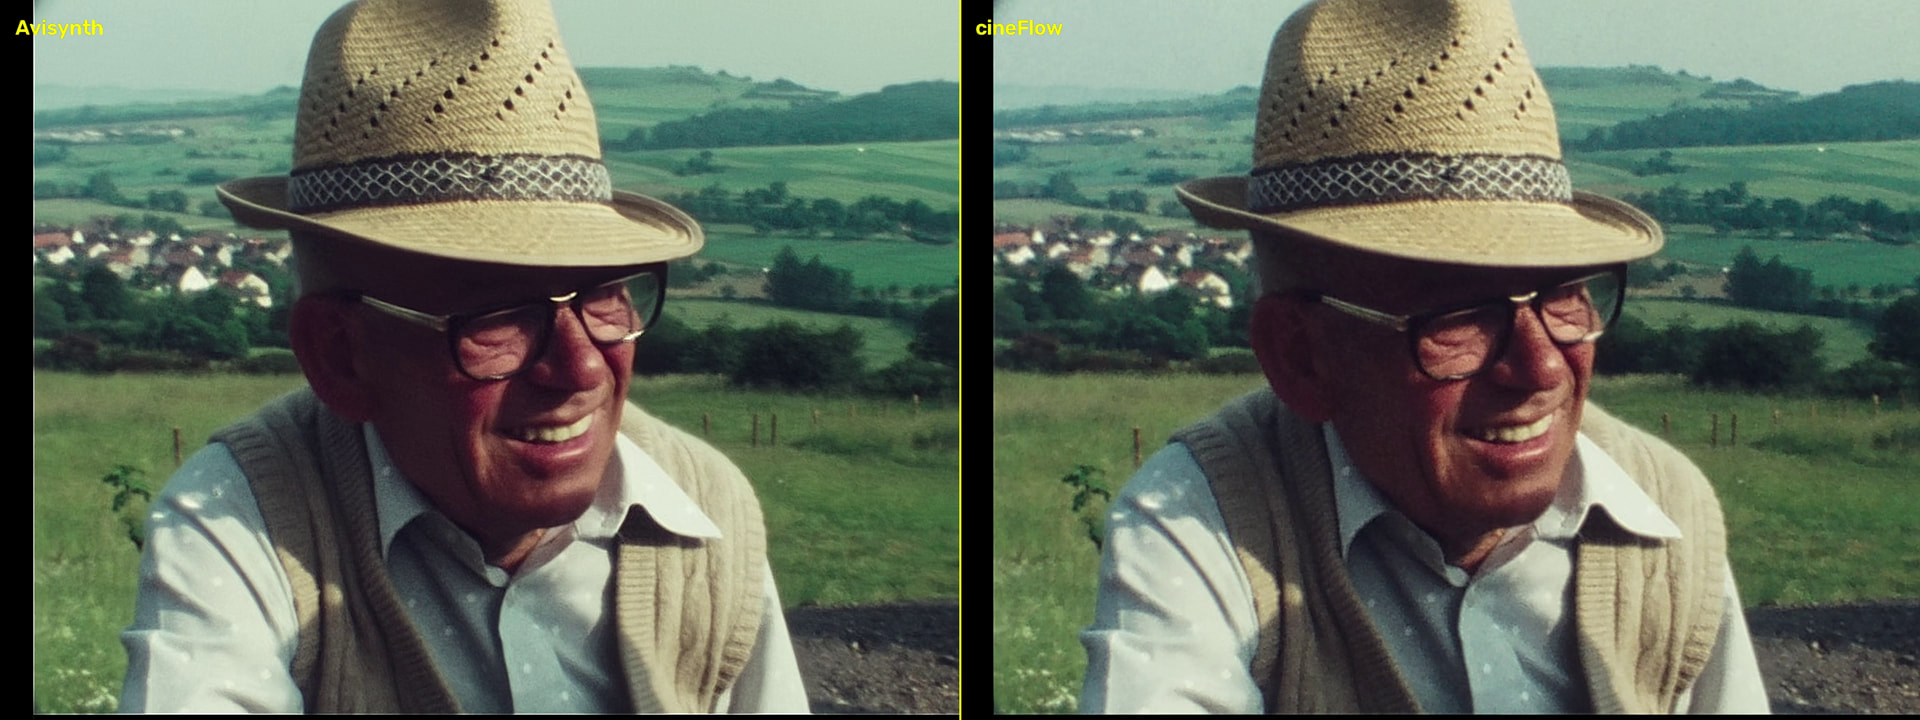
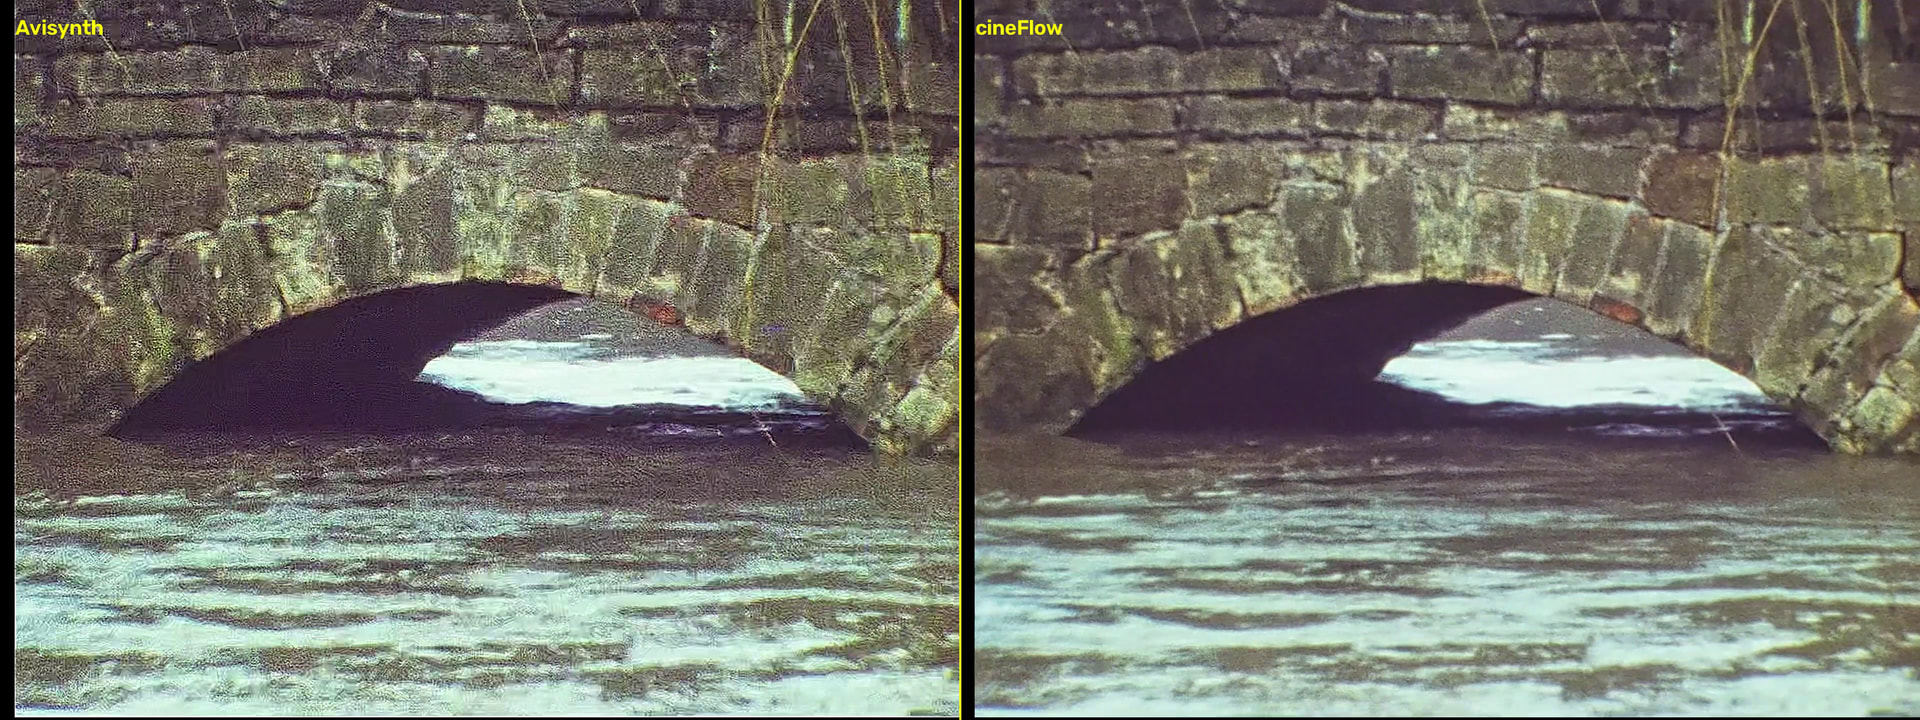
Now, a comparison is hard to make: you never know if a bad results is caused by bad parameters or by a principle system flaw. Here’s a failure of the avisynth-script:
Especially with fast moving objects in high grain areas, cineFlow performs better.
(Note: these examples were not “tweaked” to give good results. They were all processed by cineFlows standard parameters, except context, which was set to context = 2)
Hi — for anyone who wants to try out cineFlow and its GUI: there is a newer version on GitHub.
Some minor cosmetic changes to the program, but above all better default values — the ones used when the user sets nothing. I have tested these with HDR/RAW, Kodak/Agfa/Fuji and several very different scenes and film sections.
The defaults should now be a better starting point for your own optimisation.
I really want to try it on my films but I exported them as a jpg image sequence, do you think you could make your script work for jpg too (not tif only) ? Would that make sense ?
Well, in a strict sense: no. The film grain is a very delicate structure and jpg eats away that structure, together with the optical image content we are trying to recover. It mainly depends on your “quality” setting, or whatever your encoder calls it.
The easiest (and fastest) approach would be: load your jpg frame sequence into any editor of your choice (DaVinci is fine) and render it out as a video. If you have the space, I would suggest ProRes as codec. cineFlow as well as flowQt happily work with such video files.
If you need to use h.264 or h.265, try at least a high bandwidth setting - otherwise the grainy areas will be smeared out with no chance to recover any optical image structure. Compression kills the signal we are analyzing in cineFlow/flowQt
In any case, I take this as a suggestion for further program development. I’ll post upgrades of the software in this thread.
Note added: if you are referring to the output format: cineFlow can be instructed to output video files like ProRes or h.264 with a command line option. Just call cineFlow without any option to see the possibilities. flowQt can render directly into mp4 with a low quality codec for fast checks - the manual has details on that. Actually, the first worked example of the manual renders out mp4. Currently, only tif and video formats ffmpeg knows about are supported as input data.
I’ve exported some tiff sequences to test cineFlow, my use case might be a bit different, I don’t mind the super 8 grain nor the lack of sharpness, but I really need to remove dust and dirt from my films.
CineFlow gave me pretty good results with color negative films (50D) but for b&w negative not so much, the grain becomes blurry and most of the dust are not removed.
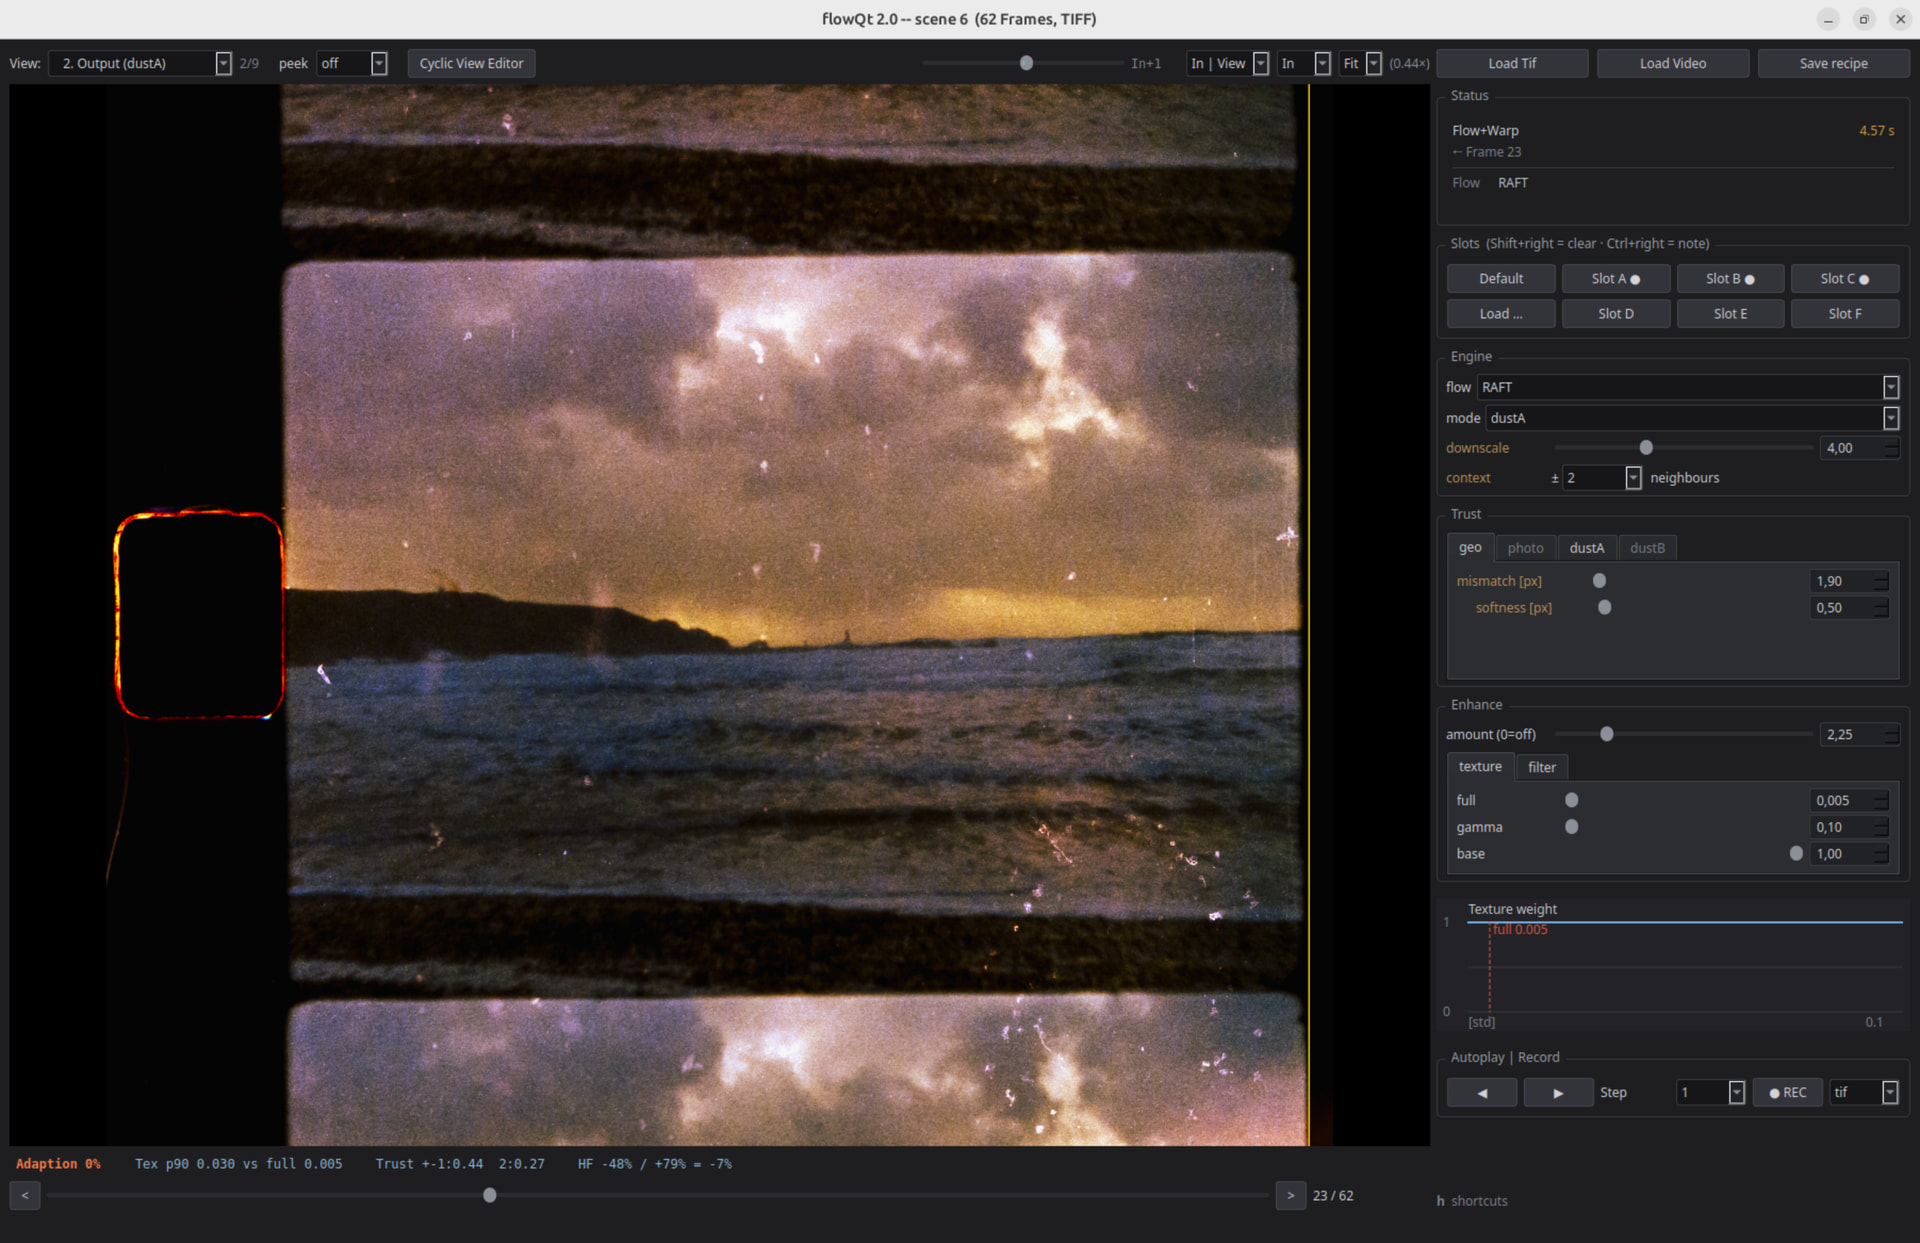
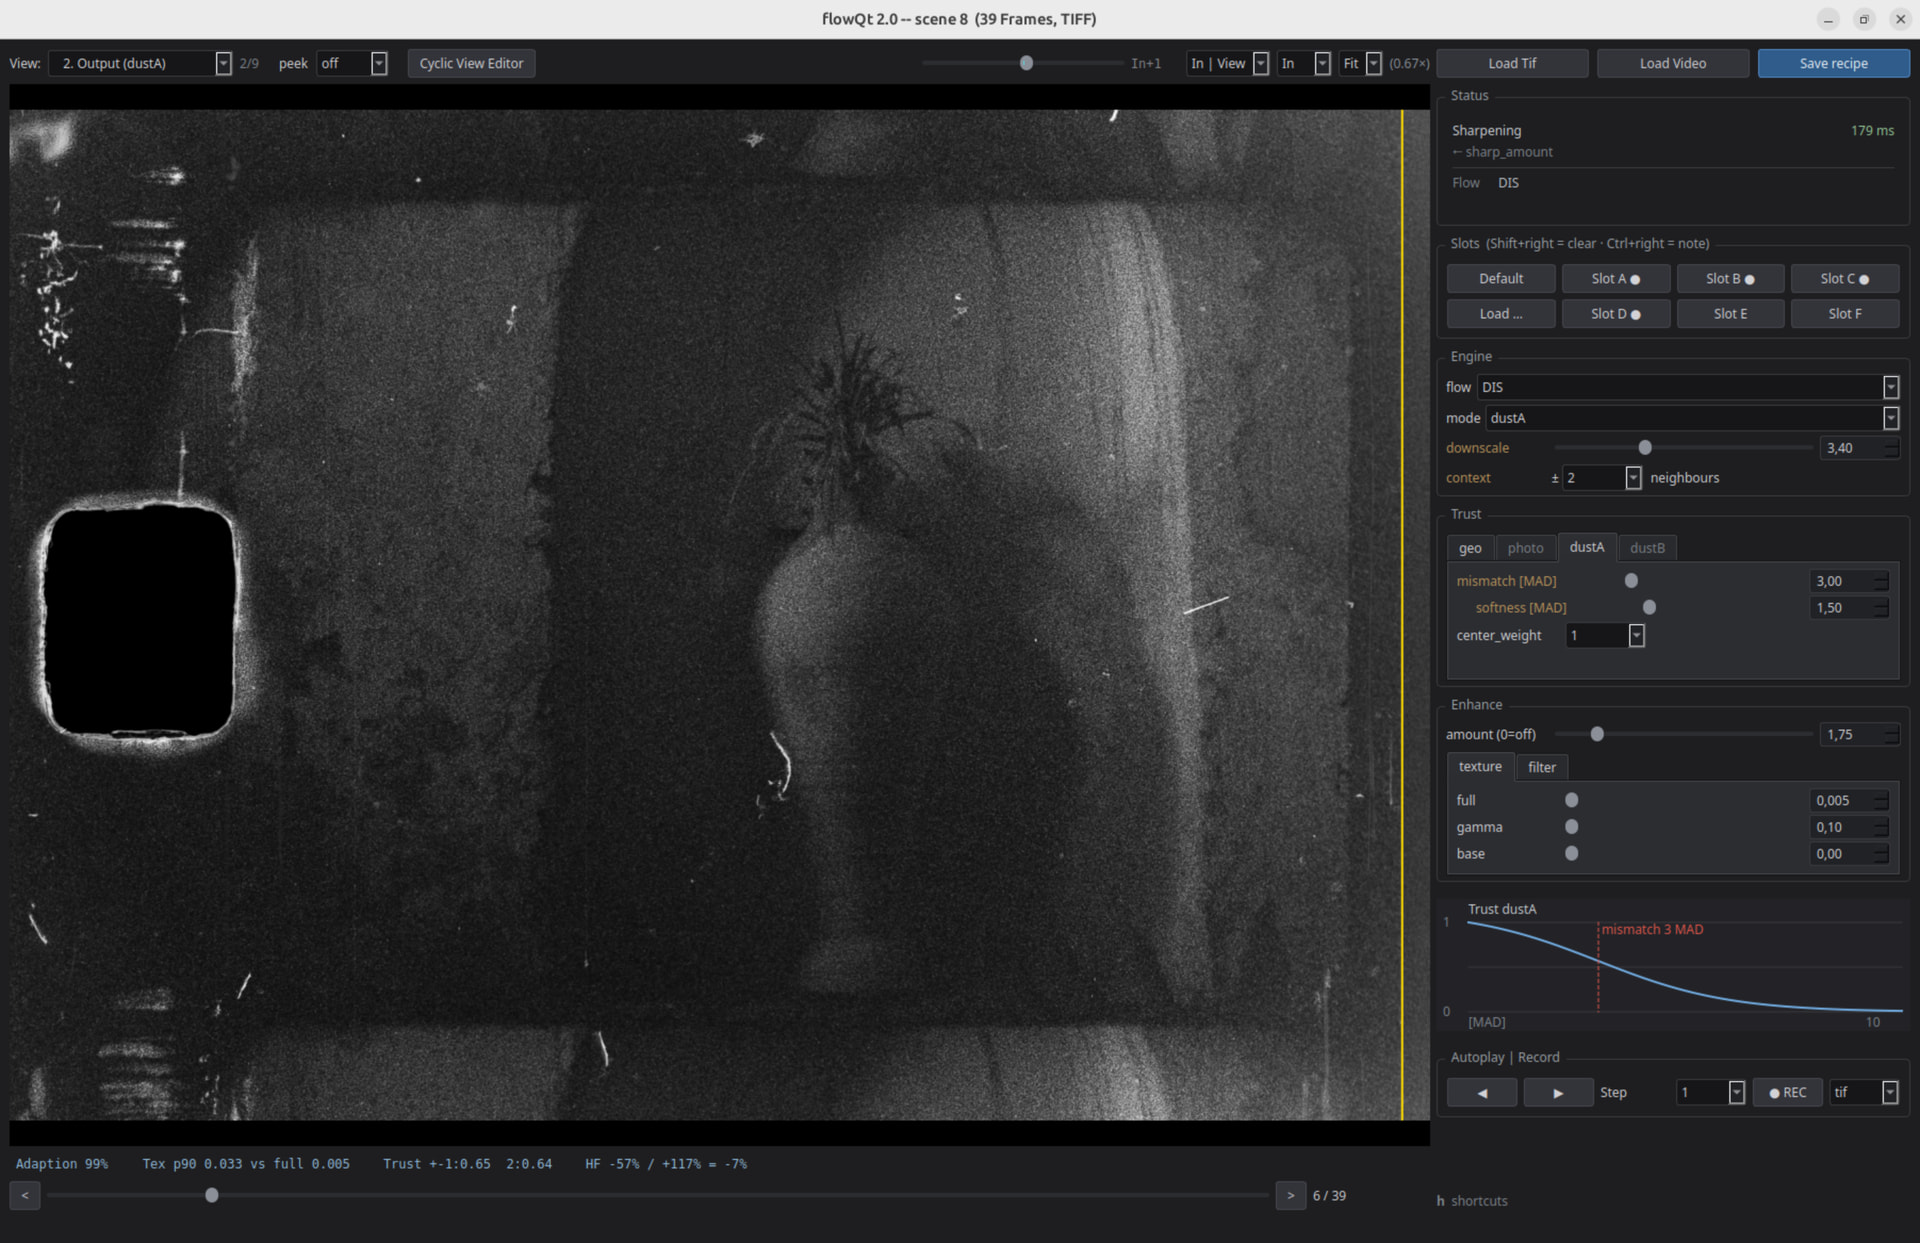
I don’t know if the screenshot is helpful, but we can see dirt on the right, and the grain is blurry in the bottom right of the sea :
Well, cineFlow was developed for S8 color reversal film. At least some of the parameters have values which would need to be adjusted for film stock with widely different grain. Seems that your bw-stuff definitely has a strong grain - it might overwhelm the algorithm in it’s current form. One would need to have a look at the flow-charts - they should not look like a random patchwork. Try to raise the downscale to higher values and see if there is a change. Also, the neural network flow estimator (RAFT) was trained on color material. Try the other one (DIS), which might yield better results. Play around with including a larger neighborhood of frames (context). That’s the reason flowQt exists: you can see (more or less) immediately whether a parameter change improves things.
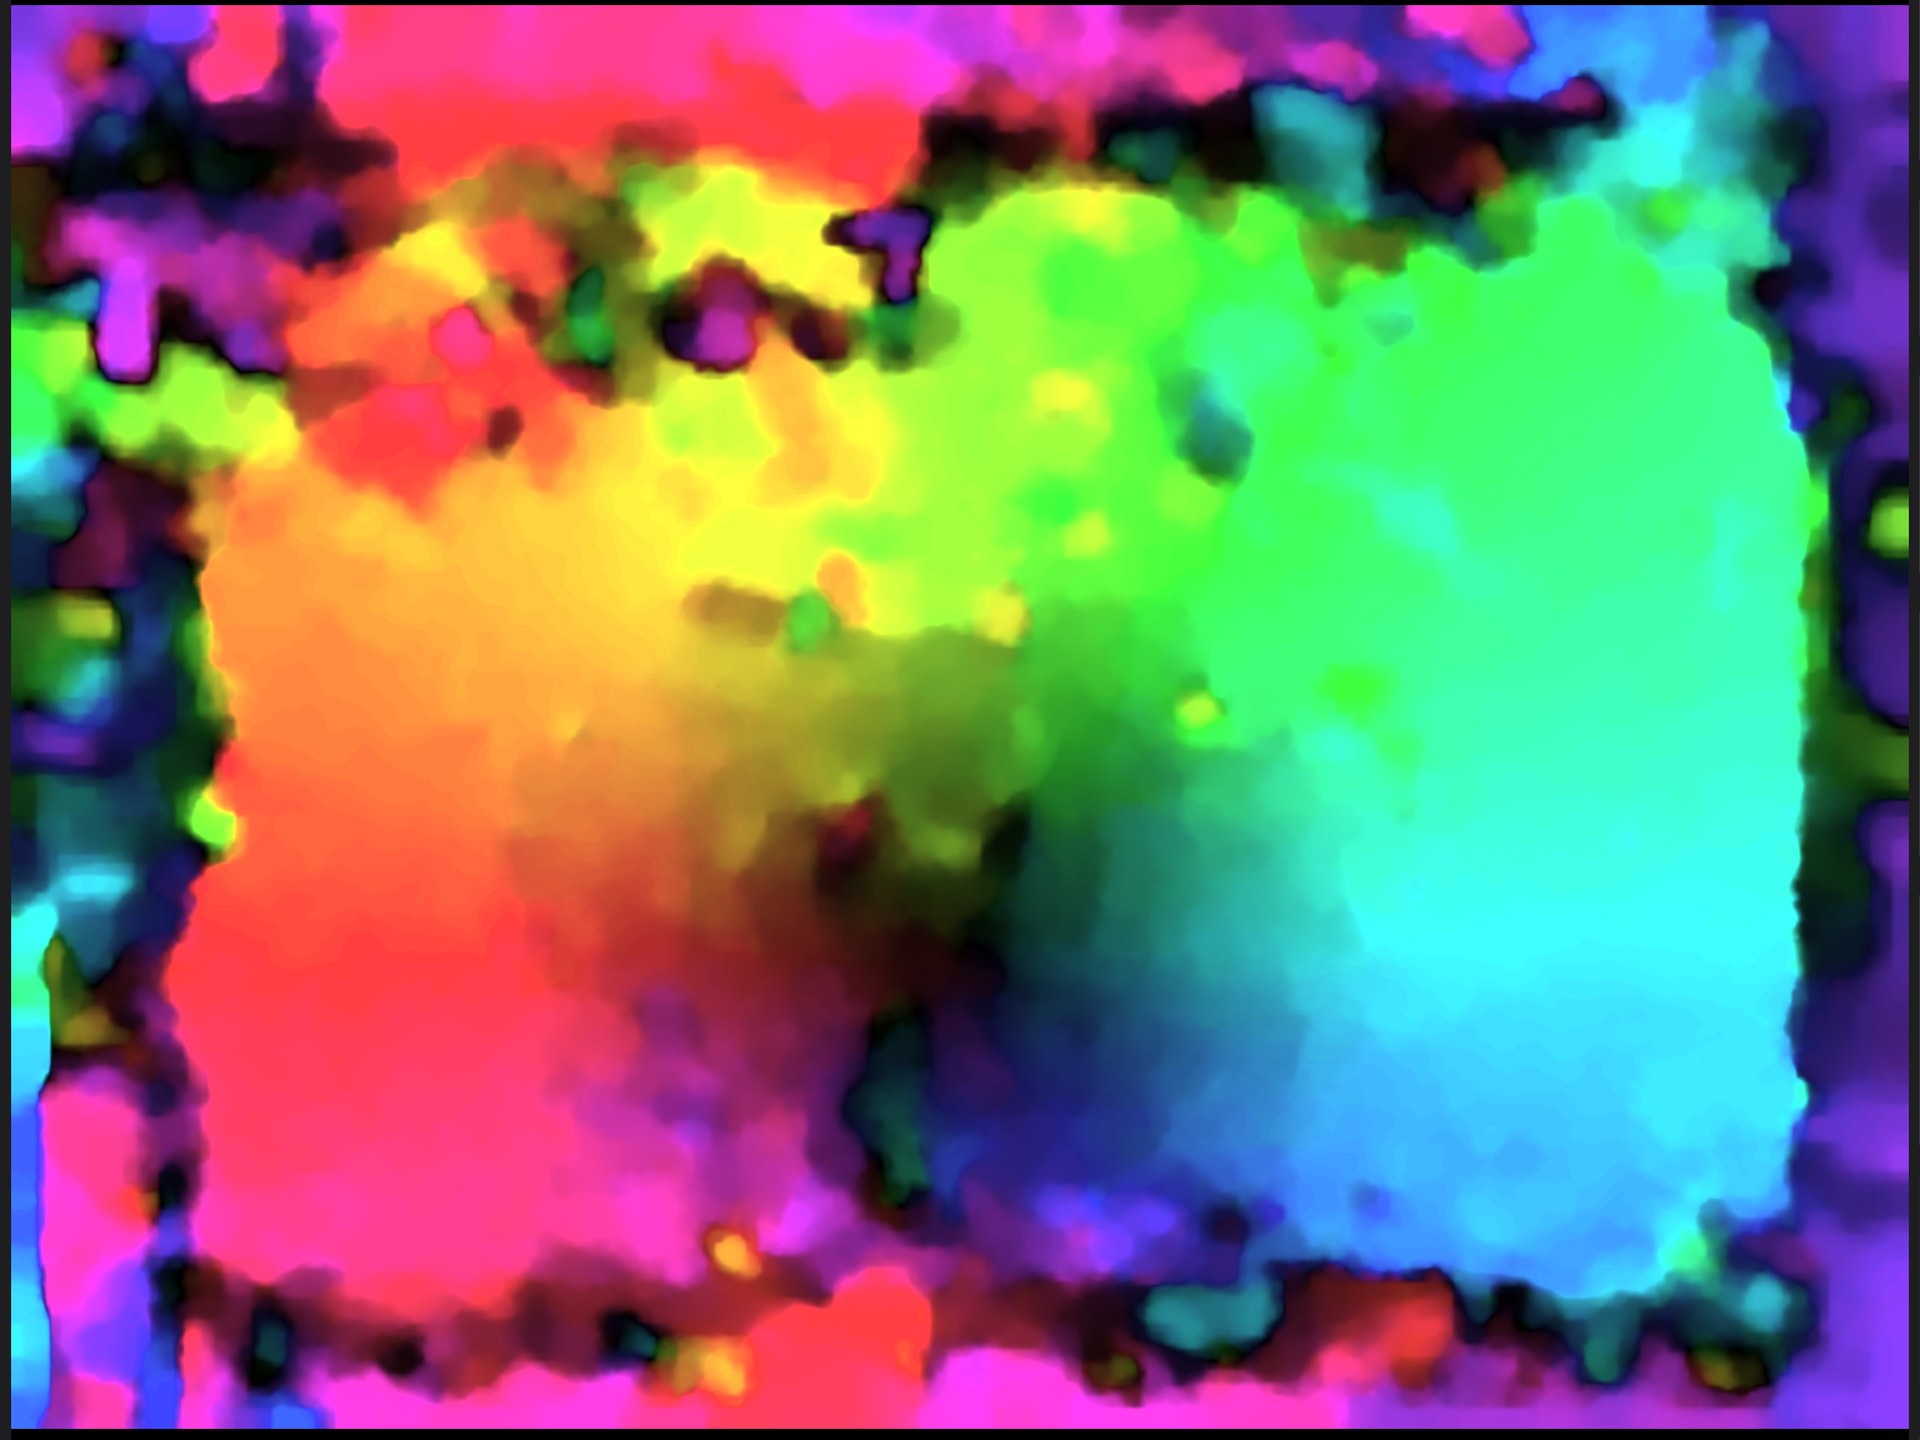
Your trust values are very low in the bw case: 0.07. Compare this to the color case: 0.44 for the nearest neighbor. Compare input (key “1”) with neighbour warped (key “3”). They should nearly look identical. If not, the optical flow computation failed. Here’s an example how the flow looks if everything works (key “5”)
(This is how optical flow looks if a camera is zooming out)
In any case, the specific purpose of the software is to handle S8 color-reversal material - your mileage with other material will vary, up to the point that it’s useless.
Thanks for the feedback, indeed, the color negative results look good (even so the software was not aimed at such material). With your bw-material, try to play around with the various parameters, check the different views provided and observe the values of the status line below the main display. Trust values of 0.4 or larger indicate that the algorithm was able to lock onto the image structure, trust values below that signal that this lock failed. Also, the Adaption value reported as 0% indicates that your parameters for the E-layer are not optimal.
Since the cli is able to handle a directory with multiple scenes in it I think it would be nice to be able to do the same in flowQt.py
We could have an horizontal panel with all the scenes similar to the “clips” panel in Resolve.
Creating multiple recipes would be much faster this way without browsing to each scene directory individually.
Processing is quite slow for me, about 0.25fps, giving more than 4 hours of processing time for a 3min super 8 film.
I’m running an Intel Core i7-1185G7 (4 cores | 3.0 GHz), 32go RAM, and an RTX 3060 GPU, on Ubuntu
Is this normal ?
In order to reduce disk space usage, after degraining, I’m planning on using the tiff sequence to render an uncompressed “raw” video using DaVinci Resolve, which format do you recommend ?
Sounds great! Just note that the dust-modes did not yet get the attention the main operating mode “best” received. They are still in an experimental stage.
Most notably, your trust values increased (see status line just below the main window).
You did raise the downscaler, and that will help in several ways:
it makes it easier for the flow estimators to lock onto image detail in the presence of strong noise
it makes computations faster
Speaking of computing speed. The major factor slowing things down will be your source dimensions. As mentioned just above, using a larger downscale can help here. Increasing the “content” value will also hurt your speed, but might improve your results. This is a very mighty control: try to work with the smallest value where you still get good results.
Note that cineFlow and flowQt are using your GPU, if available. The first few log-lines of flowQt will tell you exactly if everything needed is there - or misssing. This is discussed in detail in the manual, but if you see anything else than this here
```
you should investigate. In the extreme case, both programs will fall back to pure CPU-processing. Which is no fun.
To give you an idea of what you can expect: a cineFlow-run over 1800 x 1350 px frames with the default settings (content = 2, downscale = 2) reaches on my machine 2.89 fps. This is an old Intel Core i7-8700 CPU @ 3.20 GHz, with a RTX 5060. This GPU features 8 GB VRAM - which is an important variable: you should control that shared memory is not used during processing. Especially in my hardware, the GPU is connected to main memory via a PCIe 3 bus (newer PCs would support PCIe 5) - once the NVIDIA drivers start swapping, things grind to a halt, essentially. The manual has a little bit more information.
Well, actually, this functionality is already there, just implemented in a different way. Again, the manual describes the details of this concept. At this point in time, the GUI of flowQt is already overcrowded, so something like a horizontal panel was not implemented.
The basic functionality to save and quickly apply a stored recipe is using the slots available. If your visual memory is not good enough, you can save the displayed result from slot A to disk by pressing “p”. Load the next recipe, let it compute, save it again by pressing “p”. Now navigate to the folder your material is present. There will be a subfolder where you find exactly your two results to becompared with. And you can switch immediately between the two views using your file explorer.
Given, it’s not that comfortable compared to commercial programs - but the different view possiblities of flowQt were already quite challenging to implement.
In fact, the deliberate use of the file explorer is kind of build in into flowQt. Open your scene folder, drag-and-drop the first scene, grade it. Save your recipe, maybe assign a slot. Now drop the next scene onto the main window. If this scene already has a recipe, flowQt will ask you whether you want to use this old one, or whether you will use the currently active one. I usually go quickly through all scenes while keeping the recipe, noting for which one whether the current recipe works and which scenes need refinement or a totally new recipe. Than, I save the current recipe and copy it to the scenes were it worked - usually via the file explorer. I than attend the first scene needing additional adjustments, do them, save them - and so on.
This is my personal way of working - the software supports actually various other ways. There are three levels of recipes: default, global for a cineFlow run, scene-specific.
Have a look at what is possible, the manual is quite informative here. In essence: flowQt is intended to be used together with the file explorer on your machine.
I already gave you above some numbers on my machine. “Normal” will heavily depend on the recipe you are using, and on the available hardware and software environment. It PyTorch is missing (or wrongly installed), things will slow down substantially. Again, consult the manual - the programs are quite chatty in the console output and the manual discusses various solutions for specific issues.
If you run
python cineFlow.py -h
you will get the following:
```
usage: cineFlow.py [-h] [--config CONFIG] [--video-codec {ffv1,h264,prores4444,prores4444xq}] [--video-range {pc,tv}]
                   [--output-format {tiff,video}] [--yes] [--tag TAG] [--force-config JSON]
                   input [output]

CINEFLOW v2.0 -- batch processing

positional arguments:
  input                 Input path: video, TIFF folder, or parent folder holding several scene sub-folders
  output                Output root folder (optional, otherwise from config/default)

options:
  -h, --help            show this help message and exit
  --config CONFIG       Global JSON config. Scene-local cineflow.json still overrides it.
  --video-codec {ffv1,h264,prores4444,prores4444xq}
                        Codec for video OUTPUT. prores4444 = DaVinci reads it, costs 0.077 %. ffv1 = lossless, but DaVinci
                        does NOT read it.
  --video-range {pc,tv}
                        Force the range of INPUT videos. pc = full (DaVinci: 'Data Levels: Full'), tv = limited. DaVinci does
                        NOT tag the range -- without this option it is measured, and that can go wrong on flat material.
  --output-format {tiff,video}
                        Force the output format. Default: follows the input (TIFF dir -> TIFFs, video file -> video).
  --yes, -y             Answer prompts (e.g. not enough disk space) with yes -- for script/batch use where no input is
                        possible.
  --tag TAG             Descriptive suffix for the run directory, e.g. 2026-07-12_1834_texref-sweep
  --force-config JSON   FORCE this config -- scene-local cineflow.json files are IGNORED. For A/B tests of several parameter
                        sets on the same frames -- no duplication needed, the output folders get a counter suffix anyway.
As you can see, you can instruct cineFlow to output videofiles instead of tif-dirs (the later being the most professional one). One thing which has changed in newer DaVinci versions (and is wrong in the current help message): DaVinci can now read ffv1. So this would be the output codec I would recommend. If your version of DaVinci cannot read that codec, try one of the ProRess ones.
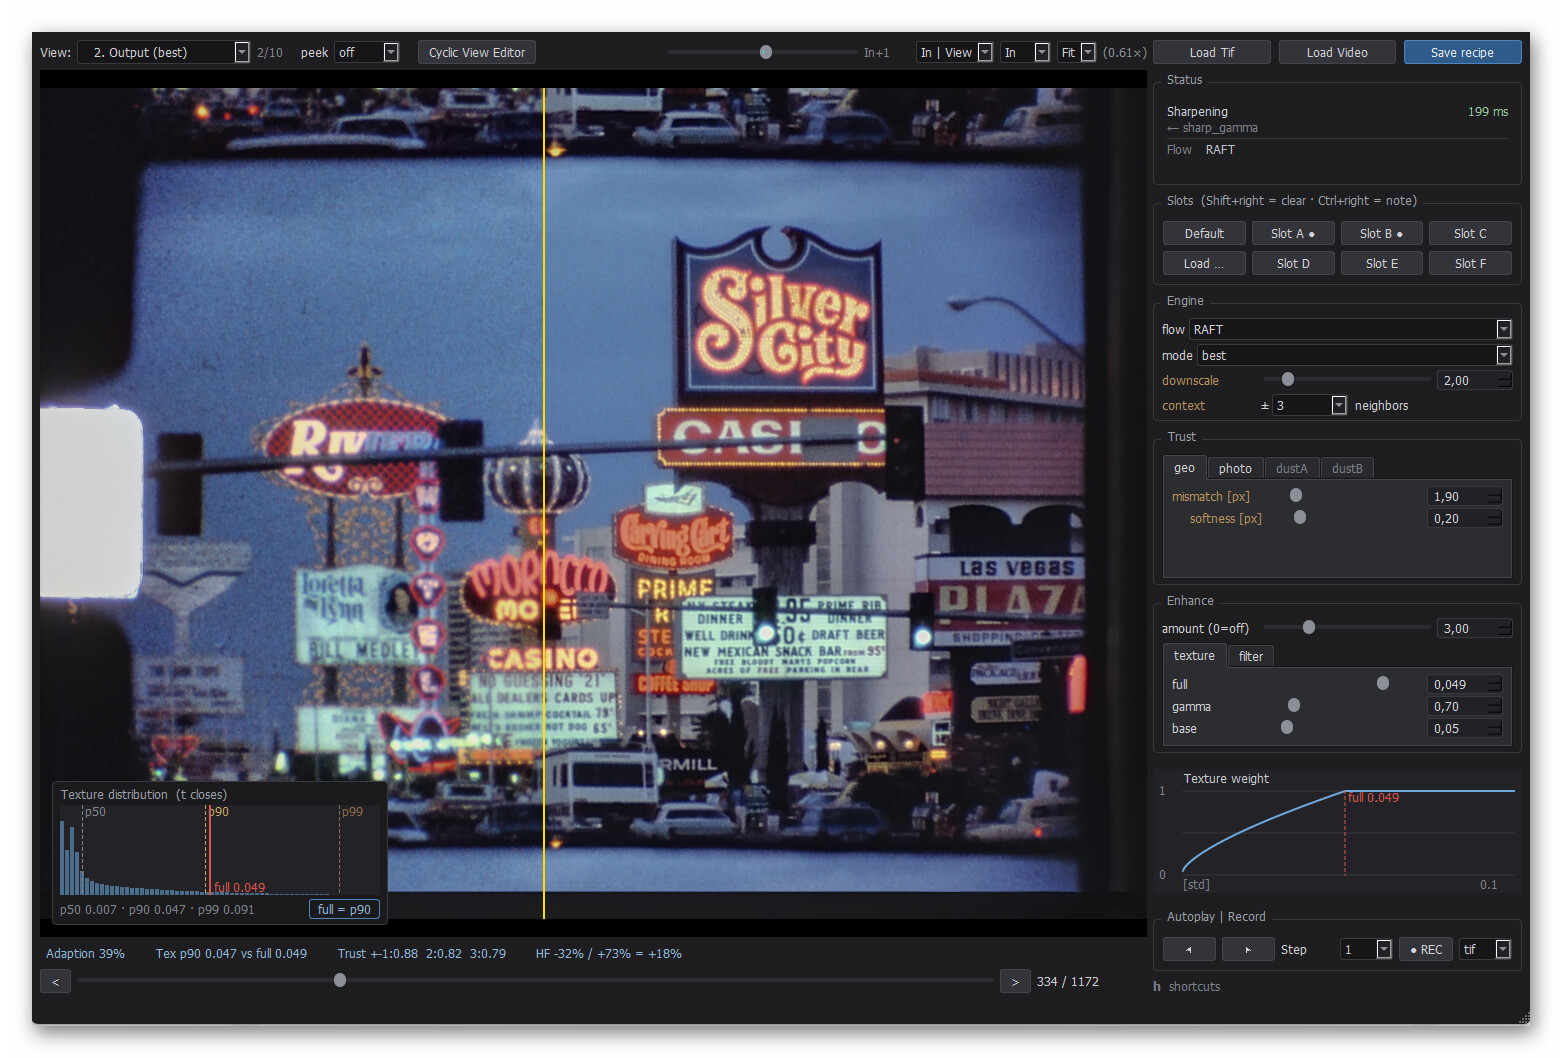
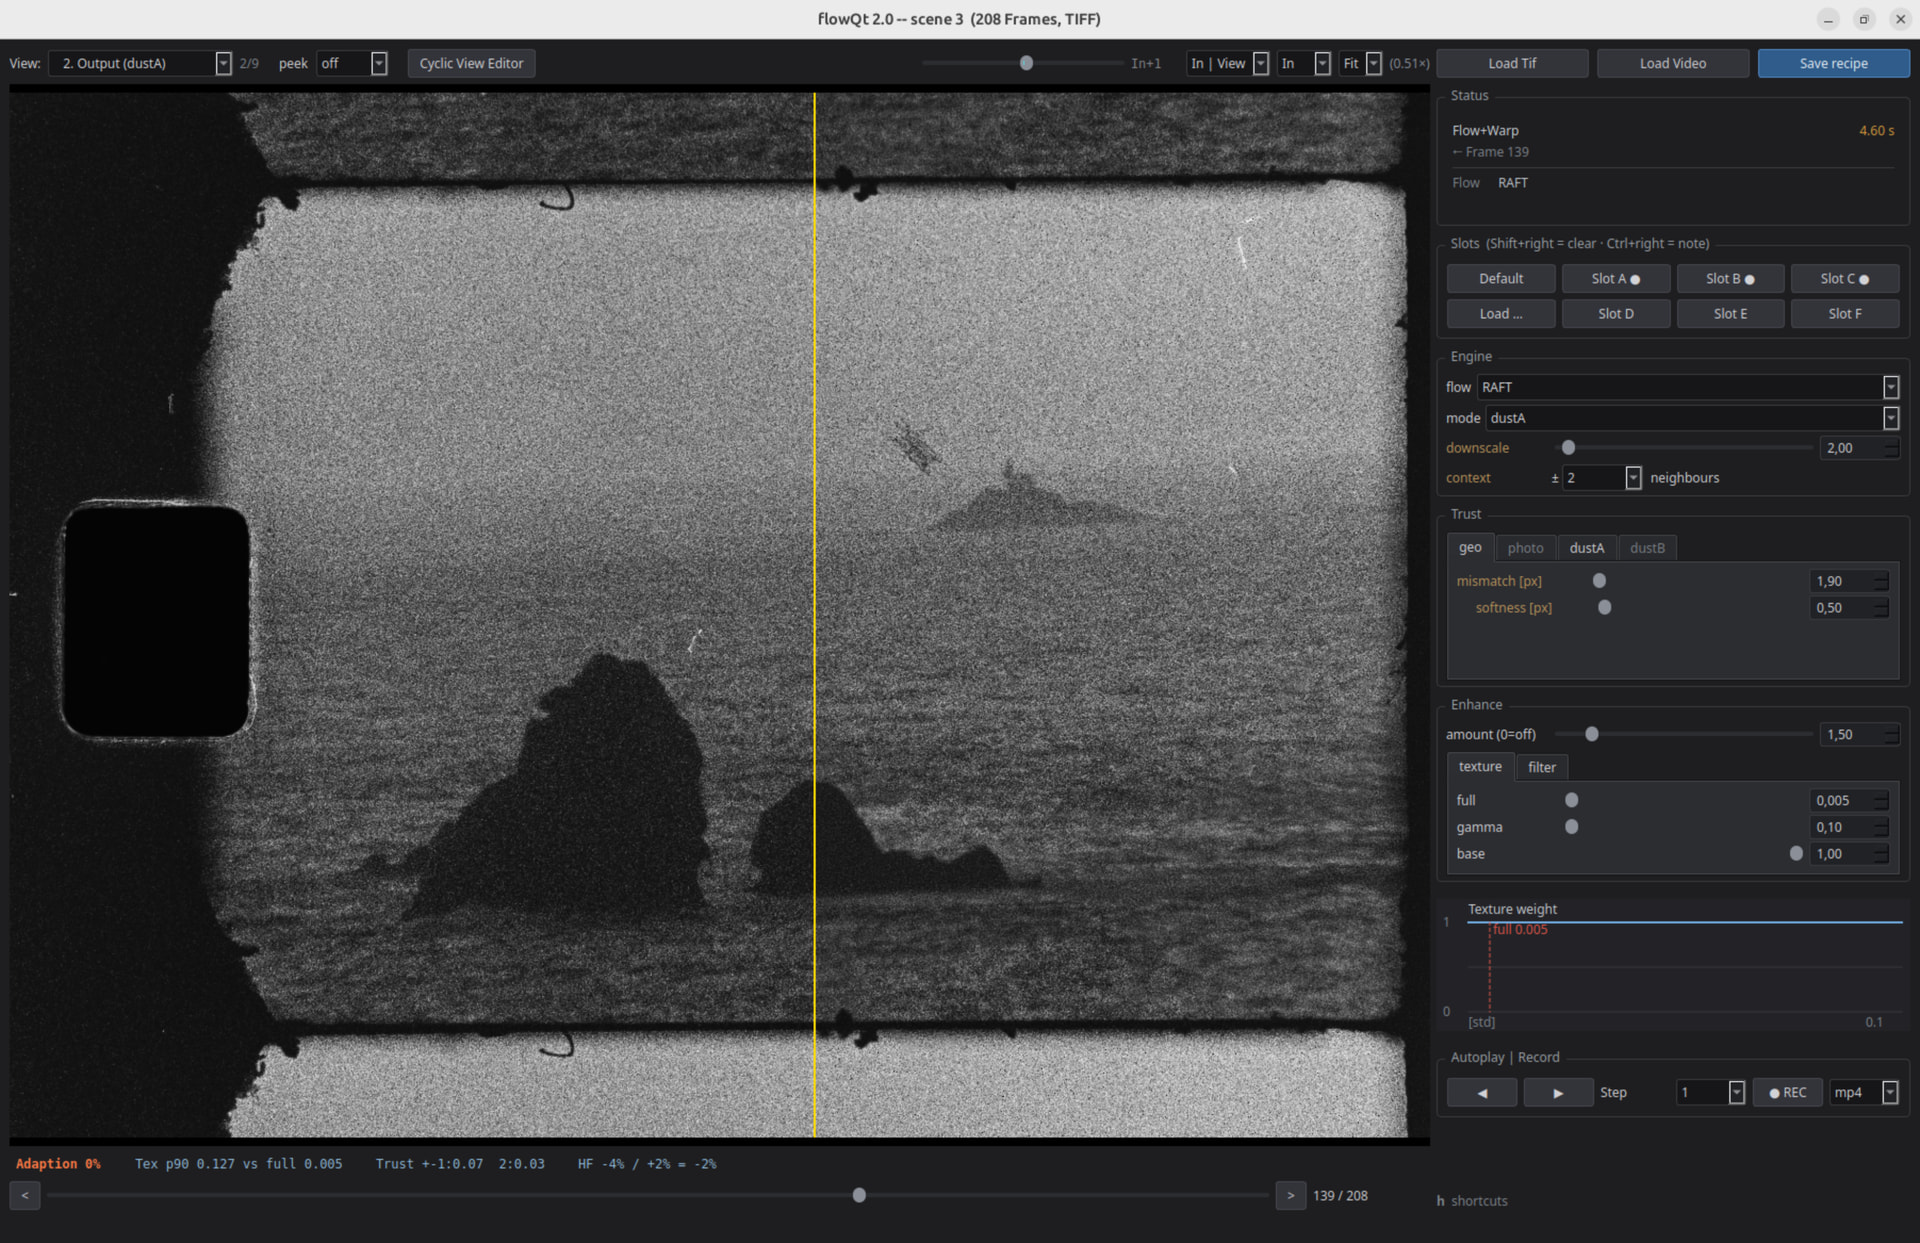
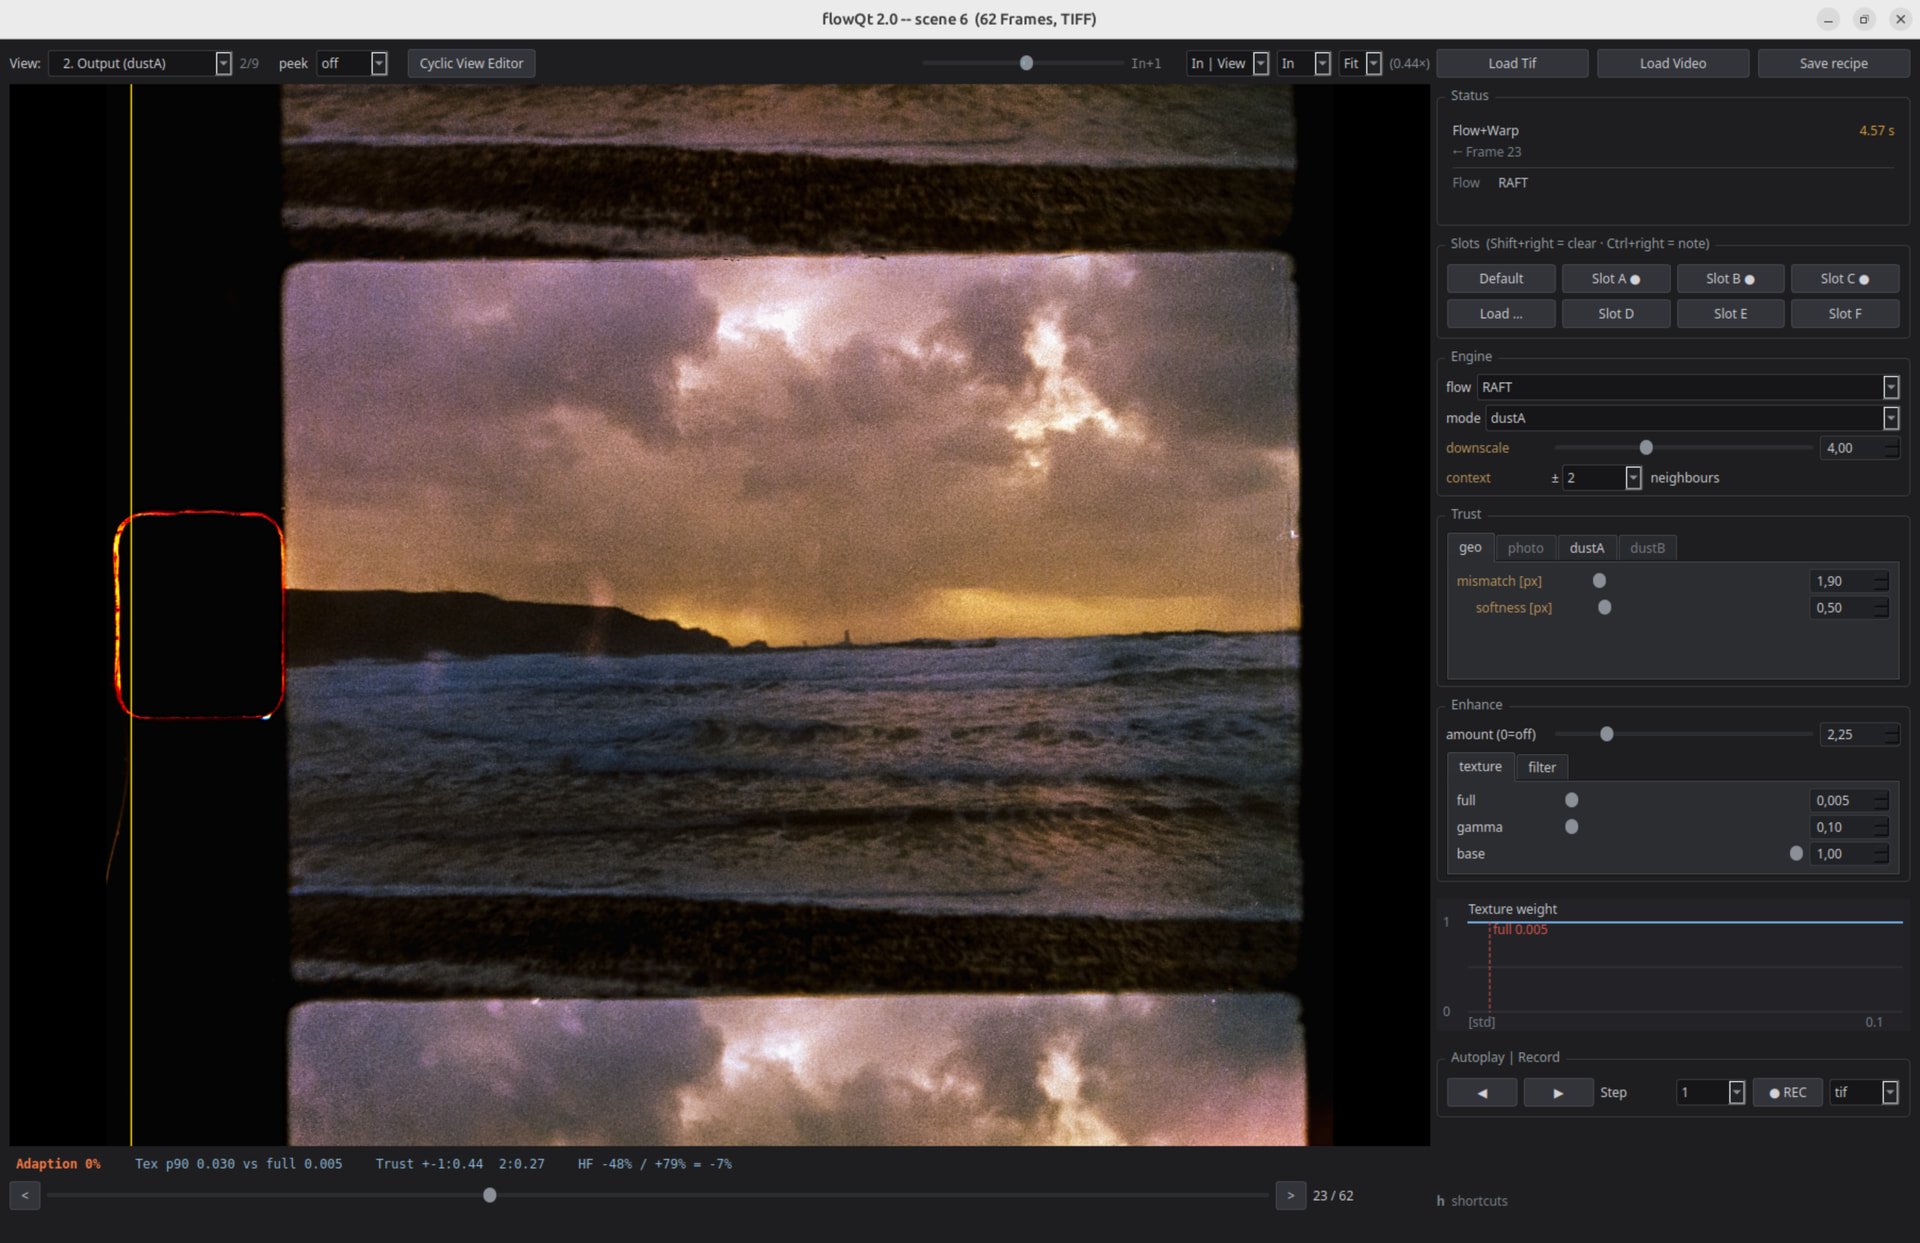
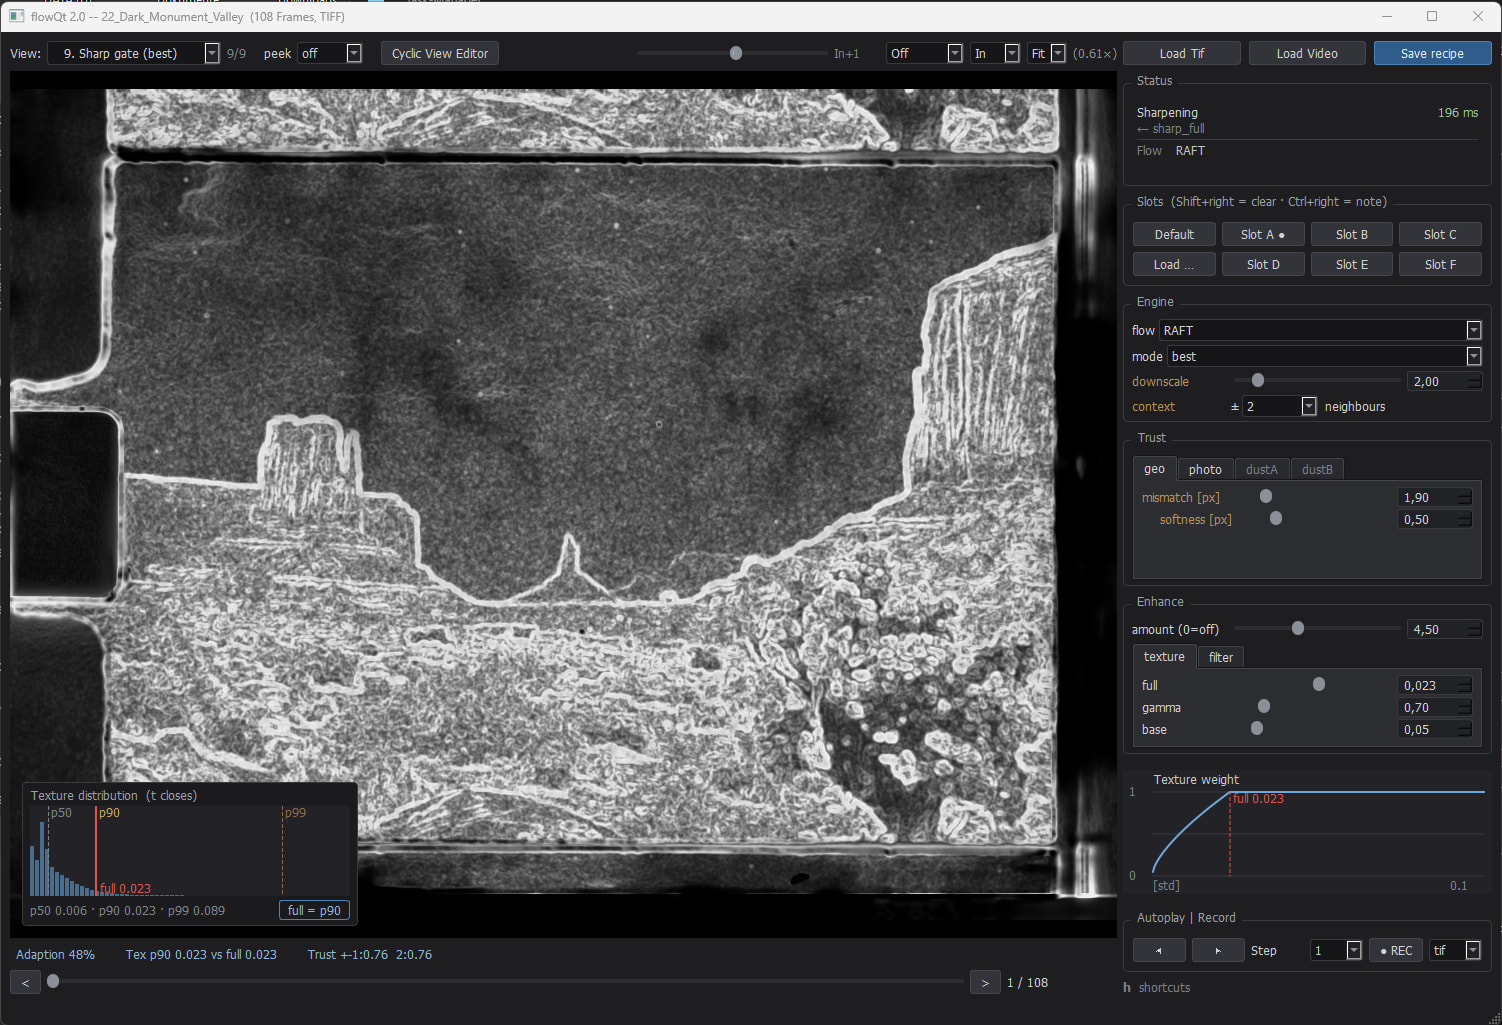
One thing I note in your screenshots: it seems that you are not using the E-Layer (the adaptive Enhancement) in the intended way. Have a look at this screen:
The main view is the “Sharp Gate” - which indicates the variation of the sharping module across the screen. It is a function of all the previous processing steps - here the “intelligence” of the algorithm is summarized and applied.
The main slider to control all this is the “amount”-slider. Set it to zero and the E-stage is actually switched of. The three sliders below tune the enhancement toward the material. “base” is the value in image areas where the algo estimates that he could not improve image detail. Accordingly, “base” should have a rather low value. “Full” is the opposite: this is the enhancement-level in image areas where the algorithm is pretty sure it could improve image detail. “gamma” is shaping the curve for trust values in the intermediate range. The best setting depends on your material.
The primary variable is “full”. To set it correctly, press “t” - the little plot visible above will appear as overlay, giving you the range of texture available in your footage. Normally, it is a good idea to set “full” to the p90-value of this graph - you can do that quickly by pressing the “full = p90” button there.
But, this is already half an esthetic choice, half a choice which depends on your material. So it’s not set automatically.
Anyway, be creative and try things out. If you get lost, pushing the “Default” button in the slot panel resets everything to the factory defaults. All sliders will also reset to their defaults when double-clicked.
@TonyTruand was so nice to supply me with scans of negative S8 film stock. So for the first time I was able to test cineFlow on other than color-reversal material.
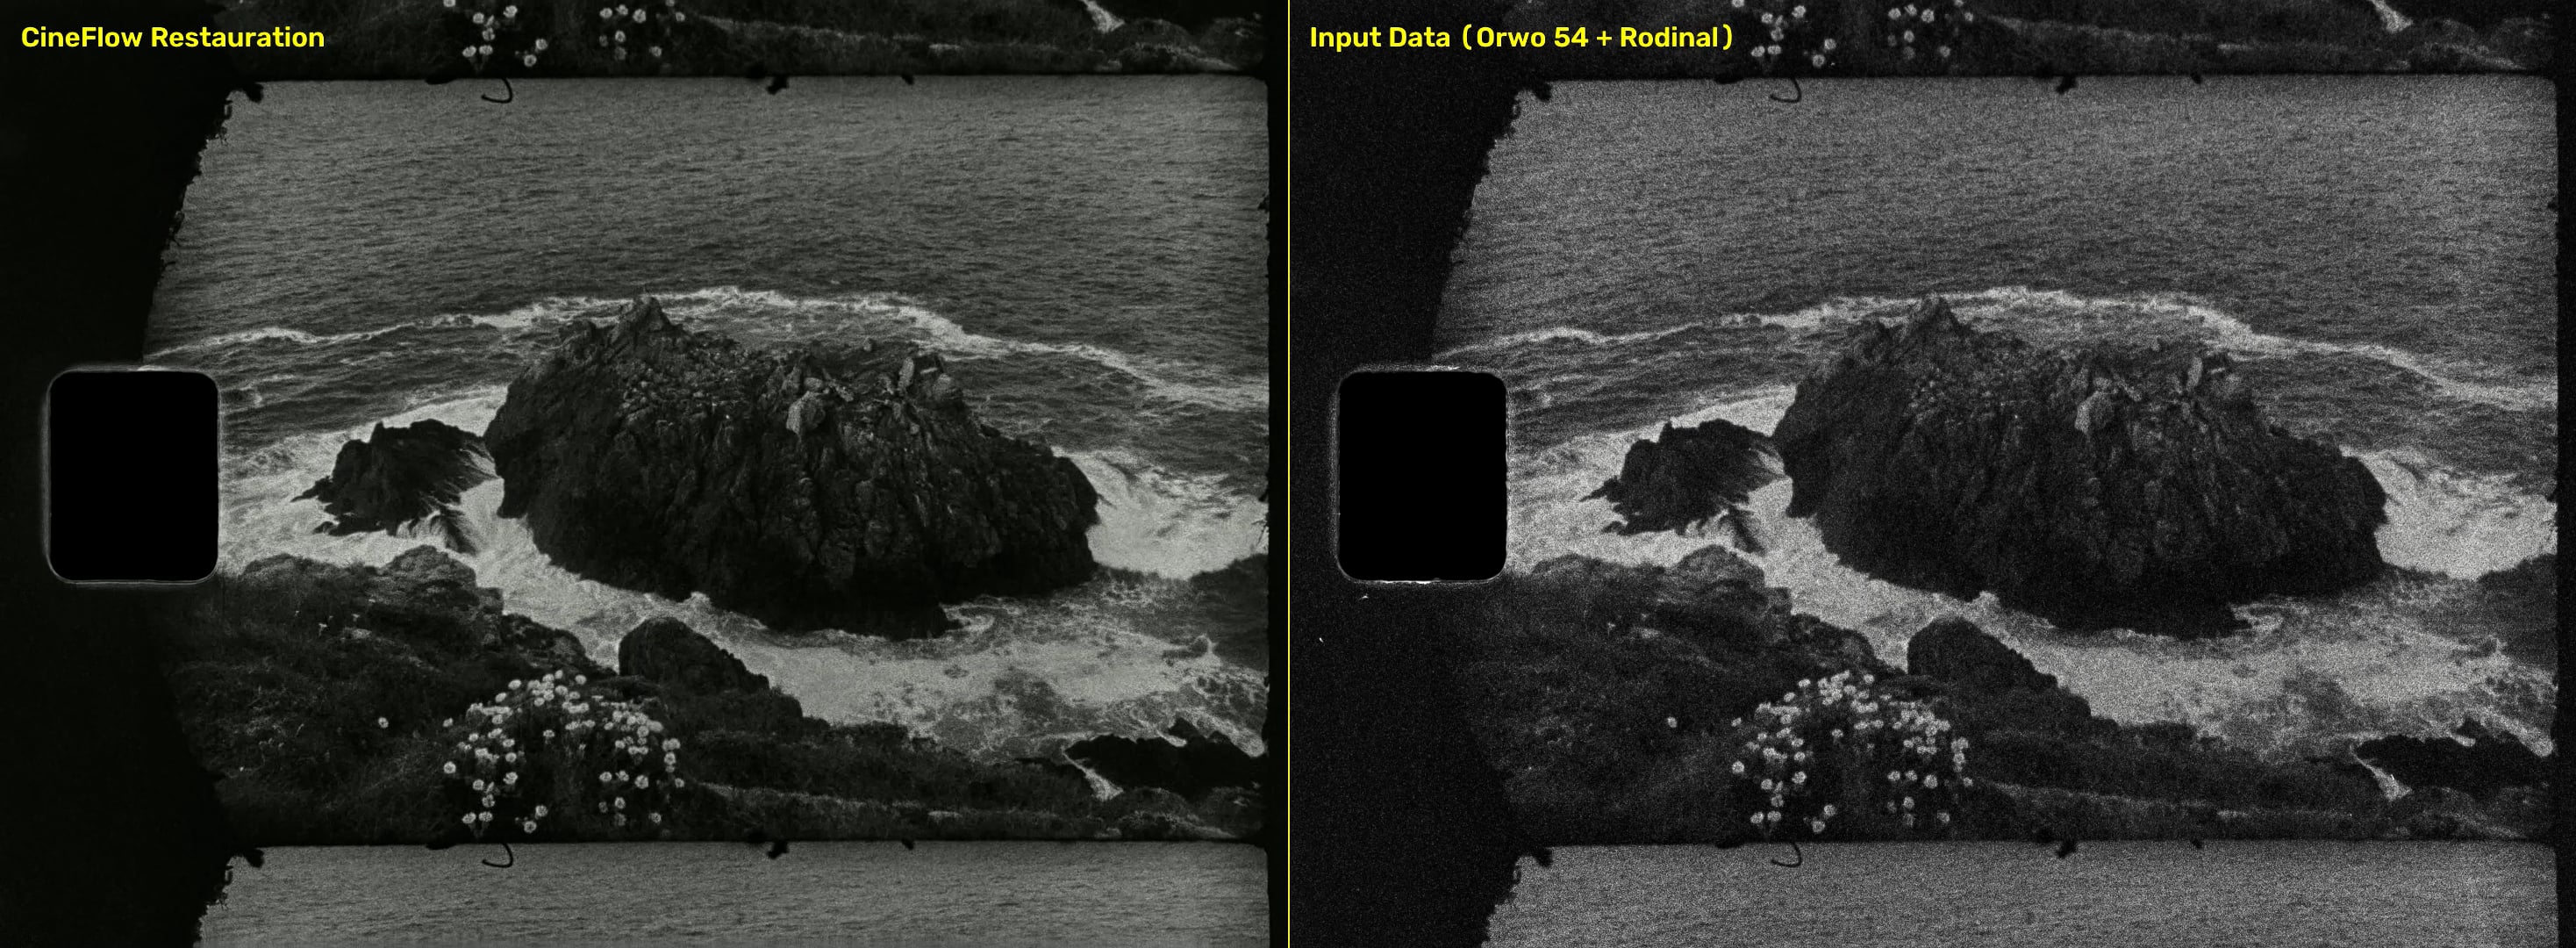
(Testmaterial kindly provided by Tony Truand; Film stock: Orwo 54, Development: Rodinal)
As one can see, cineFlow is able to manage the grain. Orwo 54 combined with Rodinal does create a very distinct film grain, so it was not clear how this material would perform.
CineFlow can be tuned to certain esthetics, so it can help in the creative process. For example, in the above image, not only the film grain is reduced, but the development marks visible in the original scan (right side) are gone. The reason is simple: cineFlow was operated in this example in dustA-mode, which cleans the source of most deviations which occur in just one frame. Which is true for development marks.
If you want these marks to survive: the same run with cineFlow in best-mode will achieve this.
Again, thanks to Tony Truand (@TonyTruand) for providing me with great source material for testing.
There has been some updates on the cineFlow software:
README and manual now explain the method through temporal coherence rather than film grain. Chapters 1 and 3 tightened, chapter 9 extended with the video export route and the Data Levels trap, chapter 10 rewritten around what the dust modes actually do.
Software:
default codec is FFV1 instead of ProRes 4444, held in one constant
output folder without a path argument is now results/, was Resultate/
disk estimate computed from resolution x frame count, codec-aware
--output-format tiff on video input ran into an UnboundLocalError
tiff_fps replaces the hard-coded 18 fps
help text corrected throughout; a bare call now prints it
safe_name applied to --tag
flowQt: h-list corrected and extended, message when only one backend
Here’s a short example clip with a negative scan (Orwo 54 developed in Rodinal, kindly provided by Tony Truand (@TonyTruand )