I found an interesting video showing the Lasergraphics Archivist in use, here’s a screenshot:
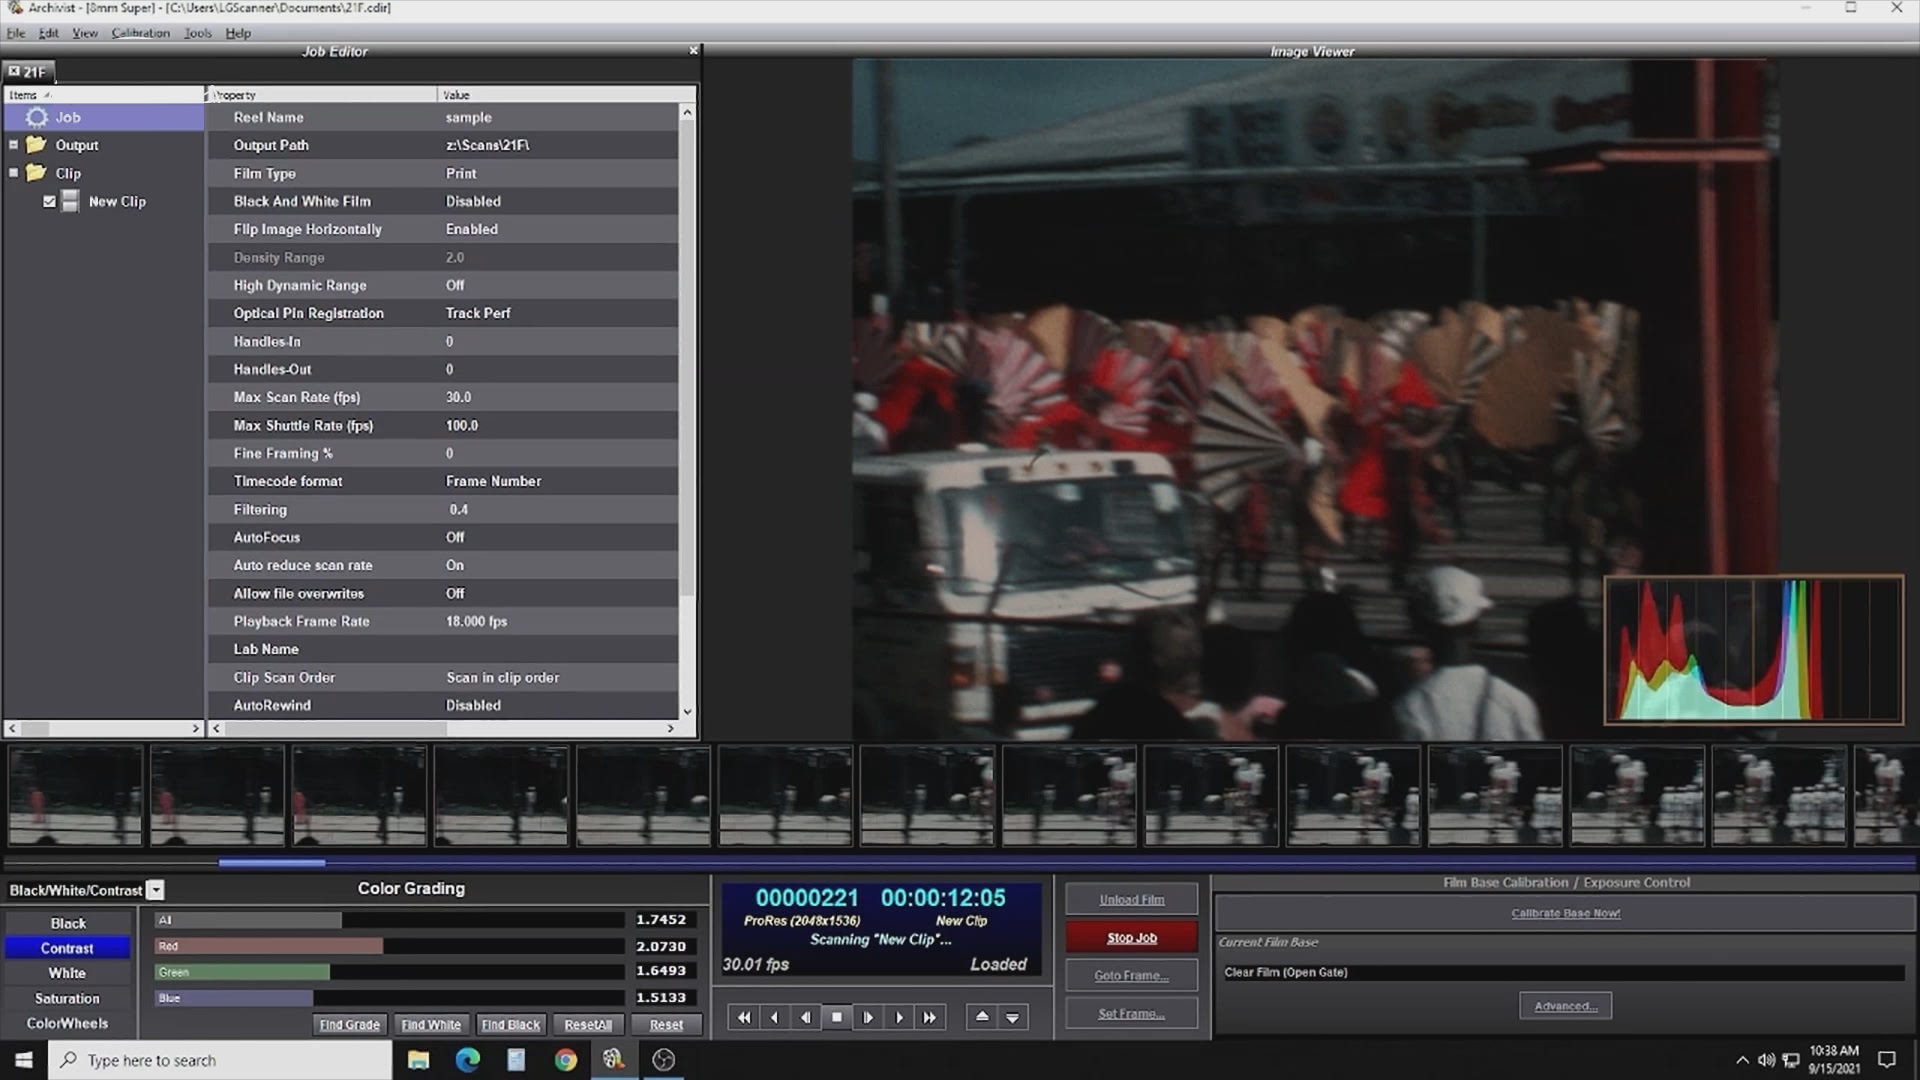
I’ve removed the company’s logo to reduce identification of the source since I don’t want to be shaming them, but this actually shows how most users use these machines. In the settings you will notice “Filtering 0.4” that is the default setting for these machines, it artificially sharpens the scan. Professional users switch this off since it degrades the quality of the scan. This one also has the HDR license which you can tell because it’s not greyed out, but they’re not using it for this scan. Again this is the default setting you have to switch it on to make it do 2-flash HDR and most of the time you won’t notice a huge difference in quality. Finally they’re doing colour grading using the in-built grading tool in the scanning software, this is also not advised as it can degrade the quality of the scan, it’s better to use a professional tool like Resolve to do the grading afterwards. A little bit of an RGB tweak is OK and doesn’t hurt, but you really want to do your own tests first before you ever do that for restoration.
As for the default settings, one of my friends puts it this way: “The Scanstation comes with stupid default settings.” If you don’t want to have to adjust all the settings every time you set up a scan what you basically have to do is make a bunch of project files, fix all the settings, and then label each project file accordingly to the settings. Then when you do a scan you just open the appropriate project file (e.g. “6.5K 16mm Optical”) and then save-as a new project.
Finally I’ll show you guys a resolution chart:

This is from a major scanning company off a Scanstation. This also shows they’re using the artificial sharpening to do their scans (this is even more obvious if you’ve seen raw frames of their scans). We have the same chart and I’ll show you how this should look with professional restoration settings off a Scanstation when we have a chance.