Hello, I’m new to the forum, have some experience in building the T-Scann 8 and a modified Bauer T192 Scanner with the DS8 (@Manuel_Angel) software. Some info on my projects can be found here https://www.moevi.nl/projecten.html For video editing already for many years I use Apple FCPX. I’m also using FCPX to go from jpg to mp4 and have developped this workflow FCPX from jpg to mp4 my way - YouTube Perhaps there are some other members that also use FCPX and could share their findings? Thanks and regards, Hans
1 Like
Welcome to the forum!
So the way I use to convert a sequence of image files to a video file in my own FCPX workflow is by using Apple’s Compressor – not quite FCPX, but definitely within the FCPX ecosystem,. In fact, I believe this is the way Apple intended.
The way it works:
- Open Compressor
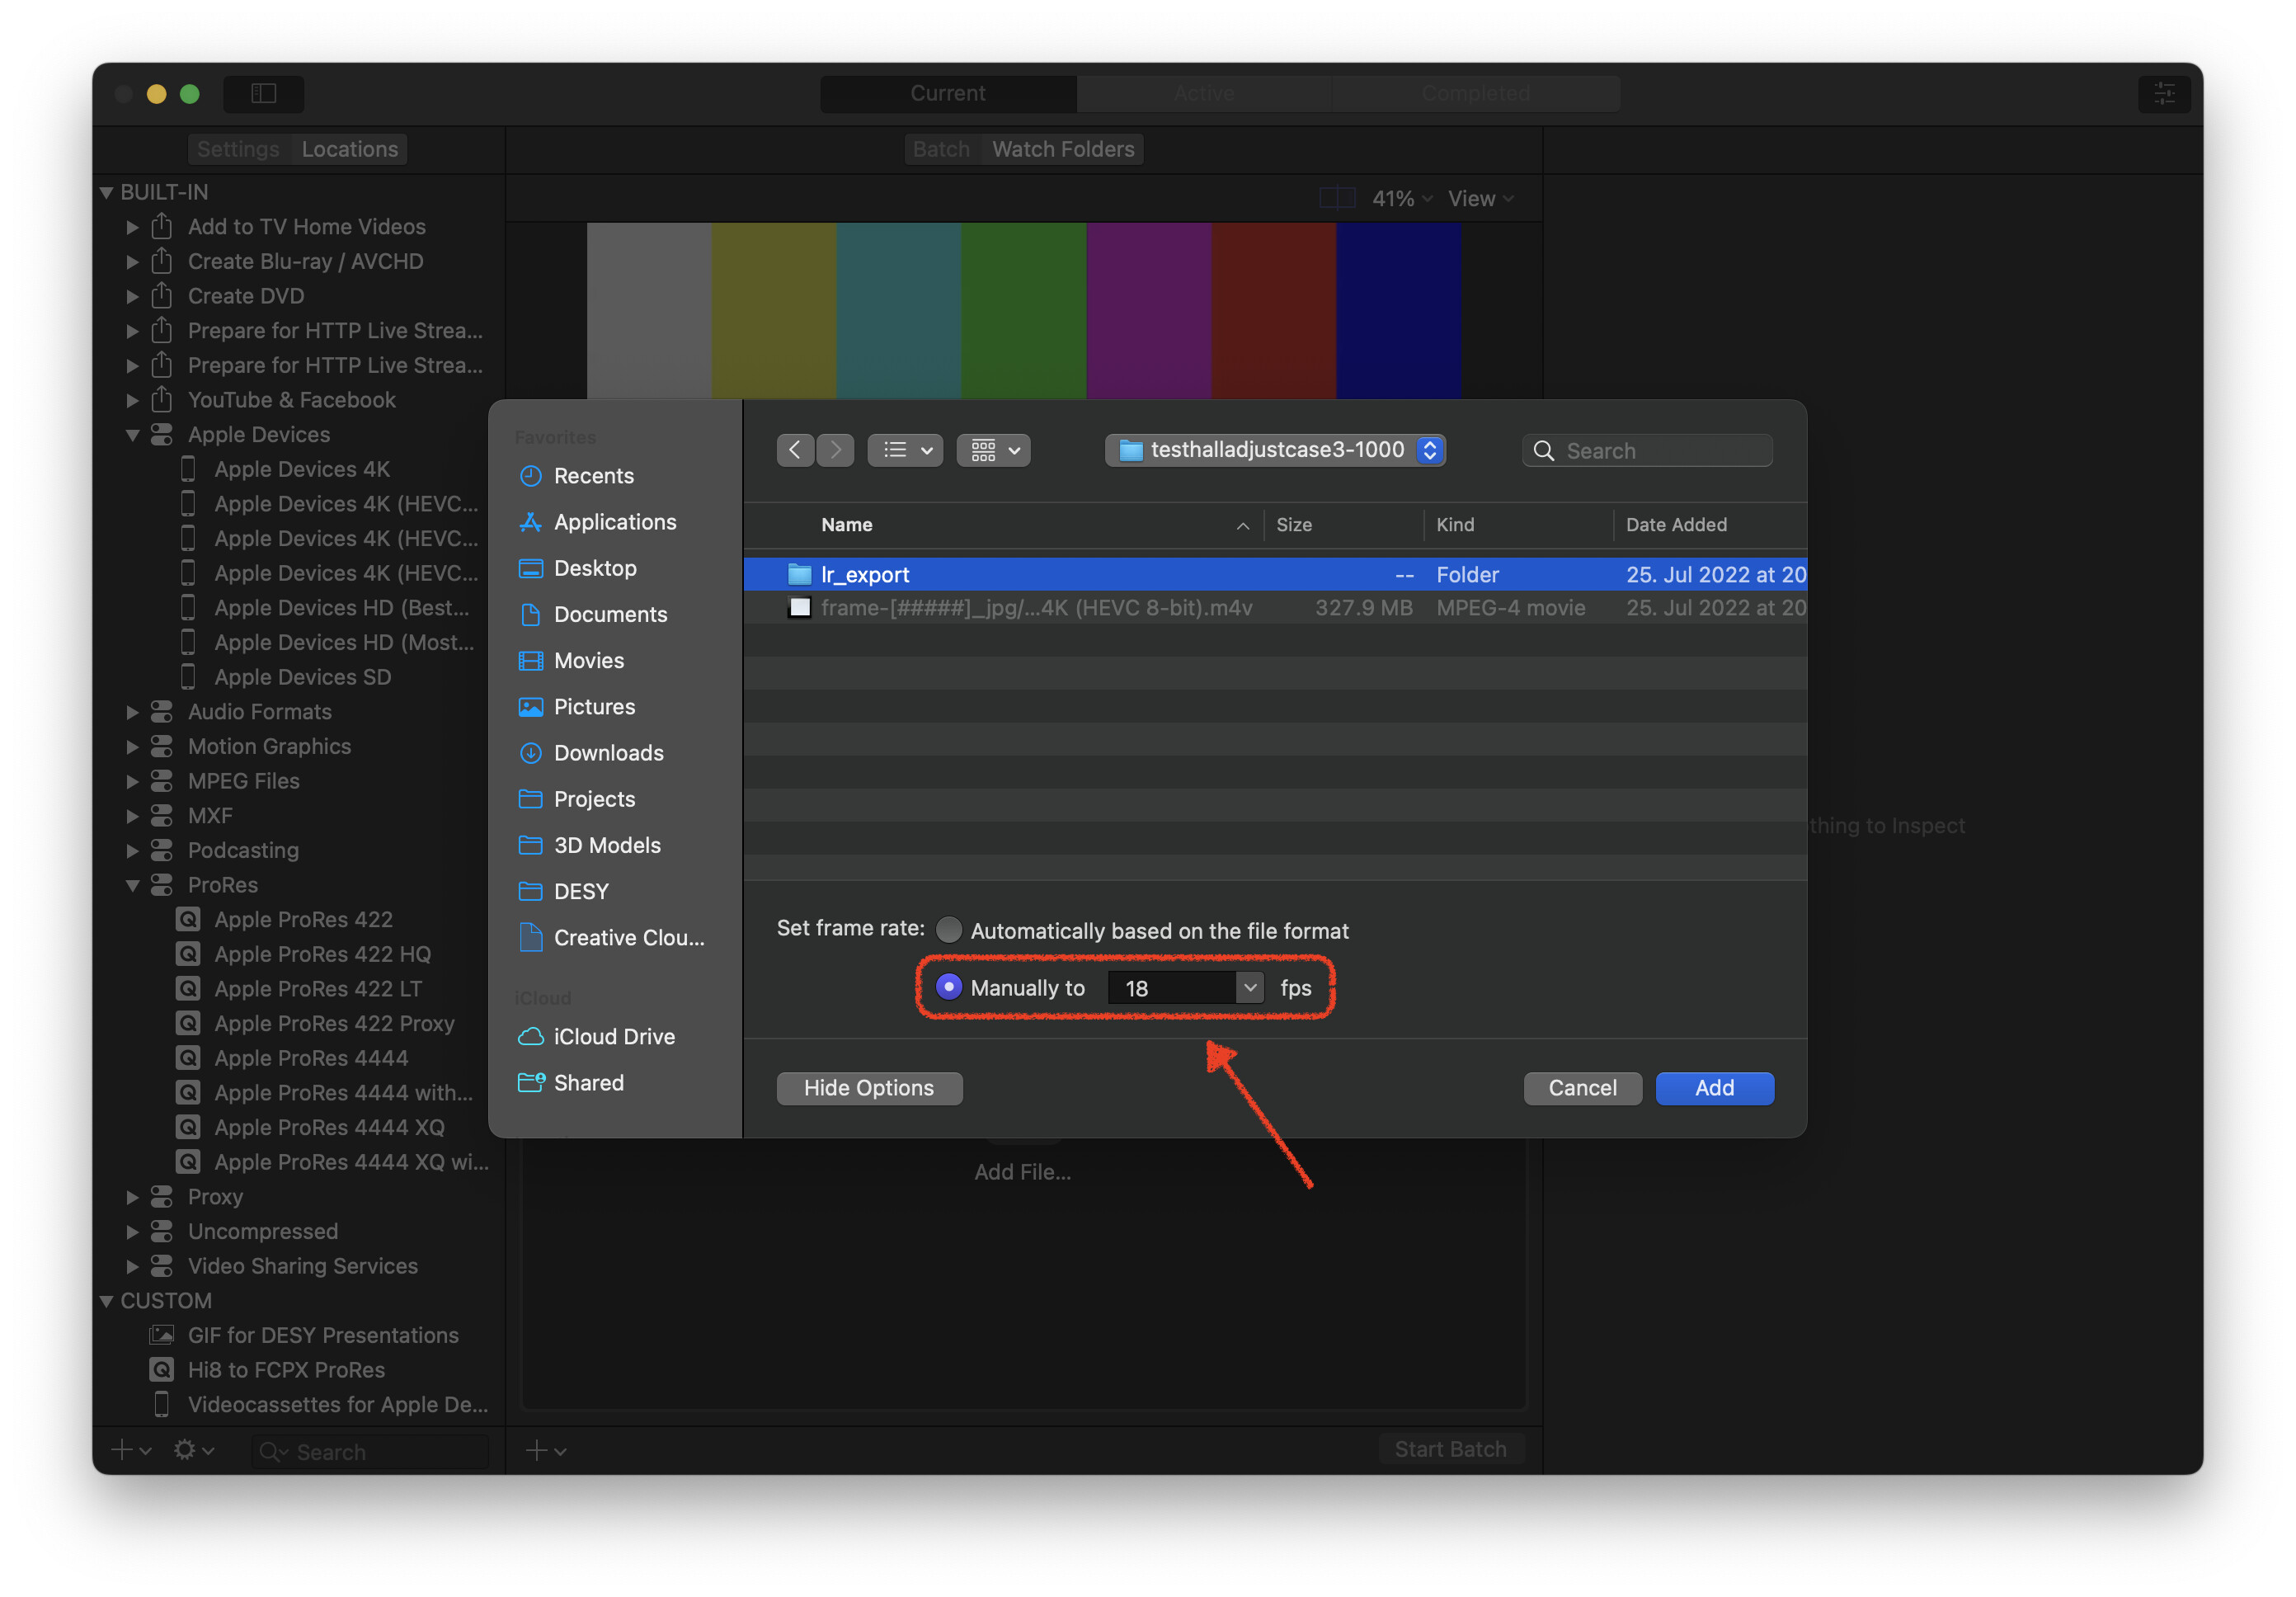
- Click the little “+” in the Botton and select “Add Image Sequence”
- In the file selection, navigate to the directory that contains your images. Note that they must be named with some kind of ascending number (e.g. frame-xxxxx).
- In the file section dialog there is an option “Set frame rate:”. Select “Manually to ___ fps”. Type in your preferred frame rate, like 18 fps, for example.
- You should now have a new source in your batch. Now, you just need to drag your preferred output video format onto that source, click “Start Batch” and watch Compressor do its thing.
Hope this helps!
1 Like
Thanks @jankaiser this really helped a lot! Compressor is a powerfull tool, but could be improved on userfriendlyness. With your instructions it is however very doable. I now have a much faster process with same quality. I’m very happy not to have to go the command line tool road. Best regards, Hans
I’ve made a small video about how to use Compressor https://youtu.be/PC1SqUGSA4A to convert a sequence of image files to a mov video file.
Nice video!
One thing to note, though. You are changing the frame rate in the wrong place. Instead of selecting the correct frame rate on the image sequence, you changed the frame rate of the output file instead. As a result, Compressor thinks your original image sequence is 29.97 fps and then actually re-renders it to 18 fps, meaning it throws away some frames and your video will run too fast. You can actually see this in the final render.
Step 4 in my original answer is the critical one (for 8mm film digitisation anyways) because in the image sequence selection file dialog you need to manually type in the original frame rate that your frames were filmed at. Compressor should then select the correct frame rate for the output file automatically because it will usually render to the same frame rate as the input, unless you tell it otherwise.
Look at the screenshot below for where the frame rate needs to be changed.
1 Like
Thanks @jankaiser I will import the MOV into FCPX for post editing. The end result is a mp4 25fps. Assume that I need to adjust the framerate of the MOV already to 25 fps? Here is the link to the modified video: https://youtu.be/CvXiW5L6yOM
You can either export to 18 fps from Compressor and then let Final Cut retime the clip on import into the 25 fps project, or export 25 fps straight from Compressor as you are doing now.
Personally, however, I prefer to archive scanned motion picture film in the original frame rate. While Final Cut doesn’t officially support 18 fps projects, with a little workaround it will handle custom frame rates easily:
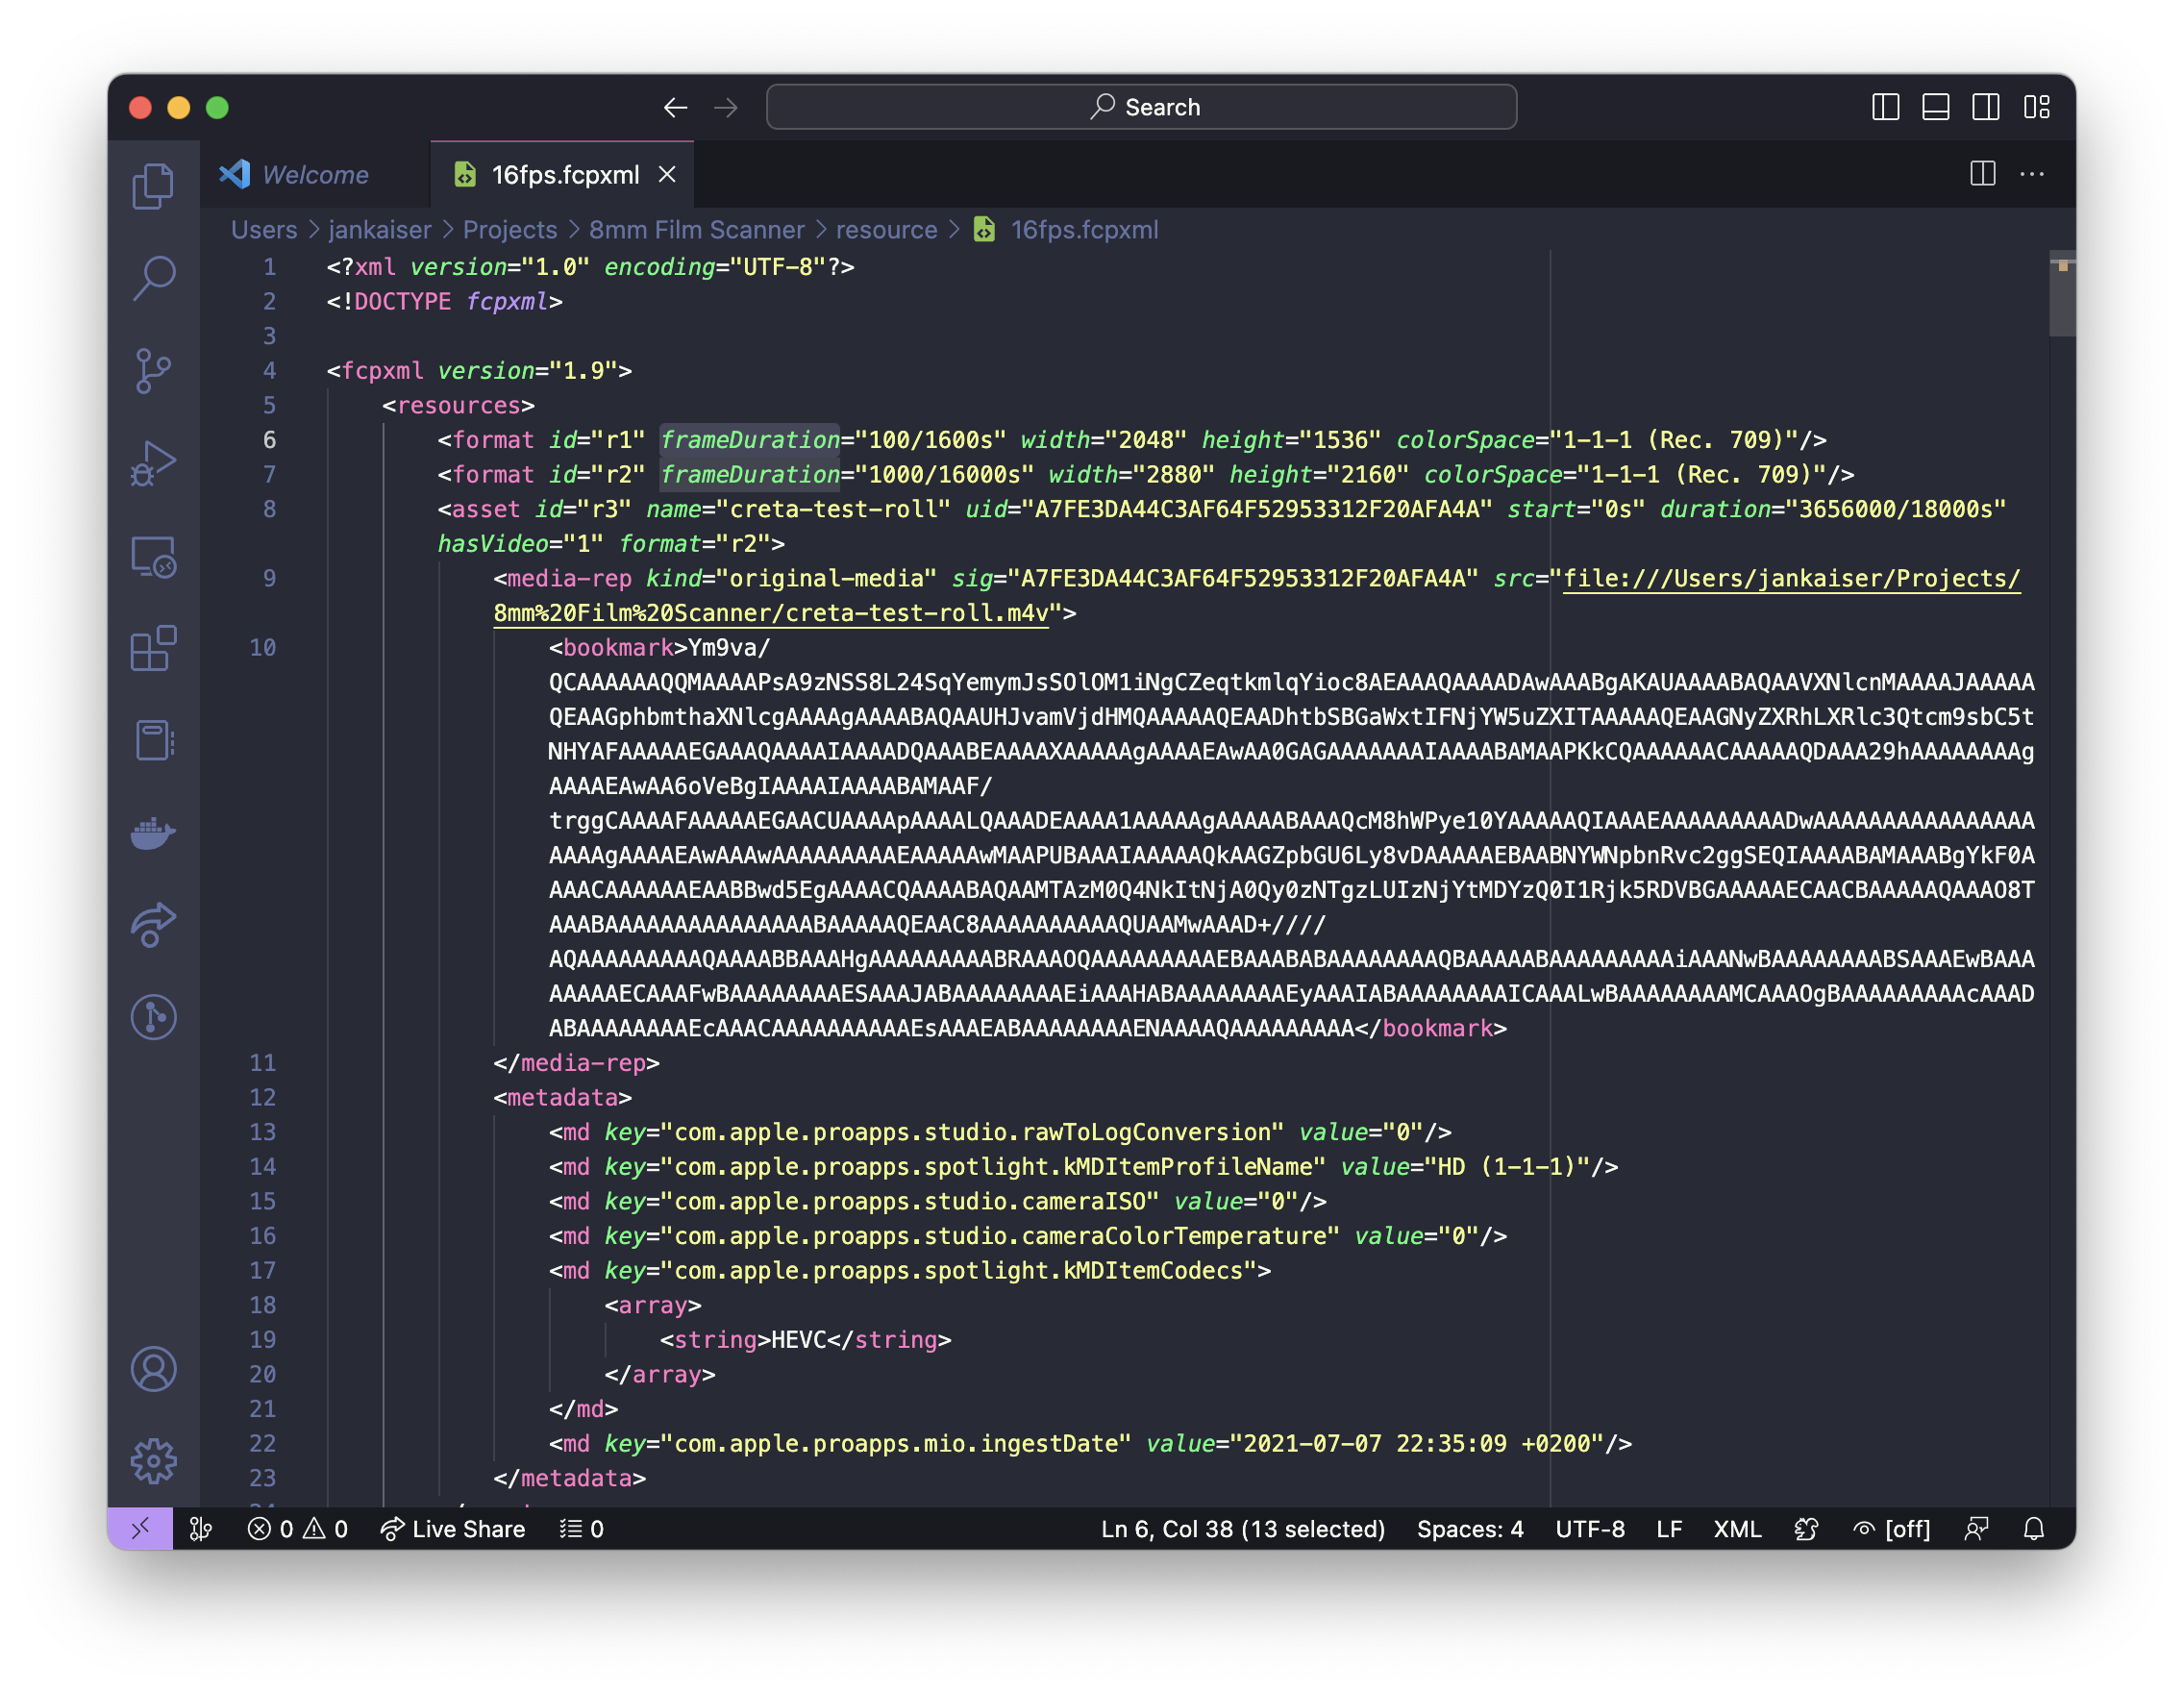
- Create a new empty project make sure it already has the correct resolution and color space set. You will not be able to change it later.
- With the project selected, go to File → Export XML… and save the
.xmlfile somewhere. - Open the
.xmlfile and find all theframeDurationfields. Change them to match your desired frame rate in the format that they are currently in. I’ve put a screenshot of an example changed to 16 fps below. Don’t forget to save the file. - Now, go back into Final Cut. Select File → Import → XML and select the
.xmlfile.
You should now have a project that correctly shows that it’s 16 fps (or whatever you selected). If you want to avoid having to redo this process all the time, you can simply duplicate the project when you need a new one.
A little trick here: Duplicating with the keyboard shortcut cmd+D works even when the context menu item is greyed out. Only Apple knows why ![]() .
.
1 Like
Very interesting and thanks for sharing!
I’ve made a small instruction video how to use 18fps in FCPX https://youtu.be/MxEf1liDaco
2 Likes