Lens questions

In my project I used successively two lenses
a 35mm CCTV of good quality
a Schneider Componon 50mm

For these simple lenses I can do the optical calculation:
Sensor size → object example PI/HQ 6,29x4,70mm
Frame size → image example S8 5,79x4,01 16mm 10,26x7,49
Optical magnification = image/object S8: 1,09 16mm : 0,6

For example in the simple case S8 we have about a magnification of 1 then:
distance center lens → sensor = distance center lens-> film = 2*focal length of the lens
My conclusion :
The CCTV has a blur in the corners and the Componon is really better
I don’t know if it would be different for smaller focal lengths like for example the 16mm CCTV available with the Picamera?

Now I see users who use “microscope lens” or “macro lens” and there I do not understand very well

For example I see a microscope lens CS Mount Arducam AR55100 has the following characteristics:
Focal 55mm
Optical magnification 0,12 1,8x
Magnification ratio 15:1 ???
Working range 45-135
This seems quite adequate for a telecine, it is simpler and without extension tubes, the distance to the frame is reduced.
But what quality can we expect from it?

As for the macro lens they do not seem adequate because generally they have ratio higher than 1:1 ?

What experience do you have about lenses ?

– you might just try out the microscope lens and report the result here… :upside_down_face:

Seriously, lens design is a challenging subject. The reason is that optical design is part art, part science. You as an optical designer are using non-perfect materials (glasses with dispersion, so different colors are focused differently), non-perfect optical surfaces (for cost and technology reasons, most lenses are spherical ones - ideally, they should be aspherical or even freeform) to optimize the image the lens is going to cast onto the sensor.

What is important is that lenses are therefore designed only for one task, specifically for a given working range and for a given image format. If you are using the lens within that design limit, you should be fine. If you are using the lens in another setting, you might see bad to very bad performance.

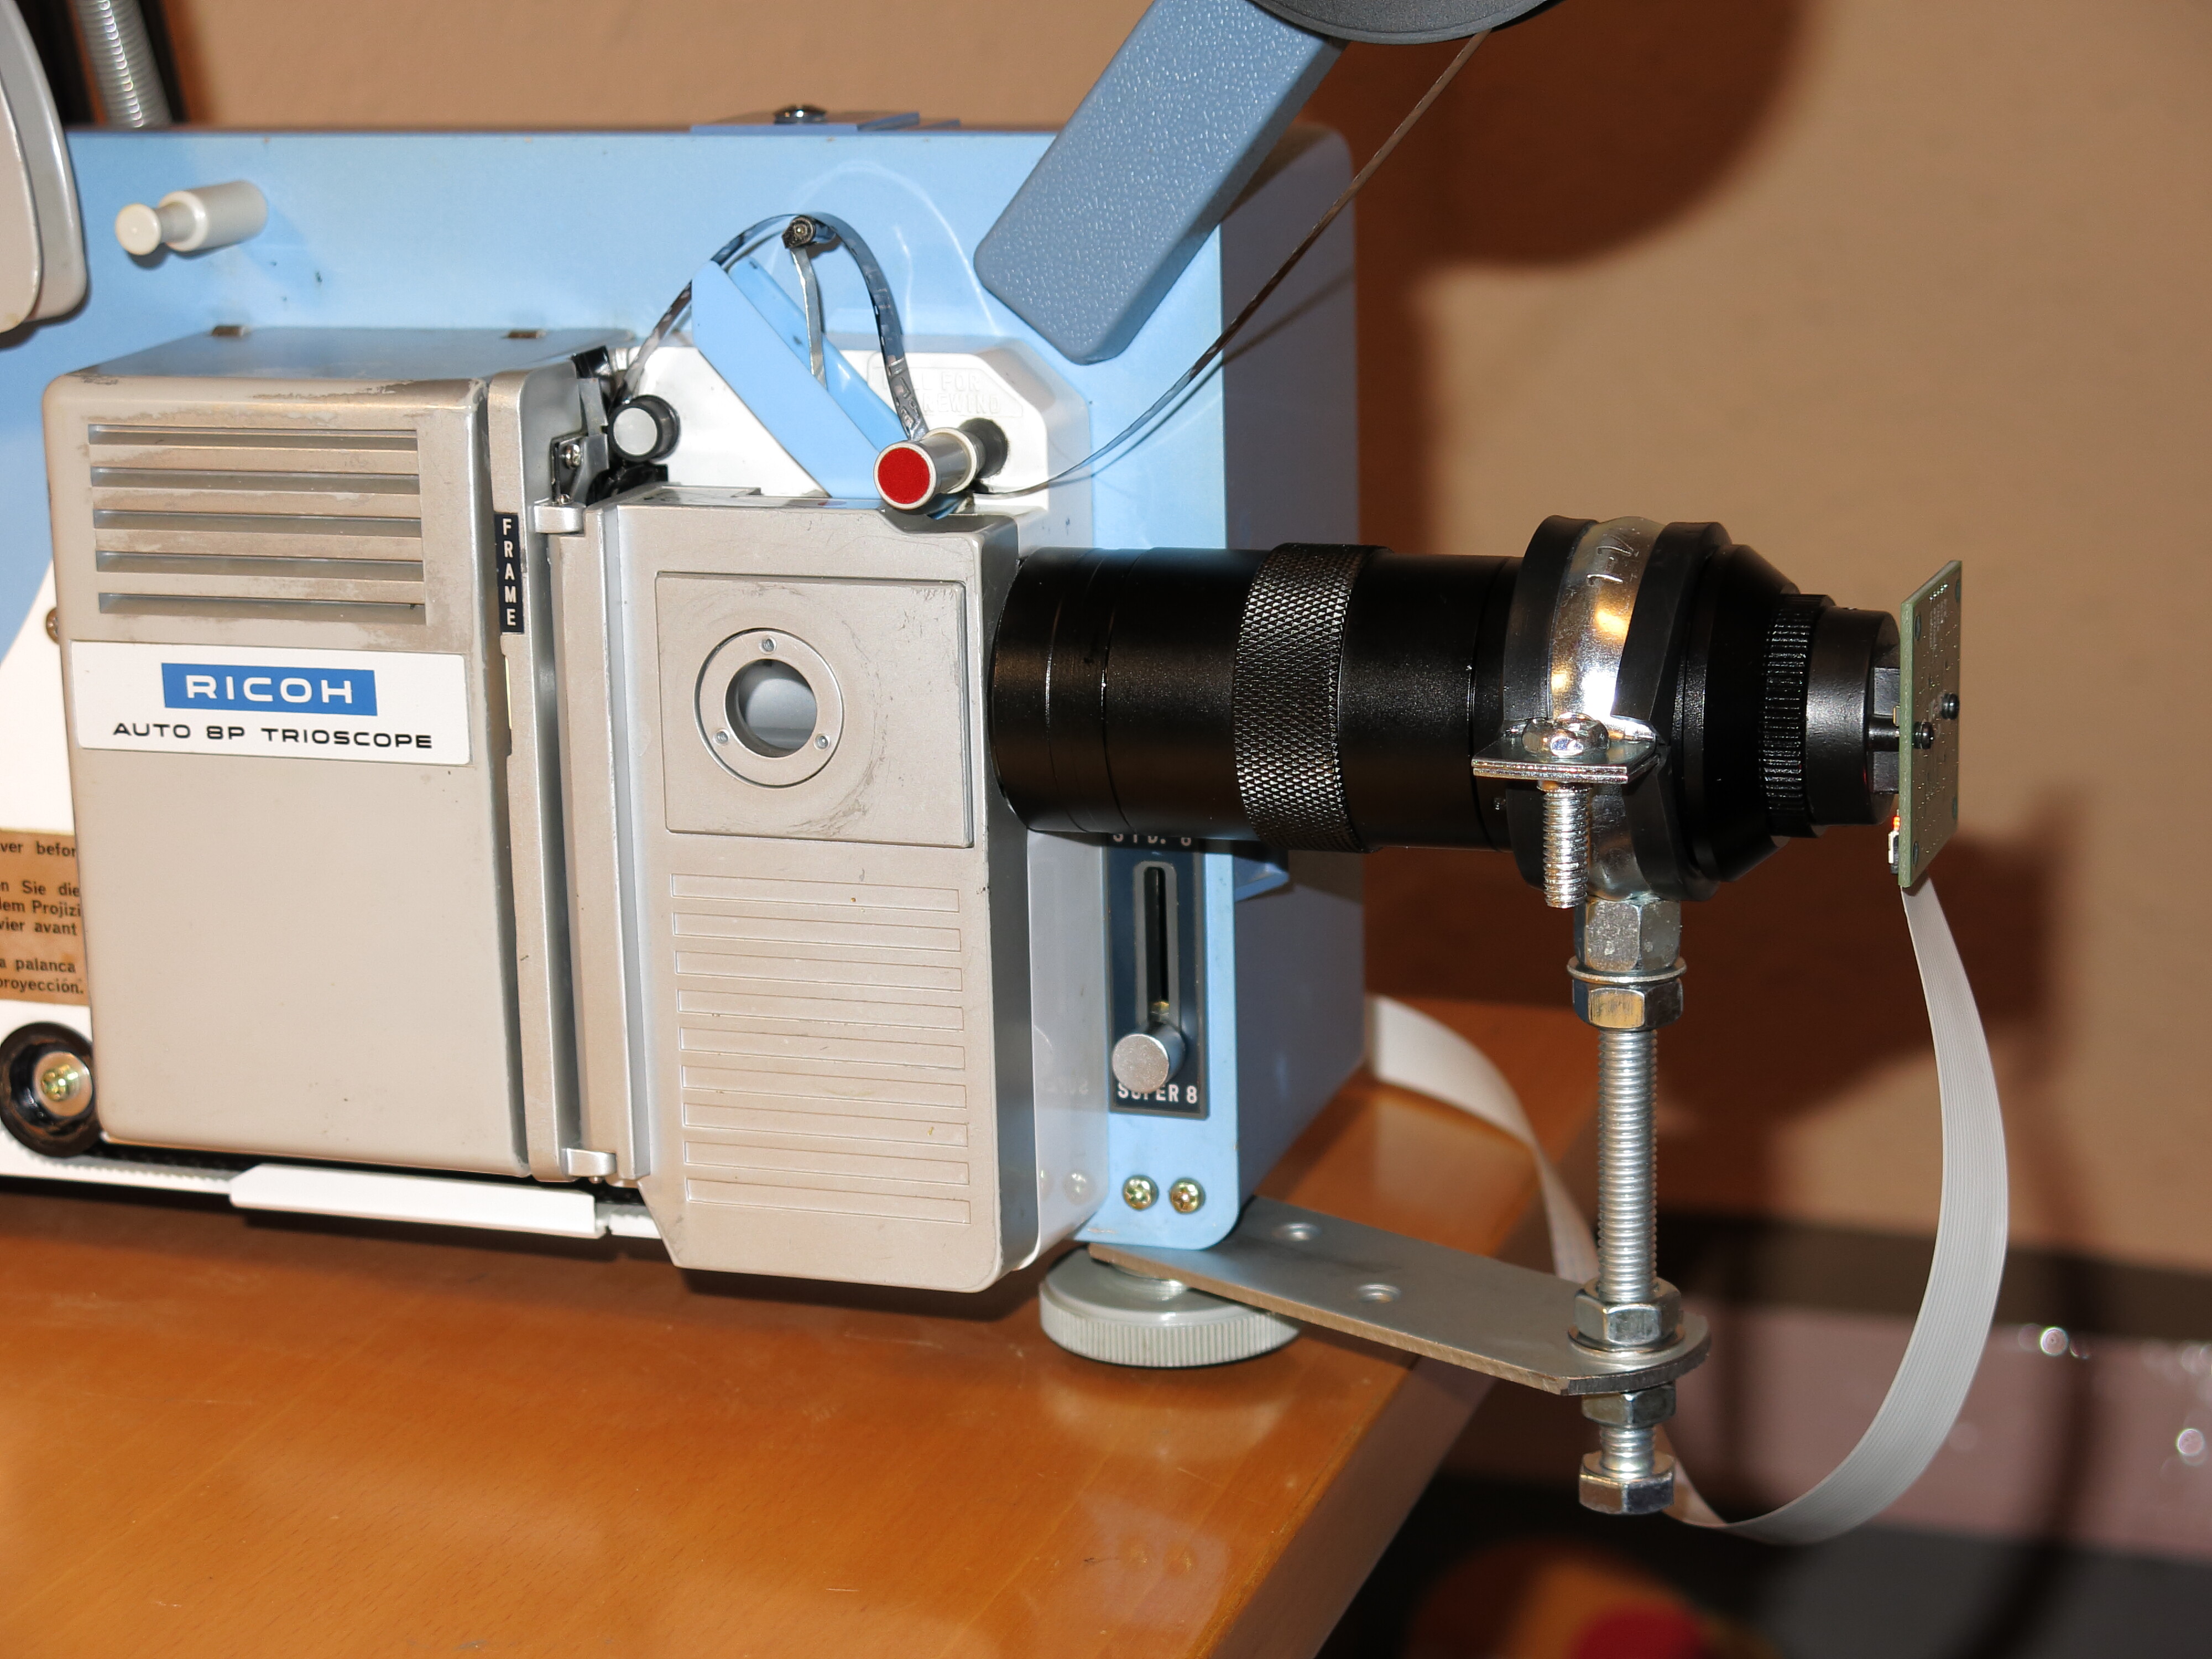
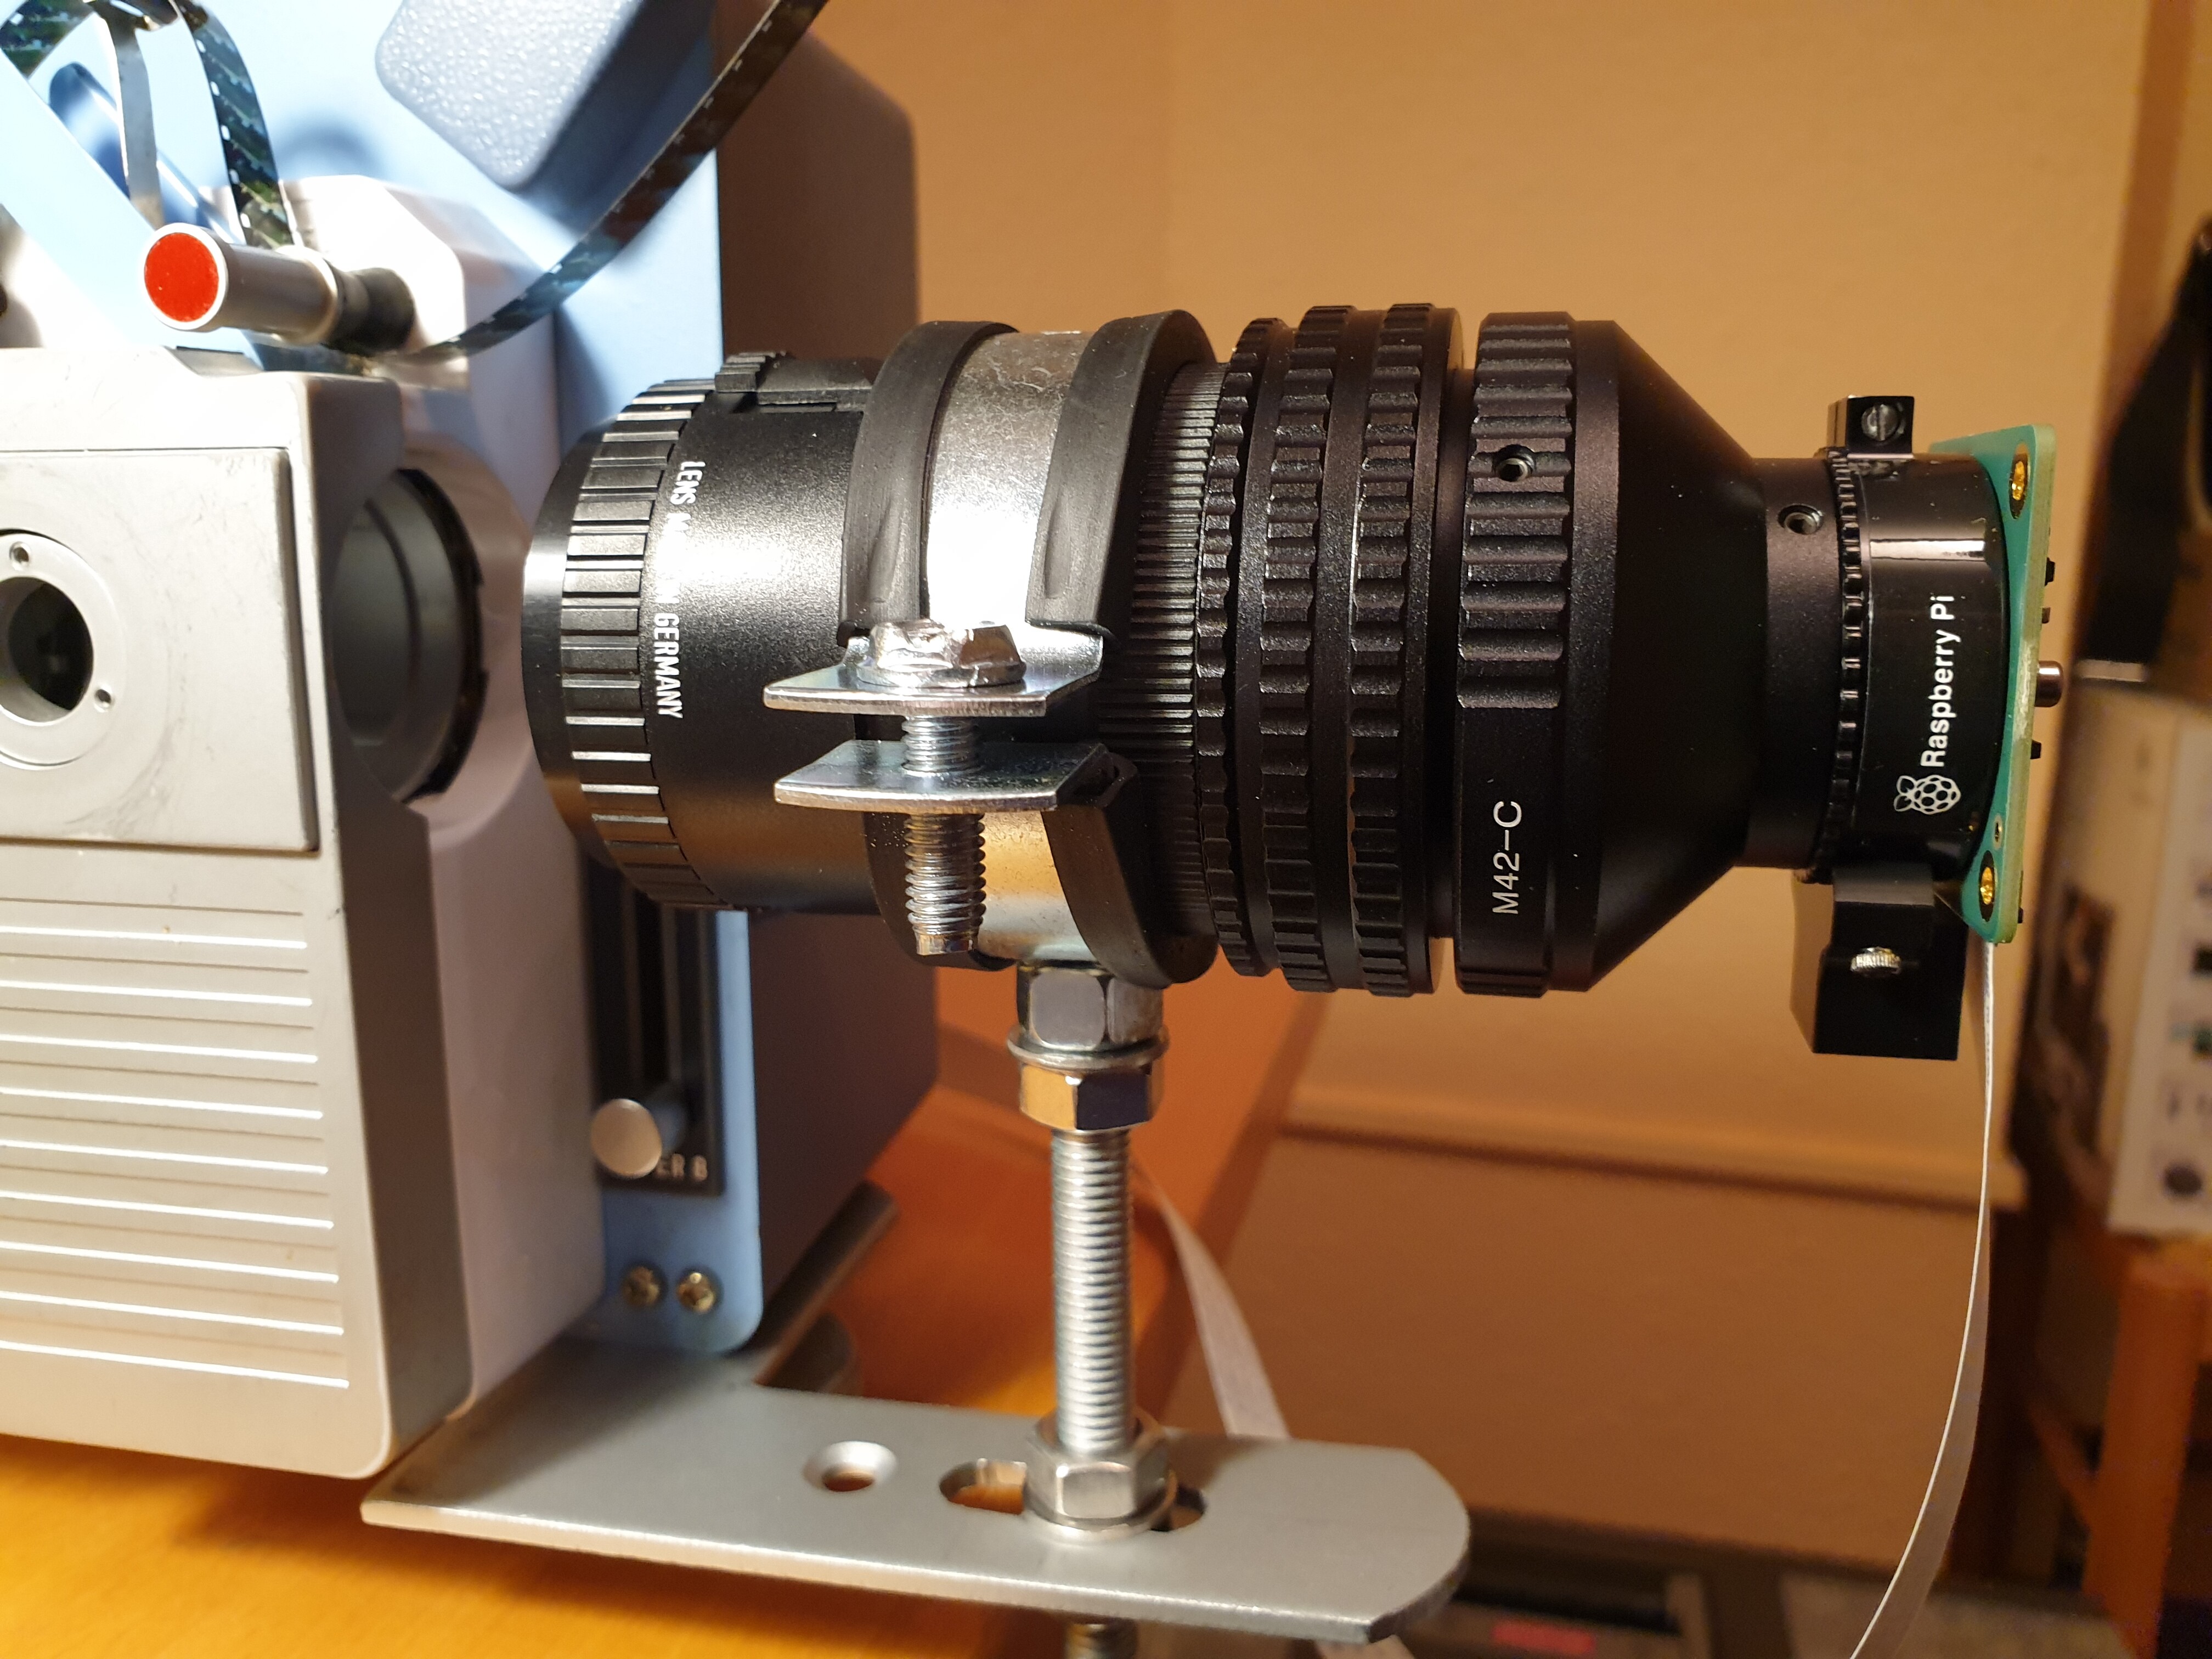
Now, the Schneider Componon-S 50 mm is designed to be an enlarger lens for the 35 mm standard frame (there exists a Componon-S 80 mm which is designed for the 6x6 format). When we are using that in the 1:1 setting (which is appropriate for S8 to HQ sensor chip), we are using the lens in the working range it was designed for. Furthermore, we are using only the center part of the lens’ design. The area the lens is optimized to is much larger. So performance should be good (and it is as good as it gets, if you use the correct f-stop).

Also, the Schneider guys know what they are doing, they are in the optics industry for a long time. (There are actually two different Componon-S around: old ones which used lead-based glasses and newer ones, after lead-based glasses were phased out by the optics industry). In addtion, this lens design is a classical one and it is optimized to perform up to a 1:1 mapping. This is exactly our usecase.

CCTV lenses are designs which tend to be on the cheaper side of life from the onset. Afterall, these lenses are used in security cameras to the thousands. So again, from the start, you are probably dealing with a lens which lacks some image definition. In a security application, you might not care too much if the edges of the frame are a little bit blurry or the thieves have some color fringes.

Also, the sizes these CCTV lenses are optimized to correspond at most to the sizes of standard sensors - so much less image area is usable than with the Componon-S 50mm.

Furthermore, these CCTV lenses are designed to image things which are meters away from the camera. They are not designed and will not work satisfactory when used in a macroscopic imaging situation.

By the way, the points raised in the above two paragraph apply equally well to lenses from old 16 mm cameras, for example. They might work, but they are certainly no optimal choice. They too are not designed to be used as macro lens and there is always the danger of rapidly declining performance towards the edges of the image area.

I am afraid that a microscope lens is also not optimal when used in a 1:1 mapping. These lenses are designed to work close to the specimen (nearly as close as the focal length of the lens), creating an intermediate image several focal lengths away which is viewed by the enlarging eyepiece. Again, too far away for my taste from the imaging situation at hand with HQ sensor and S8 format.

One last comment: small focal length lenses are generally harder to design than lenses with a larger focal lengths. So for a given amount of money, you might end up with a better lens if you buy the one with a larger focal length.

Not an expert on the subject, but did a lot of time in darkroom with B&W film enlargers.
Normal or reverse mounted? It will make a difference.

I used a Nikkor EL 50mm 2.8 (there are two versions, I used the latest design) and just recently bough a Schneider Componon-S 50mm 2.8. My sensor is larger, 23.2 x 15.4 mm, it is a Nikon D3200. So the way I think is the enlarger lens work the same as in an enlarger, which would be reversed mounted to the sensor. I found a lot of good information on this site, which is why I decided to try the Componon-S. The difference in corner sharpness for 8mm is noticeable between the Nikkor and Componon, operating both at their peak resolution aperture (between 4 and 5.6).
The bottom line, two lenses made for the same purpose, same focal distance provide different performances. I think it may be hard to extrapolate the quality results until is tested.

if you look at the diagrams on the site you linked to, the Componon-S 50mm performs generally best at the 1:1 magnification setting - which is to say, that there should be no noticable difference between normal and reverse mounting. The later is anyway only a trick to adapt lenses which are not designed for macro work to use them in a macro setting.

To illustrate that a little. Imagine you have a normal lens. This lens looks at objects which are, say, 30 cm to infinity away from the lens. For imaging these objects sharp onto the sensor, the lens will need to be exactly one focal distance away from the sensor for objects at infinity, and a little bit further away for objects closer to that (I am simplifying here a little bit, not going into principal planes of lenses and so on.)

So, a standard lens has a large distance between lens and objects, and about a distance of one focal length between the lens and the sensor. This is the situation a standard lens is designed for.

Clearly, if you use an extension ring to increase the distance between lens and sensor, you are going to be able to focus much closer objects - but your lens is now operating in a situation it was not designed for: the object is much closer to the lens, and the distance between lens and sensor has increased considerably, due to the extension ring.

So the best you can do with a standard lens when doing certain macro work is indeed to reverse-mount it. In that way, the situation gets a little bit more similar to the situation the lens was designed for. But it’s always a crutch - if you want optimal results, do use a lens designed for that working situation, i.e., a real macro lens and mount them the normal way.

That’s what I think when reversing the enlarger lens. It was actually designed to have the film on what would be the reverse side for the camera sensor. The light is traveling the same as in the enlarger too.

In agreement in regards to standard lenses.

@PM490 - well, have a look at a typical (hobby) enlarger for 35 mm or so. Going from the negative to a print of 18 cm width requires about a magnification of 5. And indeed, most enlargement lenses are optimized for magnification from 10 times to 3 times at least. However, larger formats (like 6x6) often didn’t require such large magnifications. I do have historic prints which were printed 1:1. So it should come as no surprise that many enlarger lenses have an optimal performance even close to the 1:1 ratio. The link you refered to actually states “… and provides very good resolution and sharpness from 1:1 to 4:1.”

The 1:1 ratio is especially interesting with respect to our usecase, namely the imaging of a Super-8 frame onto the HQ sensor of the Raspberry Pi. This, a 1:1 ratio, is a very special situation with respect to the reverse-mounting trick.

The reason is that in this case, 1:1 mapping, object distance and sensor distance are identical with each other, namely two times the focal length. That means that the optical situation does not change for the lens when you reverse mount it. Still the Super-8 frame as well as the camera sensor are about 100 mm away from the lens.

Given, as soon as you are drifting away from the 1:1 situation, things will be different when reverse-mounting the lens. You can see this in the charts of the above link: for example, with a magnification of 2:1, the lens will perform better in reverse position (which would correspond to a 1:2 situation).

Now, reverse mounting a lens is usually somewhat challenging, as a normal lens is not designed for reverse-mounting. For example, the threads on the front side (usually designed for holding a small filter) might be less robust than the ones which were designed to hold the full weight of the lens. Certainly the normal front of a lens features a better isolation against environmental hazards than the back part. Actually, some lenses even feature open spaces in the back, allowing dust to enter into the optical path or threads.

So in summary: if you are close in magnification to the 1:1 ratio, there will be no difference between normal and reverse mounting. For other ratios, there might be a difference, but that depends on the lens’ design. Whether this is worth going into all the trouble depends. You most certainly will encounter unwanted issues (insufficient depth of threads, dust accumulation, etc.) with most lens designs when reverse-mounting.

Again, the best approach is to purchase a lens which was designed for the working situation you are encountering in your design. For the Super-8/HQ camera sensor situation, you should be close to perfect with a Schneider Componon-S 50 mm mounted the normal way (as this usecase is close to a 1:1 mapping).

I do not disagree with your perspective. I qualified my statement because my sensor is larger and magnification is needed.

1 Like

I am going to present my case.

I once participated in an auction on Ebay for a Schneider Componon S 50mm f 2.8, but no luck.

In those same days a Rodenstock Rodagon 50 mm f 2.8 was offered on Ebay at a good price, without auction.

After research on the Internet, it seemed that this lens had very good opinions, so I got it.
When I received it at home I was pleasantly surprised to see that although used it had been in good hands. It had no apparent signs of use.

Regarding the montage, I use it to capture Super8 on an HQ camera.

From the outset I ruled out mounting it in an inverted position, but for the simple reason that this lens has a symmetrical optical construction, so it is irrelevant to mount it directly or in reverse.

The only drawback to direct mounting is stray light coming in through the f-number indicator window. I solved this problem by cutting a black foam ring to size that I inserted into the back of the lens.

Compared to my old lens, the resolution and sharpness of captured images is much higher.

1 Like

@Manuel_Angel
The Rodagon must not be very different from the Componon and just as good.
To enrich the discussion, can you tell us what lenses you tried (CCTV, microscope, …), their characteristics and what you found.
Do you have any comparison images?

@dgalland sorry for the delay in reply, I’ve been pretty busy the last few days.

This was the first lens I used on the device, in conjunction with an OV5647 CS mount camera.
I do not know its characteristics, apart from the information available on the website. Yes I can say that it has a focus ring.

https://es.aliexpress.com/item/4000780942340.html?spm=a2g0o.productlist.0.0.686b3054HVf4mf&algo_pvid=077dbafd-e475-4d72-a595-629c94965eca&algo_expid=077dbafd-e475-4d72-a595-629c94965eca-2&btsid=0ab6f83915905129002514439e1113&ws_ab_test=searchweb0_0,searchweb201602_,searchweb201603_

The first captures were made with this optical system, and in my opinion with very acceptable results.
Capture example:

Now my current optical system:

From left to right: Rodenstock Rodagon 50 mm f 1:2.8 - 28mm M42 Fixed Extension Tube - 17 to 31mm Variable Extension M42 Helical Tube - M42 to C-Mount Adapter - Raspberry Pi HQ camera.
I have the lens set to f 5.6

Same image captured with the new optical system:

Regards.

3 Likes

Thanks for the experience. It’s always difficult to make comparisons, you have to be sure that the focus is the best in both cases. But we can see that the Rodagon is really better, see the top left corner for example. This is really the best advice we can give
The focus is extremely sensitive, you could see in my code how to calculate a “Sharpness” to adjust it to the best. Like you, I also had an assembly with threaded nuts but finally I bought an XYZ sliding table, it’s a bit expensive but very useful (you can limit yourself to an X table only for the focus). With the gradations of this table I see the sharpness vary for a displacement of as small as 0.1mm
You can also see that the dynamic range of the HQ for the dark parts is really better as the V1, there is almost no need for HDR on this image. For me with the HQ HDR is mostly useful to avoid burnt whites.

2 Likes

@dgalland,

Indeed focus is a truly critical aspect in this work.

I find the function for calculating sharpness very interesting.

The focus of the two images in both cases is the best I have been able to achieve, but it is done “by eye”, with a lot of patience until I accept it.

On the other hand, in the image of the OV5647 camera, the “lens shading” effect is clearly visible: a greenish circle in the center of the image and a magenta tone towards the ends.
Actually, this effect is what made me decide to change the camera and lens.

1 Like

There is also a lot of noise cancelation happening within the OV5647 sensor. This chip is also used in the v1 camera of the Raspberry Pi foundation. The coloration (and, if you measure it, a corresponding saturation decrease from center to image borders) is caused by the mismatch of the microlens array in front of the sensor and the long focal lengths of the lenses normally used in a film scanner.

The effect is even stronger if you pair a v2 sensor chip with any large focal length lens.

There is no way to get rid of these color defects. If you want to use one of the Raspberry Pi foundation cameras in the typical S8 setup, paired with a 50 mm lens, use only the HQ camera (which was developed for consumer video applications - the v1 and v2 sensors are for mobile cameras). Here’s a summary:

v1 cameras or similar, with the OV5647

  • noticable color cast between center and image borders.
  • desaturation between center and image borders.
  • strong denoising which masks typical S8 film grain. So footage might appear sharper or more pleasing to the untrained eye, but it is lacking fine details.
  • sensor designed for mobile cameras.

v2 cameras or similar

  • color cast is much worse than with the v1 camera, again, unrecoverable.
  • denoising happens, but is not that strong. Film grain becomes visible.
  • sensor designed for mobile cameras.

HQ cameras or similar

  • no noticable color cast.
  • binning mode (mode 2 in Raspberry Pi language) is badly implemented - reduces fine details. Do not use it.
  • no noticable denoising artefacts.
  • sensor designed for consumer video cameras.
2 Likes