My Super 8 film Scanner

I’m glad to be in the testing phase of my journey into building a scanner for my family films. I realized that I was digitizing the back side of the frame, whereas I know from digitizing 35mm and 120 film photos that you should handle the emulsion side for the best quality.

I’ve made some adjustments and I’m getting much better results, as expected. When I thought about it, it actually seemed quite logical. I won’t make this mistake again as a rookie in scanning Super 8.

I also get better defined contrasts now, as they should, and it looks much better to me when I watch it in front of my TV.

4 Likes

Very good results.

May I suggest to check that the illumination is even? It may be the film itself, but I noticed the upper left side corner seem darker than the rest of the frame.

The quality of the pictures is great.

I think that’s the movie itself, but I’ll take a look at how the light falls in the film gate :slight_smile:

1 Like

Hello @Utrecht This is an incredible output; the frames are incredibly clear for something that you threw together with stuff that you mostly already had! I had a few questions: what lens are you shooting the stills with on your Sony, and what software are you programming the Arduino with?

@Ambichrome I only just saw your message after quite some time. I haven’t worked on this project in a long while.

The lens is a Nikon El-Nikkor 50mm 1:2.8, which I mounted using reverse rings on extension tubes. What I ran into was that focusing with the setup I had was very difficult, since I didn’t have a focus ring or anything like that, just an adjustable table (very DIY haha). Eventually, I want to buy a Laowa 25mm lens, purely for the flexibility and quality. But the lens I used actually works great too.

I programmed the Arduino using the standard software, called Arduino IDE. With my limited knowledge, I managed to piece together the script using ChatGPT. It was mainly to drive the gear motor and apply correction if the frame went out of view (which sometimes happened). The signal to trigger the camera was sent by sending a signal to my mouse to click the shoot button in my camera remote software.

Anyway, I was thinking in terms of possibilities, even with my limited knowledge. I’m sure there are easier ways to do it :wink:

The time for tweaking, which I’ve been doing the past few days, is over. I’m going with the current lens I have. I scan it at around 3K quality, and I use Neat Video for denoising/sharpening. Finally, I use an upscaling feature in Topaz Video AI. This is the final test result, in 1080p. Ultimately the final resolution will be 4K. I think the quality is really good, especially keeping in mind that this was shot with a relatively cheap camera and little knowledge of how to operate it, back in the day.

You can see the result here

Based on this, I’m going to scan and properly capture 3.5 hours of footage. I’m really curious myself what the outcome will be. Very excited!

4 Likes

I’m currently digitizing footage for an acquaintance. His father filmed the Dutch city of Utrecht in the 1970s.

I’m scanning the footage in the same way I usually do — at roughly 2 frames per second. However, this time I’m not converting the scans to TIFF; instead, I’m saving them as DNG files so I can import them directly into DaVinci Resolve. There, I perform color corrections, stabilize the footage using the sprocket holes and apply noise reduction.

I’d like to add frame interpolation to this footage to achieve smoother motion. While I am able to do it, I occasionally encounter jittery or “jumping” frames.

Which software is especially well-suited for high-quality frame interpolation on macOS?

1 Like

I would suggest to you to try out the stabilizer available in daVinci Resolve.

You can find it on the Color Page, Tracker → Stabilizer (camera symbol):

You can leave the settings for first experiments on the defaults. Important: uncheck the “Zoom” box.

Usually, it is sufficient to select the “Translation”-mode which corrects for most of the camera shake and is the most stable of the algorithms. But it does not correct camera rotation - if this is required, select “Similarity” in the selection box besides the “Zoom” checkbox.

The problem here is that the results might be worse than the translation mode, as “Similarity” also tries to estimate and correct the zoom. The ideal setting for S-8 stabilization would be x,y, and rotation - that is not available within daVinci. Depending on the scene, “Similarity” might introduce funny image distortions you want to avoid. In this case, returning to the “Translation” mode usually solves it.

Very seldom, selecting the “Perspective” tab yields the best results - for example, if the camera moved really through a three-dimensional scene. I usually use the “Translation” mode as default.

You trigger the analysis and correction by pushing the “Stabilze” button.

There are other stabilization options available for challenging cases - very seldom that I need to use these.

One last comment: what dramatically improves the visual appearance of S-8 as well, besides the above discussed image stabilization, is frame-interpolation from the standard 18 fps to something like 30 fps. For this to work correctly, you need insert your 18 fps footage into a timeline with 30 fps setting. Next step is to cut the footage into separate scenes. Once that is done, you have to select for each scene in the “Inspector” tab under “Retime and Scaling” as “Retime Process” “Optical Flow” and select one of the algorithms available in the “Motion Estimation” tab. These algorithms vary widely in execution time and quality of the results. My default choice is usually “Enhanced better” or one of the AI algorithms. The AI algorithms tend to perform slightly better around object borders, the “Enhanced better” algorithm delivers smoother results in the case of camera pans.

5 Likes

@ cpixip Thanks for the information! I’m definitely going to give it a try. The only thing that bothers me is that when I stabilize the footage, I tend to lose parts of the frame. Still, it might be very useful for improving really shaky clips.

I’ve been experimenting with frame interpolation in DaVinci Resolve. However, when I cut the scenes and then apply the settings, I still notice a sort of cross-fade effect between the scenes, even though they’ve been clearly cut. Do you know how to fix this or prevent it from happening?

Well, this kind of warp is exactly what happens if the cut between the scenes is not precise. Here’s a way to check this:

Select for both scenes the “nearest neighbour” interpolation in the “Retime Process” selection. Now check out the cut. Usually, your cut will be off by a single frame. That’s kind of challenging to detect - you need to go frame by frame through the footage.

In any case, repositioning of the cut should solve the issue.

Once the cut is set correctly, do not forget to set the interpolation mode of both scenes back to whatever you decided would work best for the scene. Remember, you can activate different interpolation schemes for each scene.

I usually run simply the automatic scene detection on the whole footage. Again, it is important to have selected “nearest neighbour” at this point. (I assume that your footage is 18 fps and your timeline is set to something like 30 fps.)

Once the auto scene detection has done its thing, I go through the footage checking the precision of every detected cut.

While the auto detection is exceptional good, it sometimes misses a cut (which I introduce manually) or has detected the cut one or two frames off. In this case, I simply readjust the cut.

Once all of the footage has been precisely separated into scenes, from scene to scene, I do color correction, image stabilization and select the appropriate image interpolation mode (“Retime Process” and “Motion Estimation” settings) for each scene.

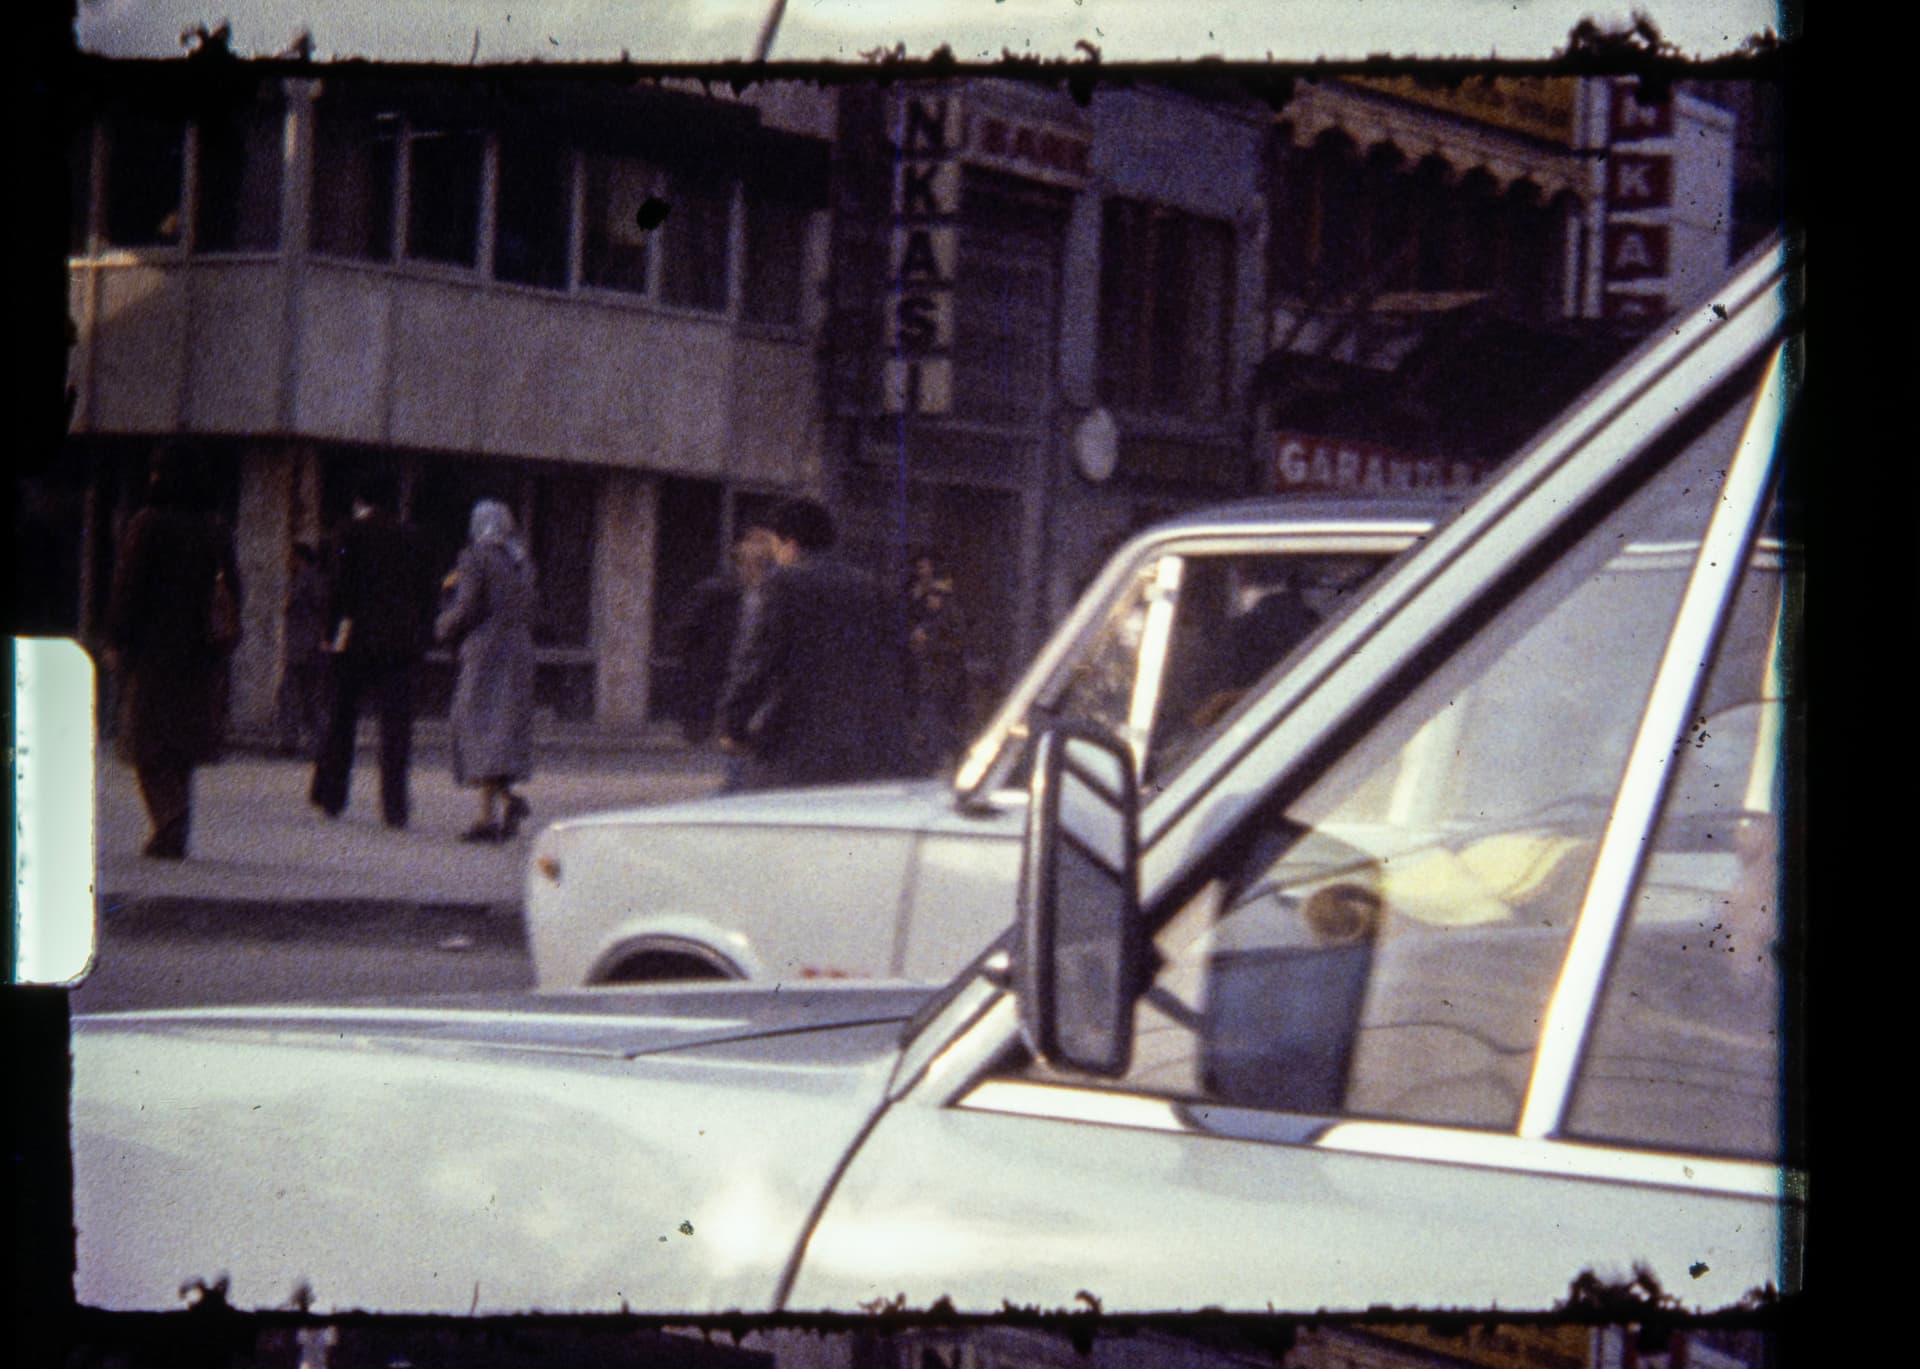
Anyway. With respect to loosing part of the image during stabilization: that’s what is expected. Afterall, you are compensating footage of a shaking camera where no additional image space was recorded at the time the footage was taken.

You have several countermeasures available here. First, do use as much of your original scanned image as possible. That is: do not crop before the stabilization run. In this way, you potentially can use every image information available to you. Remember, the original Super-8 projection window is smaller than the original camera frame.

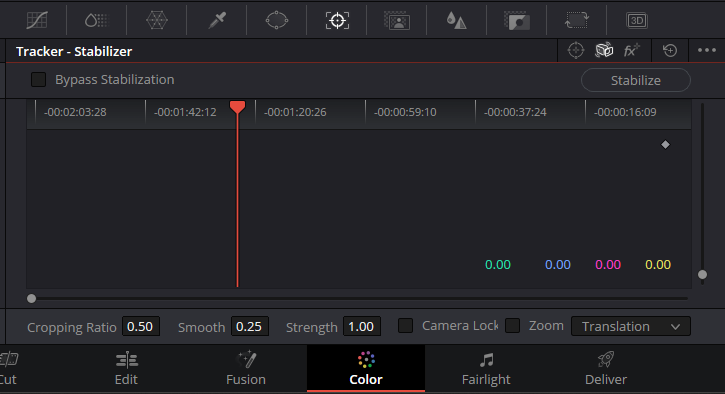
Second, use your stab settings wisely. Staying with the default “smoothing” setting of 0.25 will perform a mild correction; setting this to 0.6 will yield a much stronger effect.

In any case, there will be cases where frame borders will show up after stabilization.

There are basically three ways to deal with that.

In order of raising complexity, the simplest approach is to simply switch off the stabilization (yes!) and use the original footage as it is.

However, my standard choice for correcting frame borders is to increase for the scene in question the zoom level slightly, just enough to get rid of the borders. That’s usually not noticable at all.

One can refine this “zoom” approach by adjusting also the x- and y-positions of the clip to get rid of frame borders. At that level of correction, you can iteratively change zoom level and image positions until most of the original frame is used.

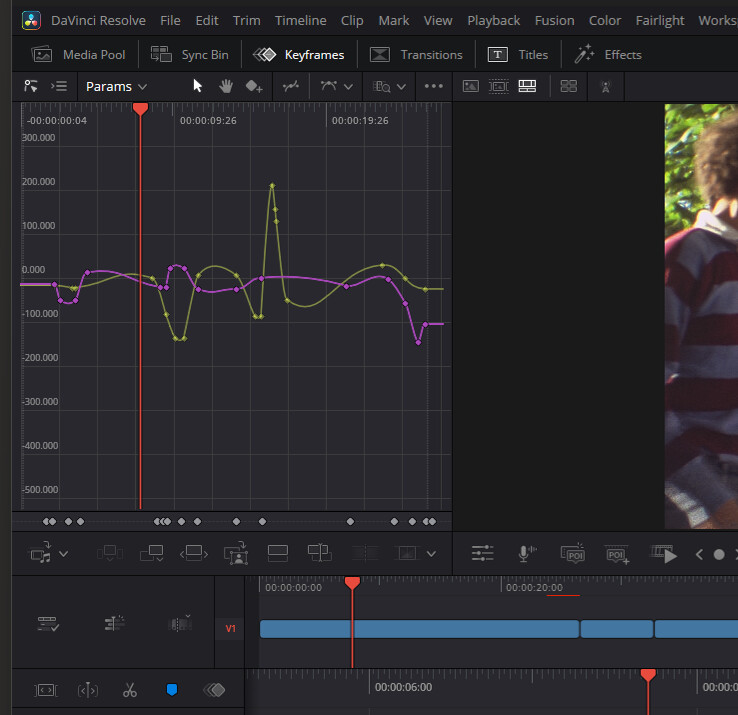
The most involved approach is to select an appropriate zoom level and than manually keyframe x- and y-positions of the scene over time. Here’s an example of how such a thing looks like:

The yellow and magenta curves above are the keyframe curves for x- and y-position over the course of a single scene. Each dot corresponds to a manually adjusted keyframe.

As you can see, this is a lot of work - so I usually do this only if absolutely necessary.

Again, normally, I simply adjust the zoom factor in such a way that no image borders become visible. Done.

One additional note: I separate in my workflow image stabilization and motion interpolation. That is, I have a first timeline where I only do image stabilization (at 18 fps) and a second, different timeline where I do image interpolation (that is: raising 18 fps to 30 fps, at 30 fps) on the stabilized footage. The reason is that you help the image interpolation processes to perform their action by pre-stabilizing the footage. I am not too sure which workflow daVinci uses if you do all of this in one timeline (could be first frame interpolation, than image stabilization - which would be the wrong way around, or it could be first image stabilization and than frame interpolation, which is the correct way).

2 Likes

@cpixip Thanks for your response! It was really helpful.

I’m curious to see a full raw file from someone else’s scan that I can inspect. I’d like to check how much zooming is possible with other people’s raw files—just from a single frame.

I’m wondering if it matches the quality of my own scans, with the grain etc. It’s purely for comparison.
If anyone can help me with that, I’d be very grateful! :smiley:

Hi @Utrecht,

I’m attaching a link to download two raw-dng files that I just captured with my scanner. The camera used was a Raspberry Pi HQ:

It’s a capture of a Super 8 frame that I regularly use for testing.

I captured it at two different resolutions: 2028x1520 and 4056x3040 px. The latter is the camera’s maximum resolution.

I hope they help you. If you need any additional information, please let me know.

Kind regards,

Manuel Ángel

2 Likes

@Manuel_Angel Thanks you very much!

If I want to open these files, I see a lot of darkness. Was there an export problem? :slight_smile: Or is this a problem from my side?

Good evening @Utrecht,

First of all, my apologies for the poor quality of the files. I really don’t know what could have happened.

I’ve retaken the capture and I think everything is fine now.

In addition to the dng files, I’ve included files of the same frame in jpg format. All files were generated by the libcamera and picamera2 libraries.

I’m attaching the link again:

Best regards,

Manuel Ángel

Thank you so much! Now I know I’m not going crazy when it comes to quality. :grinning_face_with_smiling_eyes:

And it’s just good to have a comparison now and then, as a sort of check, to see what the quality from someone else looks like. The black line on the right side of the scans is from my transport system (I’m scanning using a disassembled Super 8 viewer). I’m leaving it as is for now, since I end up cropping the footage anyway.

Here are some .tiff files from me (I couldn’t export them as dng for the moment). Excuse me for the large files.

Hi @Utrecht,

I’ve been investigating the causes of the dark dng images that appeared in my first post.

I have to tell you that, thanks to your request, I discovered a stupid bug in my capture software.

The error consisted of the scanner’s backlight being turned off before capturing the raw image, hence the cause of the darkness in the captured image.

The bug has been fixed.

In the end, everything has its explanation.

Regards,

Manuel Ángel

2 Likes

Let me add some examples for you as well. The following three scans are all material from the same medium-quality S8-camera, but captured 40 to 50 years ago on different film stock:

  • RAW_00967.dng: a scan of Kodachrome film stock - note that the sharpness of the film stock actually outperformes the camera.
  • RAW_00288.dng: same camera, but different film stock, more grainy than the previous example. Might be Fuji, but I am not sure.
  • RAW_02523.dng: again the same camera, but now even more grain. It’s an early Agfachrome film stock (70’s of the last century). Actually my worst example in terms of resolution/grain I encountered so far.

For comparision: this here Raw_00013189.dng is also Agfachrome film stock, but a little bit more advanced, a few years later in time. Also, the camera used for that clip was of much higher quality than mine.

So you see, there are substantial difference in old S8 film stock, depending on the type of film used and the available camera quality (lens, primarily). In fact, if you dare to search for them, there are various other .dng-files posted here in the forum.

In this respect be aware of the fact that for HQ material such as @Manuel_Angel posted, it is much better to scan always at 4k. If you need smaller resolution, scale it down in post production. Do not scale it down in camera to 2k. This will result in a worse scan performance. There is a post about this somewhere in the forum.

To judge your scanner setup, it’s actually better to look at frames with dirt on them - the dirt particles should be as sharp as possible. That is in my opinion the best reference for judging scanner performance - not the appearance of any grain pattern. In this respect, your scans seem to be doing just fine (judging the image definition of your dirt particles). By the way, your footage seems to be from two different S8-cameras (judging from the different exposed areas around the sprocket hole)? Certainly your scan resolution (17 Mpx) beats the maximal resolution of the HQ camera (12 Mpx).

2 Likes

@cpixip Thanks for your response, your scans look great.

I do scan at a high resolution, and I’ve noticed that some of the dirt doesn’t appear very clean when zoomed in. It seems like there’s a sort of “glow” or halo around it, but that might just be because the dirt is slightly out of focus. I’ve done other scans of sharp objects using the macro setup, and those look solid and crisp.

Unless anyone in the community has specific feedback, I’ll leave it at that and continue scanning. I’ve realized I can be quite a perfectionist when it comes to quality—something I’ve always had with my hobbies. But I think I’m starting to get the hang of it.

You’re right, the scans are from different cameras and film stocks. The first film stock is unknown in terms of the camera, but it’s Fujifilm, likely from around 1974. I got it from a friend whose father filmed a Dutch city back then. The third frame was shot on Kodachrome 64 using a Pallas Soundmatic 318 in 1979—these are my father’s recordings. It was a budget camera at the time, not the best lens either. In a while, I’ll be shooting some Ektachrome with the same camera I inherited from him, and I’m really curious to see how it turns out.

Maybe if I take a step back in terms of resolution, I might end up with a cleaner overall image. So I’m thinking of scanning at around 4K quality—around 12MP cropped. But I’ll have to experiment and see how that turns out.

1 Like

This is a sample scanned at reduced resolution. In theory, it could be made even smaller.

1 Like

As someone who also had to come to terms with the image quality of the Pi HQ camera, here are a couple of random frames as they appear in my DaVinci timeline before grading and all. :slight_smile:

All of your’s look rather crisp by comparison, but I can’t go down that rabbit hole again. :sweat_smile:

3 Likes