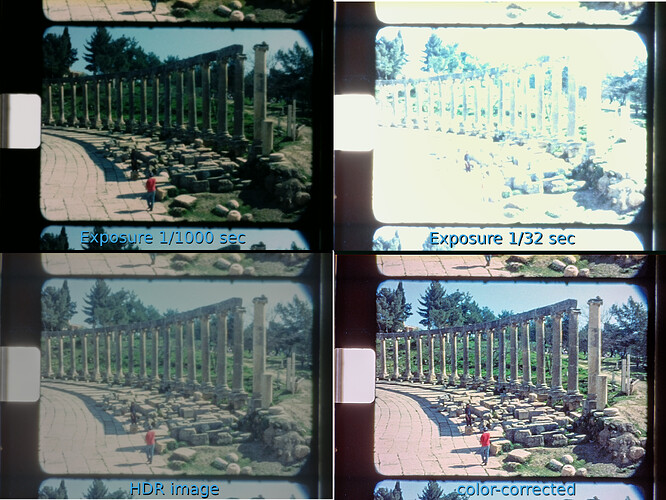
… here’s an example of a frame capture to illustrate the above description.
Top left is the frame capture with 1/1000 sec @ ISO 100. The sprocket hole is not burned out and appears white. This is how the LED power was adjusted. Dark shadows show no image structure, as the camera can not capture the high dynamic range of the film stock.
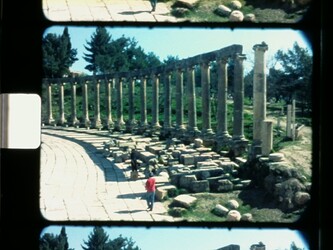
Top right is the frame capture with 1/32 sec @ ISO 100. Almost all of the image is burned out, except the dark shadows. Currently, I take a total of 5 exposures. The best single exposure image of this image stack is the following image:
For my taste, the structure of the bright stone floor is burned out to much in this image and the details in the shadow are fading too much in the darkness. That is why I decided against a single image capture and instead utilize intermediate frame motion which allows me to capture an image stack with different exposure settings for each frame.
The stack of 5 exposures is combined via exposure fusion, which result in the HDR image in the lower left corner of the top image (strictly speaking, this is not a true HDR - but this is another topic). Here, the contrast of the HDR image is reduced so all of the image detail is visible.
The HDR image is further processed into the final output image. Processing consists mainly of contrast adjustment, gamma-adjustment and sharpening. The final output picture is displayed in the lower right corner of the top image.
If you compare closely one of the input images with the output image, you will notice that a slight color shift was introduced. Therefore, the color of the sprocket hole is no longer pure white. Color correction and color grading are two close cousins…

