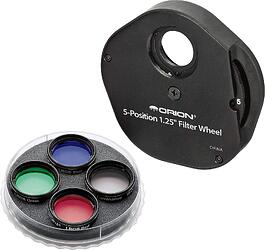
[IDEA] RGB filter wheel

This is just an idea.

I saw this ( https://youtu.be/x-6MYP0RxTI I did not upload this) special feature from the Wizard of OZ, it was about the restoration of the film. They said they scan the frames on 4K, 16 Bit at 50MB each frame. You can see this at 01:36 What they meant was each channel of the RGB is 16bit so it’s actually a 48-bit image.

My camera, at 4000x2750 the highest setting is RAW16 (color) and MONO16 (grey). Actually, the MONO16 pixel format could recreate a 48-bit image by using an R G B filter wheel attached to the camera and the lens. So you have for each color a 16-bit image that you can merge together as a 48-bit image. (the debayering part can be followed up at this topic: debayring point grey/FLIR)

The 8-bit guy made a great video about this method: https://youtu.be/a-ny3geJ-nk

Is this a good idea for Kinograph V2?

And does anyone know what kind of software they were using for removing the dirt and scratches? (at 05.06)

This would work well with a monochrome sensor, if it’s used in front of a sensor that already has a color filter array then there will likely be all sorts of interference (if the filters don’t match exactly) with no gain in resolution.

Similar to the example in the Wizard of Oz you’d wind up with 3+ color records in the computer, but unlike the Wizard of Oz, they’d all be from the same piece of film, somewhat reducing their value for dust/scratch detection. You’d get a similar result from using different, discrete wavelengths of light to illuminate the film, although there is some benefit to using a full spectrum source in place of or in addition to individual color lights.

It’s hard to say what tool they’re using in the clip, but they mention the Perlmutters at WB who developed some of the custom software they used. Sadly they’re not specific and I’m betting it’s probably an internal, proprietary thing.

Good to know. And I thought so, the color filter will disturb the color’s even more.
That’s why it was just an idea.

Shooting the frame’s on a different light density can create a HDR image?

Yeah, you could create an HDR bracket from two different approaches - the first would be to vary the exposure settings in the camera/lens and keep the light constant, the second would be to use a longer exposure time and vary the intensity or duration of the lighting for each exposure.

The difficulty with the first approach is that the camera settings might have to be changed frequently, whereas the difficulty with the second approach is having both accuracy and precision in control of the lighting since even slight deviations could result in artifacts like strobing or pulsing. There are high-end scanners that use both methods, so it’s not impossible, just challenging to mitigate some of the issues.

Using a color filter wheel with a full-spectrum source and a monochrome sensor is still a very interesting idea, I think there could be some benefit depending on where in the system it’s used. I.e. if it’s between the light and the diffuser, before the film gate. I think this deserves some testing, at least from the perspective of “individual color LEDs as light source with mono sensor” VS “full-spectrum light source and color wheel with mono sensor” VS “full-spectrum light source with color sensor”.

1 Like

Hi guy’s,

This isn’t a color wheel but it’s about color so this is maybe an alternative who has only a color vision camera:

I bought myself a ColorChecker from X-rite (Classic Nano) It’s a pricy little thing around €160!!
But by this little thing and my vision camera (or any camera that you gonna use) and if @matthewepler got his light source I could create with my vision camera a LUT under that kind of environment, so that the color of the film reel is a close as it can get by the help of this ColorChecker. (RED=RED, BLUE=BLUE,…)

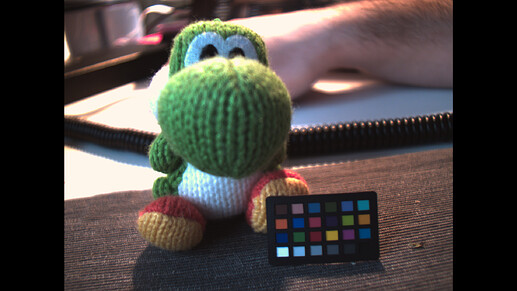
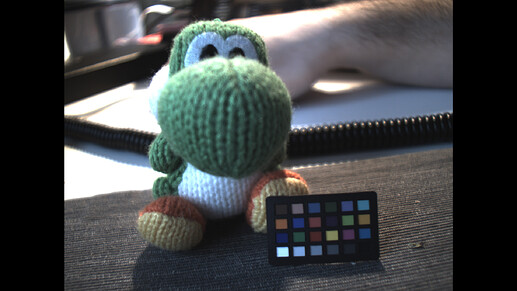
I did myself a little test under a not controllable environment, monitor light and a USB desk light from IKEA and I didn’t finetune after the use of ColorChecker but the color of my Yoshi comes very close to the original color:


The best solution, I think, would be if X-rite makes a 16mm ColorChecker frame and a 35mm frame. That could be easier for all of us. Attach this to an empty reel and make a single frame so we can make a LUT out of this an implement it to our projects…

Cheers!

A filter wheel tends to slow down a scan, as the scanner has to first rotate to the slot, wait for vibrations to settle, and then expose. Thus a single frame can easily take a couple of seconds.

On the upside, it makes the scanner very versatile, as one can use custom-filters according to the film stock being scanned.

Wow that scratch removal software is impressive.

Um @matthewepler I’m just testing my vision camera. This picture is just my desk with a X-rite color checker to calibrate the color space. I’m not working with film reels yet, I’m waiting for V2. :wink:

But in the meantime I can figure out how to work with my camera to get the maximum out of it.

That’s great! I’ll definitely be learning from you when I get my camera set up. I’m actually delivering it to the contractor next week so they can start setting it up and doing Computer Vision tests with it. Very excited to see what strategies will work.

I found a company that transfers digital photos back to 35mm photo-film.
tif-35mm
www.firstcall-photographic.co.uk

So what I want to do is make a scan of this file in a 35mm strip stitch it together on an empty 35mm reel and make a frame capture with your/mine vision camera to color calibrate the vision camera in post-production and create a LUT.

The lighting that shines true the film may be different and by doing color calibration you can apply the created LUT on your scans to get the right color, the attended way… that’s the idea anyway.

So there are 3 options:

  • Transfer 36 images to a Black and White Film (Not this one 'cause its black&white…)
  • Transfer 36 images to a Colour Negative Film
  • Transfer 36 images to a Colour Slide Film (I think this but what would the end product be…?)

Can anyone help figuring this out!? I will finance this “project”. And when it’s finished I will send one to @matthewepler

Check this youtube link to get the idea what I mean: youtube.com

@Gunther_Weygers - this is an interesting idea, however, I want to throw into a few points into the discussion which might describe some challenges along the way you sketched:

Firstly, film response curves do vary with different film stock. Juding from the offering you linked to, one will have not much control on the type of film used in the lab you referenced to. Also, you will have no idea how well their printer is calibrated. So already the color reproduction of your test print is not guaranteed to be what you think it should be (most certainly, it will be off).

Even if your test print comes out close to the colors/densities you have in our digital source image, calibrating your camera/scanner in a way that it will reproduce the colors of your test print faithfully will not guarantee that the colors of the film you actually want to scan are faithfully reproduced.

There are various reasons for that. First, as already mentioned, every film stock has it’s own soul, including the color/gray value response. In addition, every film stock has its own history - for example, I have a Super-8 film stock at hand which was first exposed, than traveled through humid and dry, hot and cold climate zones for months, only to wait on a shelf over a year to be finally developed. It than set over 45 years untouched in a cabinet as well. Unexpectibly, it shows some tint different from film of the same type (Kodachrome 40), but treated less harshly.

Given, you might be able to handle these kind of color shifts in post production. However, doing so you are going to loose in this case certainly digital dynamic range. Not so much an issue if you work with 16bit depths per color channel, but it can get challenging even with 16bit or higher color depth for difficult material. In this case, it is much preferable to adapt the camera curves already during scanning, specifically the camera gain curves, color balance and exposure values to the material in question and only leave marginal correction for the post production. If you are lucky and you can find in the material you are about to scan some large enough gray areas with different exposures, preferably in the dark, middle tone and bright tonal range, you actually have sufficient information to adjust blacklevel, whitepoint and gamma of the camera.

Coming back to the precision of a self made calibration image - from my experience, that is a rather difficult goal to achieve. There is a reason those calibration images/charts come usually with a heavy price. First of all, they are produced to highest standards, and second of all, they are measured afterward to get the exact color values one has to work with.

I used to be a member of the SMPTE, and I faintly remember that there was calibrated movie stock available (a quick internet search yielded however only this here). Here’s one for Super-8, but it’s only a resolution test film. Maybe someone with more up-to-date knowledge or access can give some hints whether such material is still obtainable.

On a broader perspective - film stock used for projection should have/might come with an immense dynamical range. However, I do not have any numbers and only some experience with Super-8 stock. It would be an interesting research goal to figure out or at least specify the dynamic range one will be dealing with a specific stock. That would probably have a profound impact on the type and brand of the camera which would be preferable to be used a film scanner.
2 Likes

Thank you for your reply on this subject @cpixip.

I know it would not be the most accurate color calibration chart outcome but none the less I could do some experiments with it, and if it helps me out then it’s a win and if not, then at least I tried. No? :slight_smile:

  • sure, it might actually work. At least one would expect some insights into the color fidelity of your illumination / camera combination. :+1:
1 Like