I will be working with a local arts center here in KY starting in January helping to transfer their physical media, including tape and film. They have a Lasergraphics Archivist scanner. I would like to learn more about this scanner before then. I’ve read Lasergraphics’ website, but I was wondering if there’s any sort of tutorial or how-to about this scanner?
There is not. You’ll need to be trained by them. When you buy the scanner they generally offer some level of training on-site when it’s delivered. At least, that was the case for our ScanStation. Not sure if the Archivist is different though. There is essentially no documentation on the machine either (something I’ve given up pushing them on, but tried for years to get them to do). That being said, if you’re familiar with film and the basic process, the software itself is trivially easy to operate. Of course, it’s very easy to do bad scan if you don’t know what you’re doing, but in terms of how the system works it’s fairly self-explanatory.
It may be possible to get Lasergraphics (Or Galileo Digital, their reseller) to do some kind of on-site or remote training, but it’ll cost you probably.
Thanks for the info! Their website has a lot of technical information I’ve been looking at, which has been helpful.
Here’s a general question I had. I know the Lasergraphics machines can perform color correcting during the scan. If scanning a faded positive print, such as early Eastman, is it best to apply color correcting during the scan or adding color correction in post? I had some scans in the last few months where color correction was applied during the scan and I thought it looked good.
We don’t do any color correction while scanning. Color neg is always done log, positive film and B/W neg are linear with the black elevated about 10% and the white of the perforation set to 95%. This ensures nothing is cut off. For color faded film we always scan in HDR mode, because you get more color data to work with that way and stand a better chance of dealing with the problem in resolve.
While it has the capability to do so, the scanner isn’t a color correction tool and isn’t really meant to be one. Doing color correction in the scanner defeats the purpose of using a machine like this - it’s designed to capture as much of the film as possible so that you can use proper tools like Resolve, to maximum effect.
The only time we do any grading in the scanner is if it’s or a secondary file we’re outputting at the same time (like an MP4 access copy, which typically gets a one-light color correction).
2 Likes
I’d like to learn how to color correct faded film in resolve, but the process looks so intimidating. I do have a scan of a faded film that wasn’t color corrected during the scan. I tried to color correct it one time and it didn’t go well; I mainly just have no idea what I’m doing.
It just takes practice. 90% of it is looking at the scopes and not at the picture itself. You can do almost all of the work with the vectorscope alone, but you have to play with the images and the tools in order to understand what affects what. I would suggest using one toolset for this kind of work: the color primaries, Lift/Gamma/Gain controls. Don’t worry about Curves or any of that other stuff for now. for faded film, most of the color shift can be dealt with in the gamma wheel and then some touchup in lift and gain if needed.
But you need to learn how a vectorscope works, and what you’re aiming for when making the adjustment and honestly, that’s just something that comes with experience. This is a good video that goes over the basics and then gets into some basic techniques on balancing an image.
")
In this case, he’s trying to neutralize a yellowish tone in the shadows and highlights, but the same concept of neutralization applies to pink fade. The thing to keep in mind is that when film is faded, colors other than the red have disappeared from the film itself - they’re simply not on the film anymore. This is why an HDR scan is critical, because it gets you just a bit more color to work with (we’ve dones some tests on our ScanStation with the same film, SDR and HDR, and you can see the vectorscope trace is notably bigger with the HDR scan. That means you have more to work with when trying to recover color).
3 Likes
I followed along with the video and I was able to reduce the red and pink tones quite a bit, but that was about it. The color was very dull. Maybe I’m expecting too much
Might I suggest that you post an original frame of your scan and your result? The community here in the forum might be able to give you some suggestions on how to proceed.
2 Likes
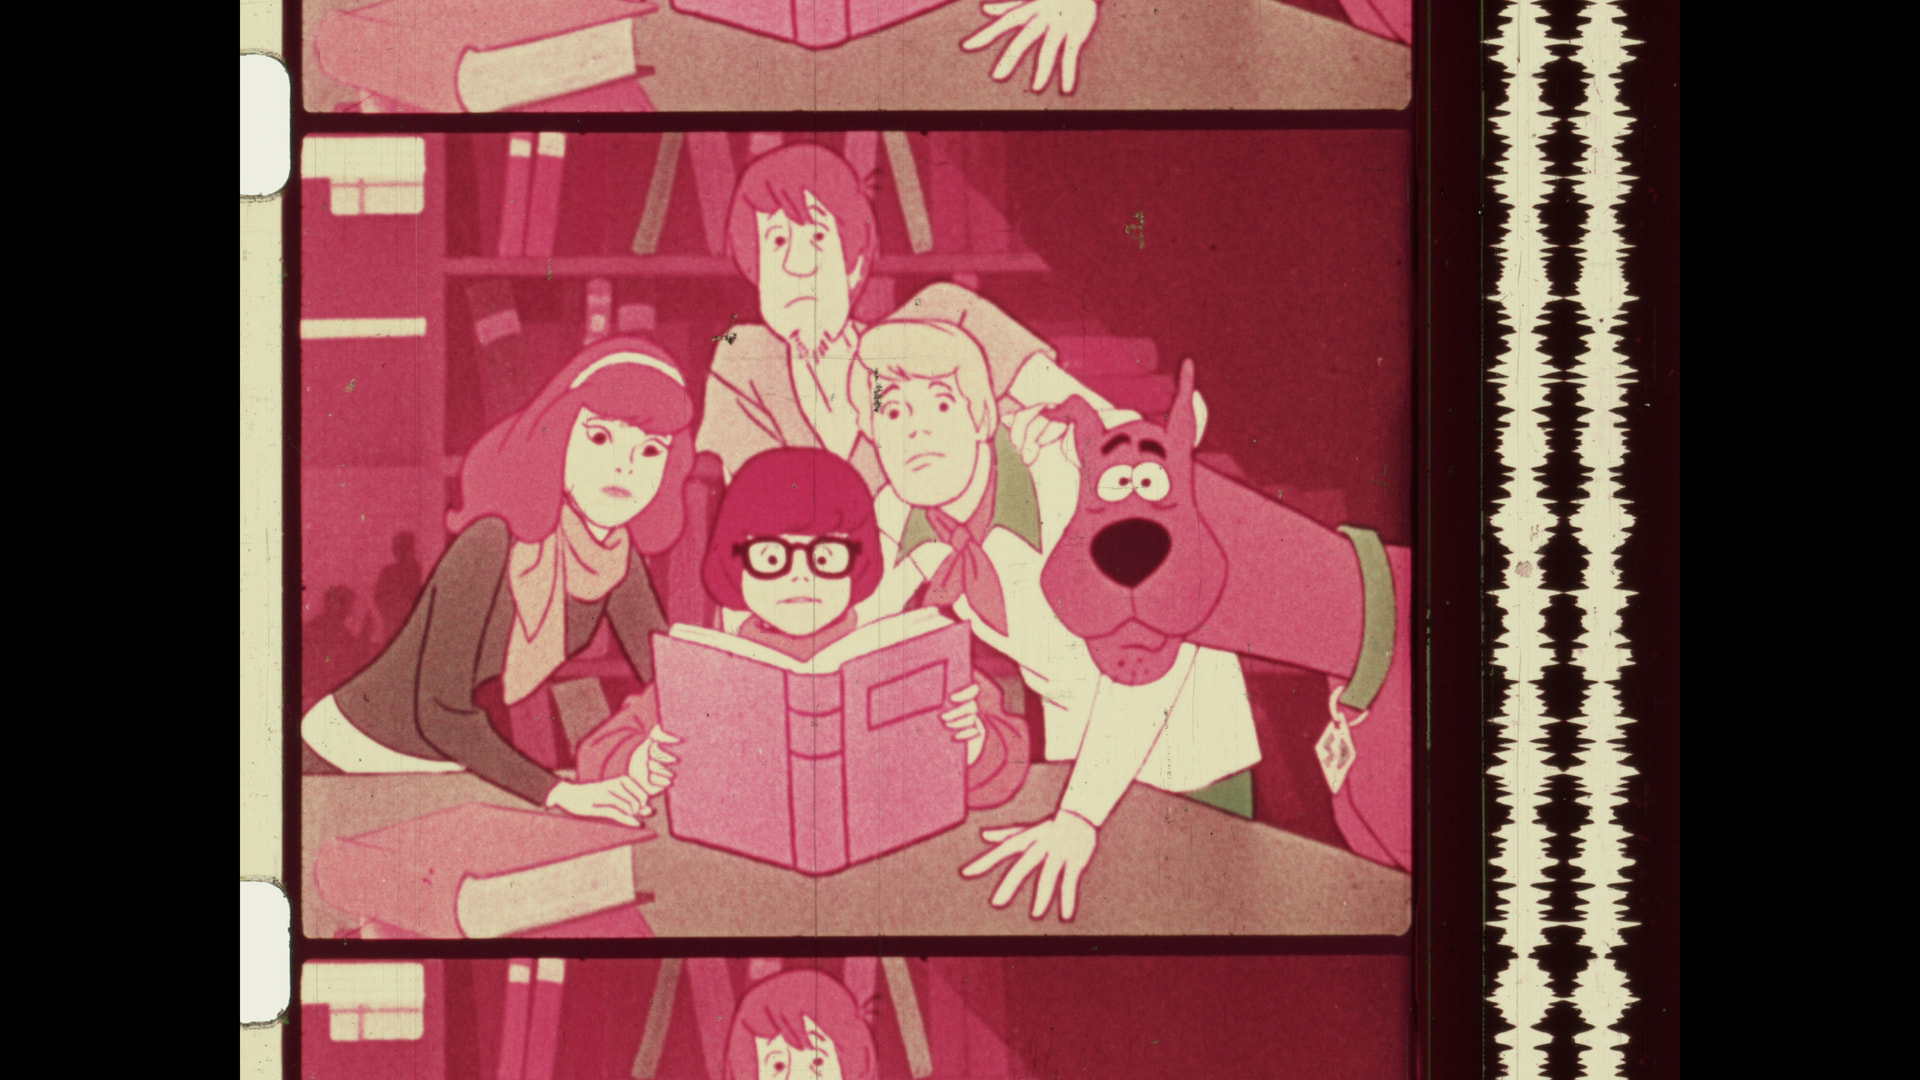
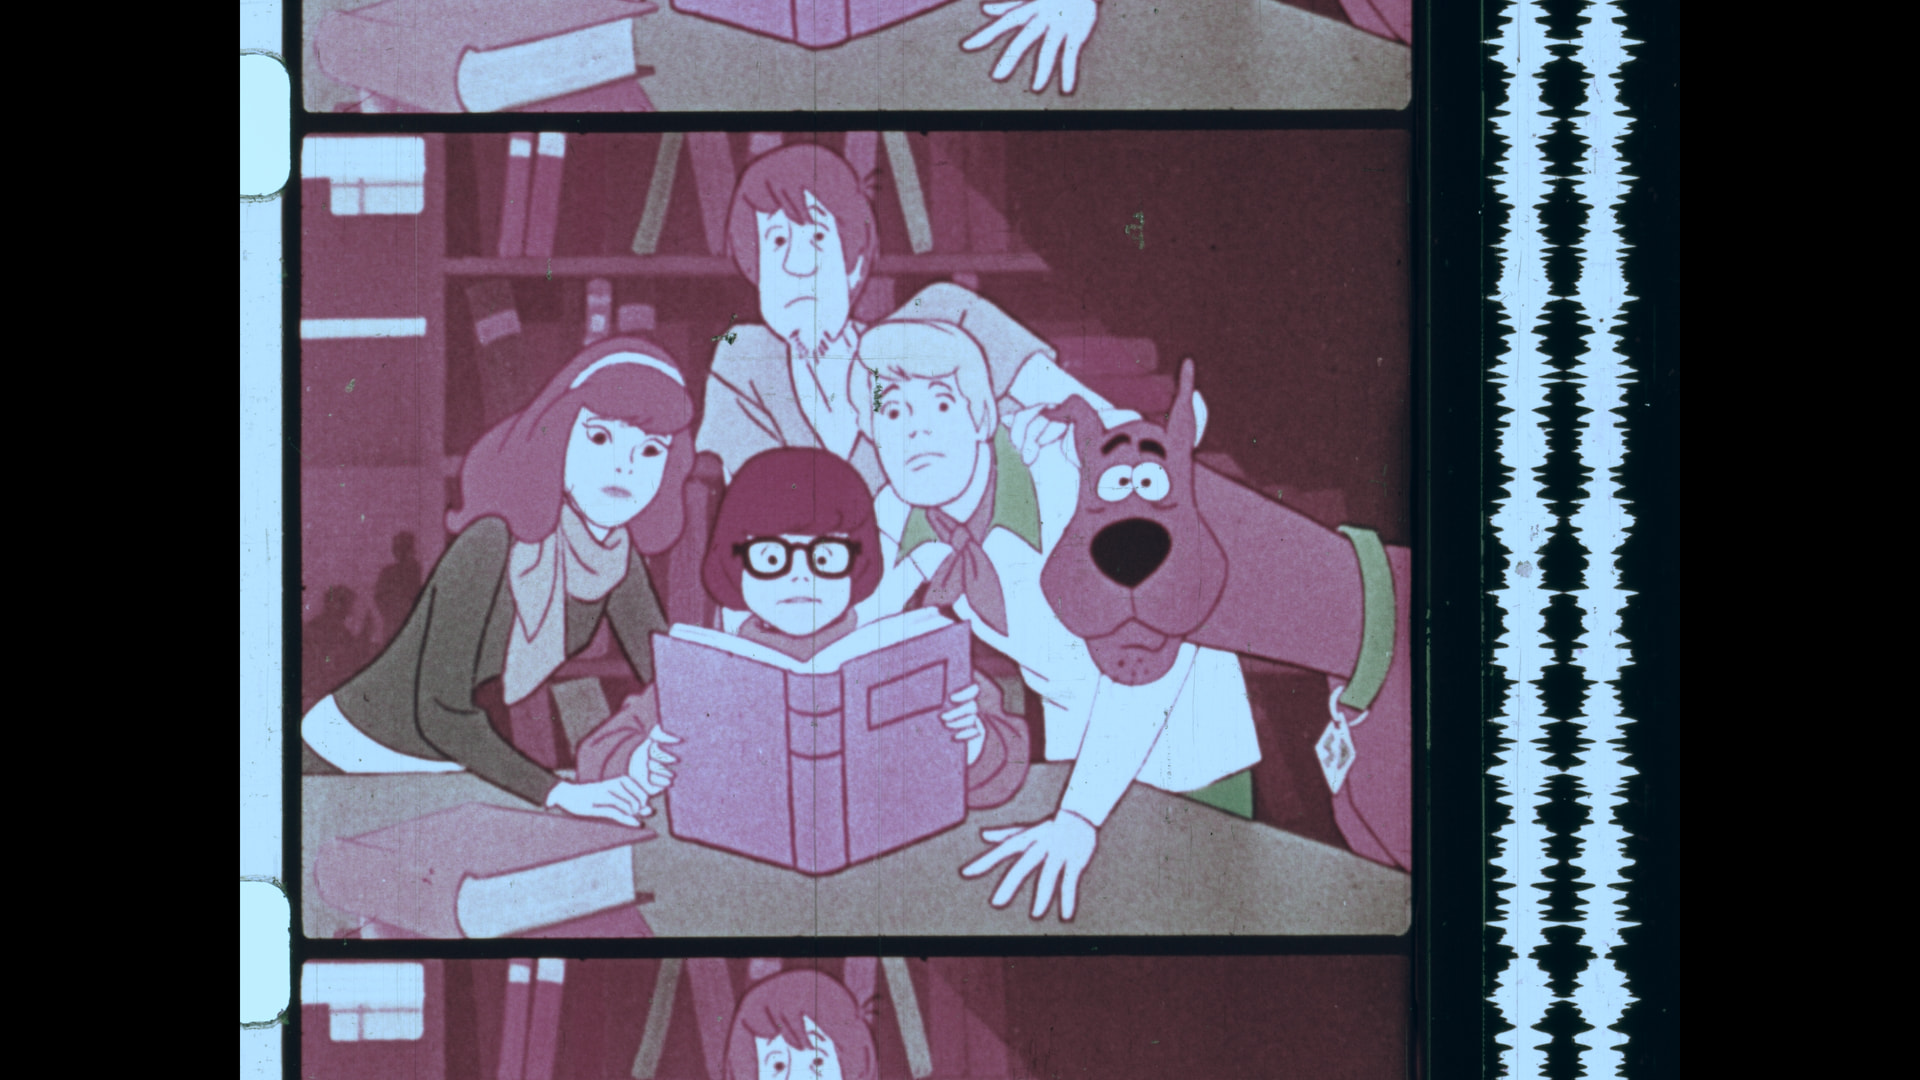
I think you are quite close. Add a serial node, to add chroma and adjust hue and maybe slight corrections in gamma for each color separately. This is what I came up with.

And here is how the scope looks.
3 Likes
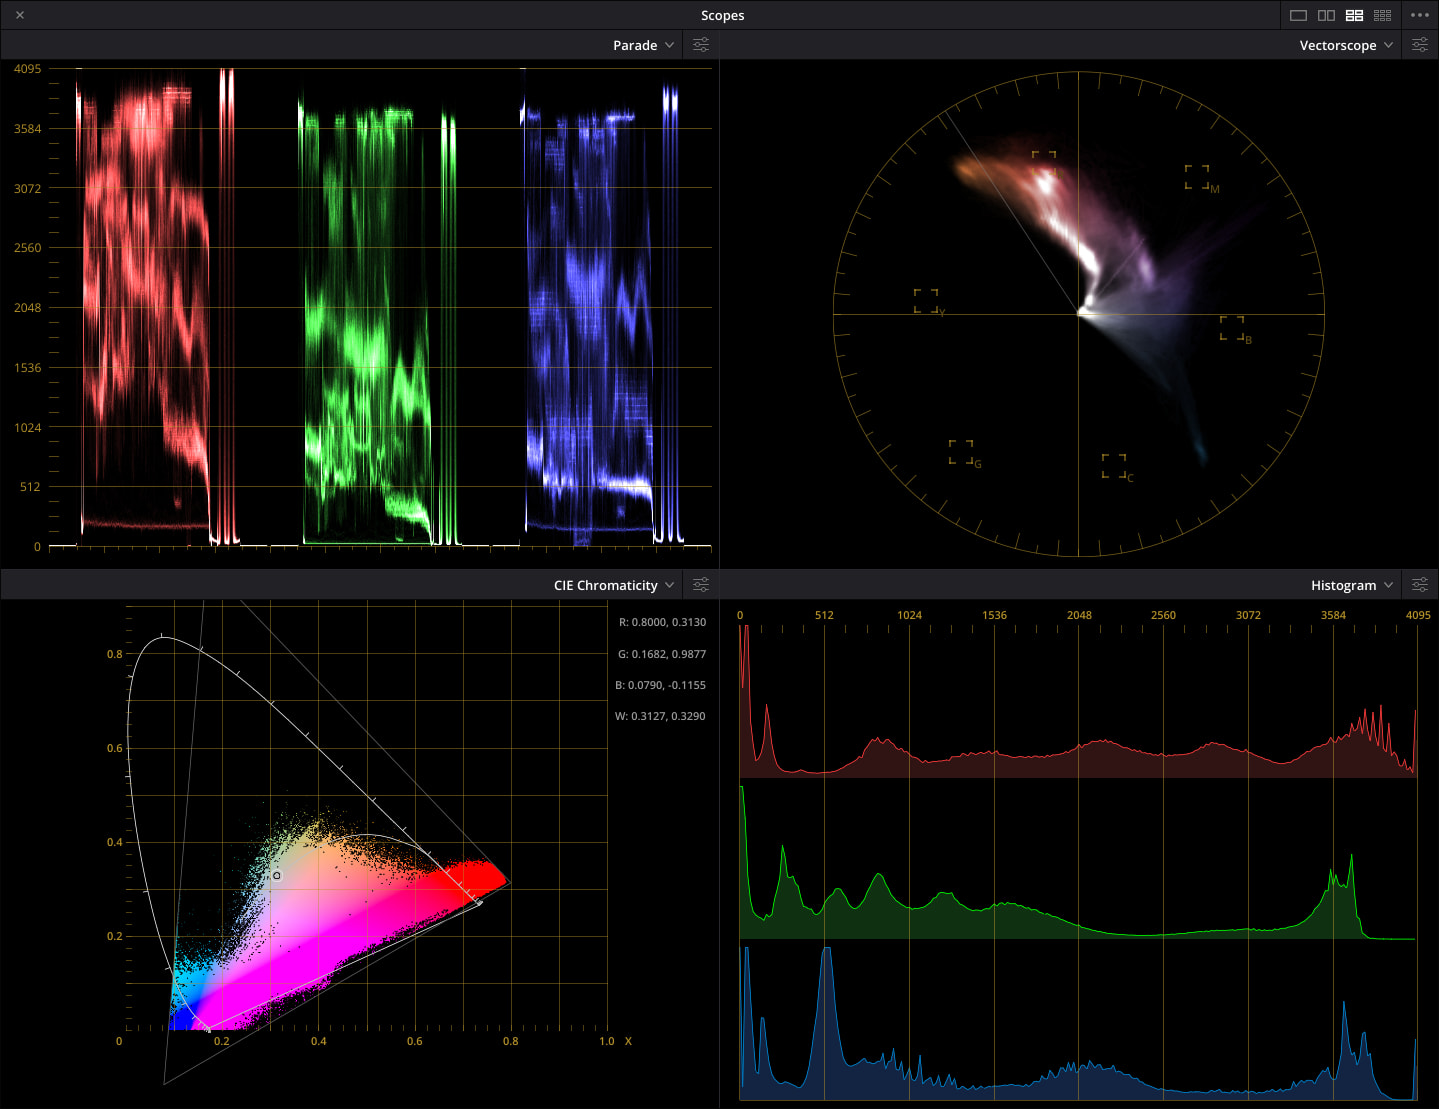
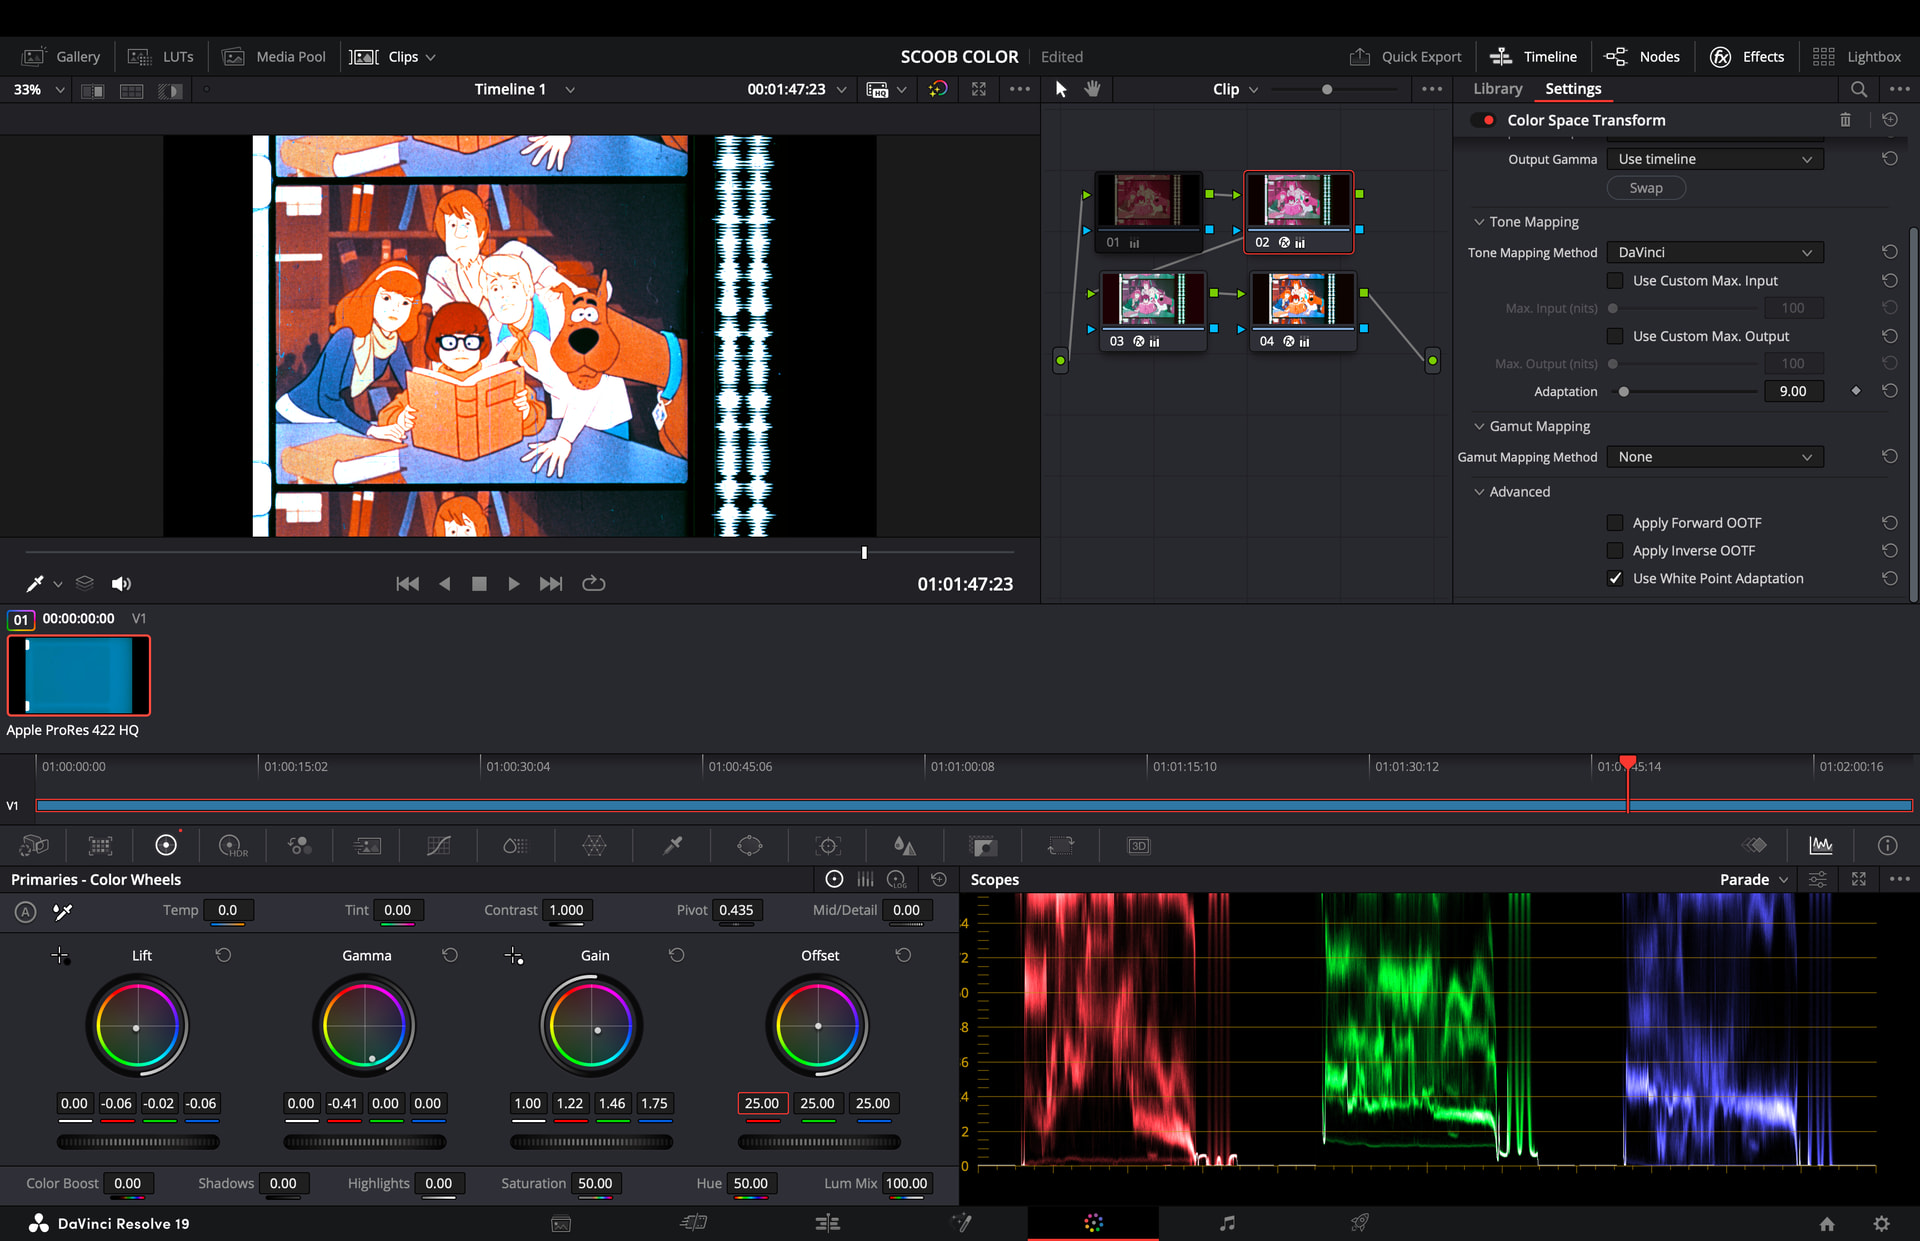
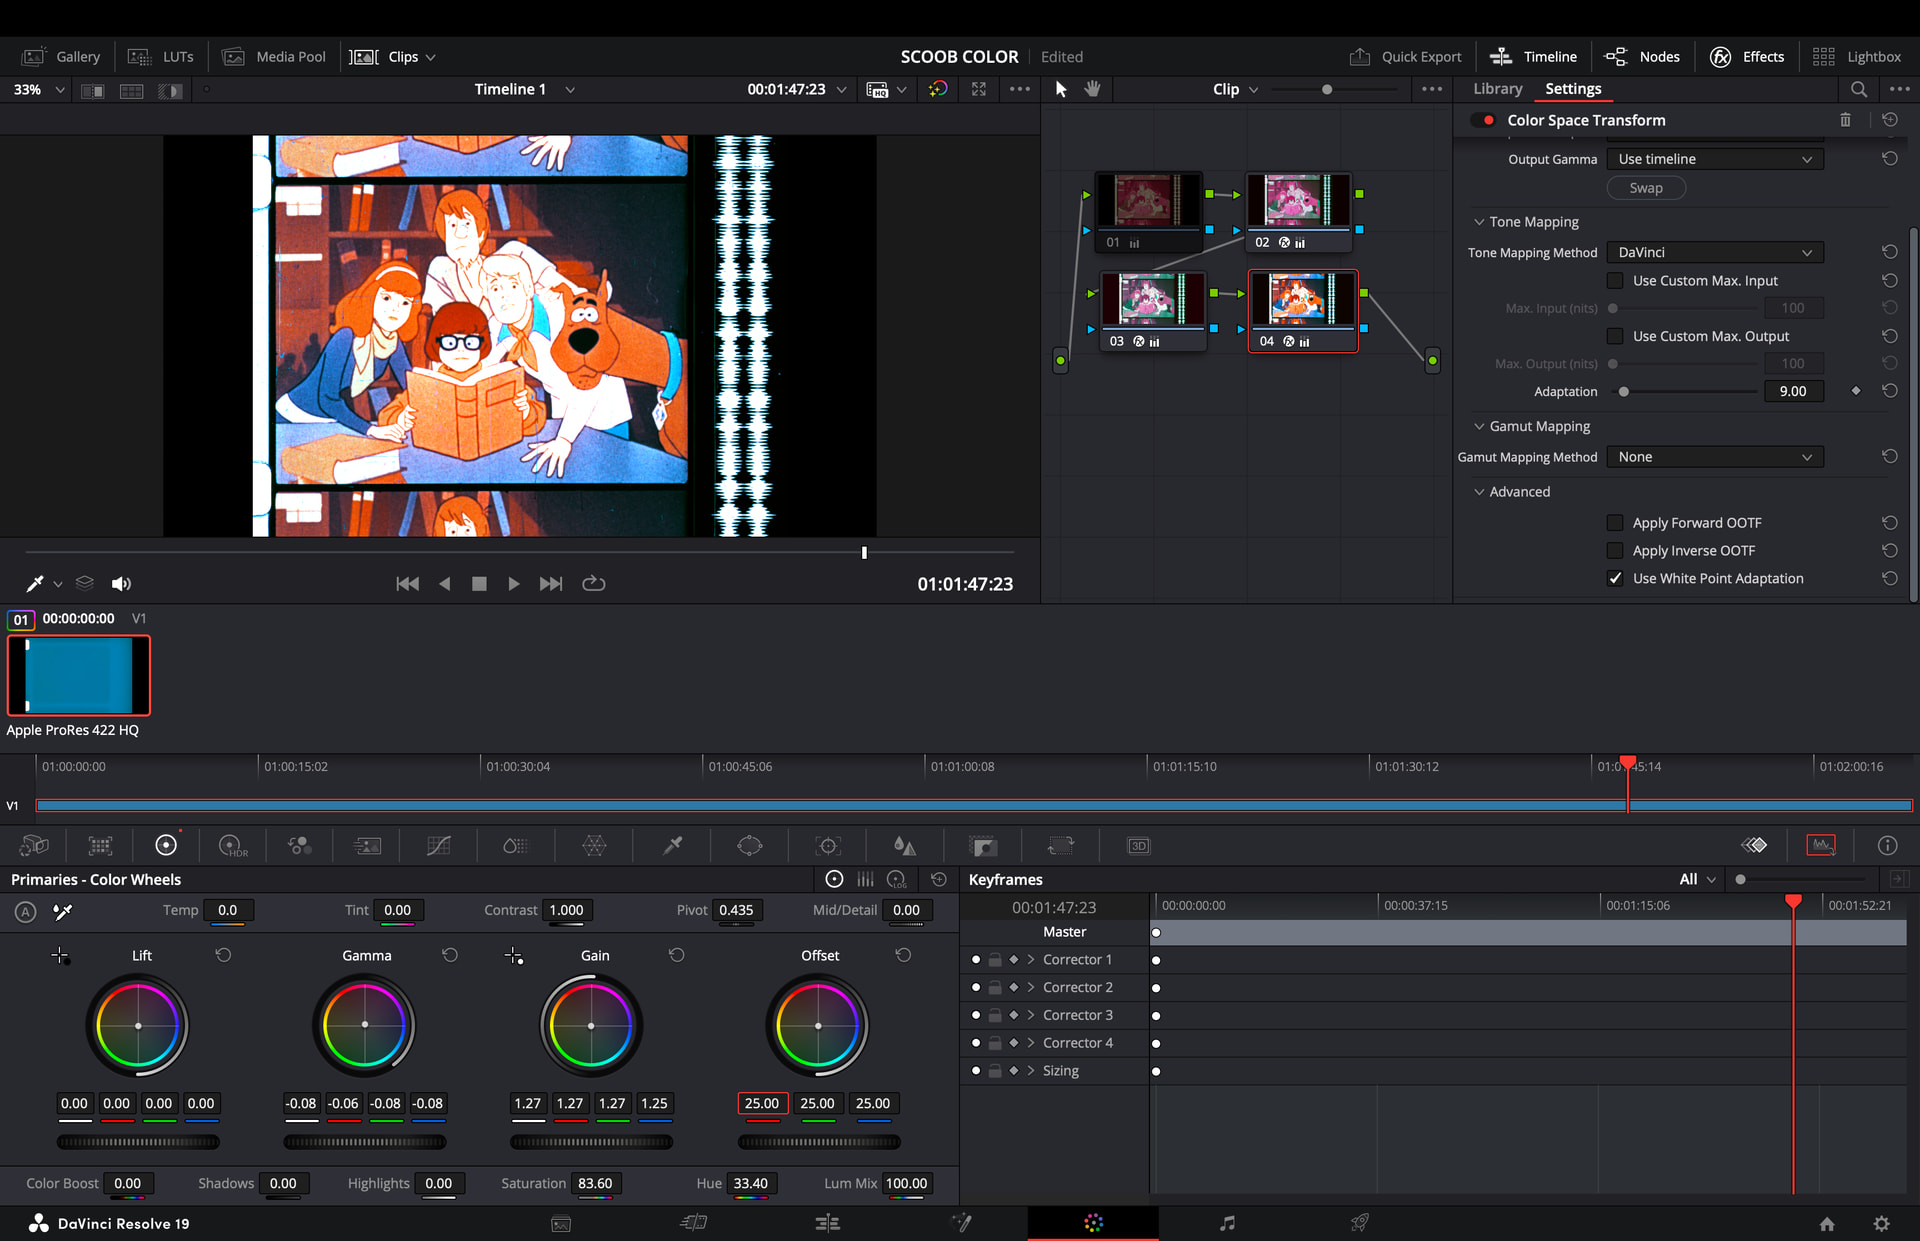
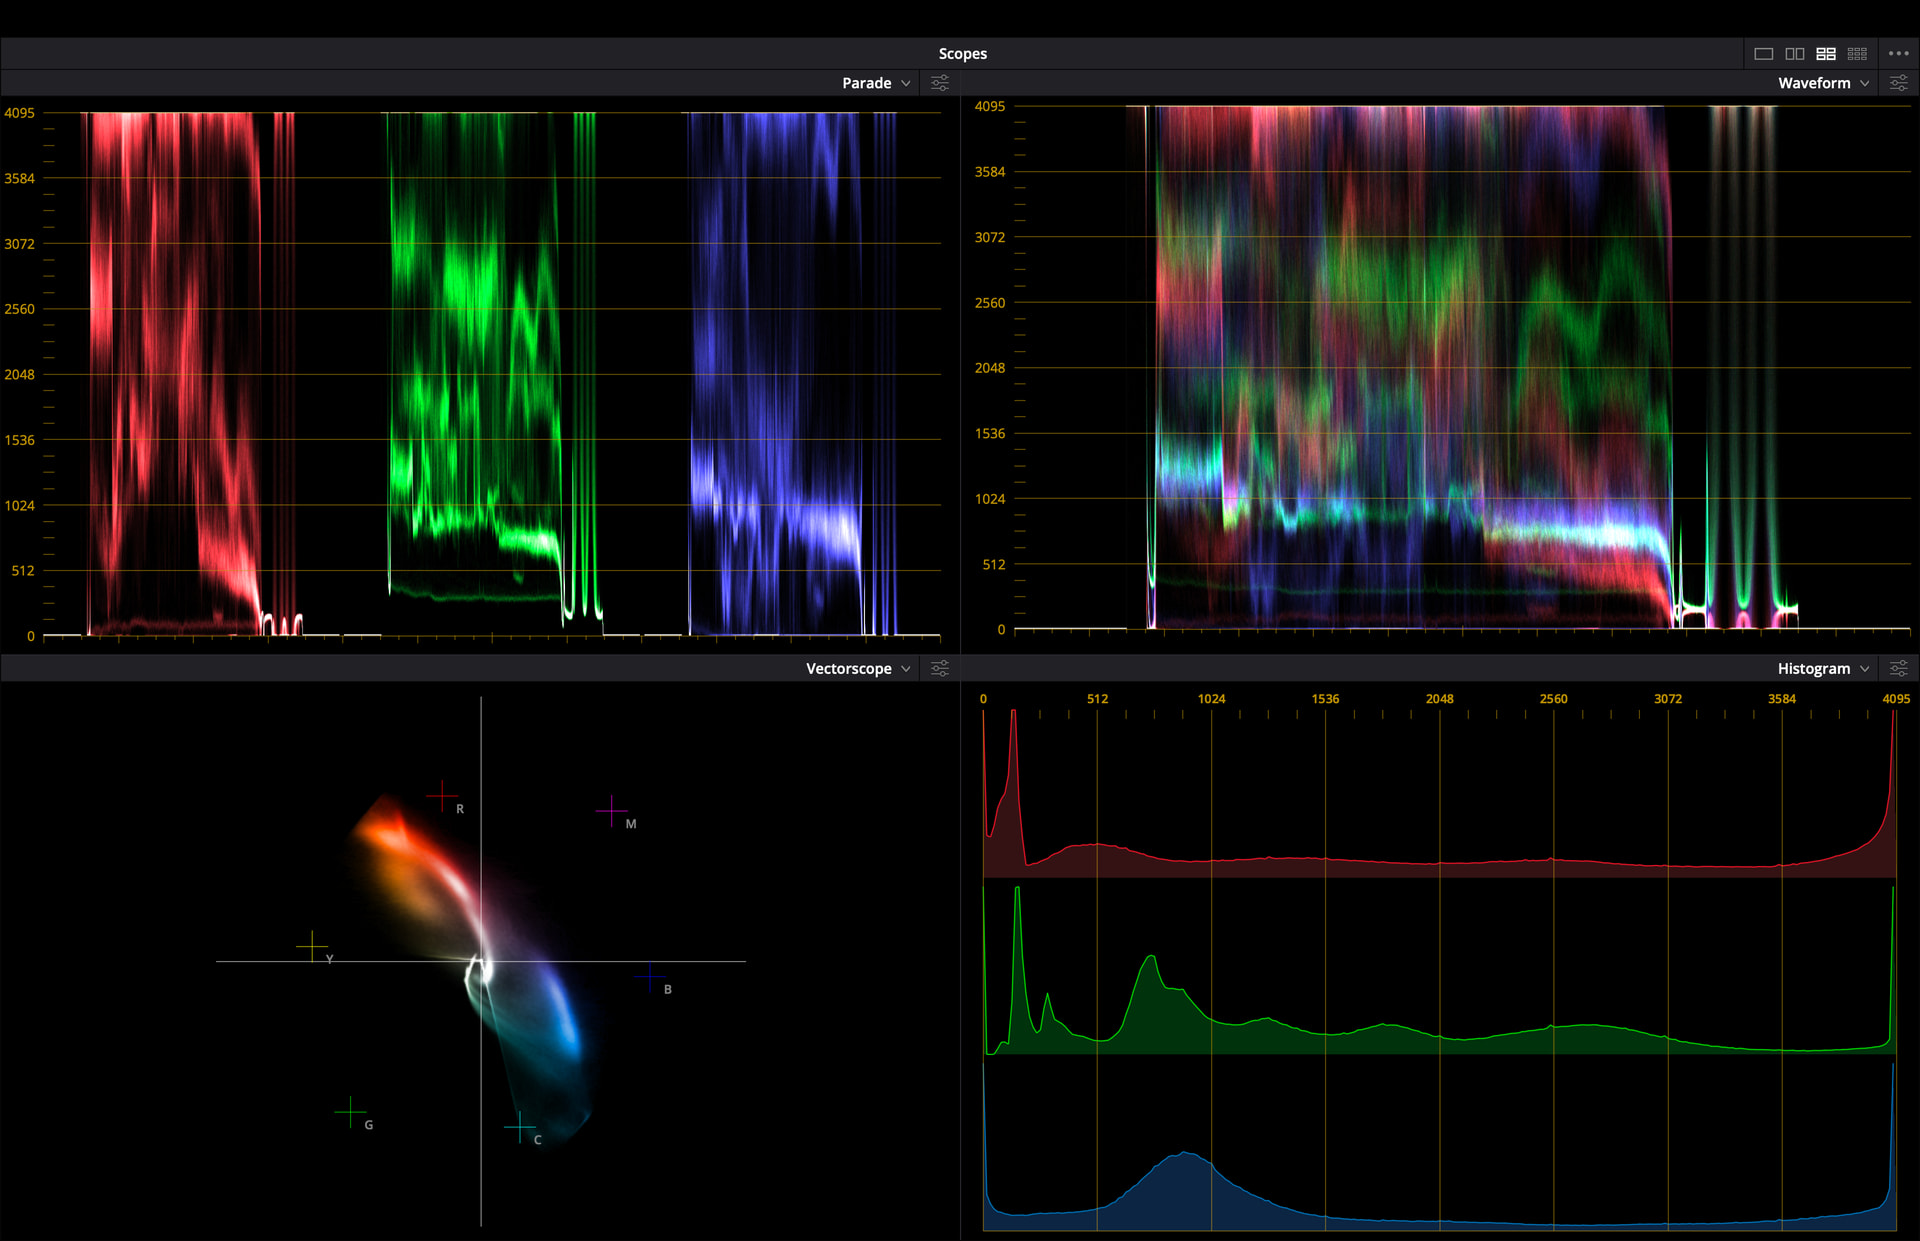
I actually really like how this looks, but I think the colors are bit too strong, especially the whites. The colors on the parade scope seem off. Screenshots of my settings for each node are included
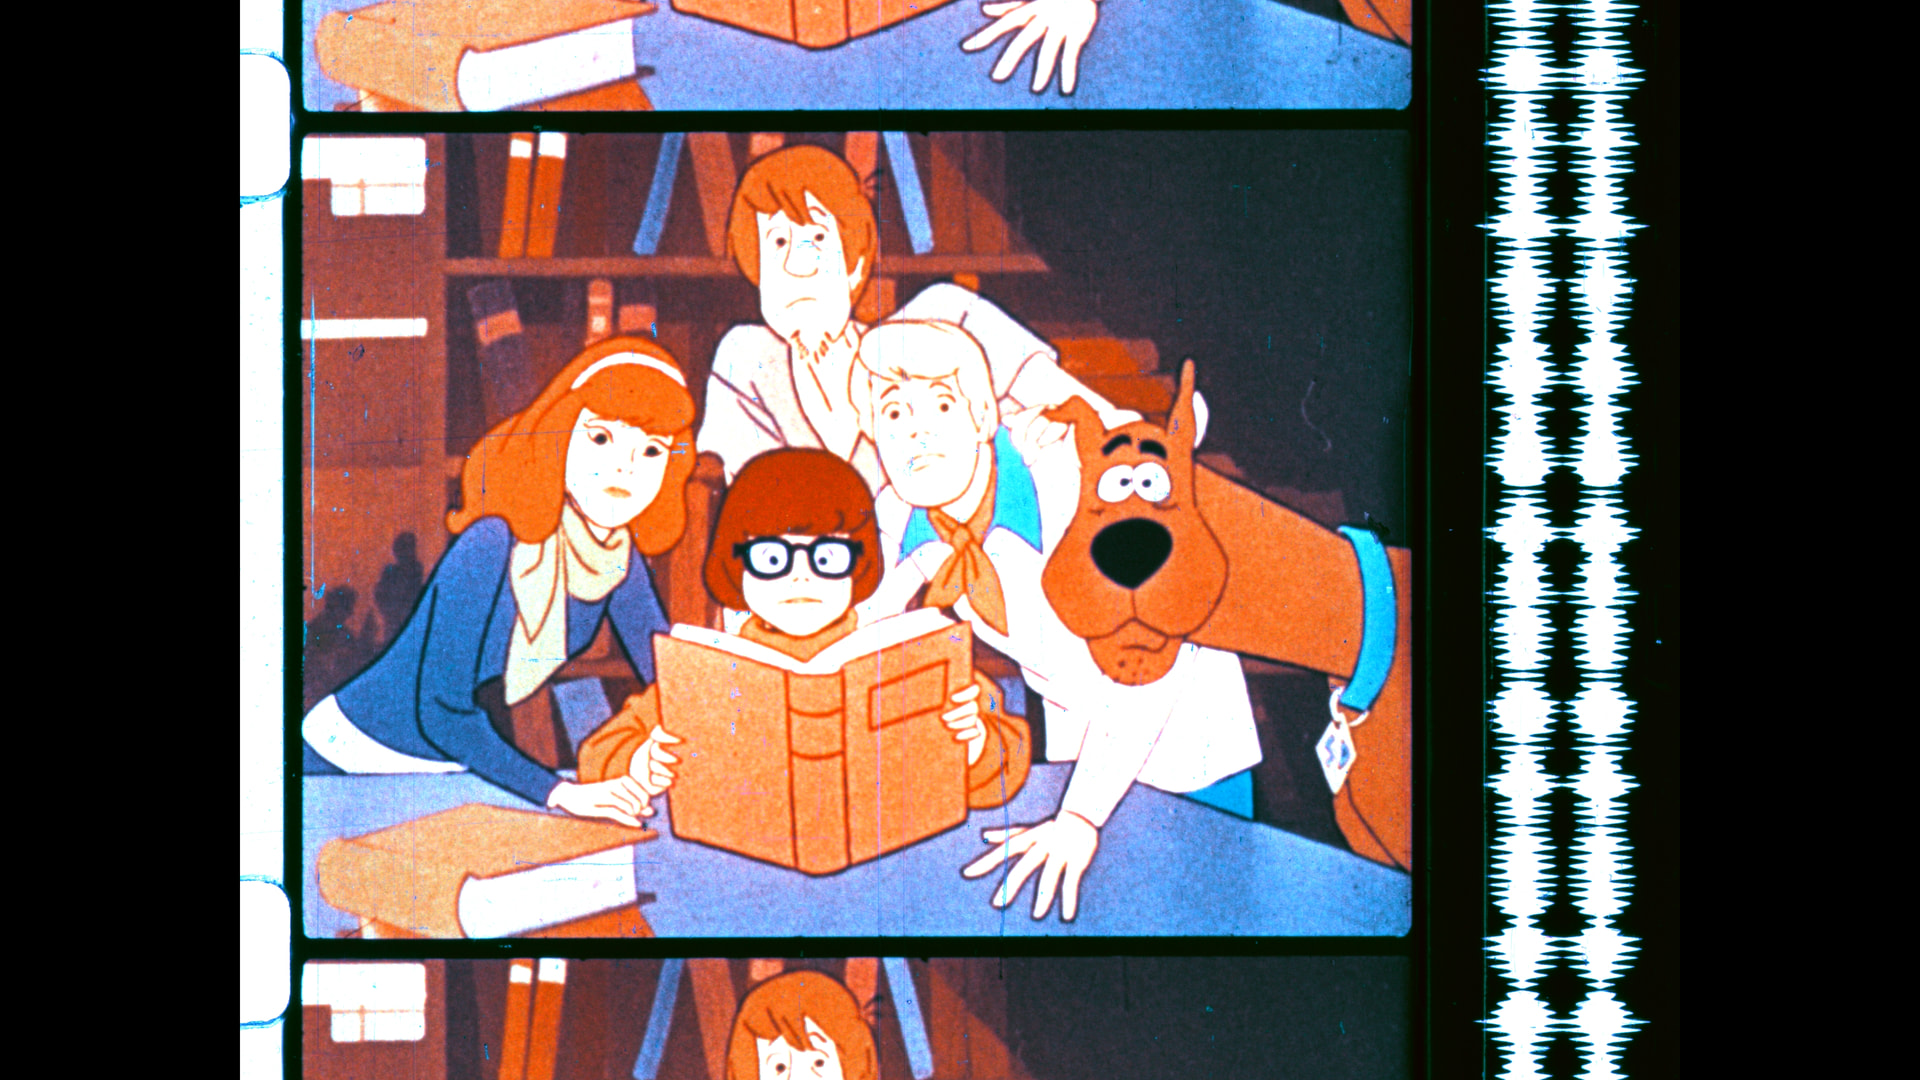
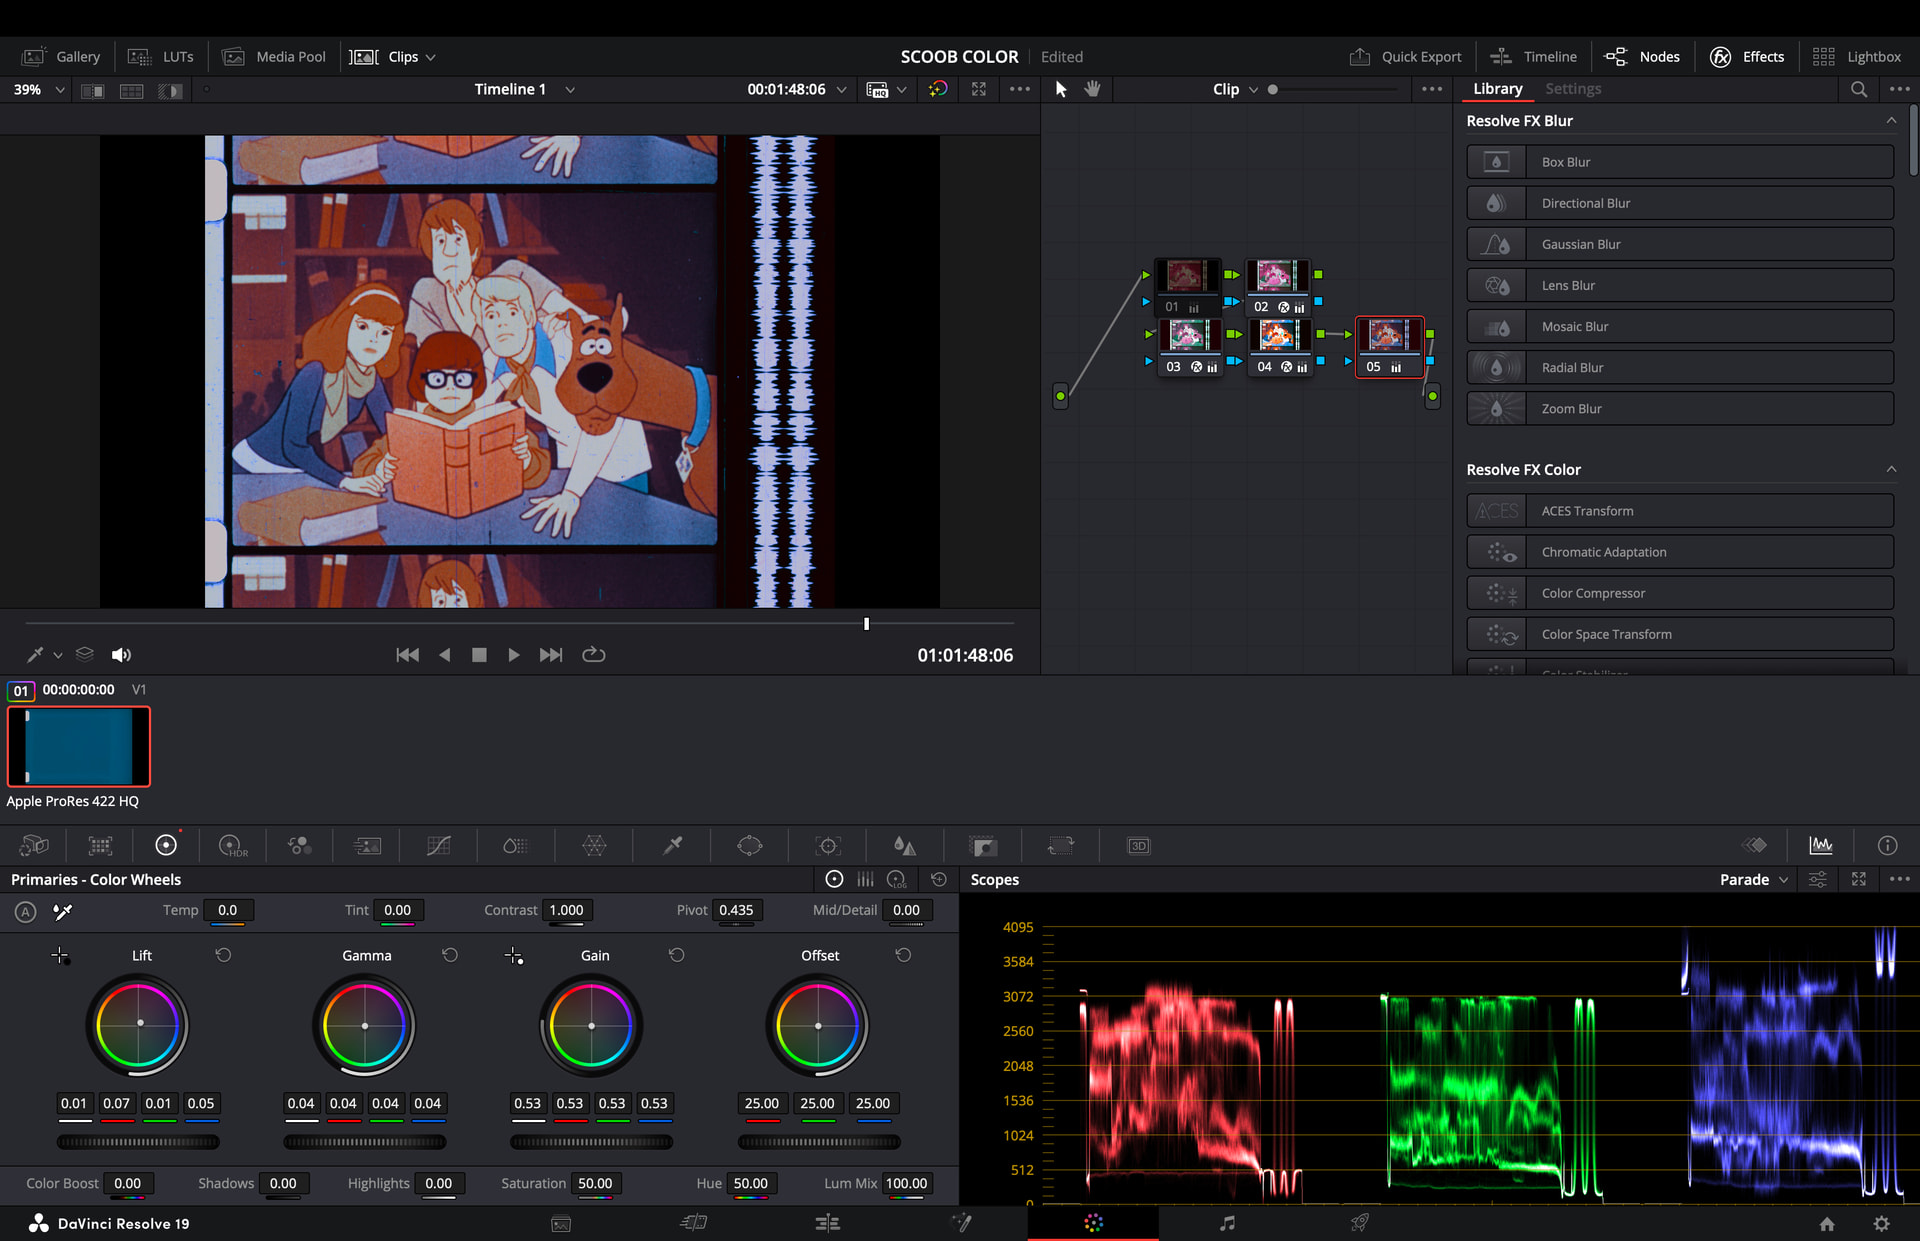
Image still
Node 2
Node 3

Node 4
Scopes
1 Like
You are certainly crushing the whites in your current flow graph. That is quite visible in Parade, Waveform and Histogram scopes. Try to add another node where you only reduce the global gain. Or, alternatively, try to use the Highlights setting of the new node. Or: experiment with the channel curves - which is even more involved. Goal is to avoid clipping ( staying away from upper limits of the scopes).
It might be that a correction like this results in a color cast in these bright areas. At your current settings, these very bright areas are just clipped - so they loose any color information. If you adjust, a color cast might resurface - which means some more work to do…
Otherwise: these are great results!
so when you see a flat line across the top of the waveform parade, it looks like it’s still clipped, you’ve just reduced the level of the gain after the clipping so it doesn’t go to digital white (100%). Generally the top of the channels in the parade should look a little less flat - left to right in each color channel represents that color in the image from left to right. So unless you have a bright area (like the sky) that goes across the whole frame, you usually don’t see that level of evenness in the parade.
It may be because of the fading in the print, scan settings, or from a previous node in your grade. I’d start at the last node, and disable them one at a time, looking at the tops of the channels in the waveform. If you see that flatness go away after disabling a node, then that’s likely the node where you’re clipping. You’ll want to bring the overall gain down, then turn the other nodes back on and see what you’ve got.
Also this looks a bit blue to me, in the highlights. I’d bring the blue peaks down just a hair and it should fall in line. It can be tricky with faded film though, because there’s so little blue there. This is where a control panel is really handy - even the tiny one BMD sells is good because you can get a lot more finesse in the dials than you can with a mouse.
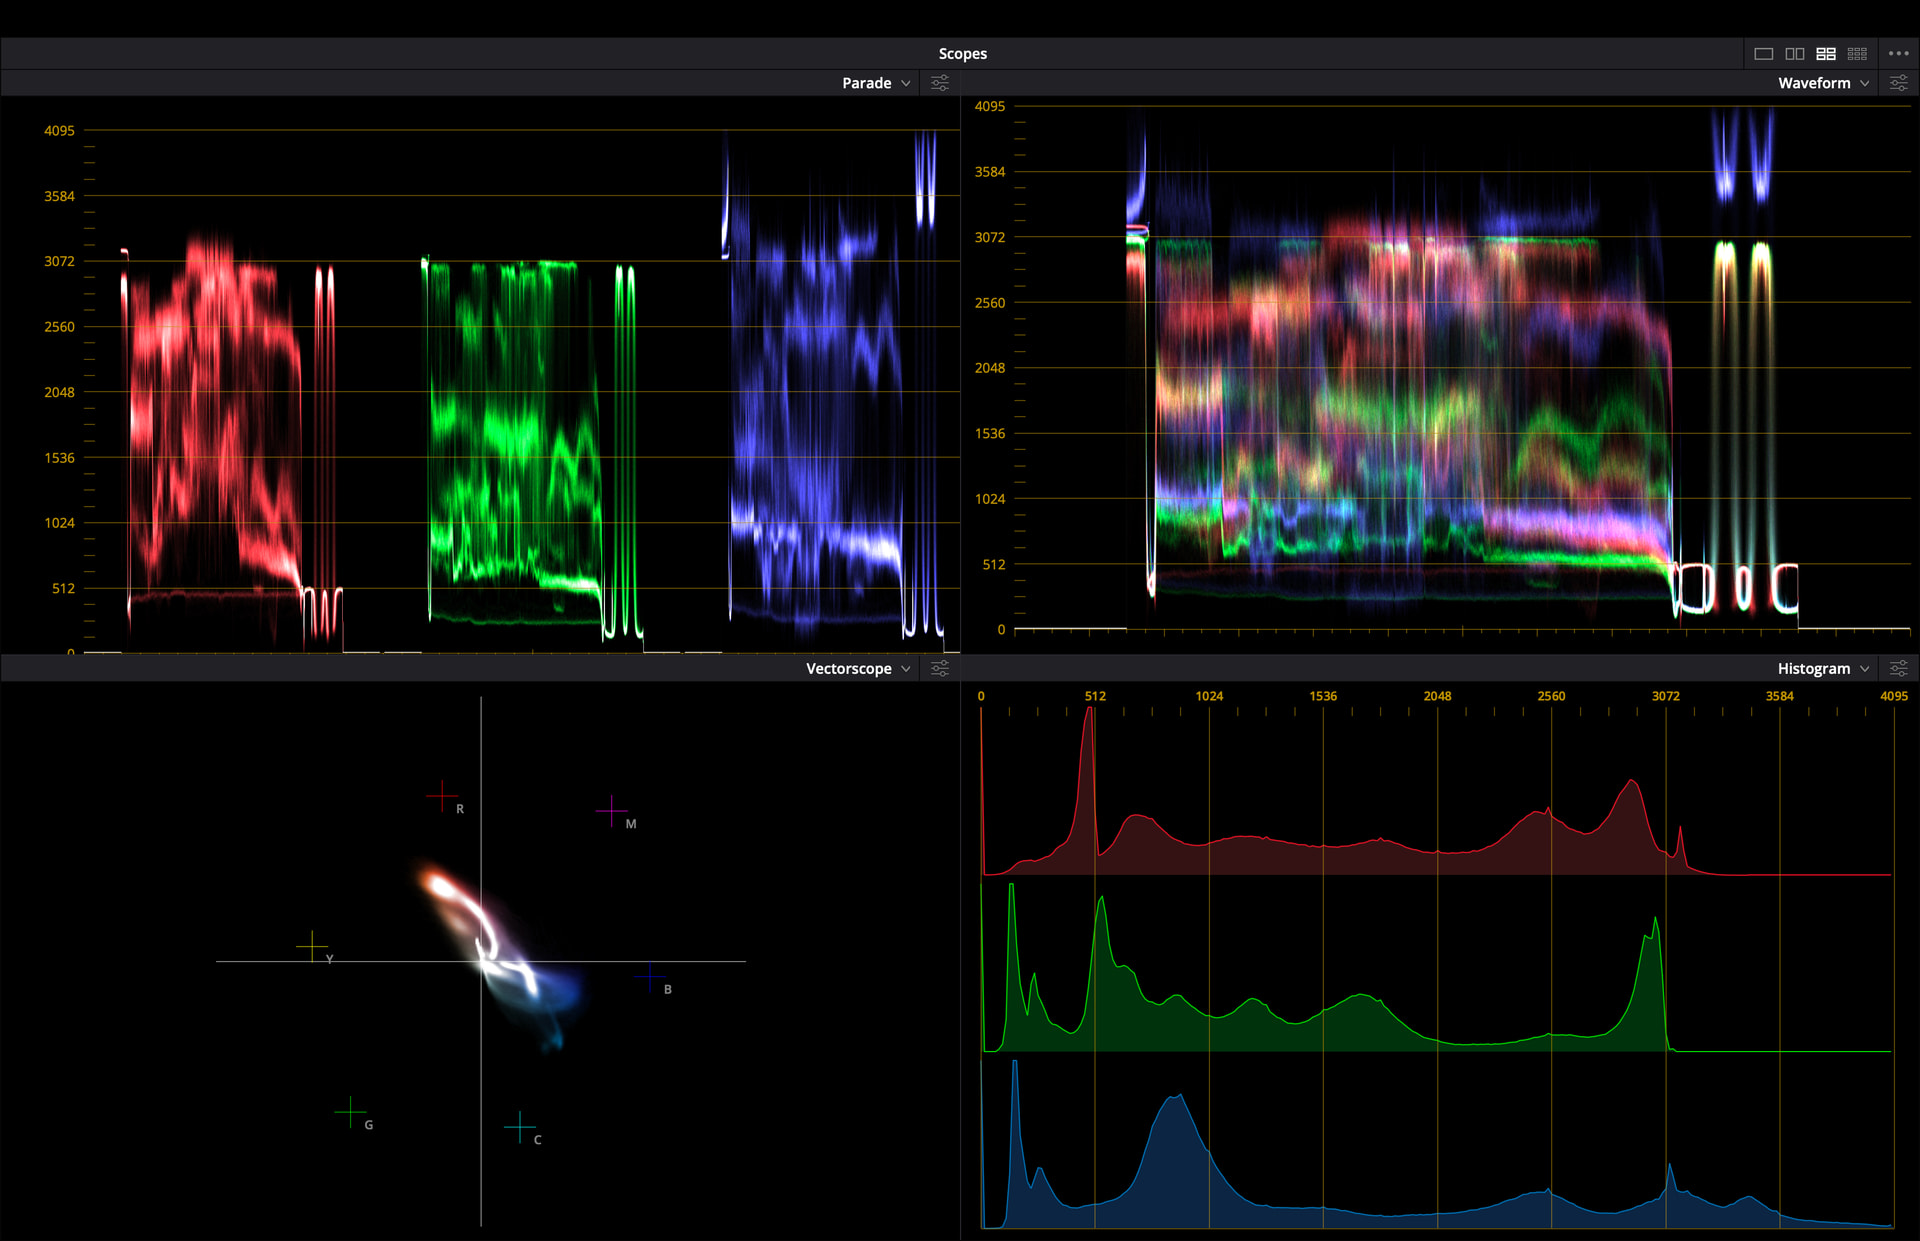
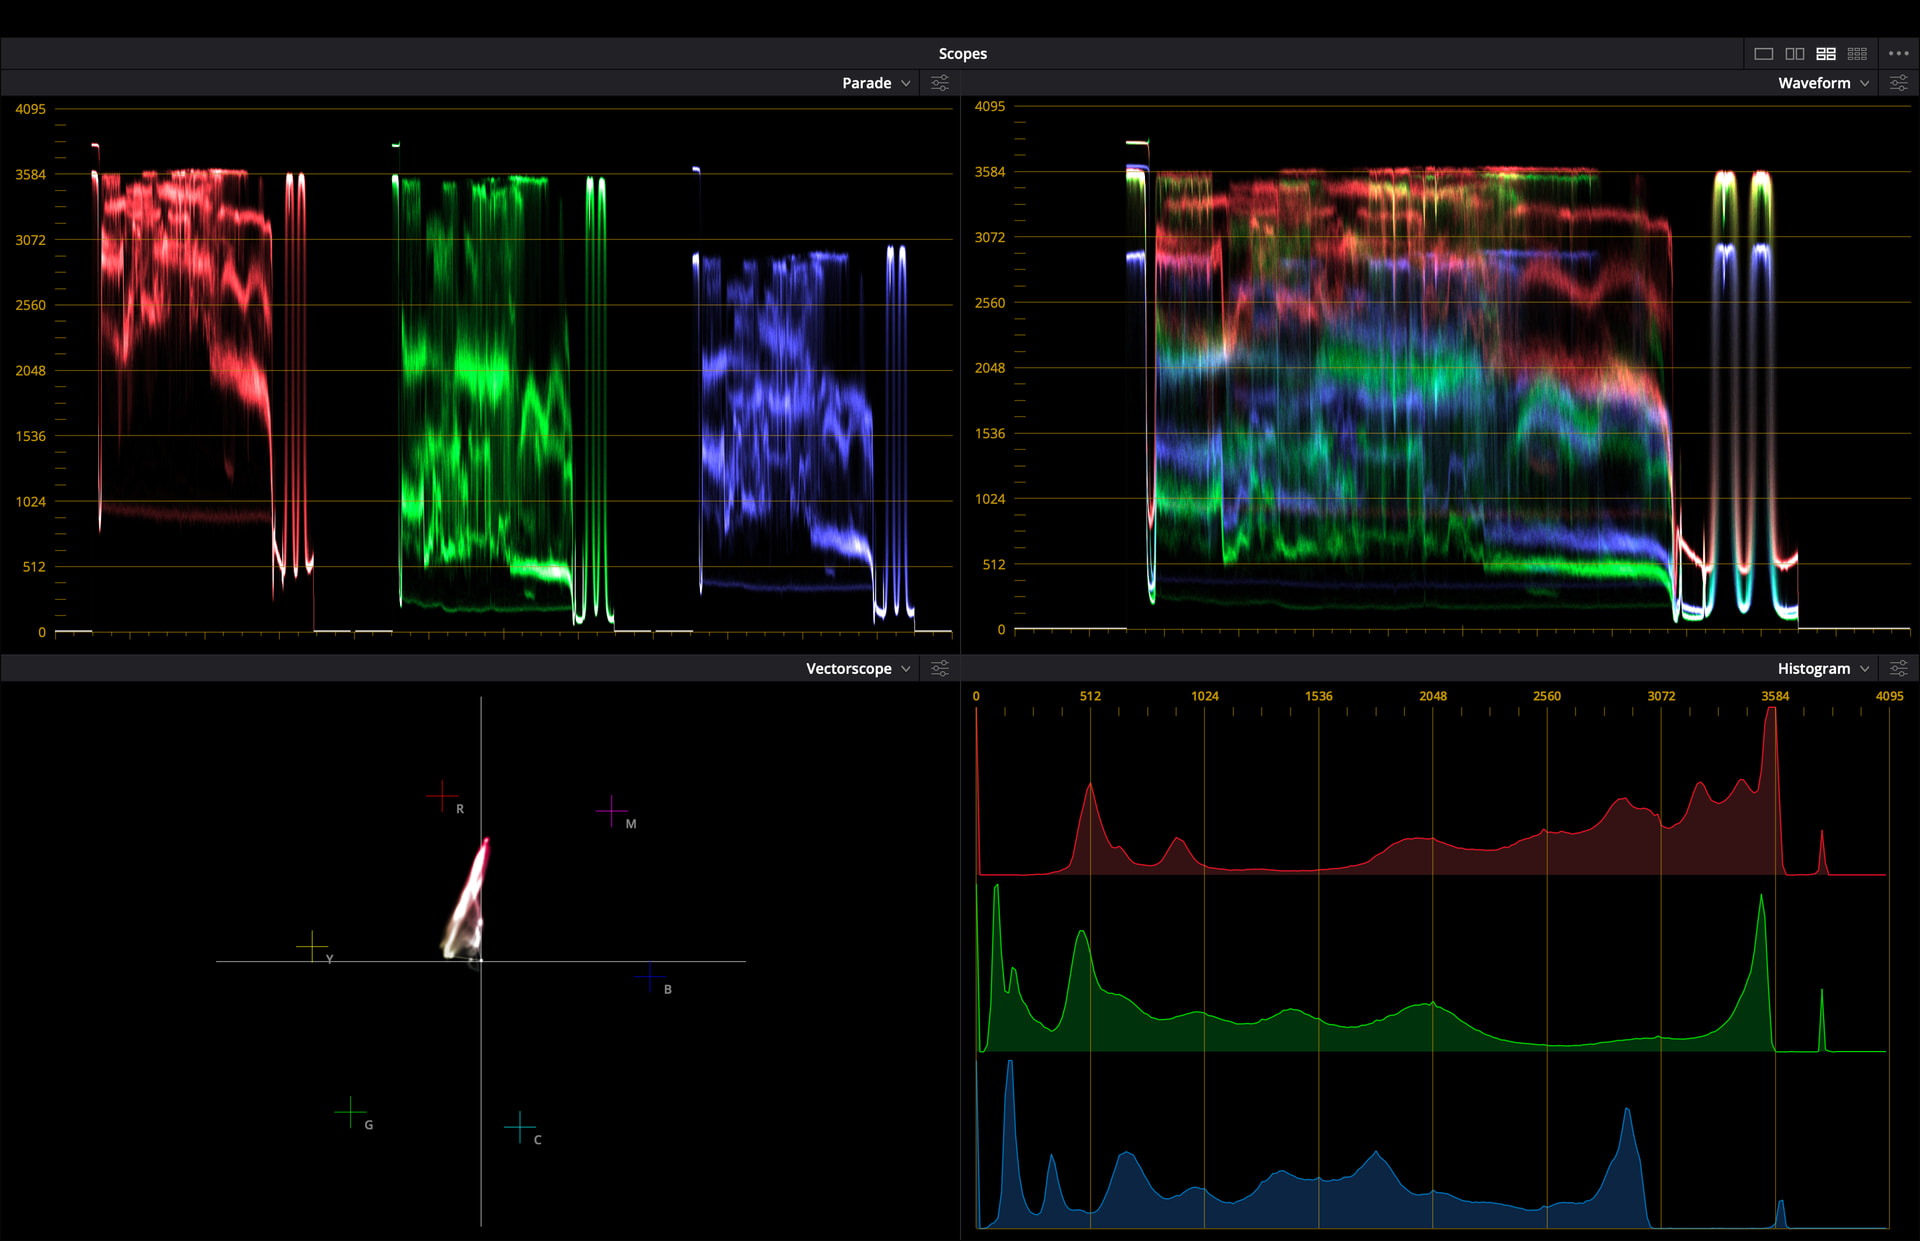
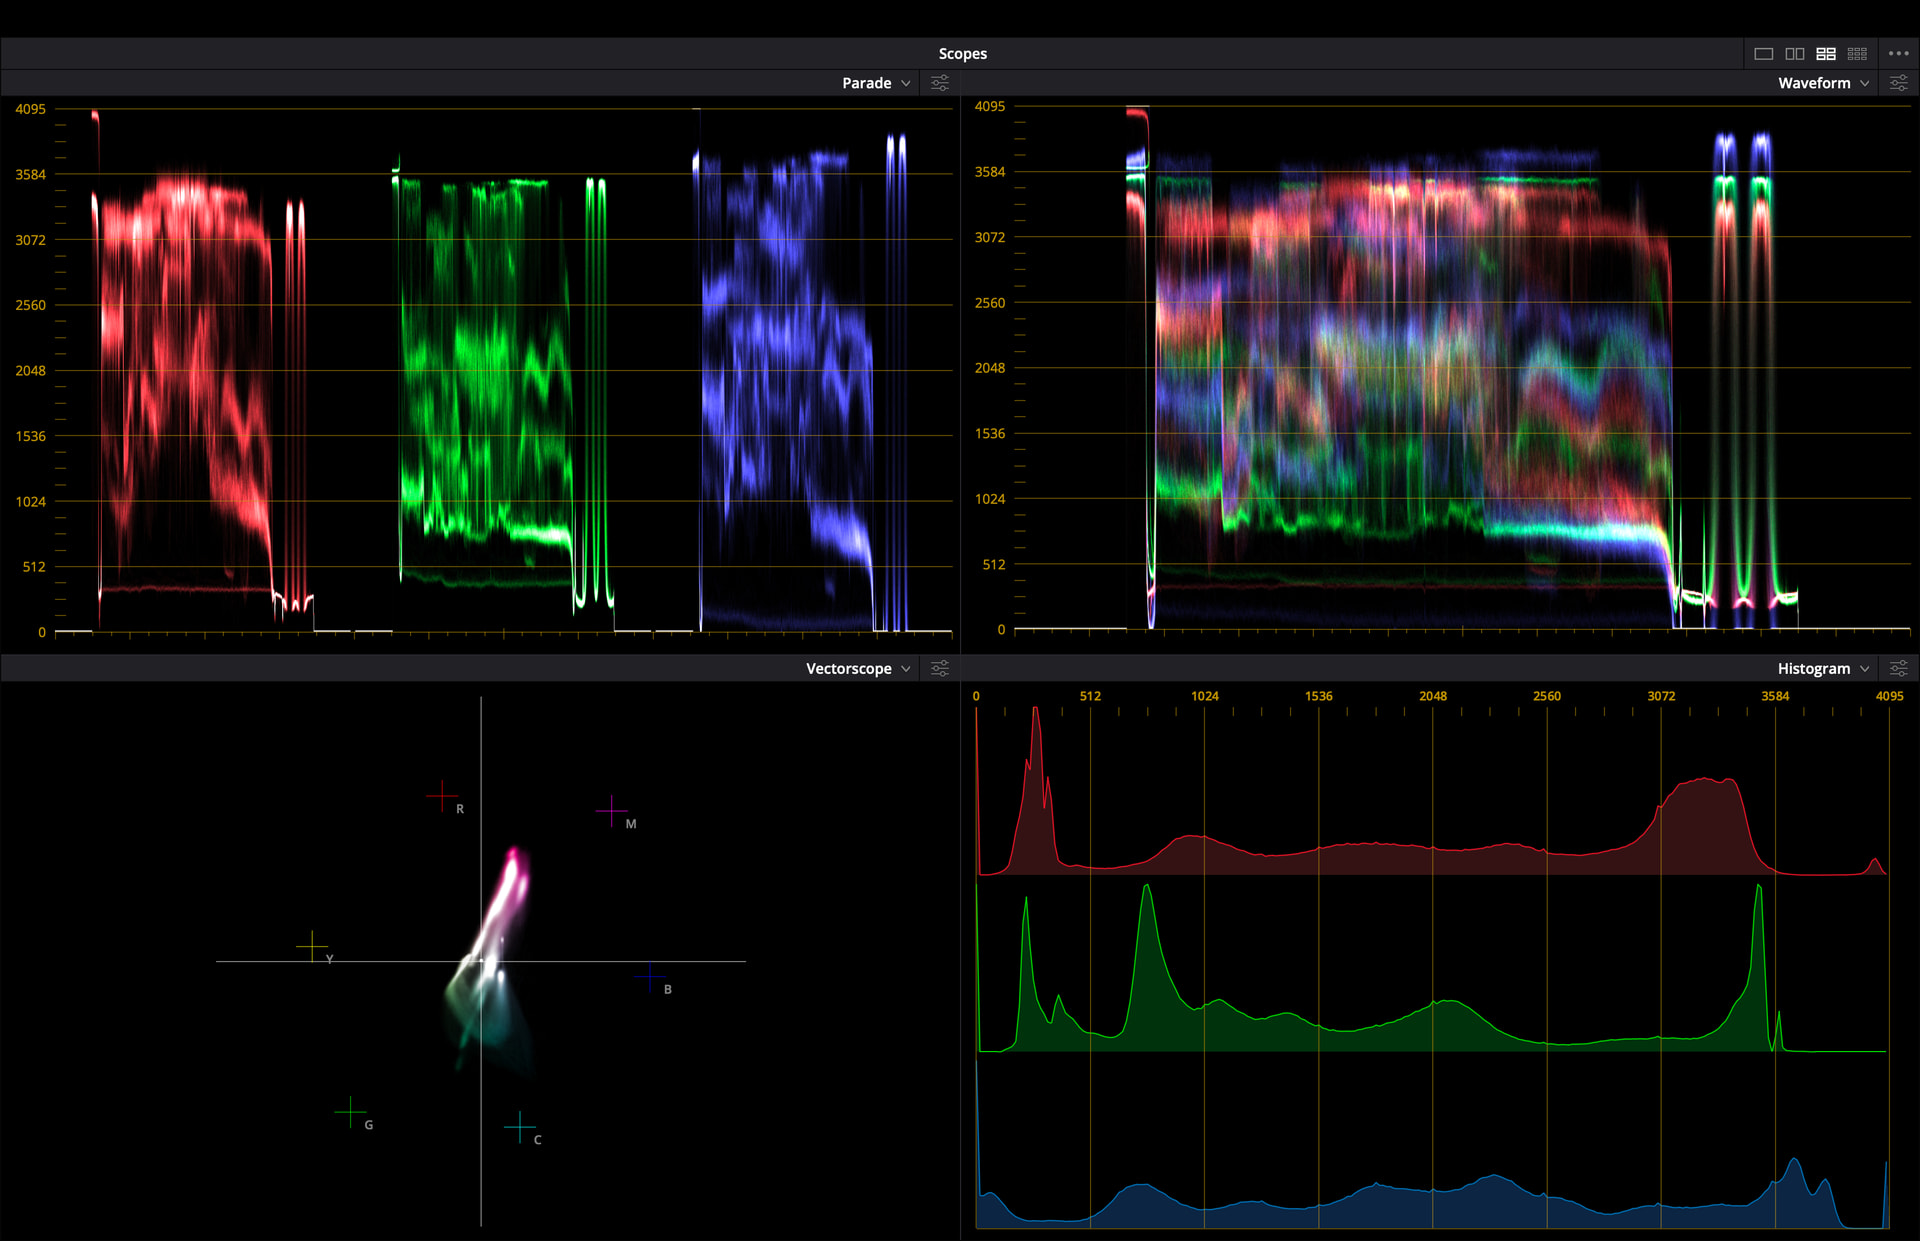
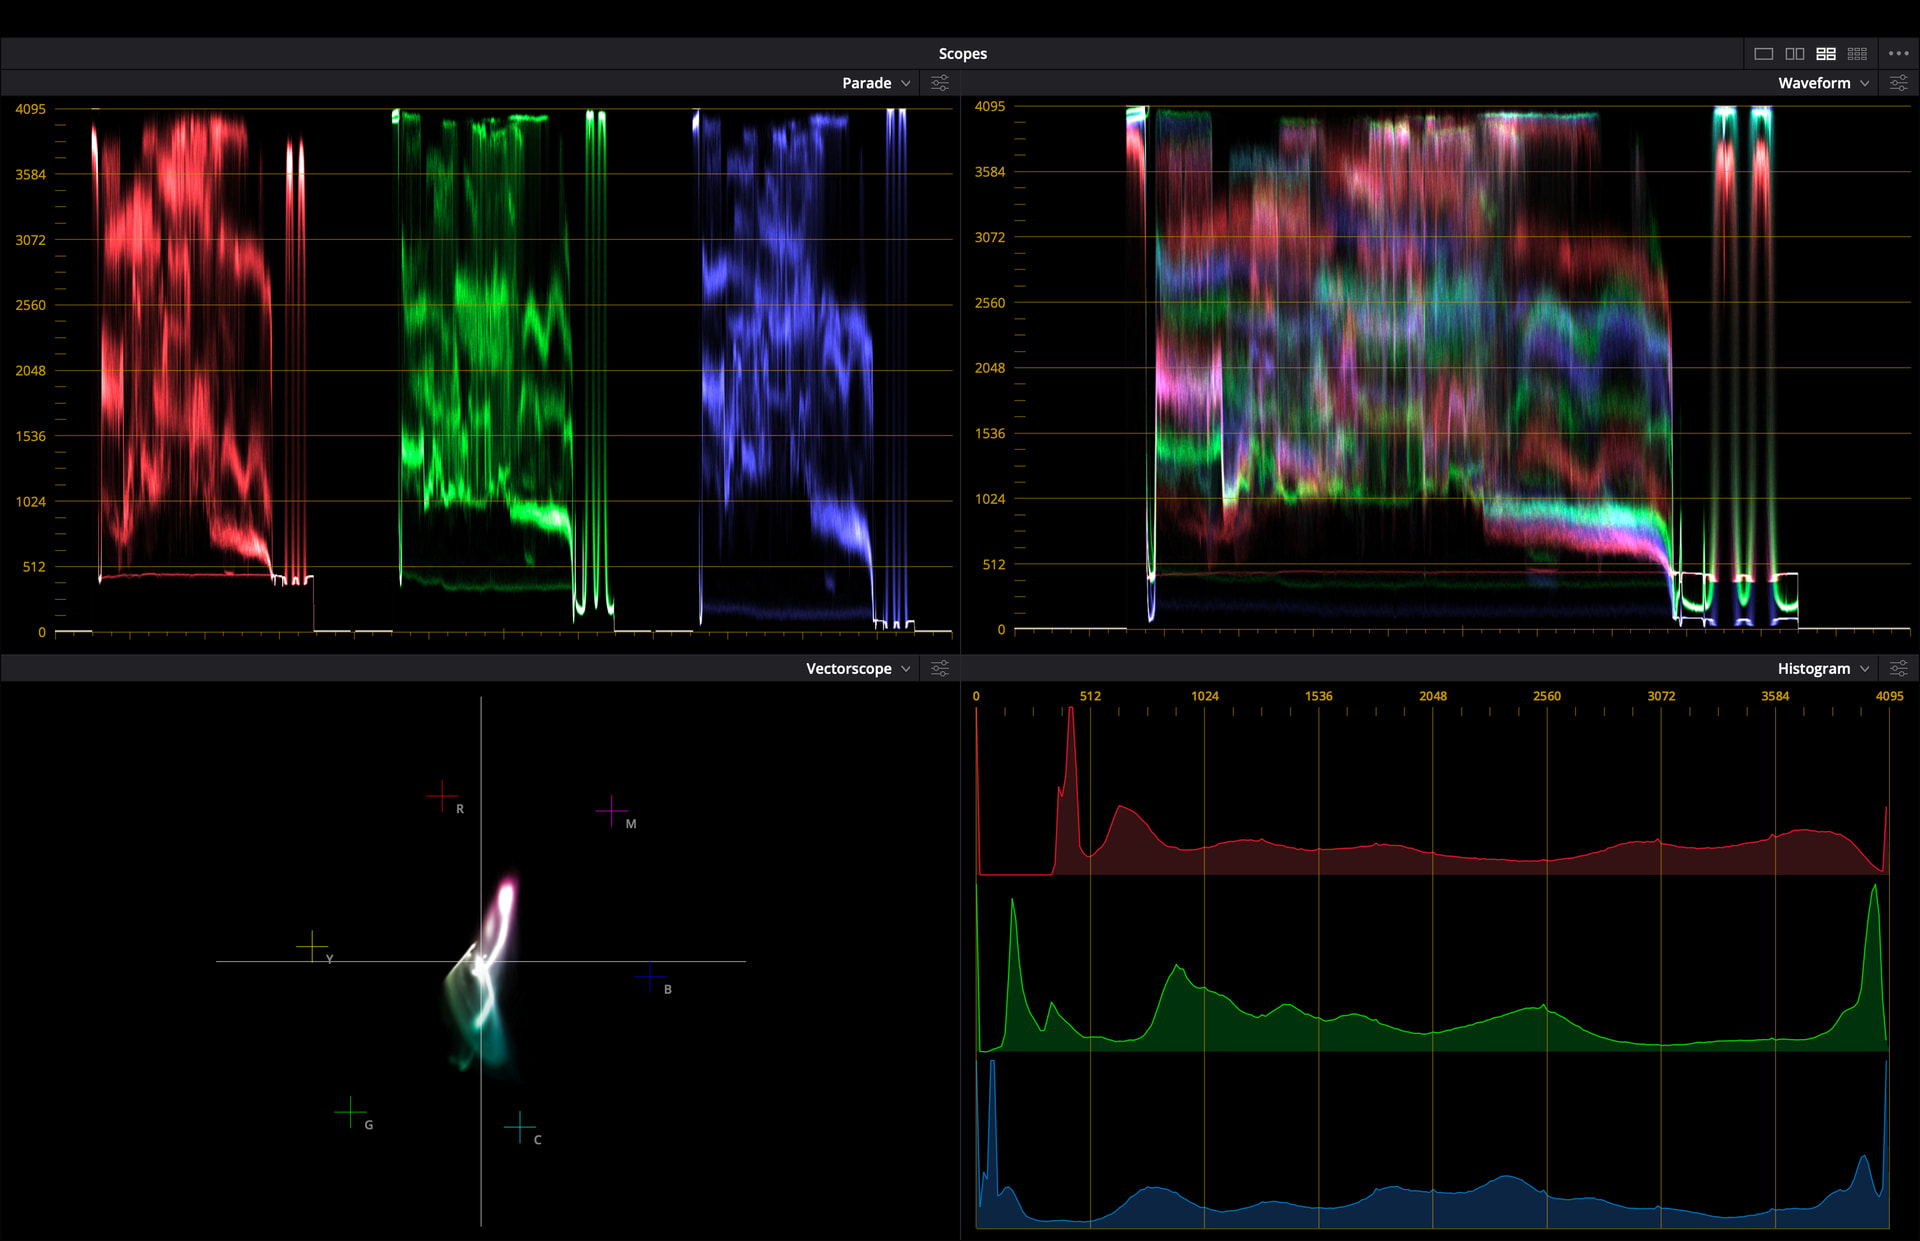
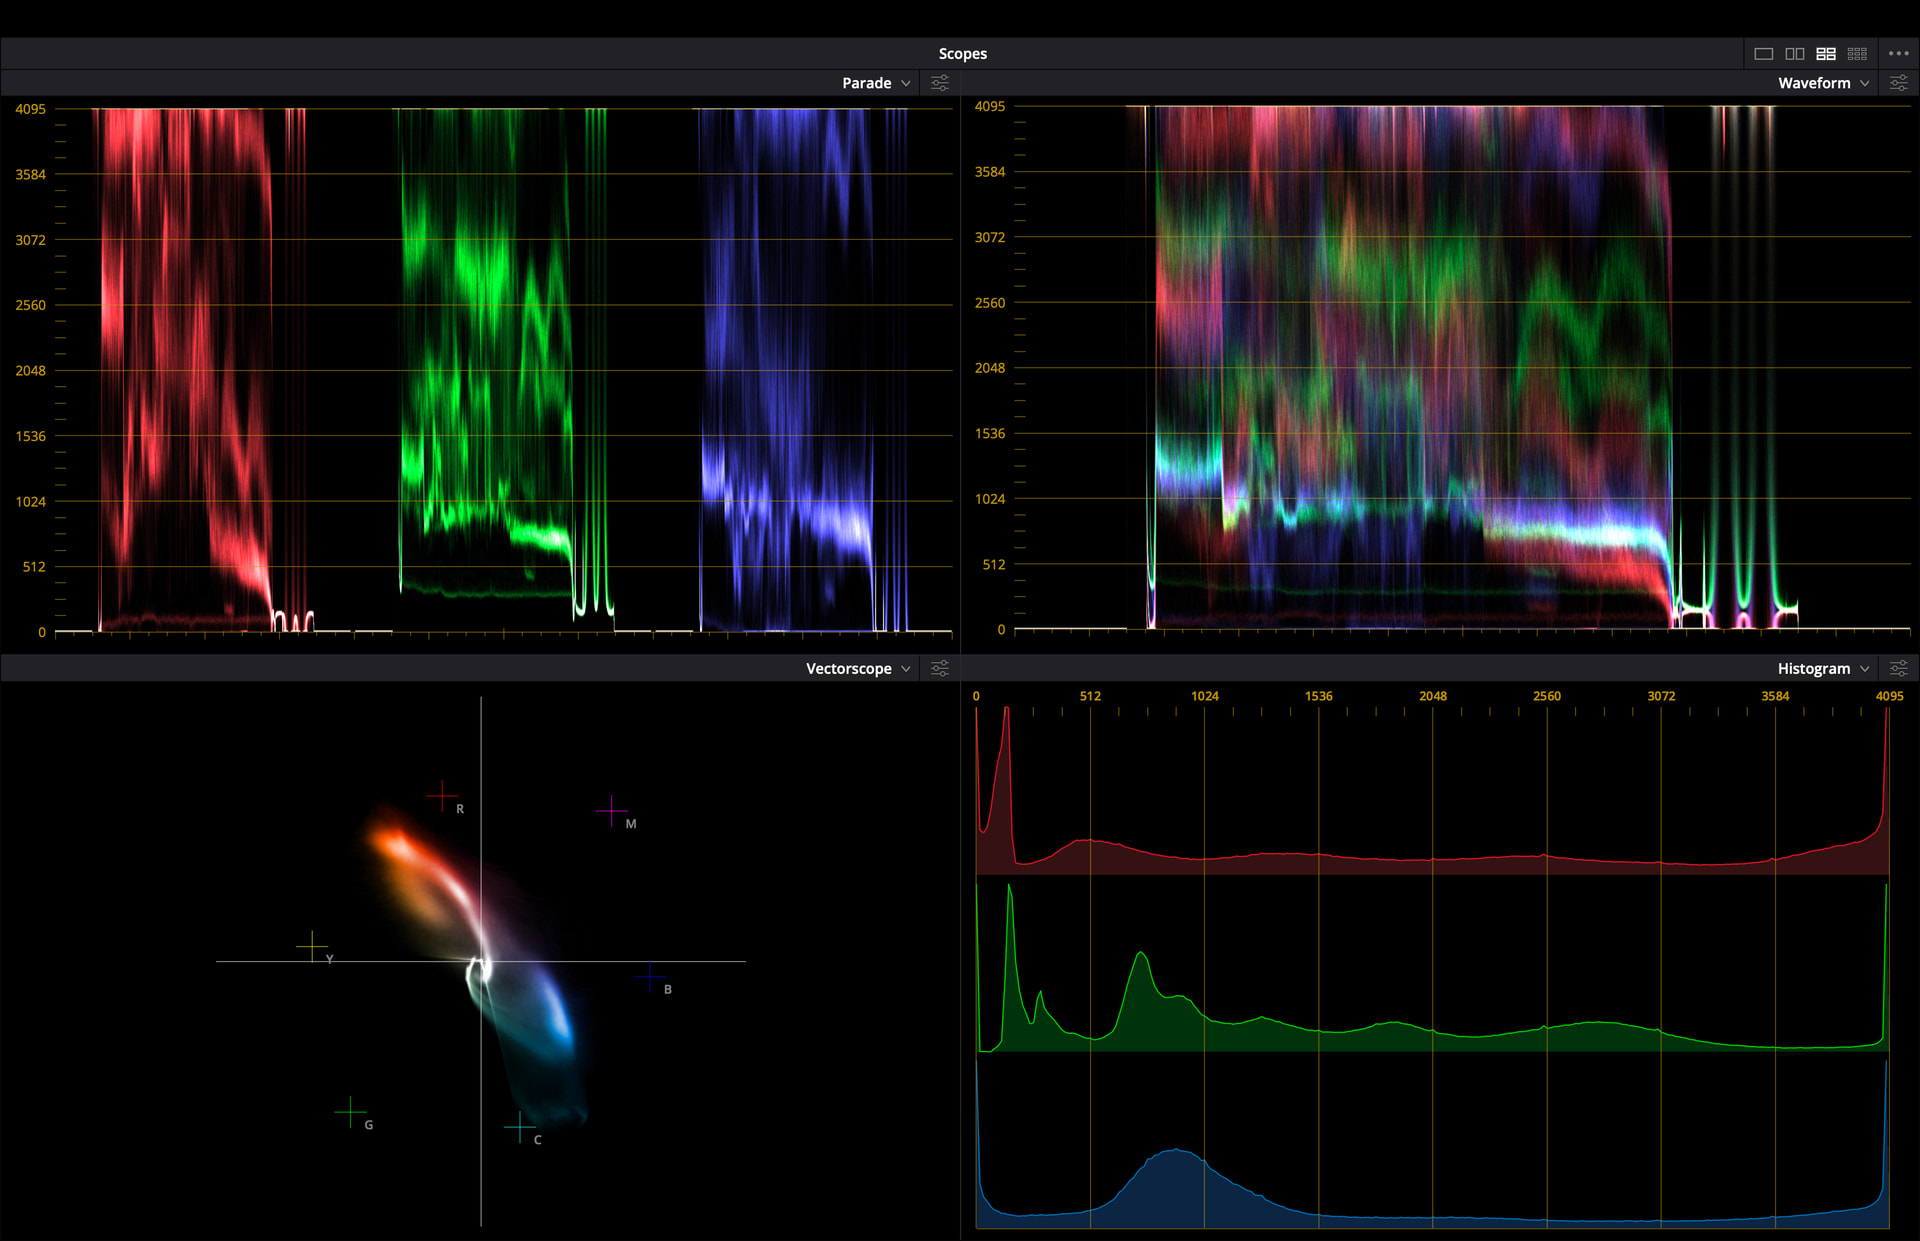
Here’s what the scopes look like when disabling one at a time:
Original scan (Node 1)
Nodes 1-2
Nodes 1-3
Nodes 1-4
Nodes 1-5 (all)
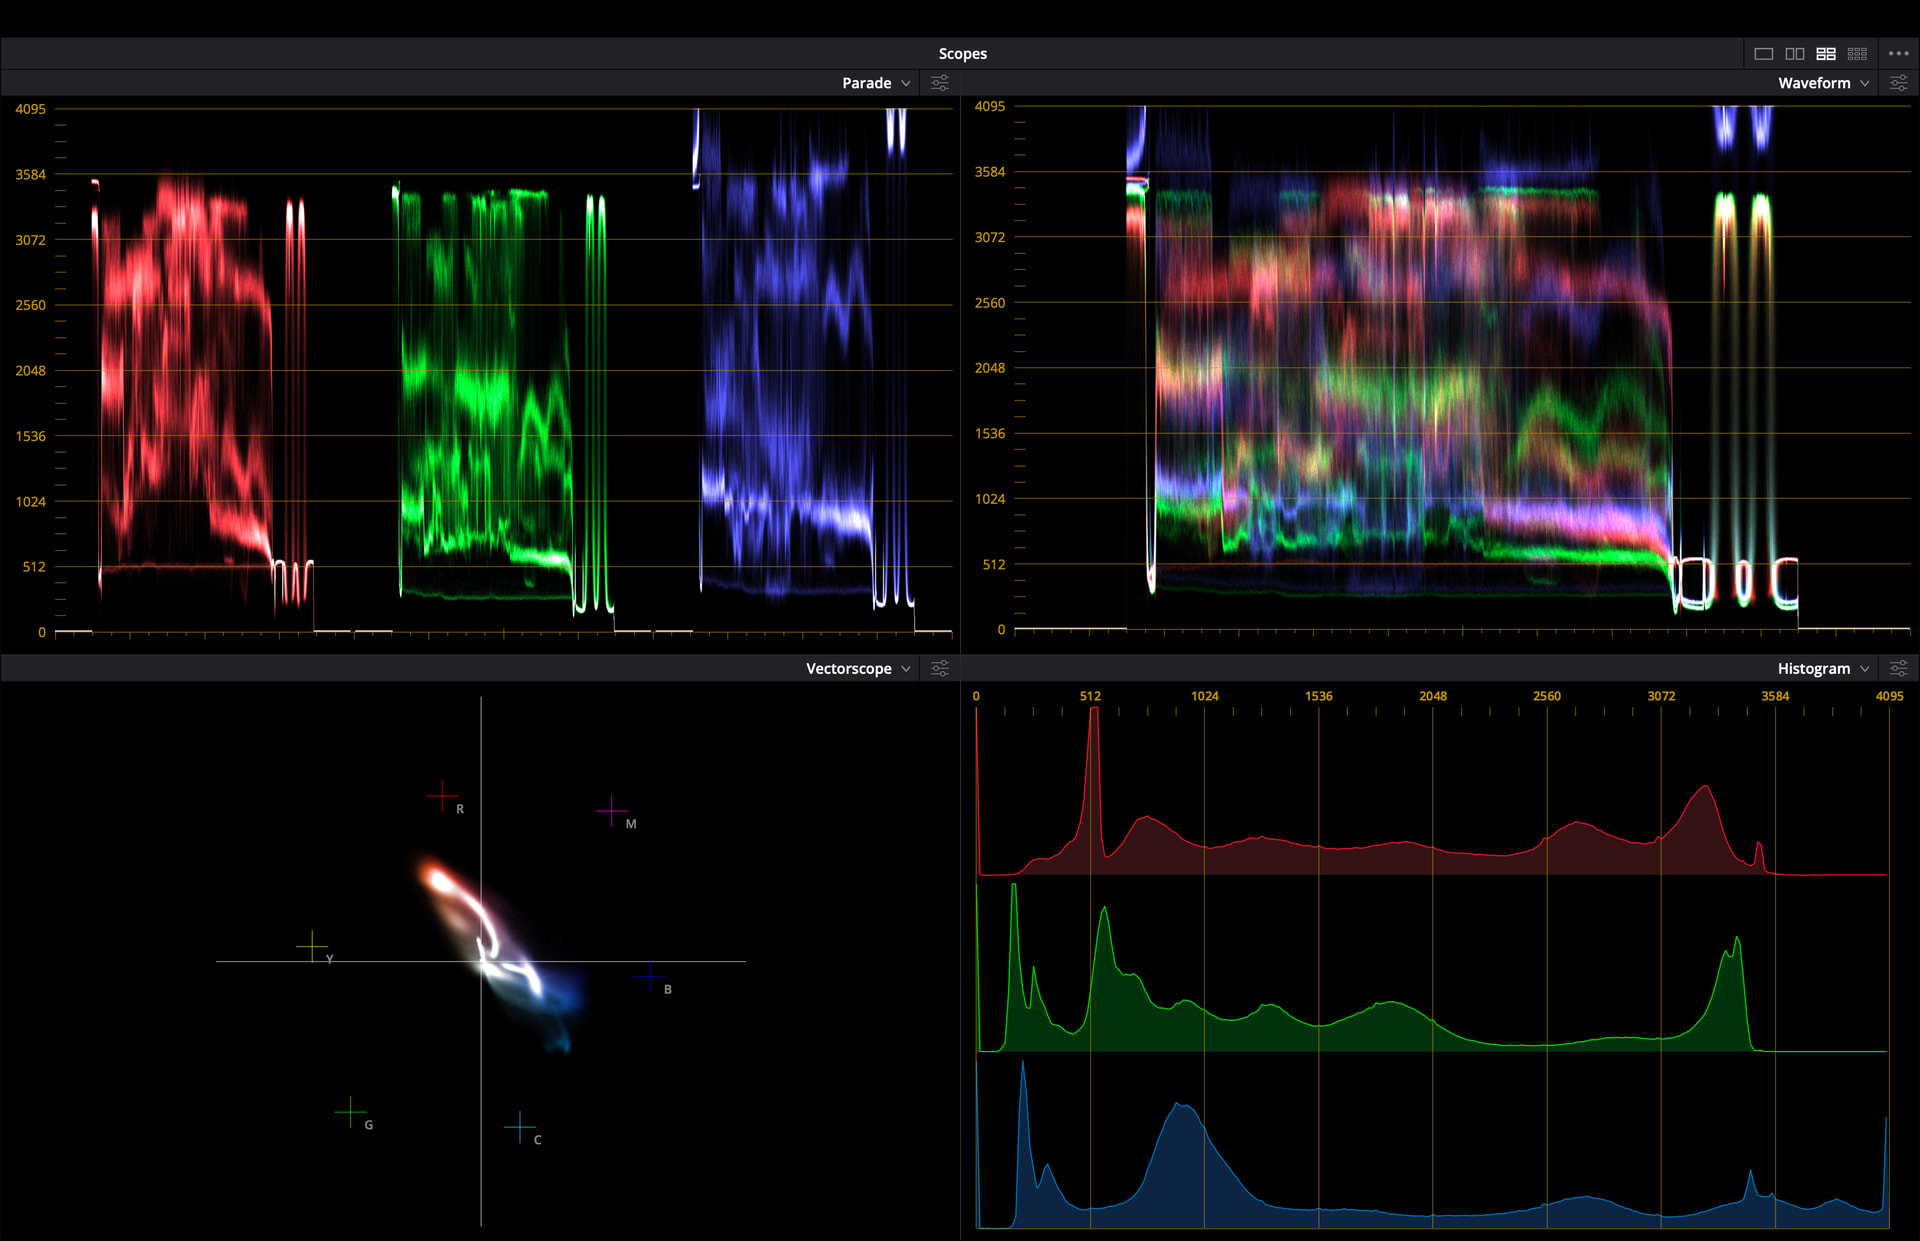
So the last image shows your flat scan? If that’s the case, it looks like there’s a bit of crushing in the green, and the blue channel might be a bit clipped.
When we scan on the ScanStation what we do is set the black to 10% and then the white in the perforation to about 95%. The perf has no film, so it’s always going to be the brightest thing in the image. Anything that’s on the film will necessarily have less light going through it and should be below 95%. It looks like your blues go all the way up to 100%.
This may just be in the film though. Things can get wacky with faded prints, so there may not be much you can do. The red channel (as you’d expect since it’s all that’s left on the film) looks pretty normal. You can see that the clump in the middle has nice rolloff, where the green kind of flatlines. Blue doesn’t look bad either, just a bit hot.
1 Like
Oh wait, Did you disable starting with node 1? I was saying you should go the other way: The nodes are serial, so what comes out of one goes into the next. If you disable 5, then 4, then 3, etc, you can trace back to where something got clipped.
If however, the last image you posted shows all nodes disabled, then the issue is with the film or the scan, at least in the green. It honestly doesn’t look too bad though.
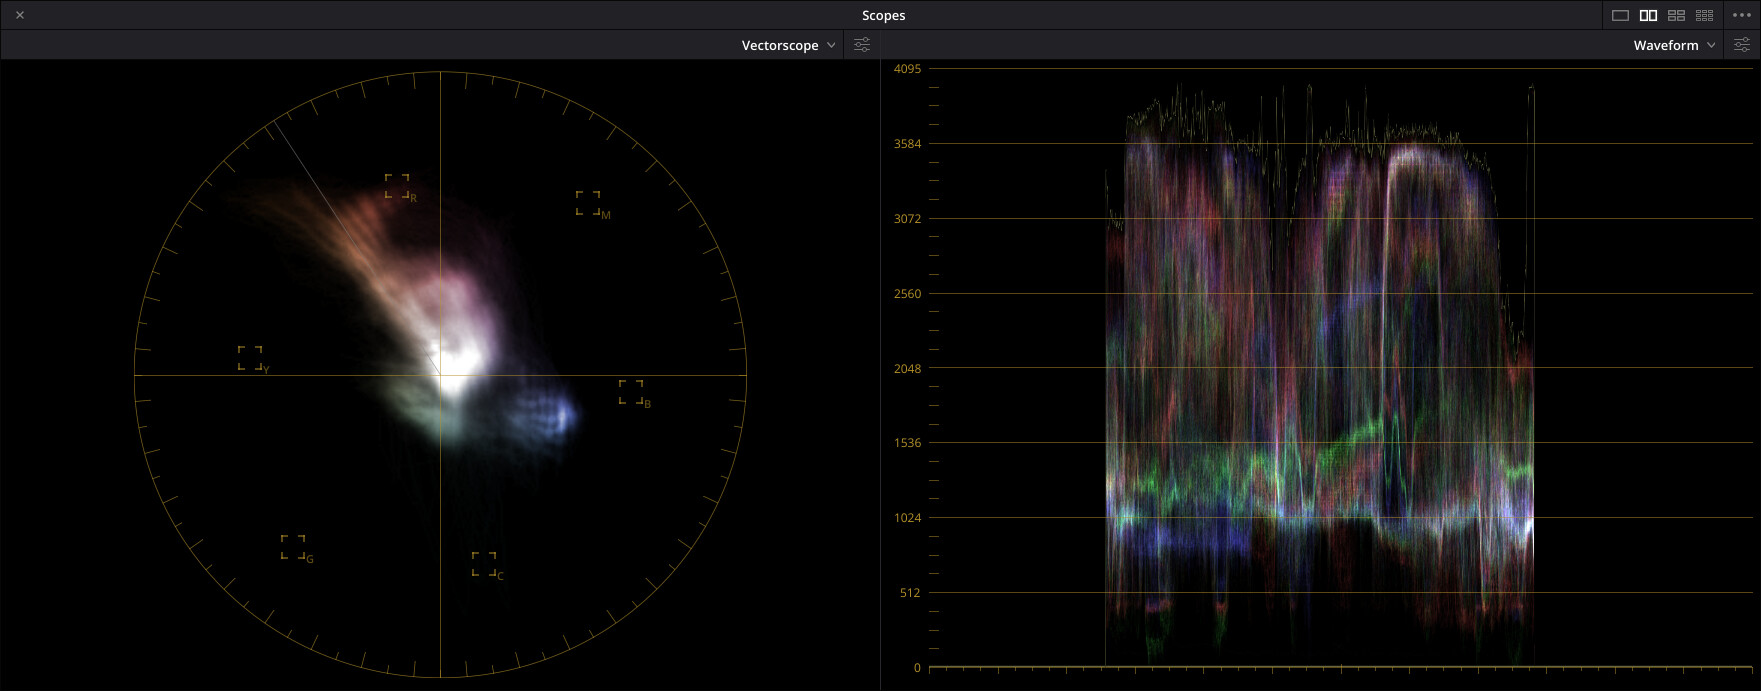
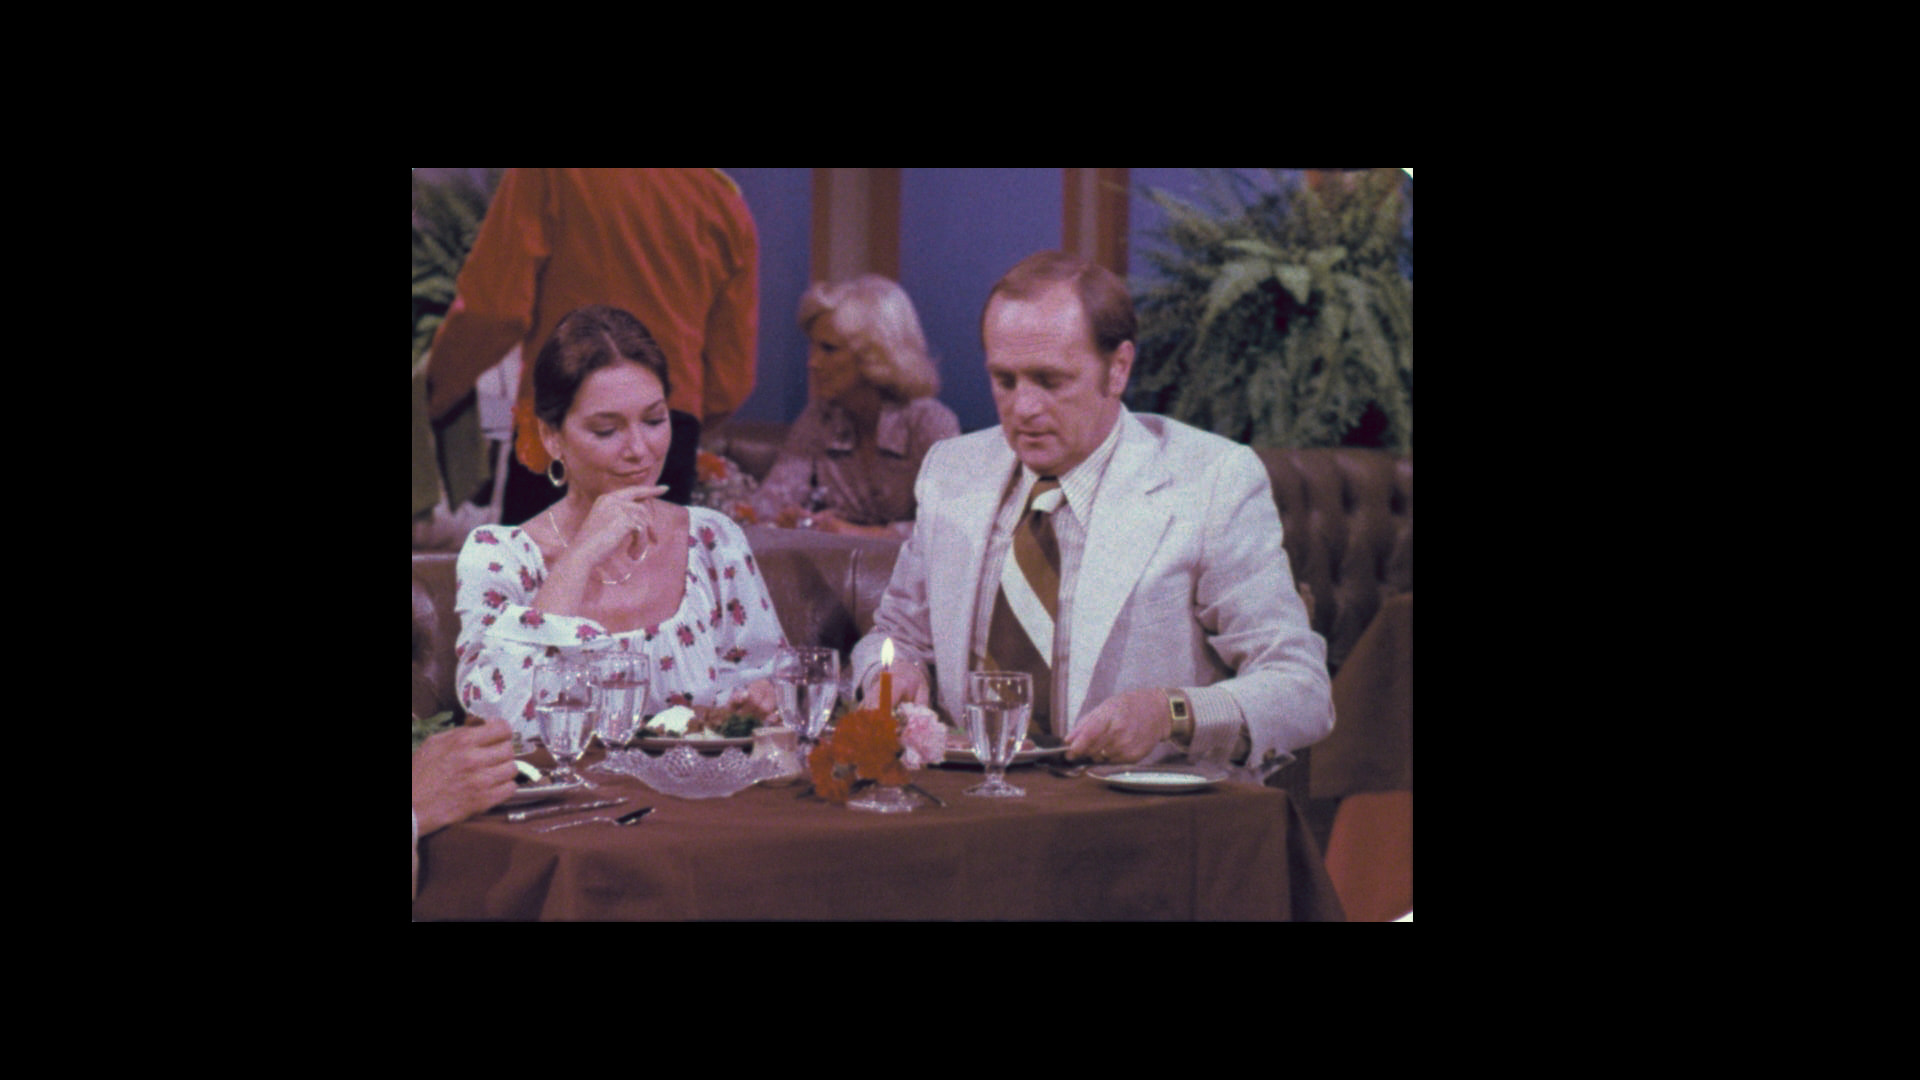
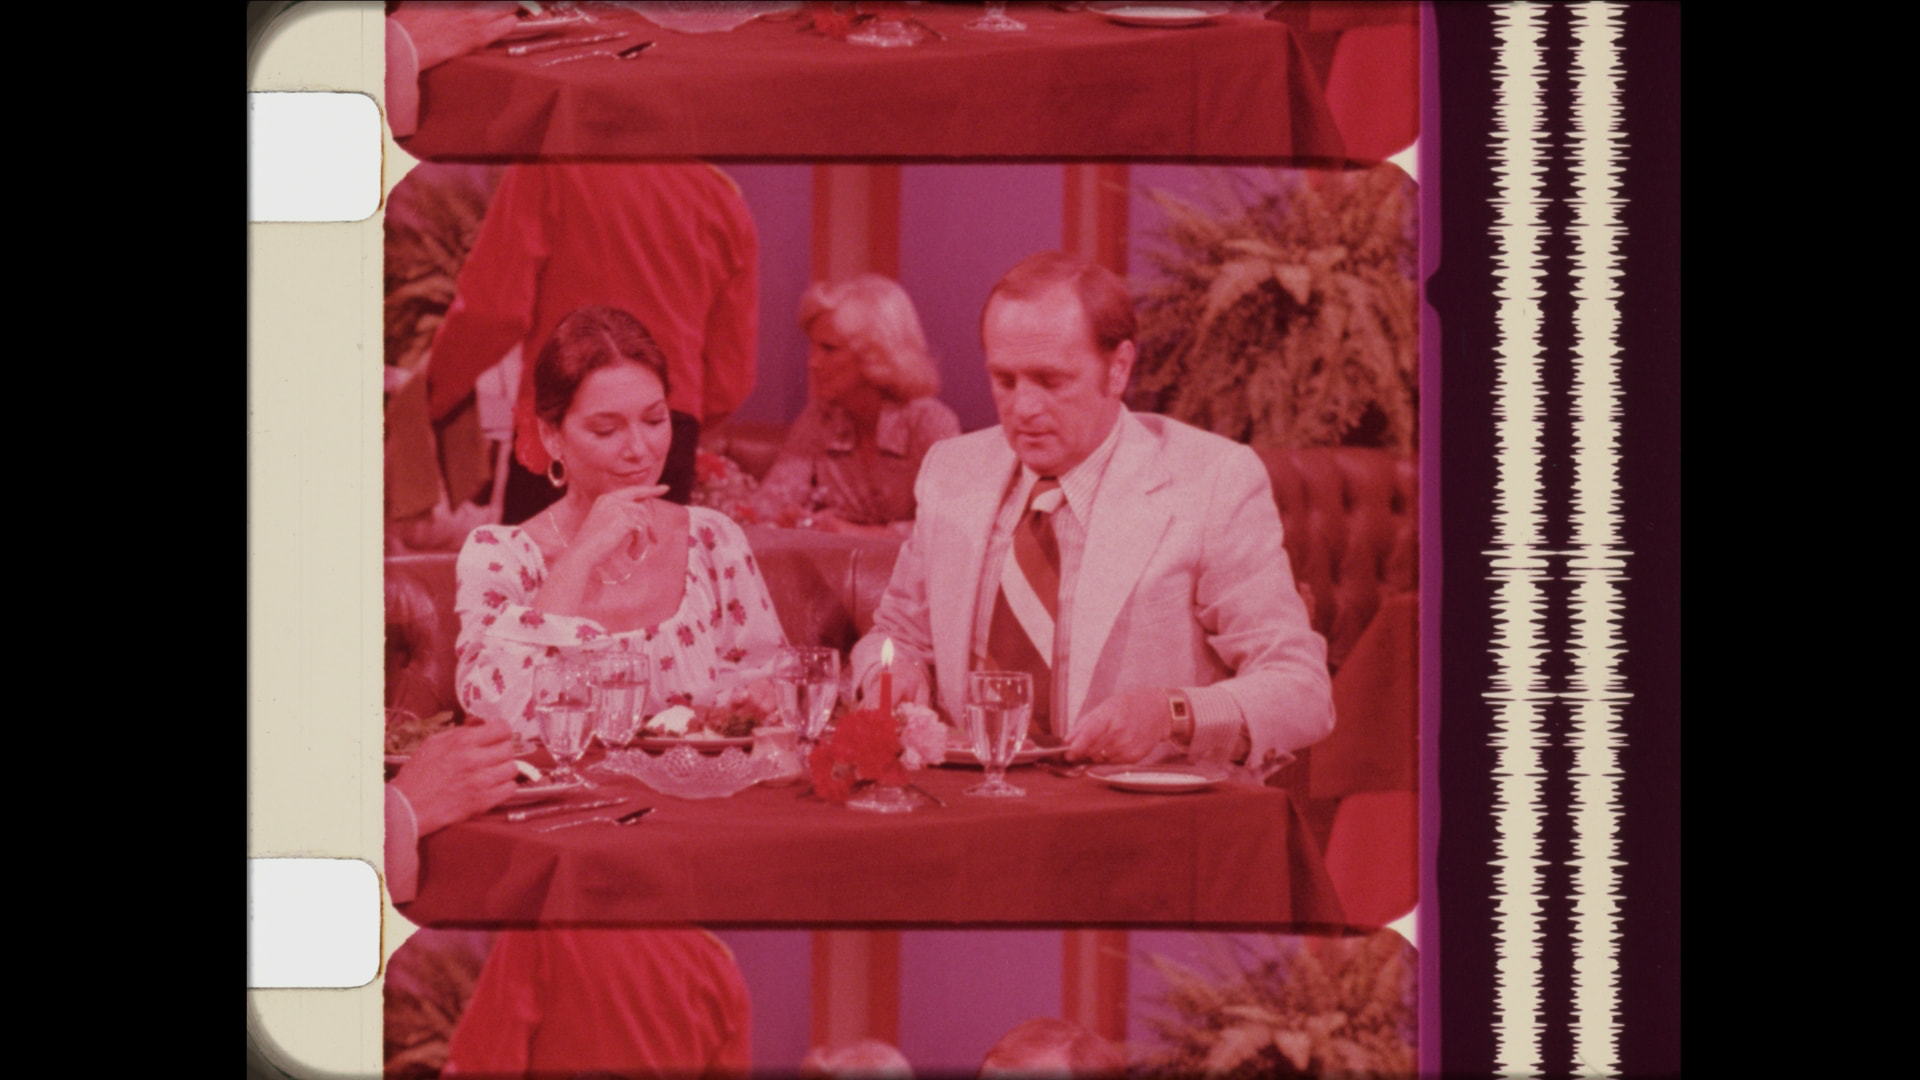
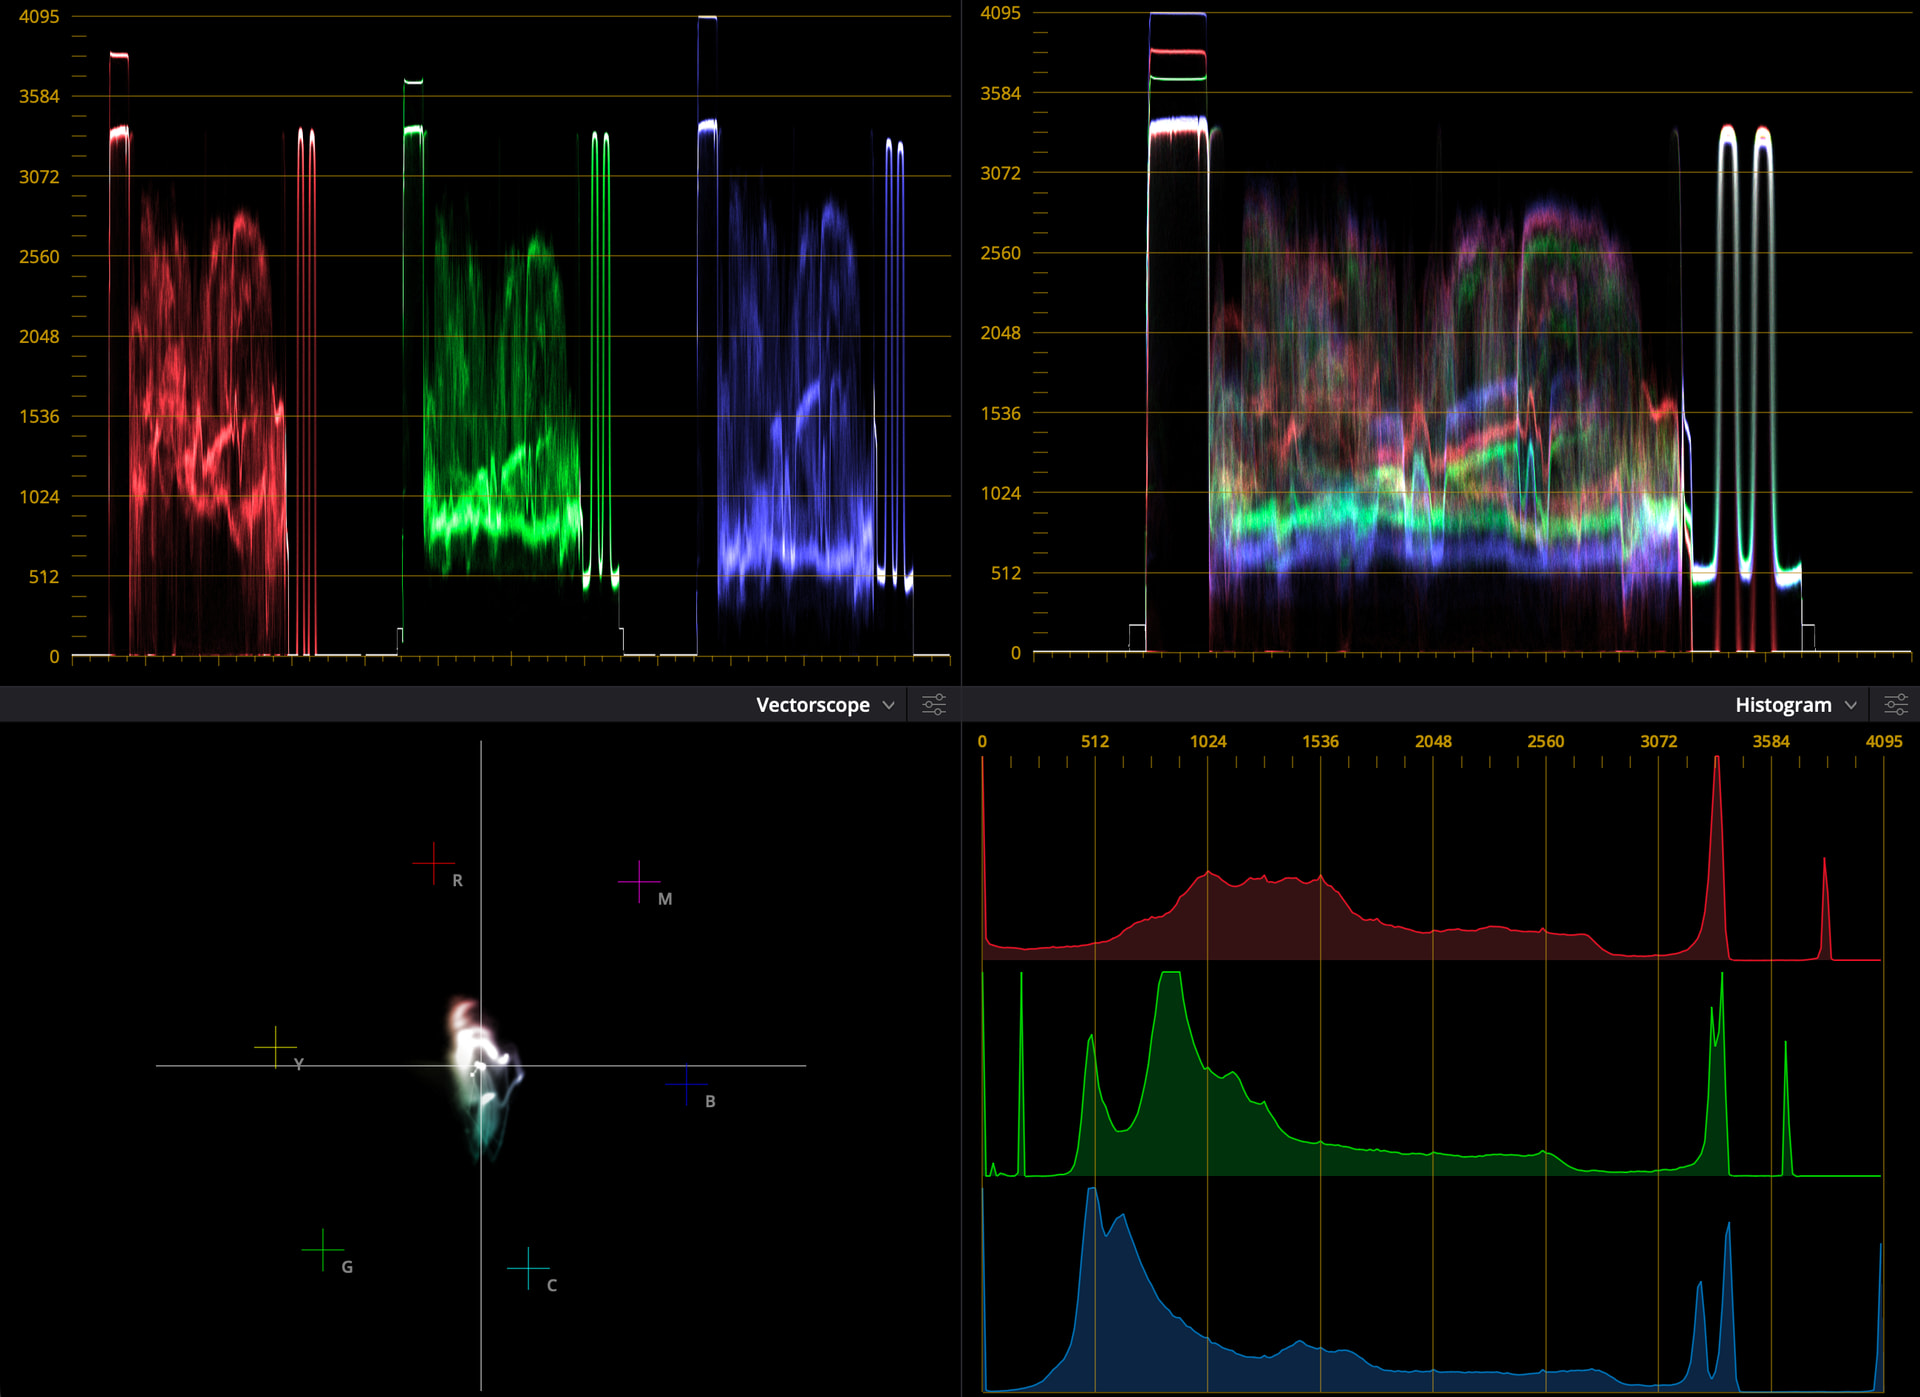
I’m finally getting back to work on learning to color correct; this time, I have a new scan to work with. The stills below come from an episode of “The Bob Newhart Show”. One is raw and the other is color corrected. Graphs and scopes are included also. How does it look?
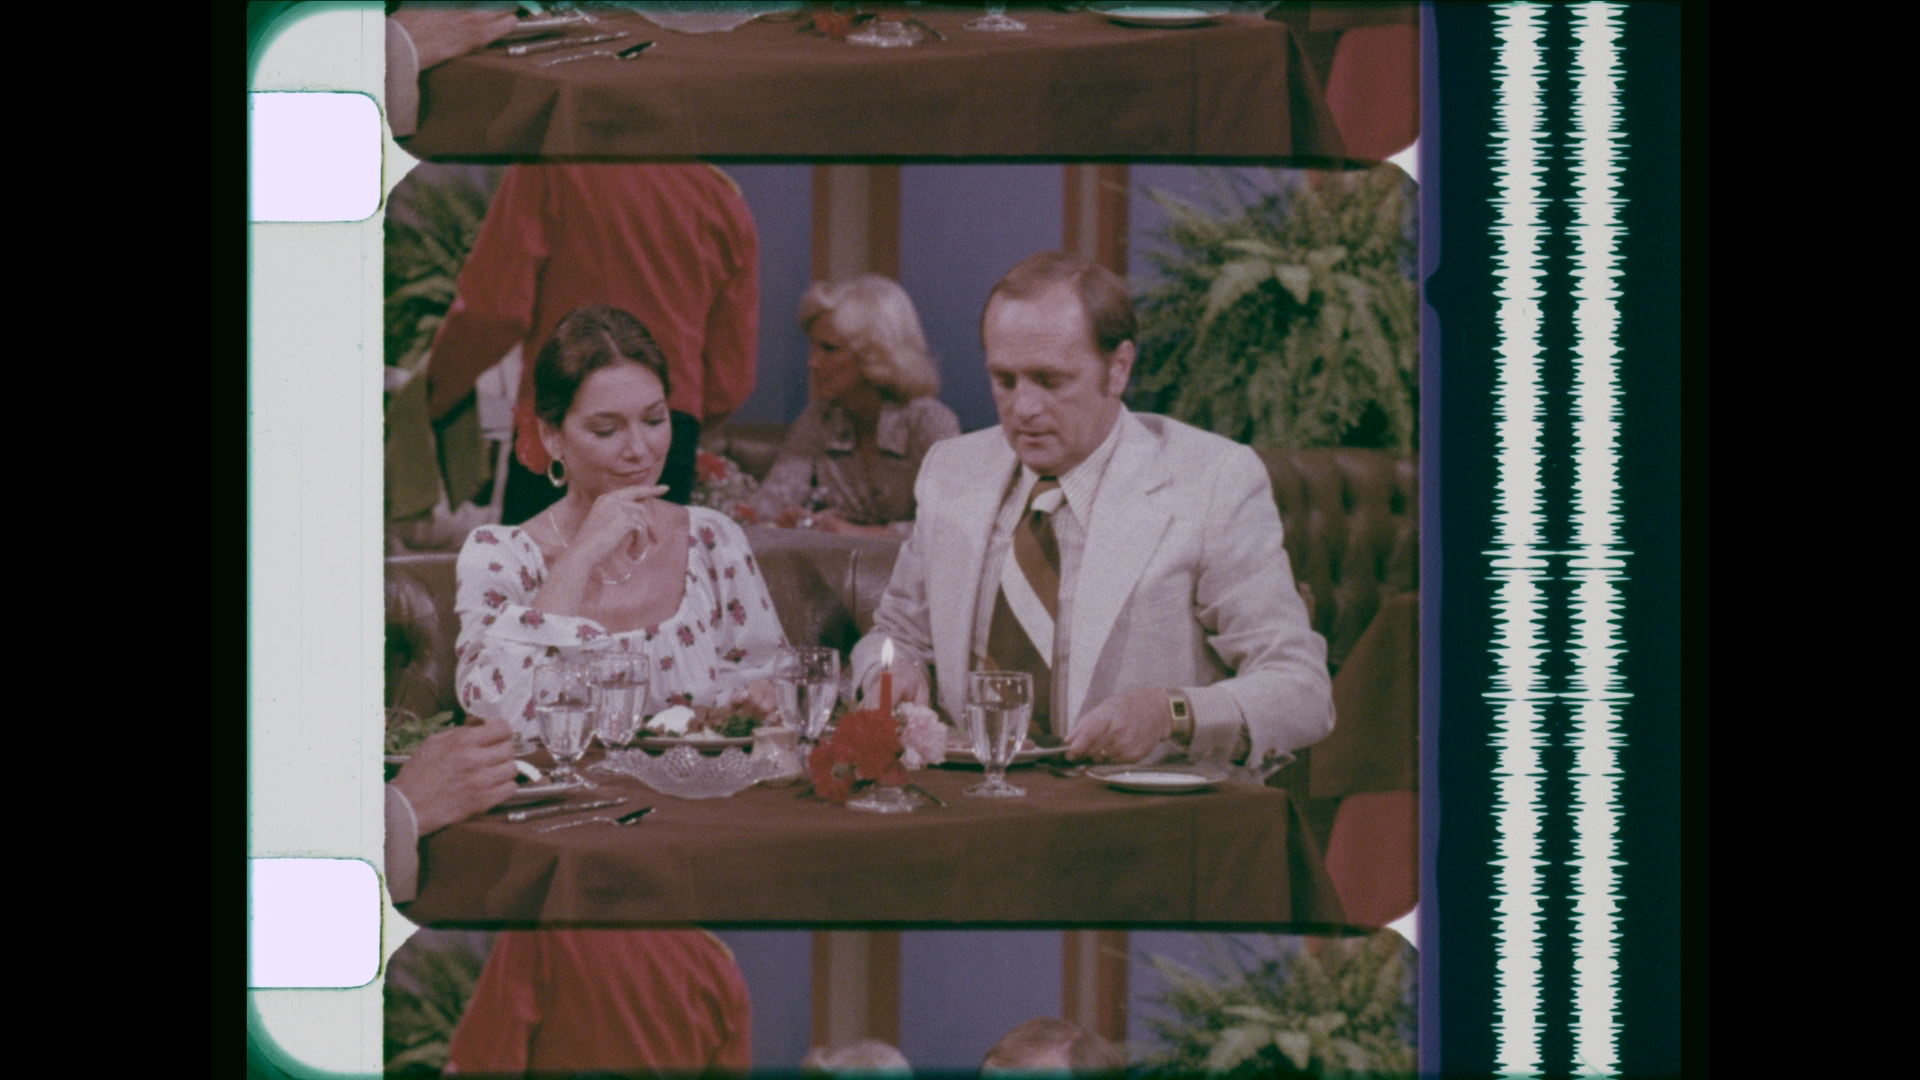
Great progress!
For my taste, the darker appear to have a green cast. One can see it in the waveform, as the balanced dark areas are not showing whiter.
Also, the skin tones have a bit of a blue cast. Suggest you turn on the skin color marker on the vectorscope, and use the x2 gain.
Here is the best I could come up in a short session.