@DPXTIF let me start for sharing my typical Resolve 19 to work in a wide color space. Then the particulars for the image (nodes 2 - node 4).
The purpose of the project settings and timeline nodes is to correct in a linear wide color space, and only convert -at the final timeline node- to the output color space and output gamma.
All corrector nodes are all operating on linear data on a wide color space.
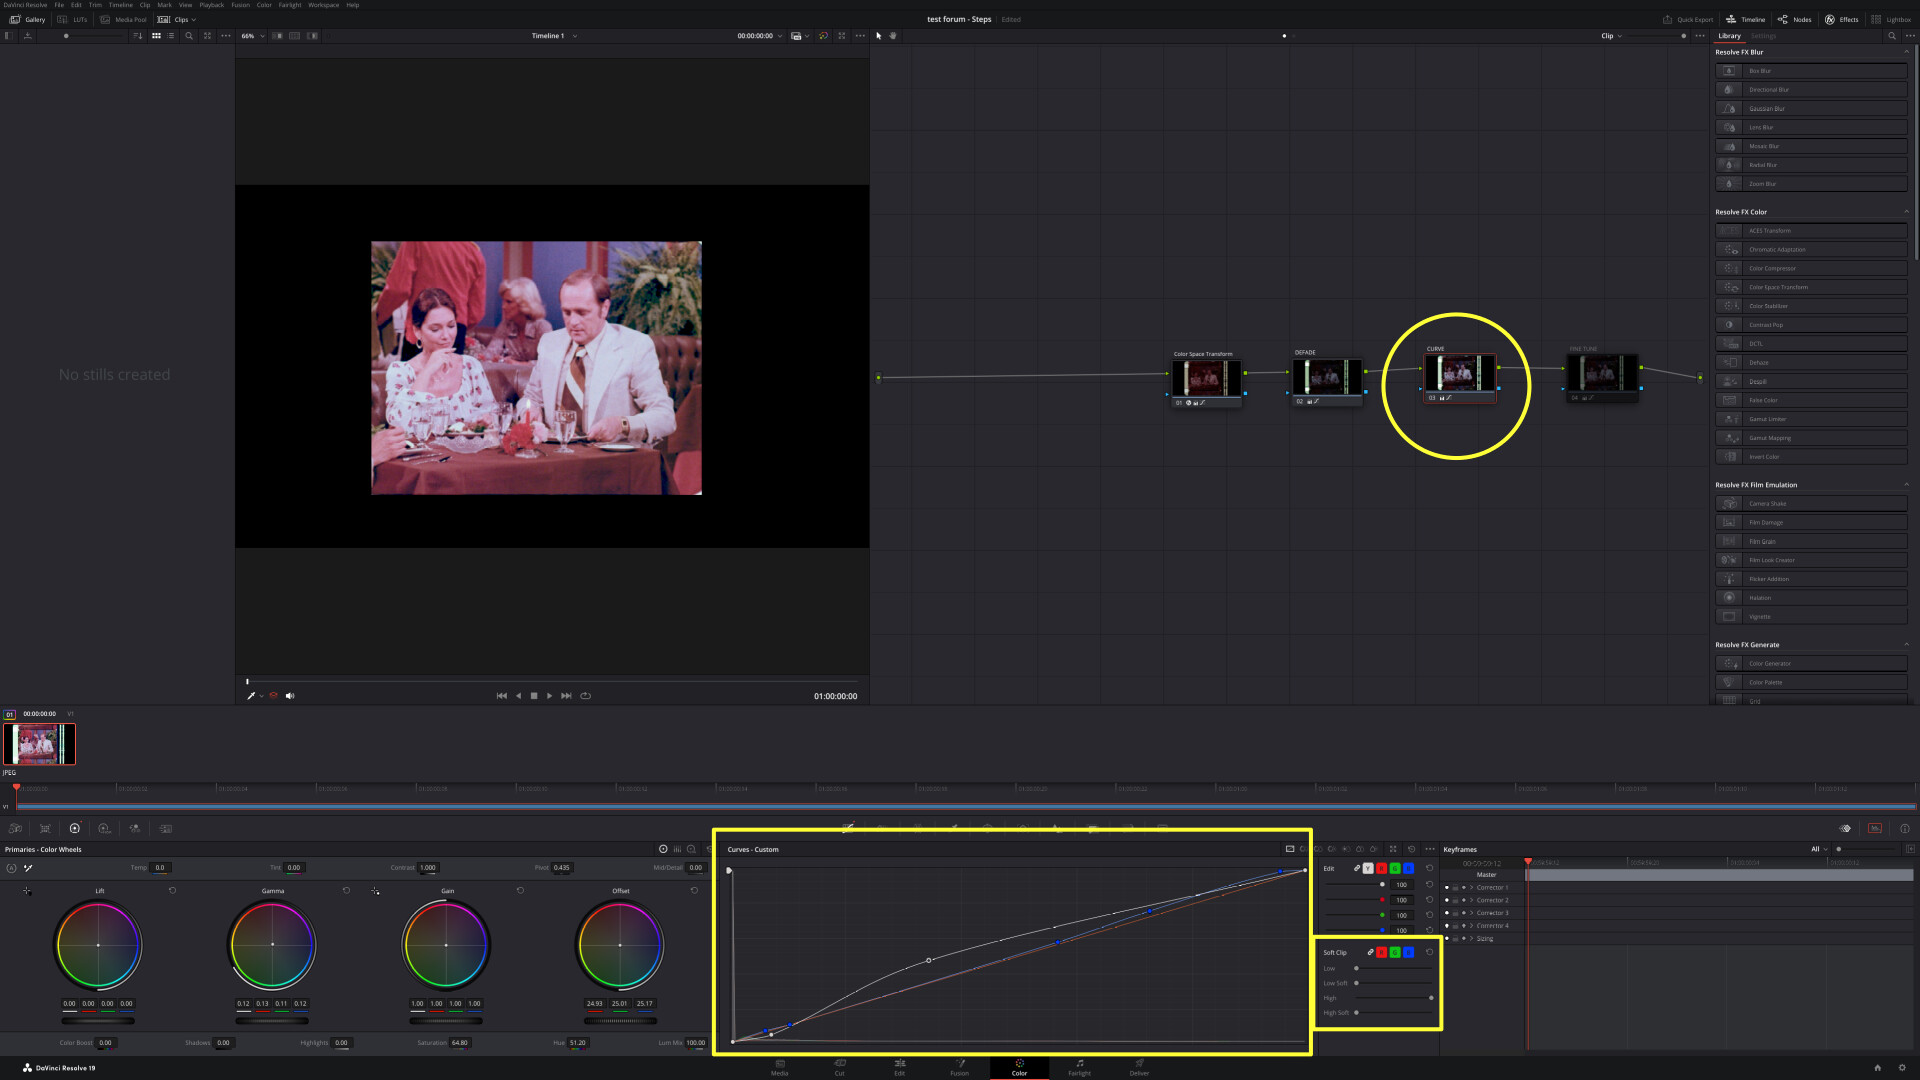
Important: On all Nodes adjust the Soft Clip as highlighted in the Third Node to avoid dark / light clipping or distortion. If Soft clipping is needed apply only at the final corrector node of the clip.
Project Settings: Color Space & Transforms
Color science: Davinci YRGB
[x} Use separate color space and gamma
Timeline color space: Davinci WG - Linear
Output color space: Rec.709 - Gamma 2.4
Color tab, node section - Timeline
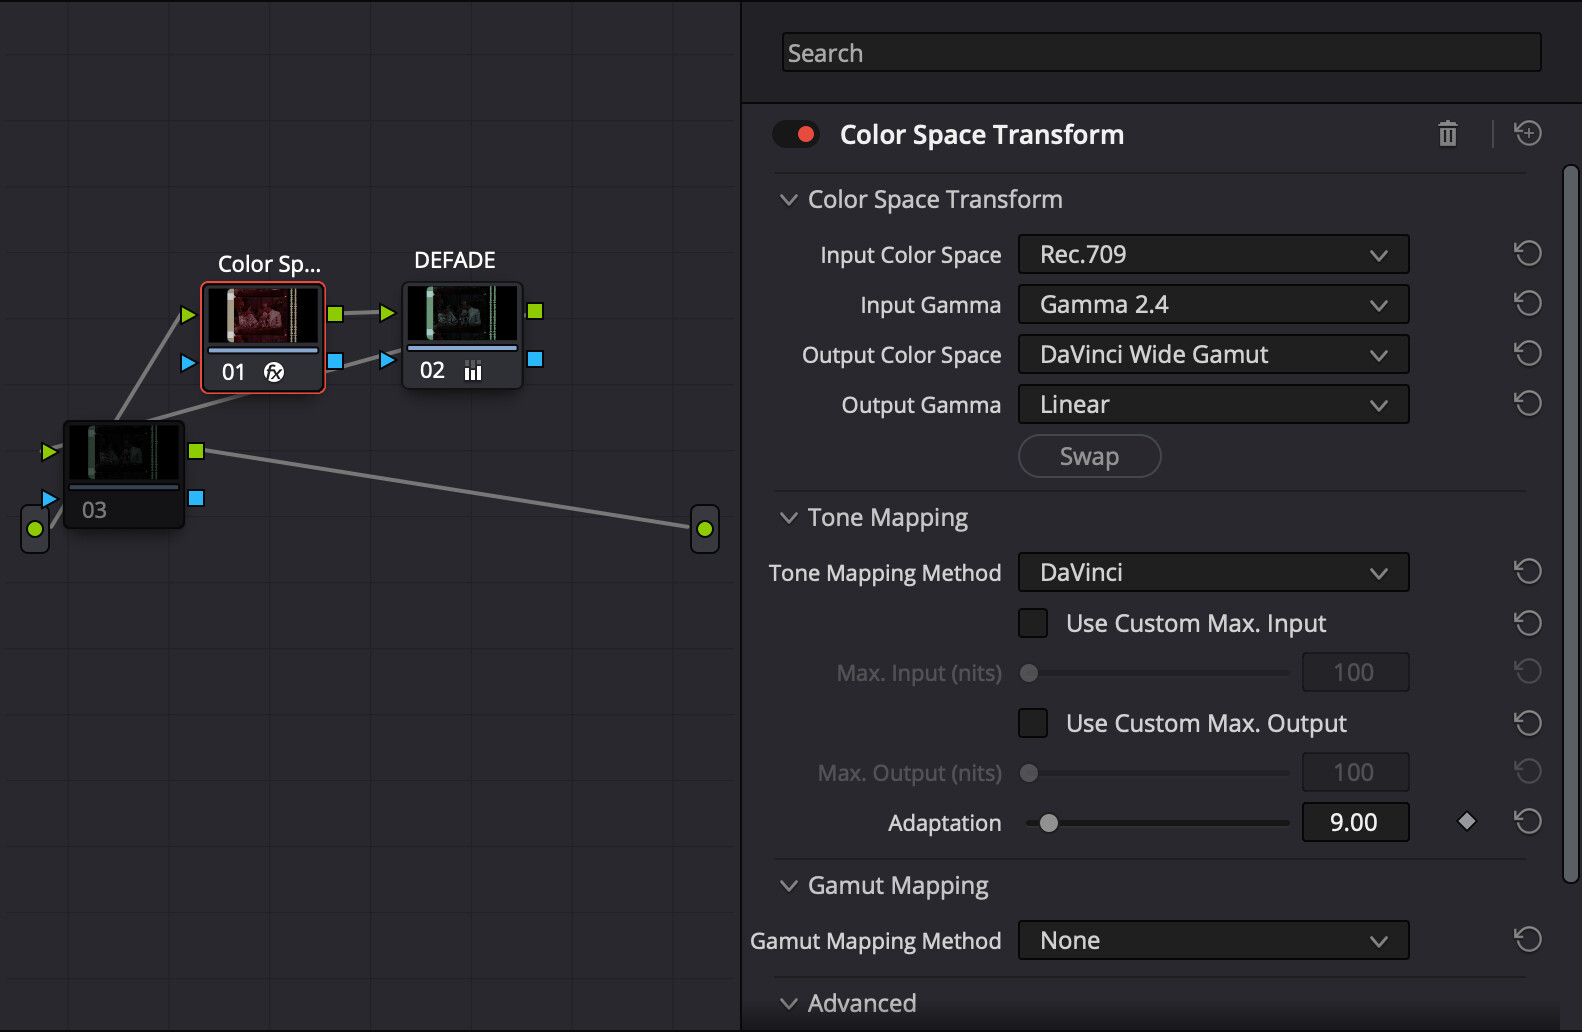
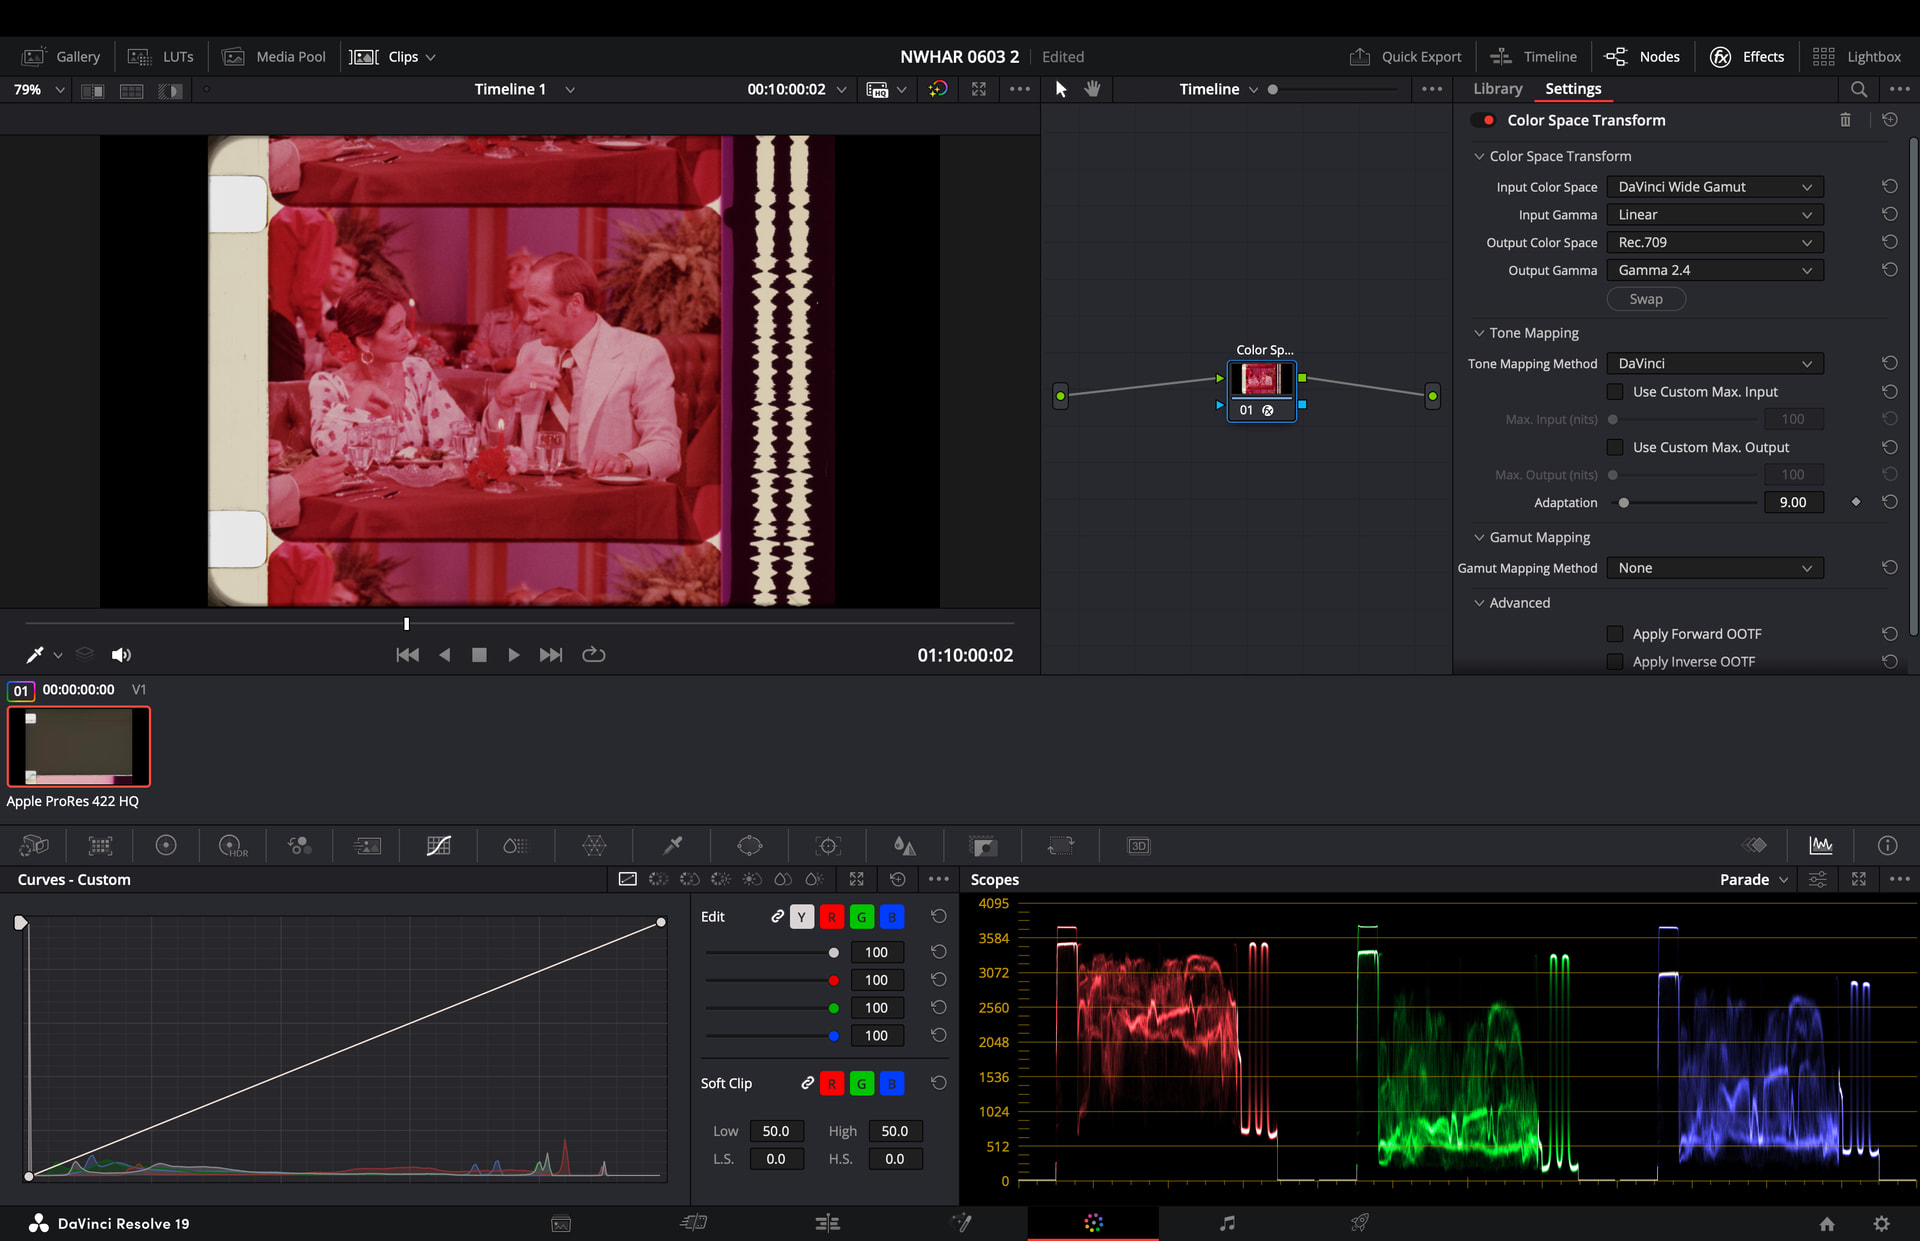
Setup a Color Space Transform Node (CST)
Input Color Space: Davinci Wide Gamut
Input Gamma: Linear
Output Color Space: Rec 709
Output Gamma: Gamma 2.4
Color tab, node section, Clip node
First Node
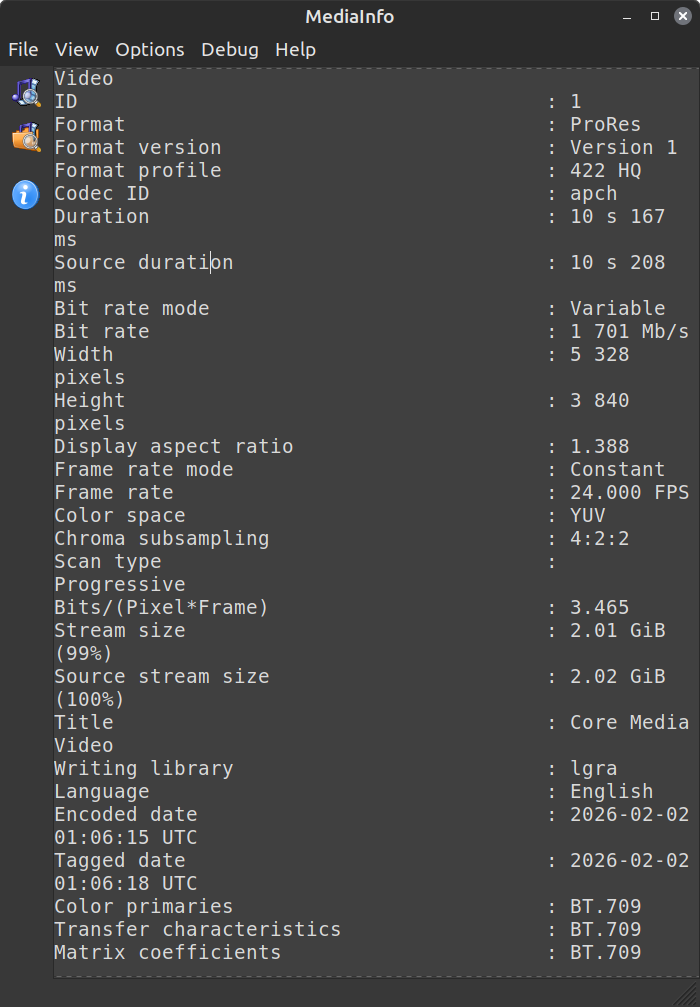
Set the input to the content color space
Set the output to Davinci Wide Gamut - Linear
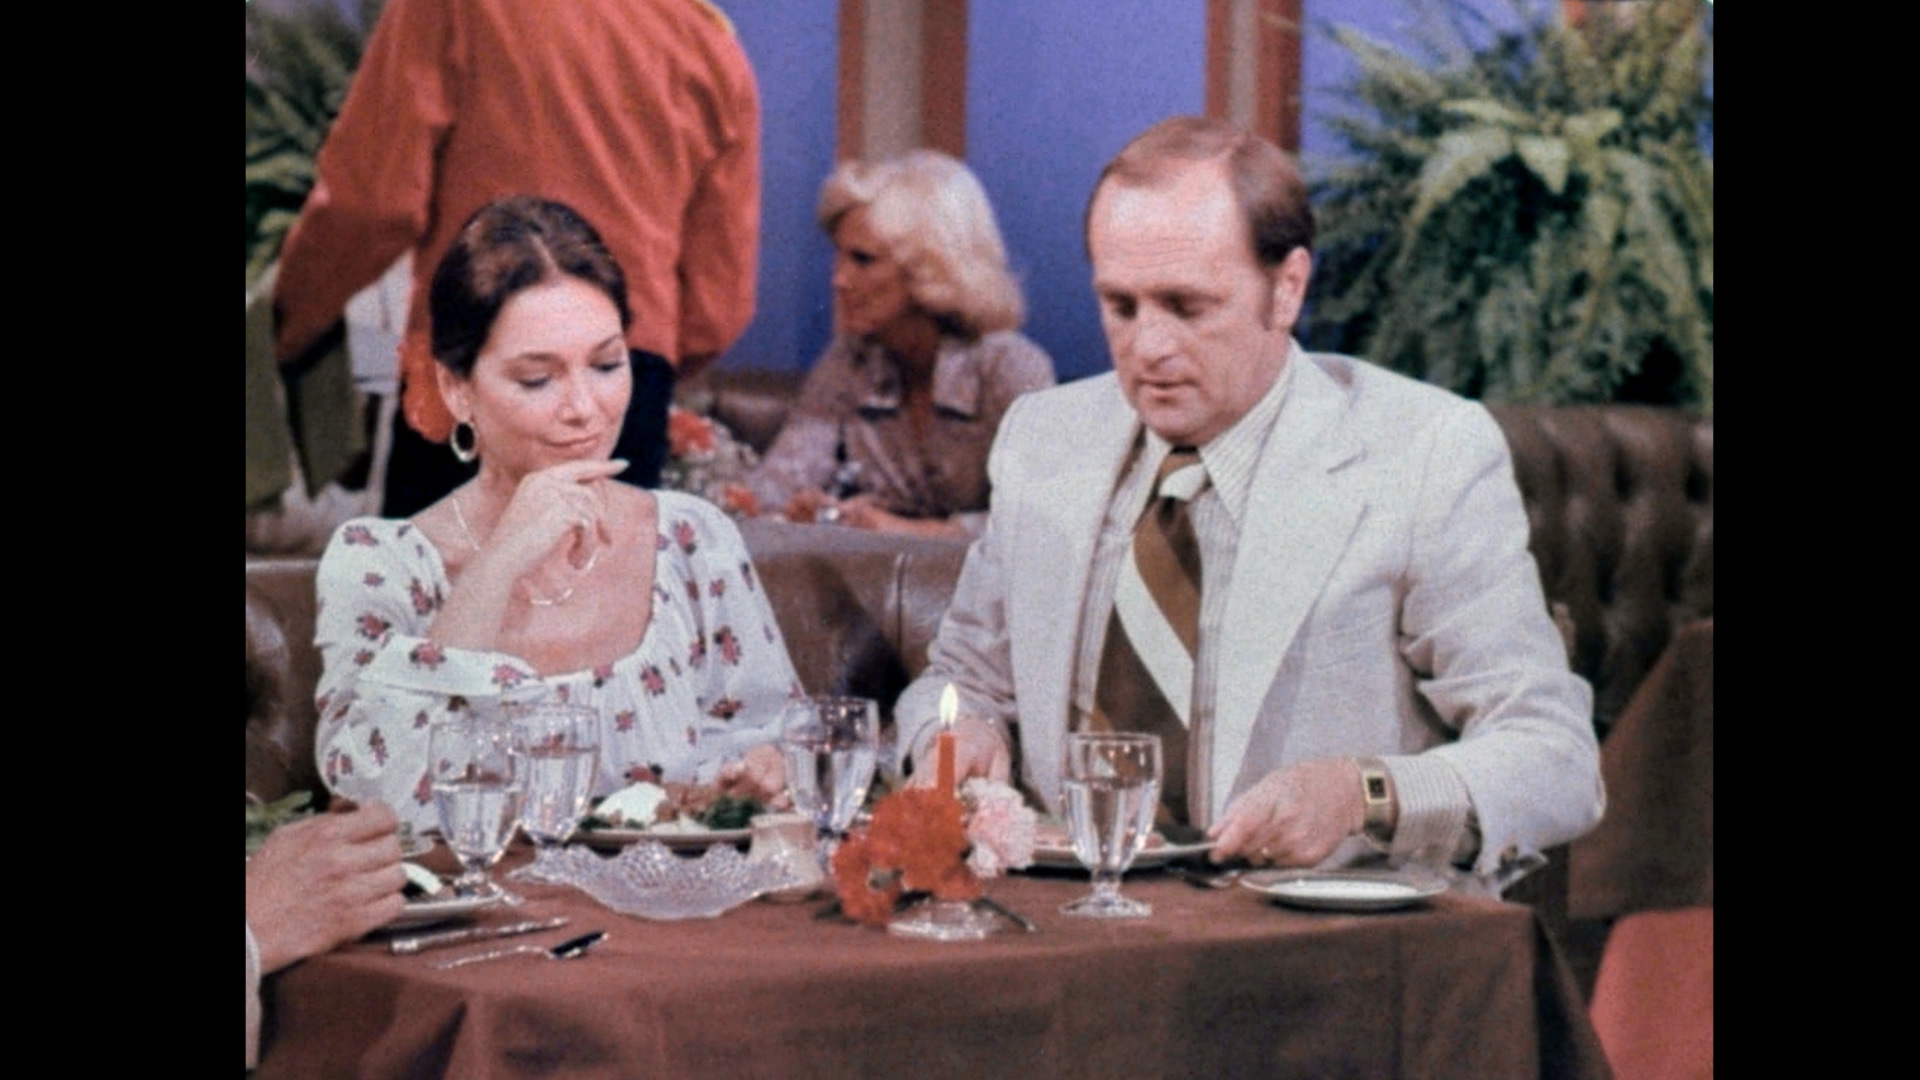
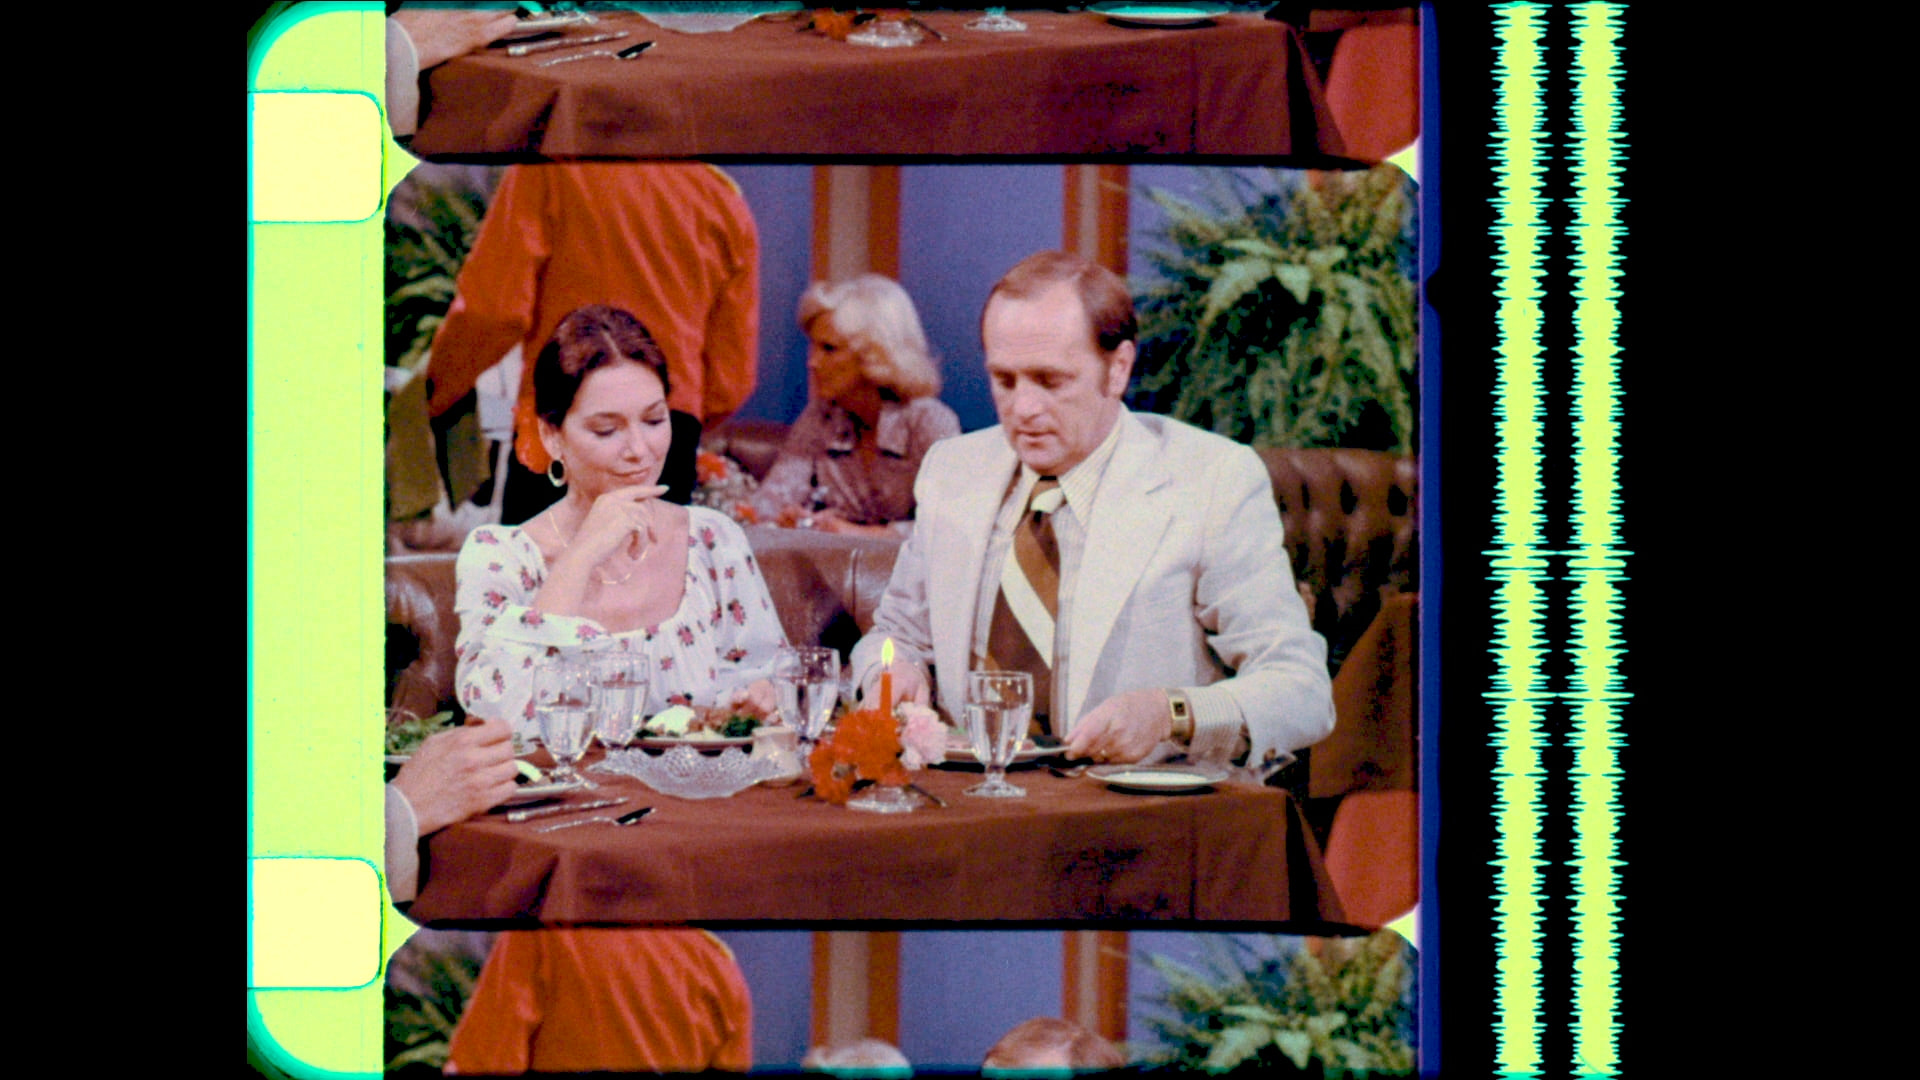
In this particular case, I am using the jpeg downloaded from the forum so the Input Color Space was set to sRGB - Gamma 2.4.
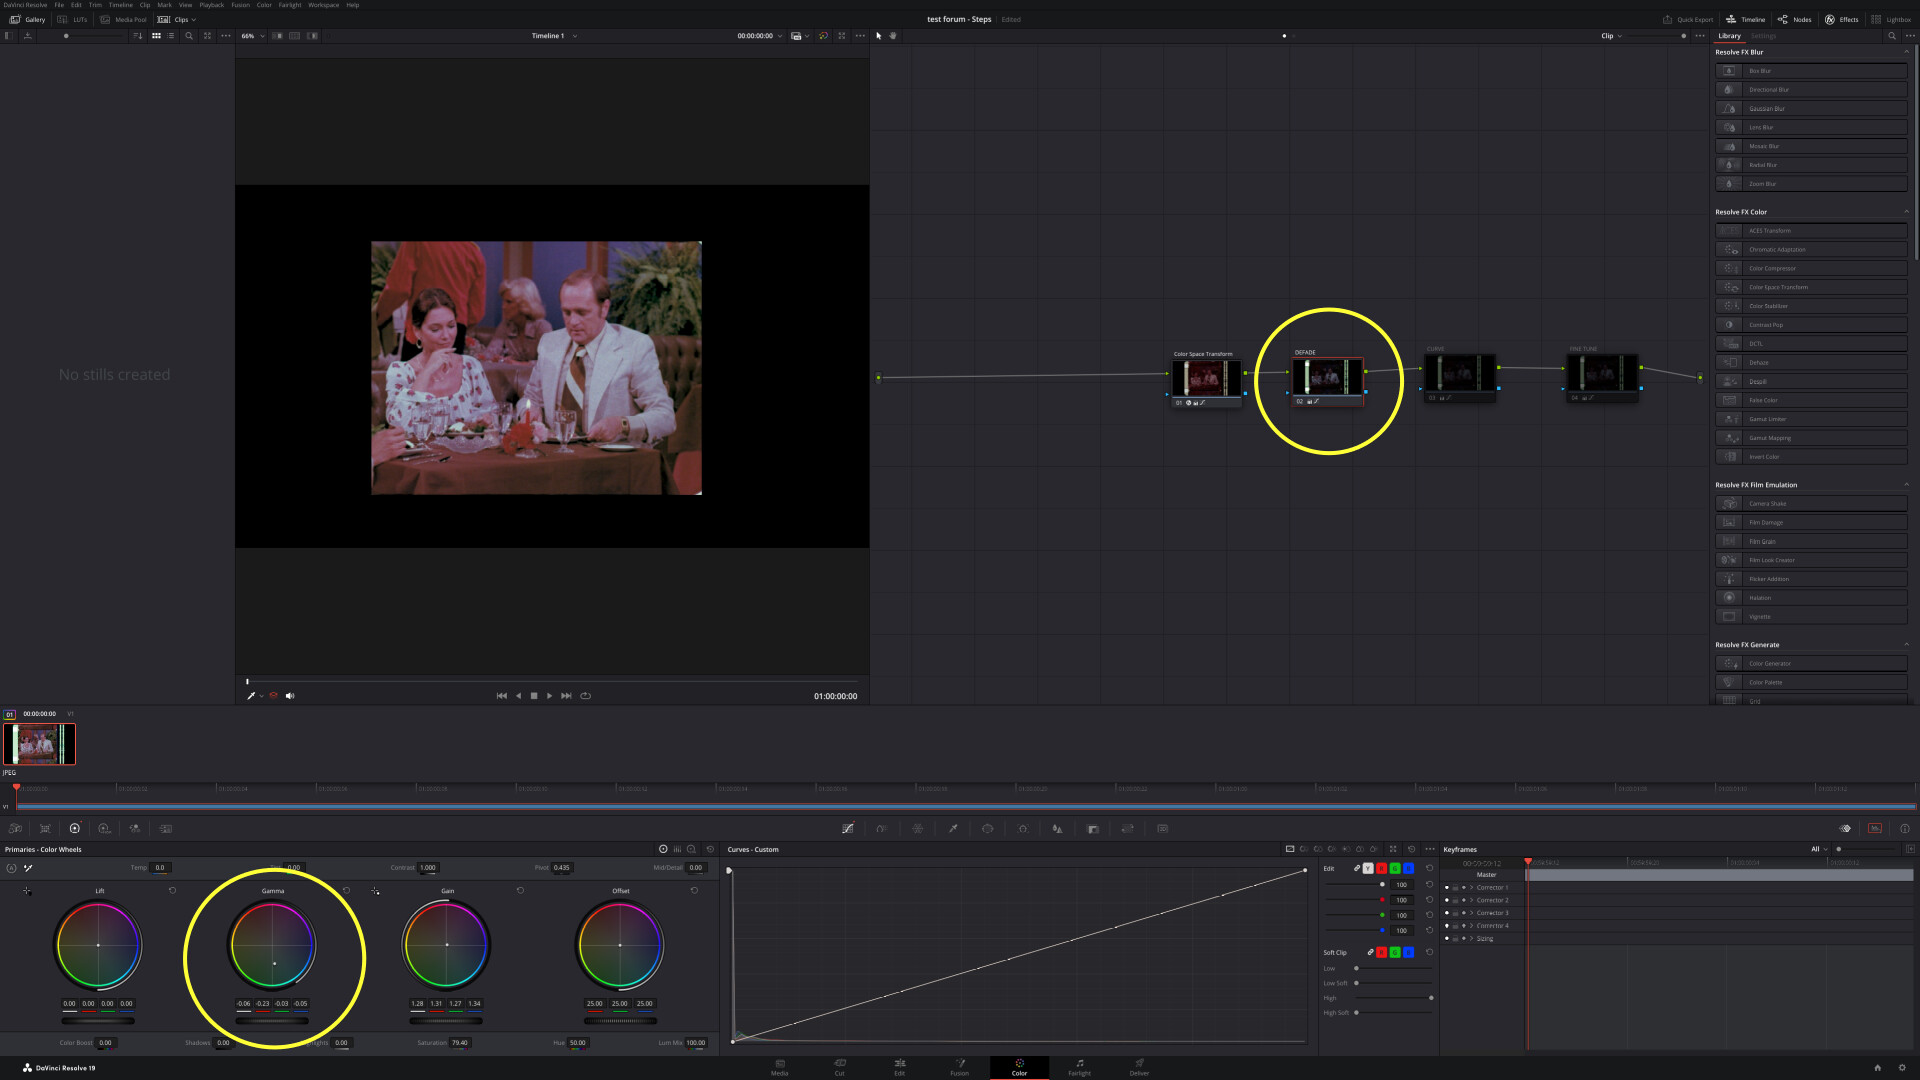
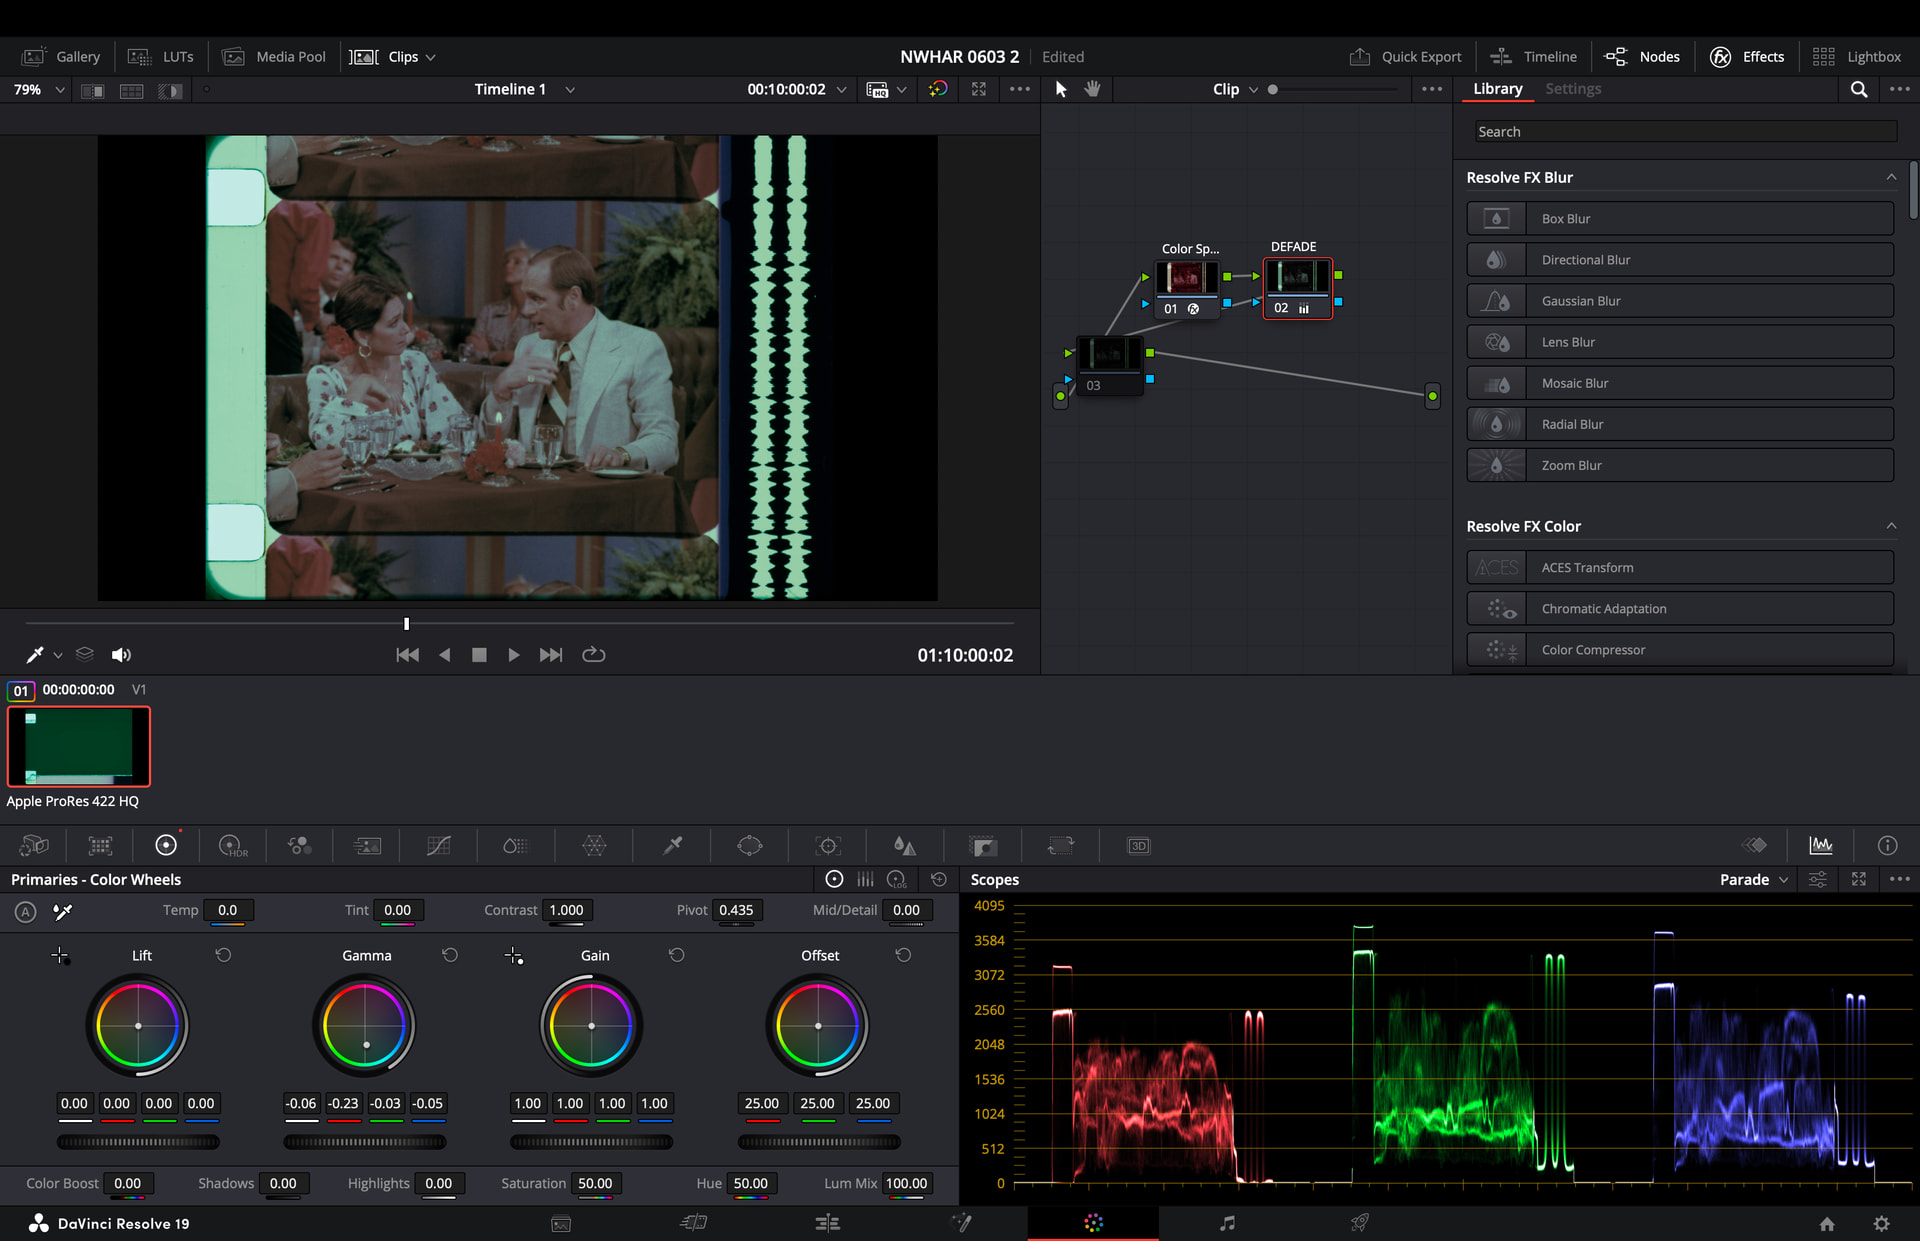
Second Node - DEFADE
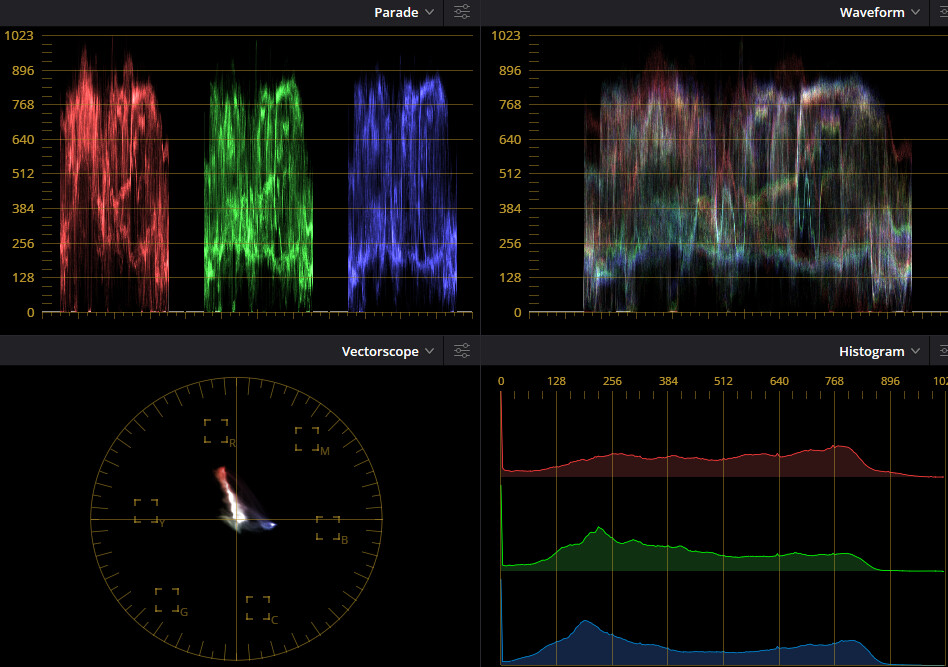
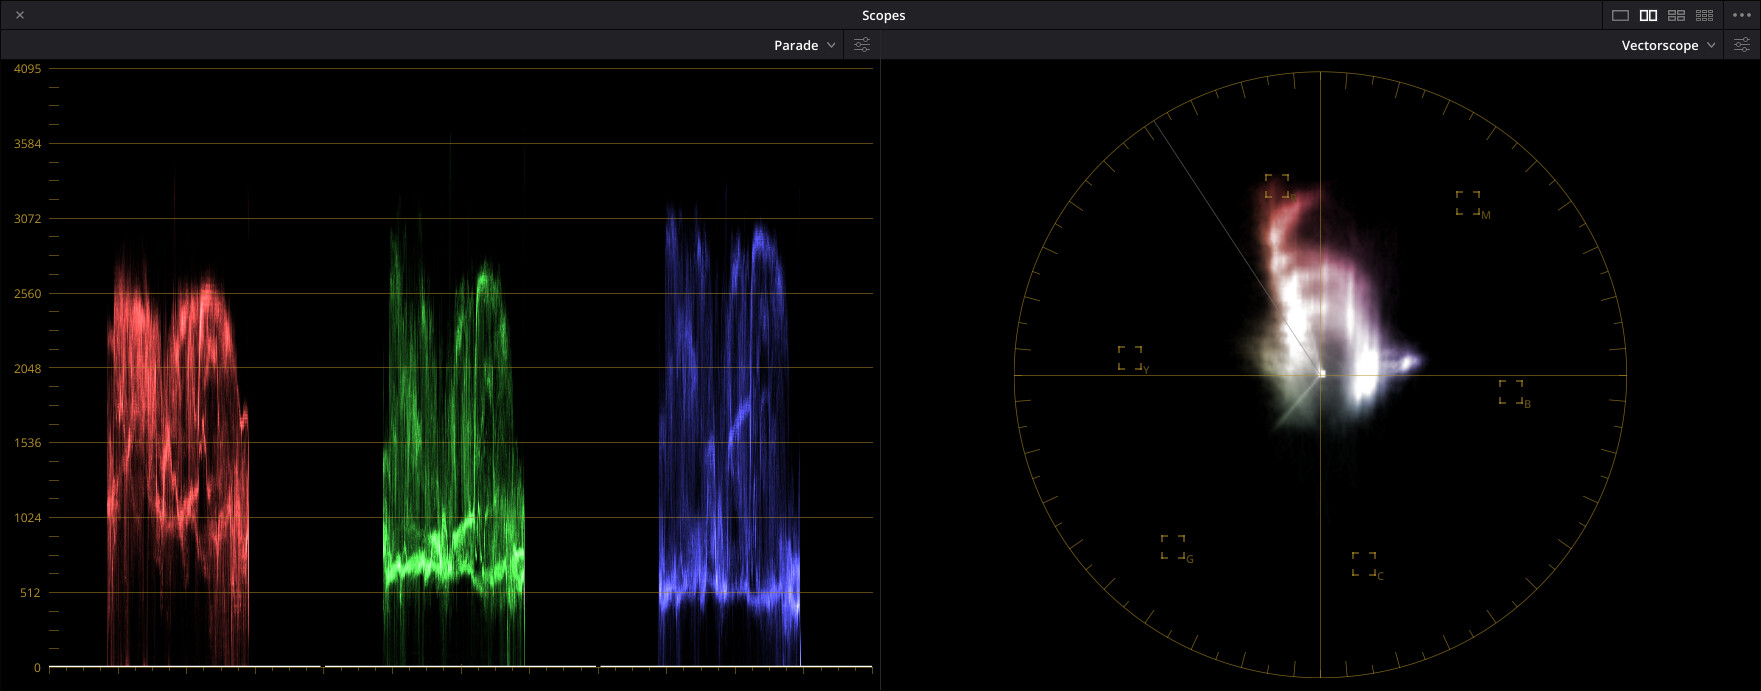
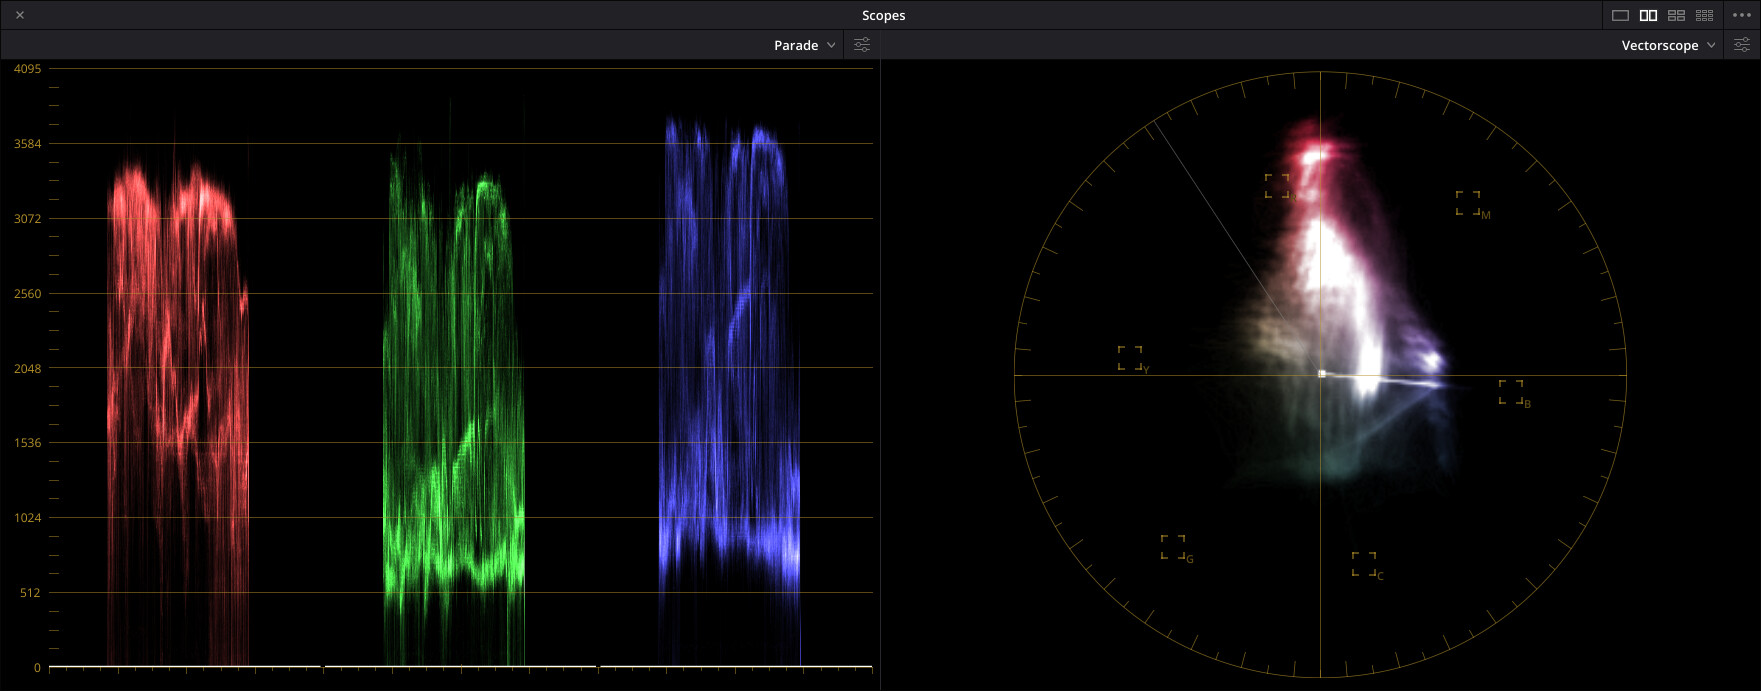
Using only the GAMMA Primary Color Wheel, adjust in the direction opposite to the predominant color of the fade until the RGB parade looks about balanced and centered.
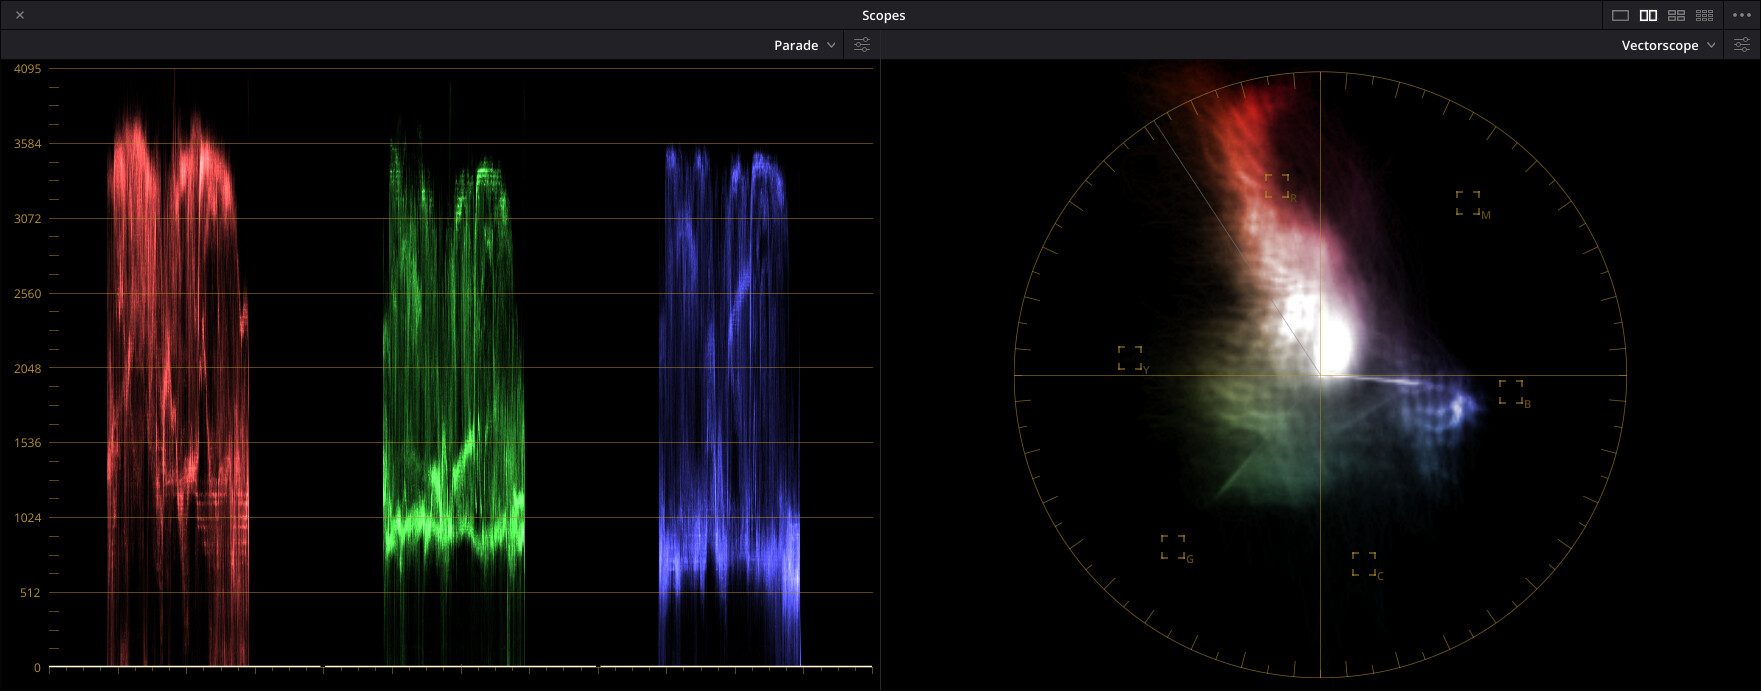
Third Node - CURVE
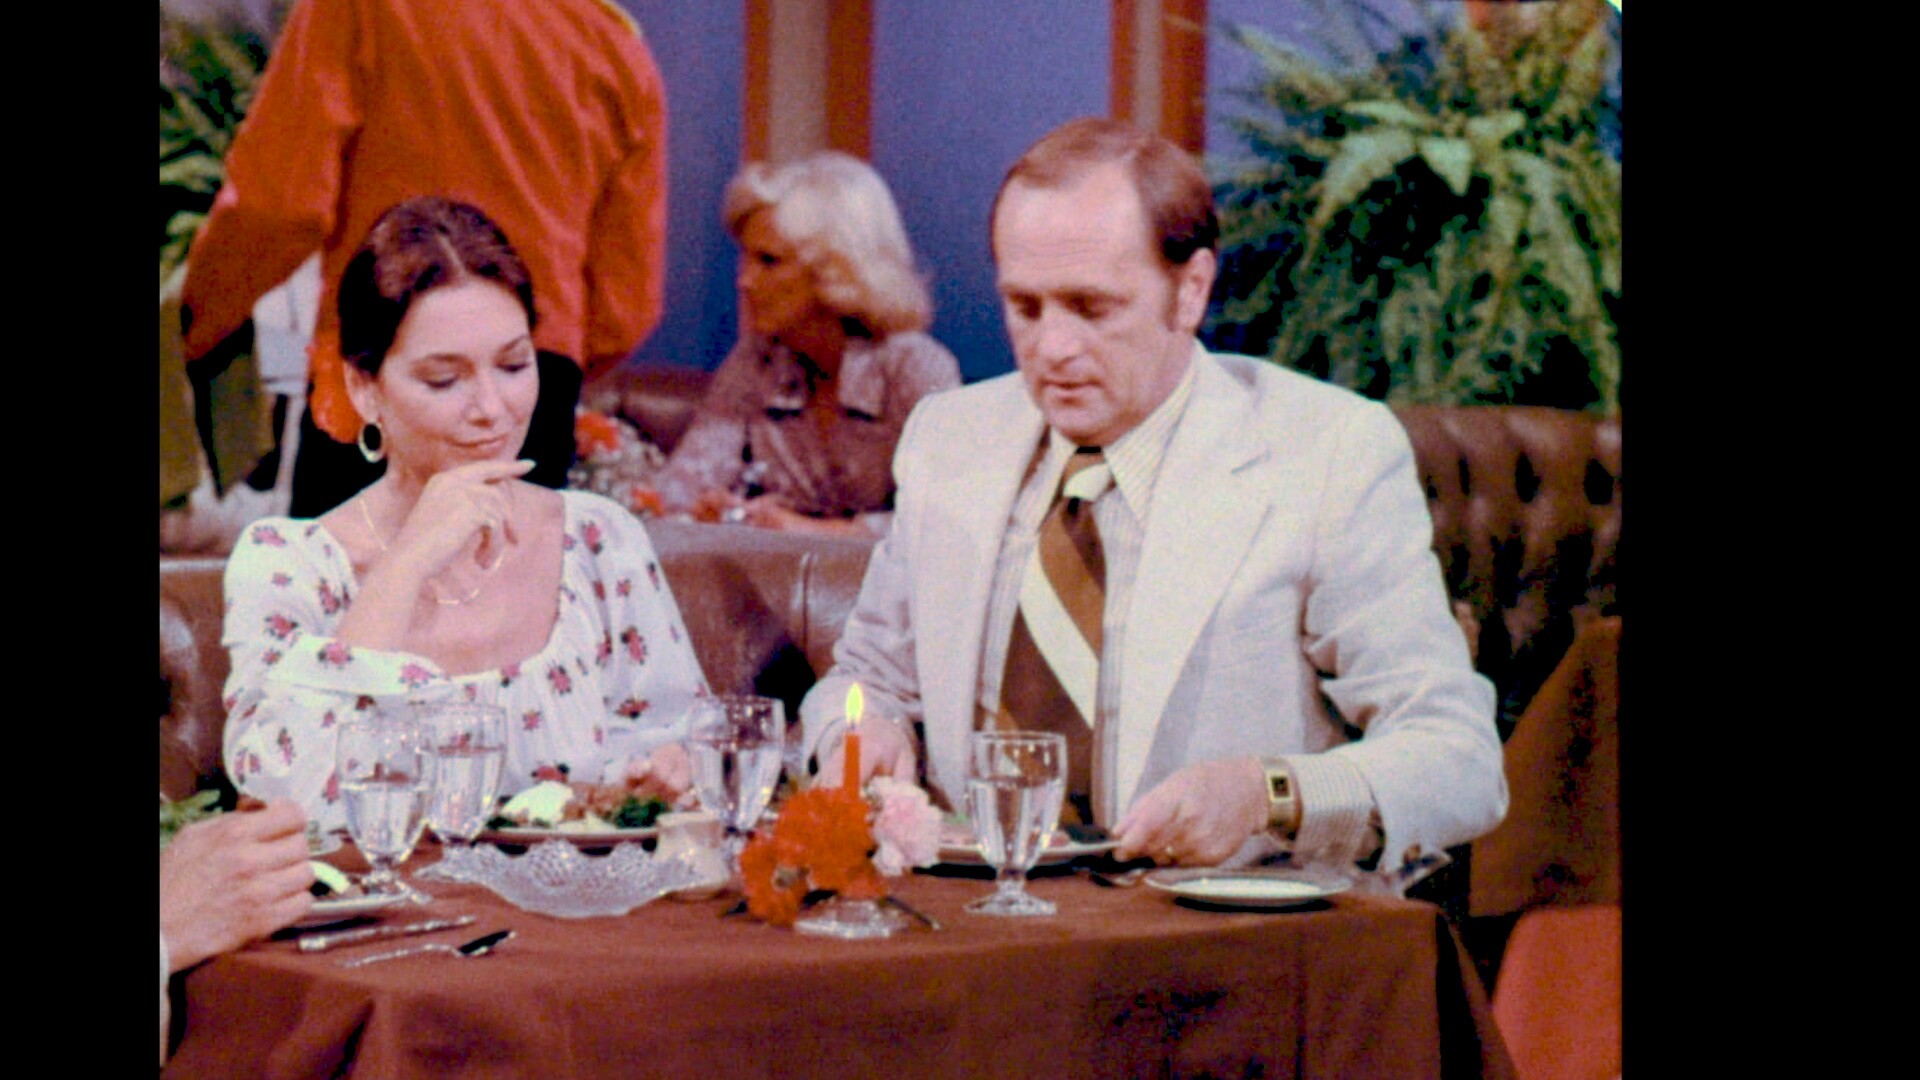
Using Custom Curves, adjust as needed to fine-tune color fading. In the same node, increase Saturation and slightly adjust Hue to align skin color to vector-skin-color marker.
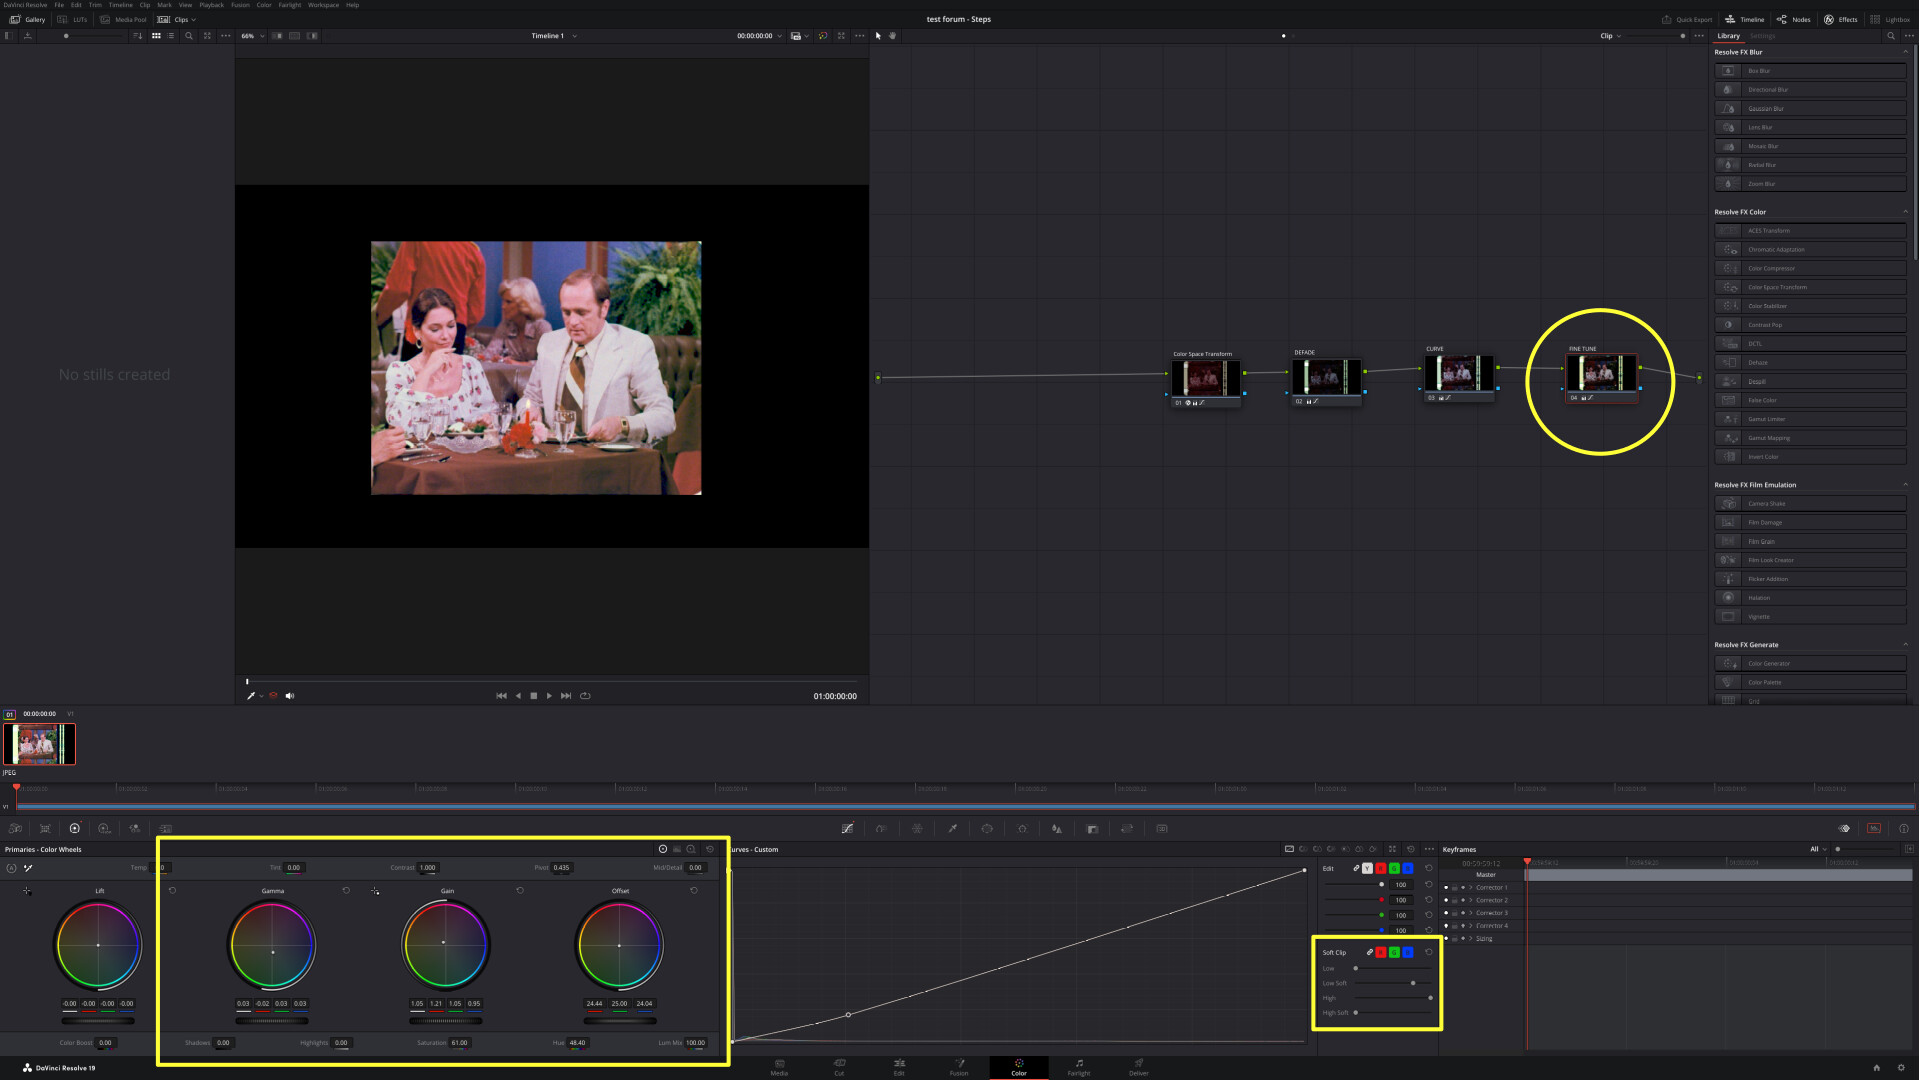
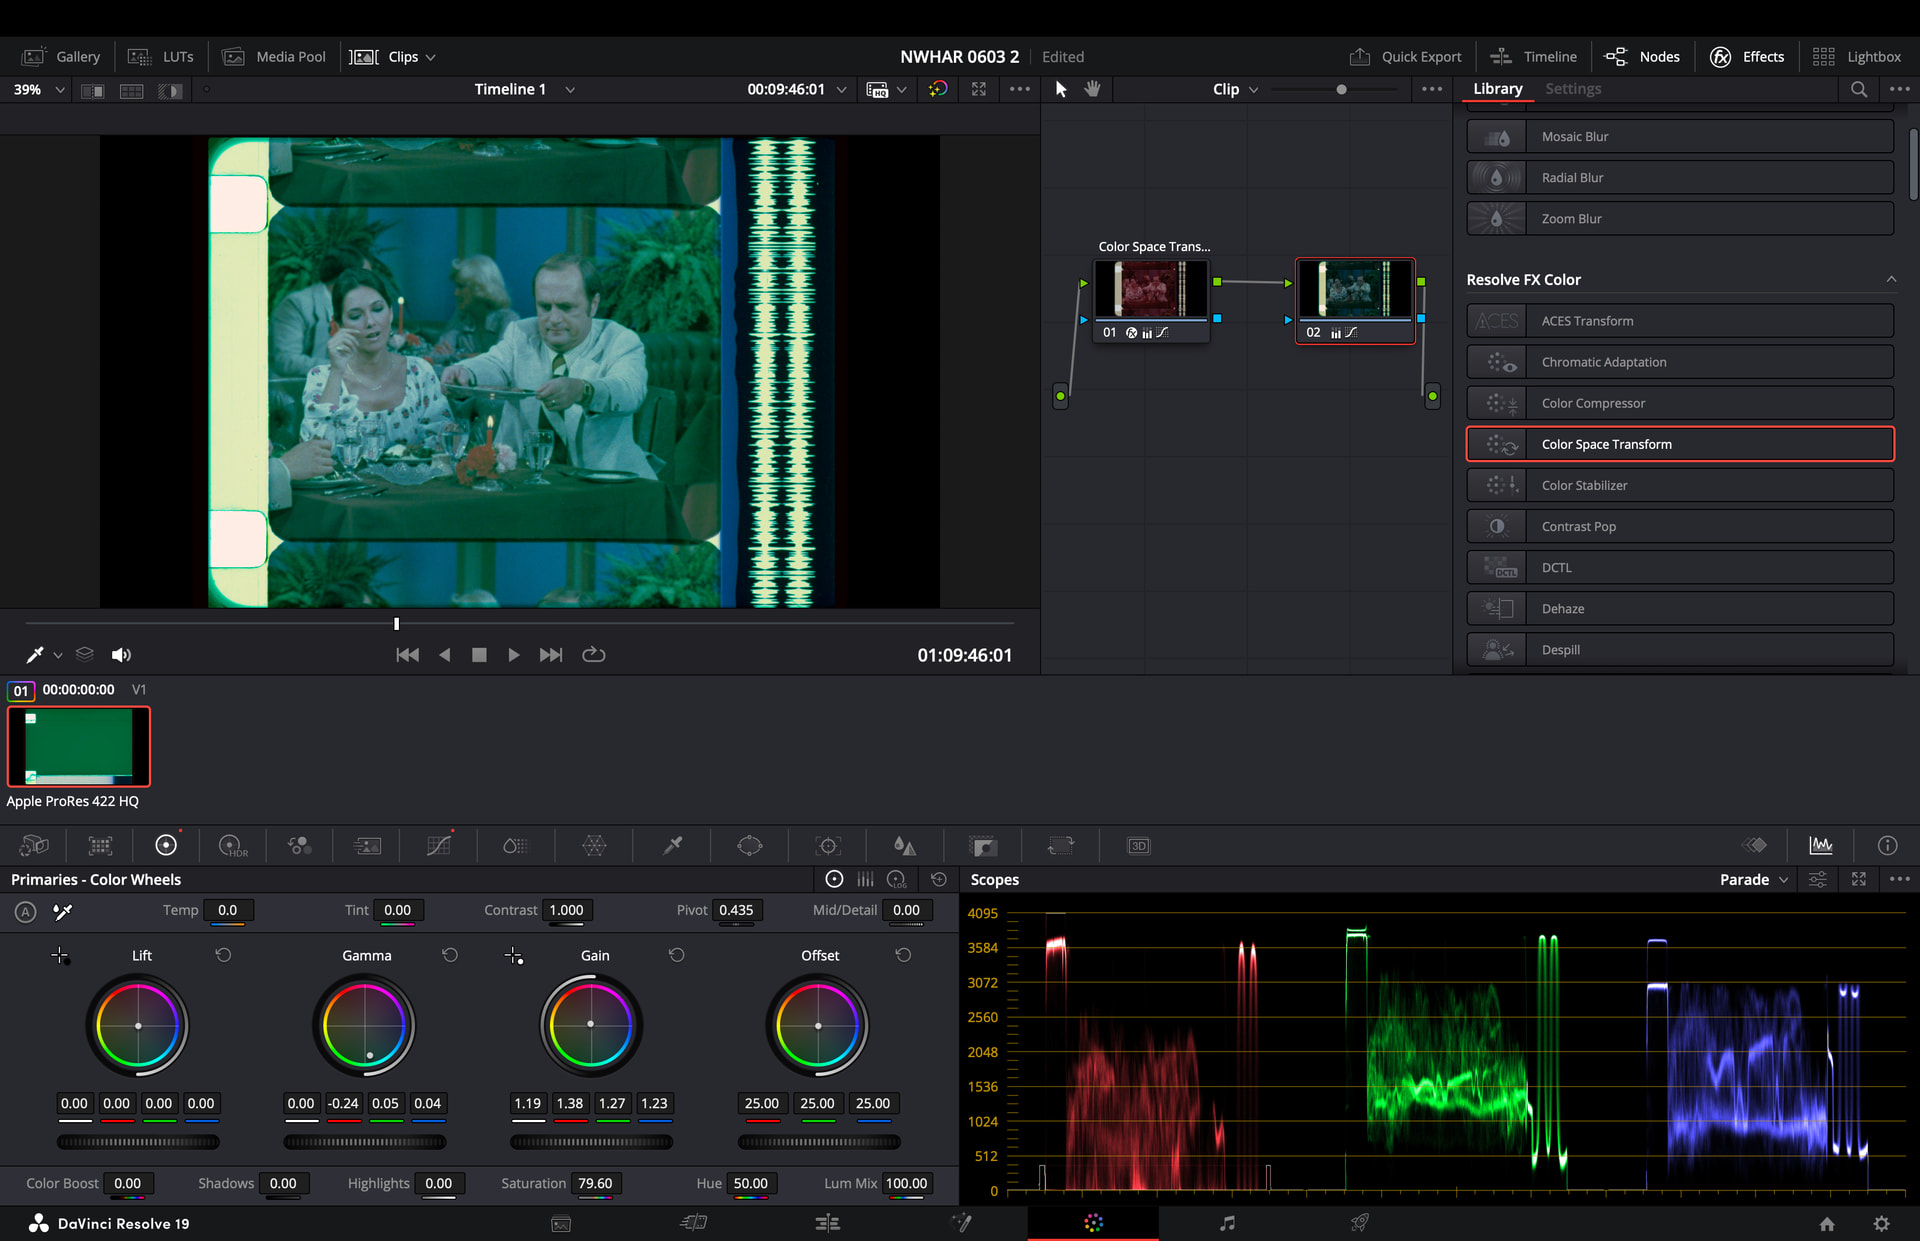
Fourth Node - FINE TUNE
Small adjustments in Primaries - Color Wheels, Offset, Gain, Gamma, Saturation, and Hue to obtain desired final colors. For Offset, Gain, and Gamma, it will require multiple iterations until all three achieve the desired color.
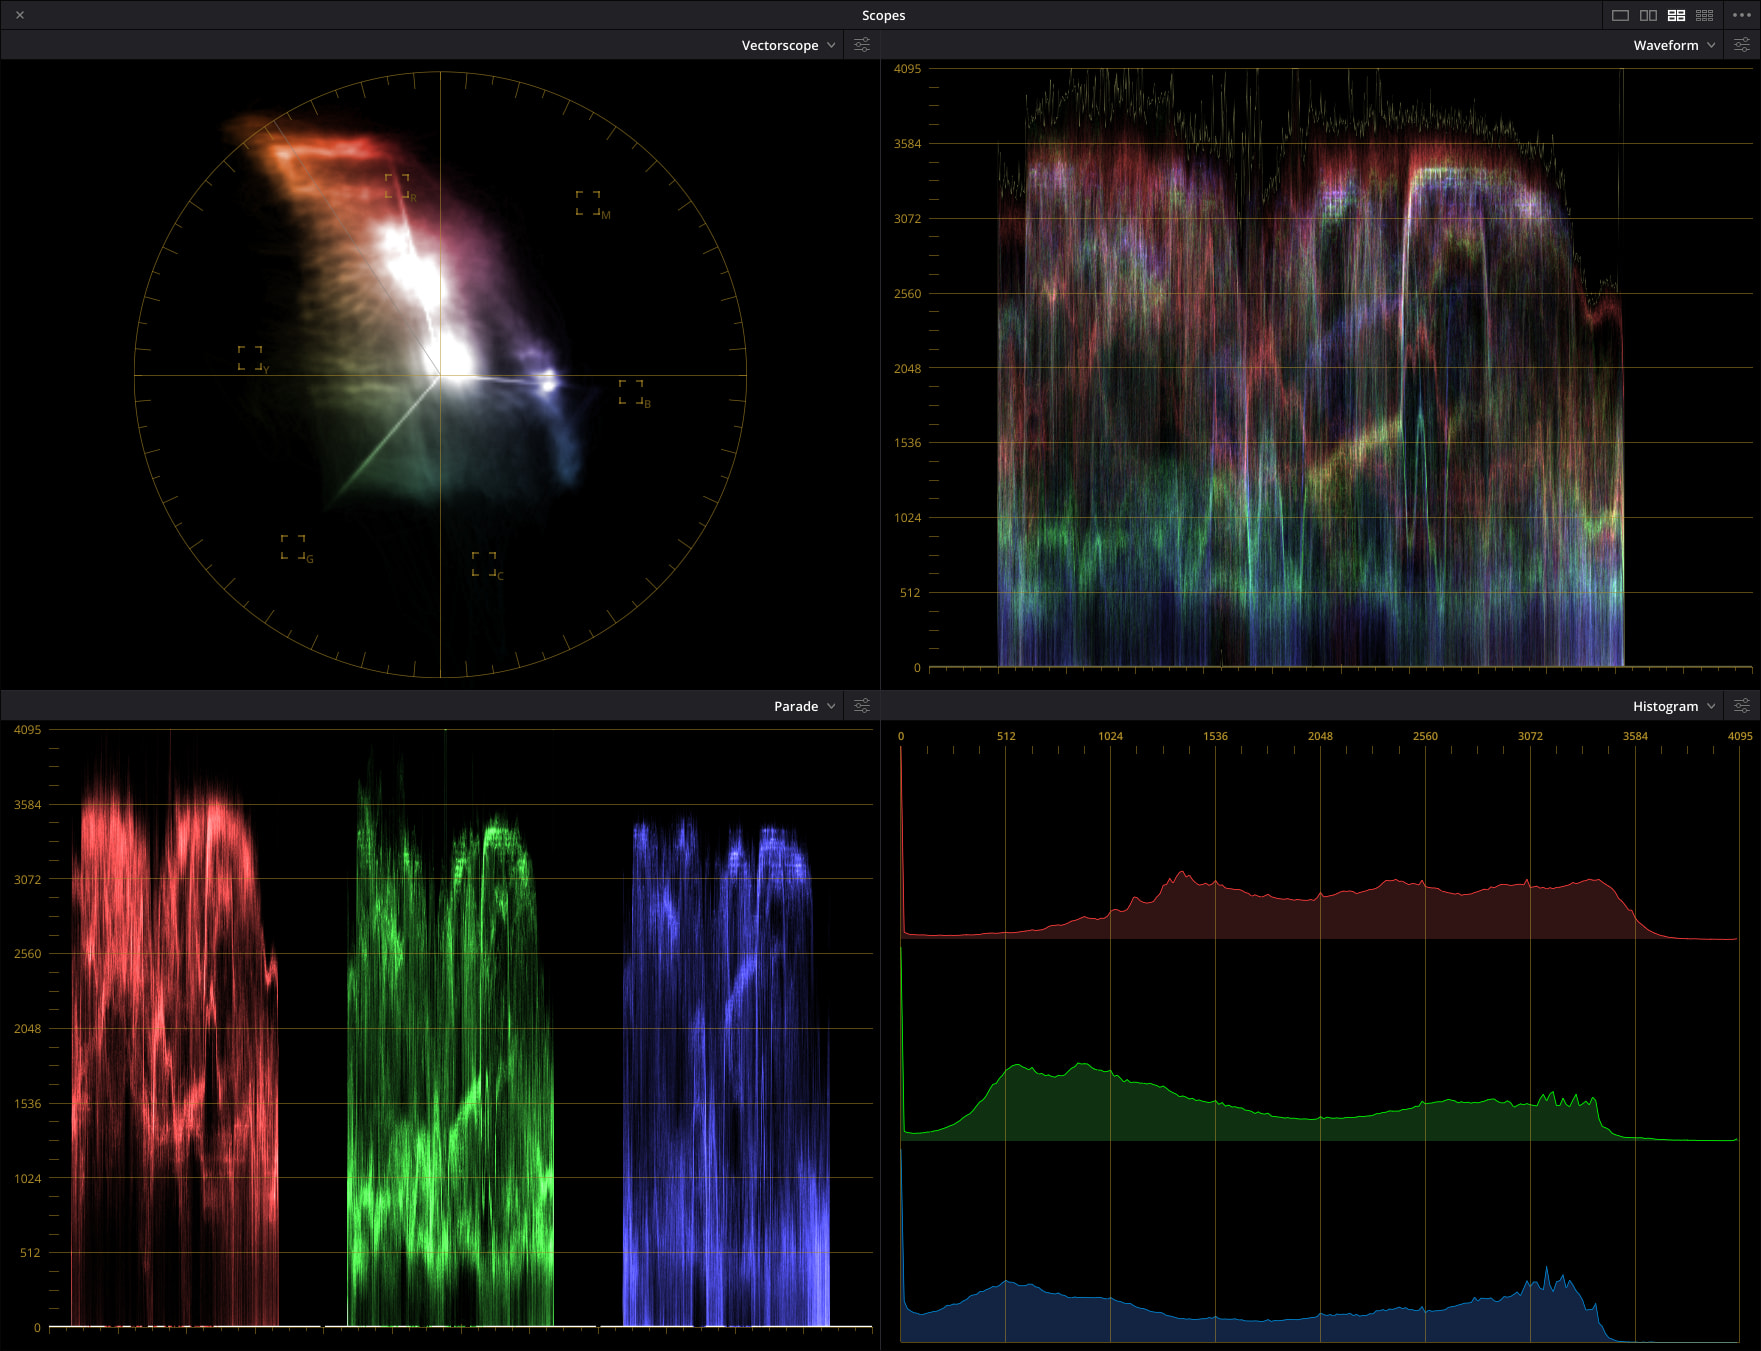
Hint: The vectorscope All - Low - Mid - High is your friend when fine tuning balance (centering Offset, Gamma, and Gain) on the fourth node.
Hope this helps.