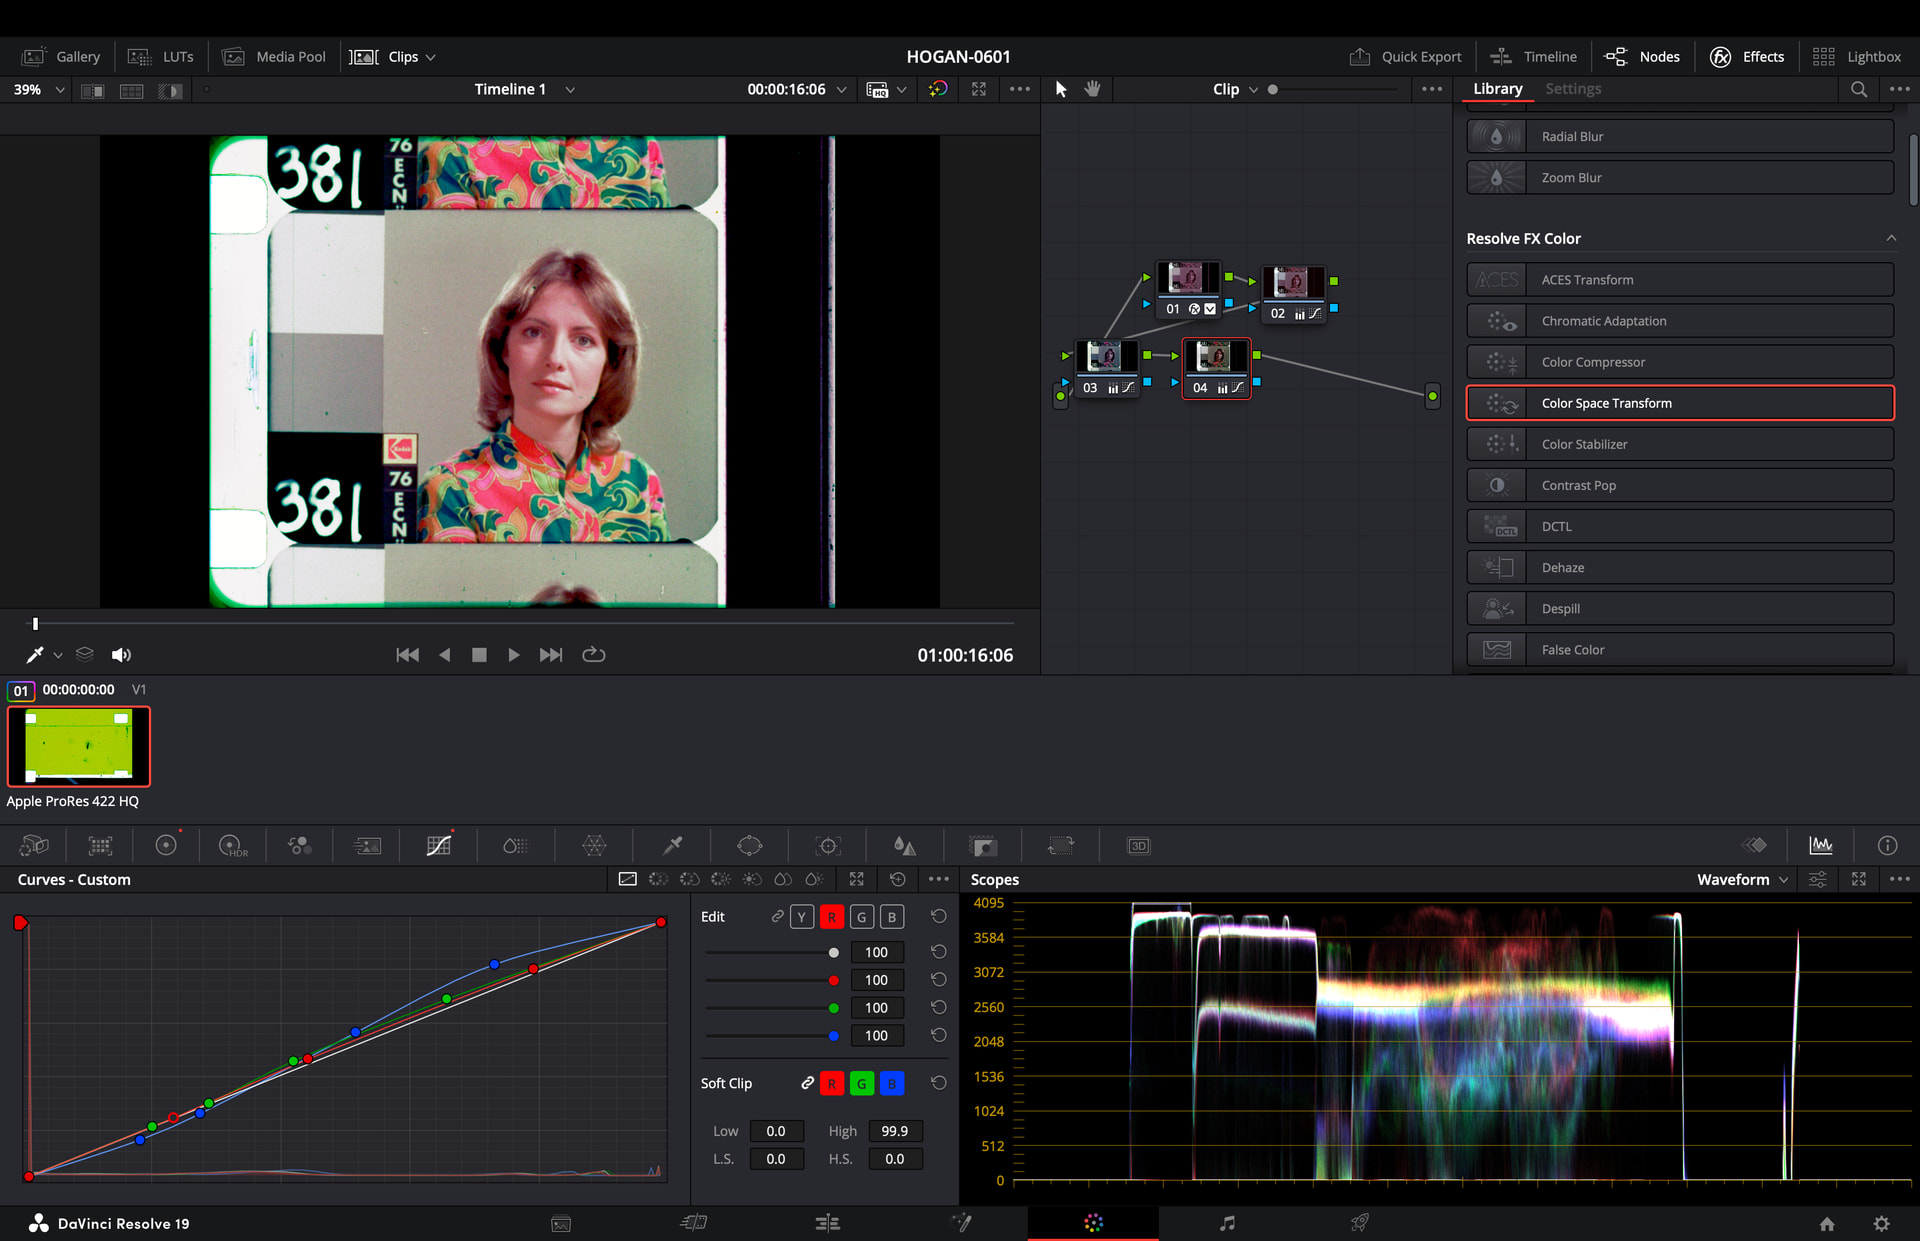
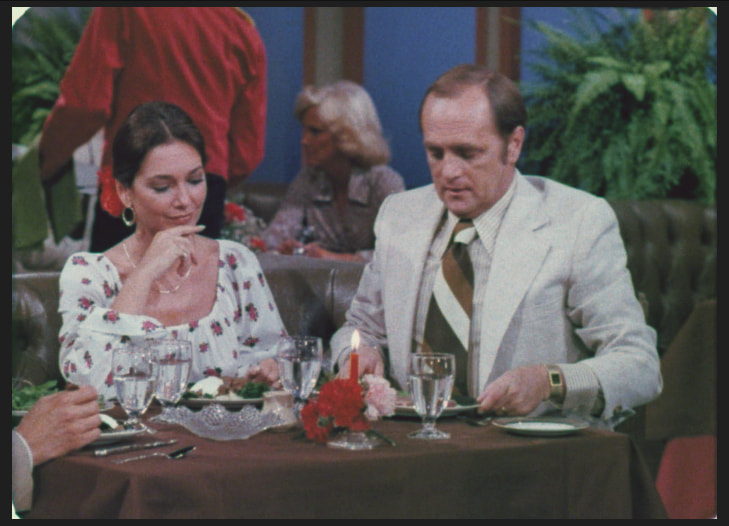
I’m trying to correct skin tones by adding a new node, selecting a person’s skin, and adjusting parameters, but it messes up the color
@DPXTIF good progress, you are very close.
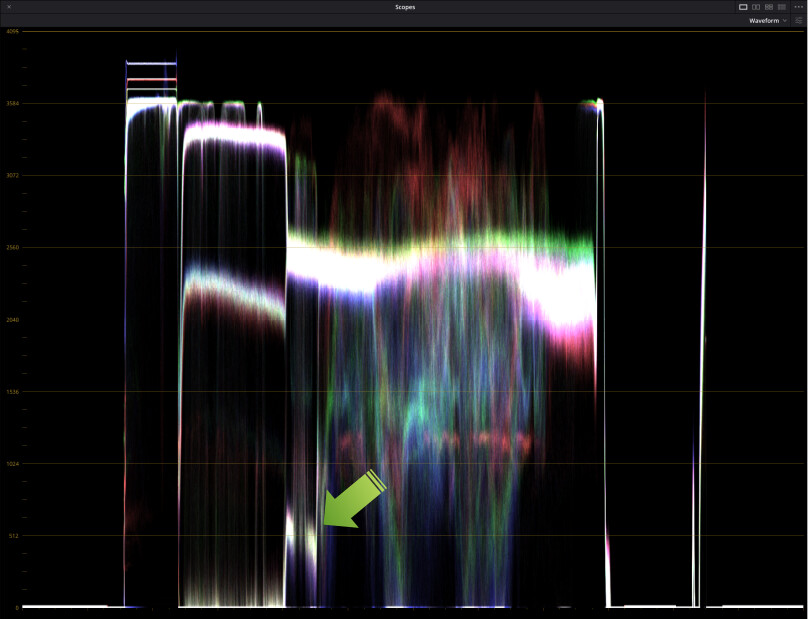
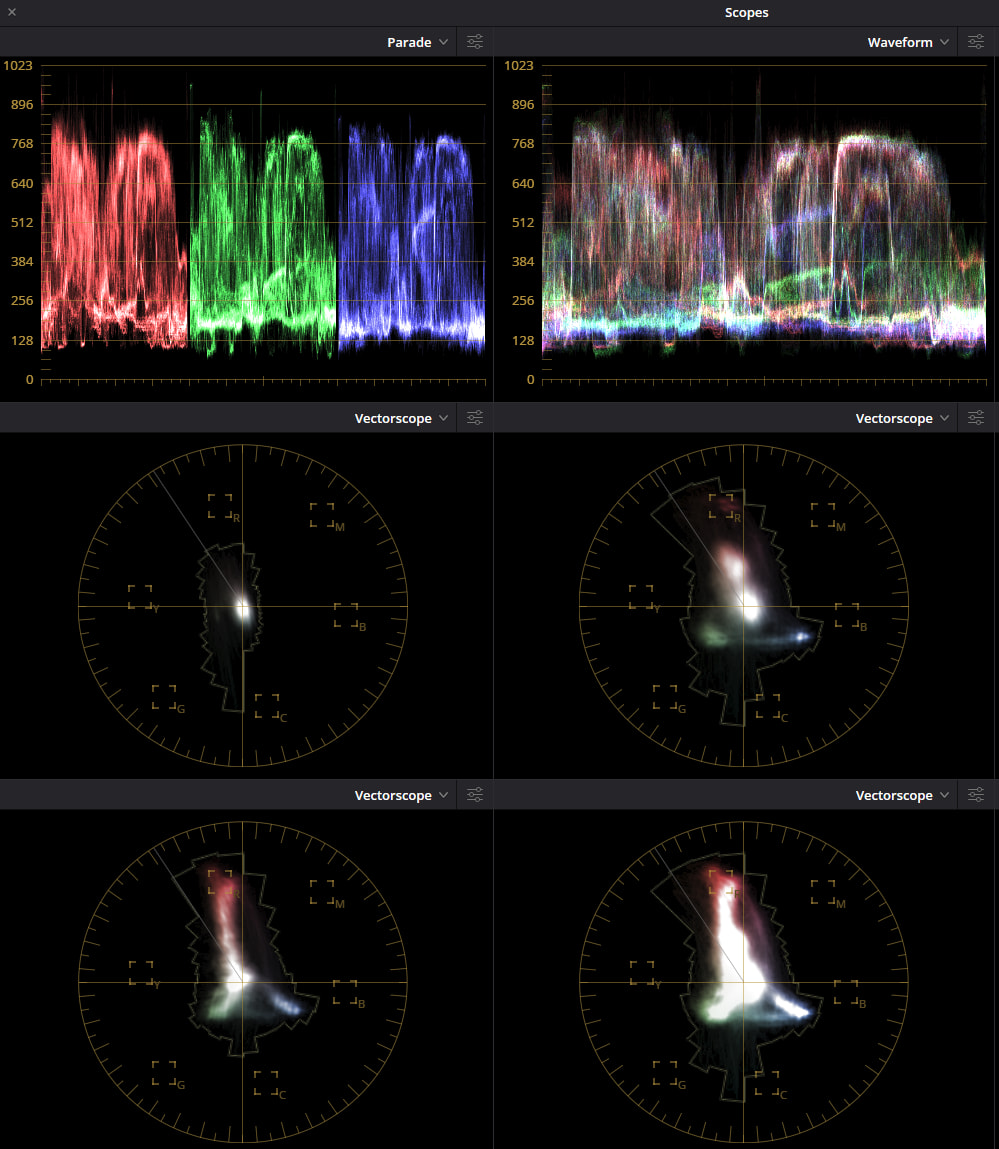
Looks like you are hard clipping black levels, and having trouble balancing at different luminance levels.
Suggest using the Vectorscope Low-Mid-High to break down how is the balance at different levels.
The waveform (without parade) is helpful too, especially on a picture that has a gray scale… you can pretty much read what you need to do. It is saying: “can’t see the low levels, too much blue on the mid levels, too little blue on the high levels”.

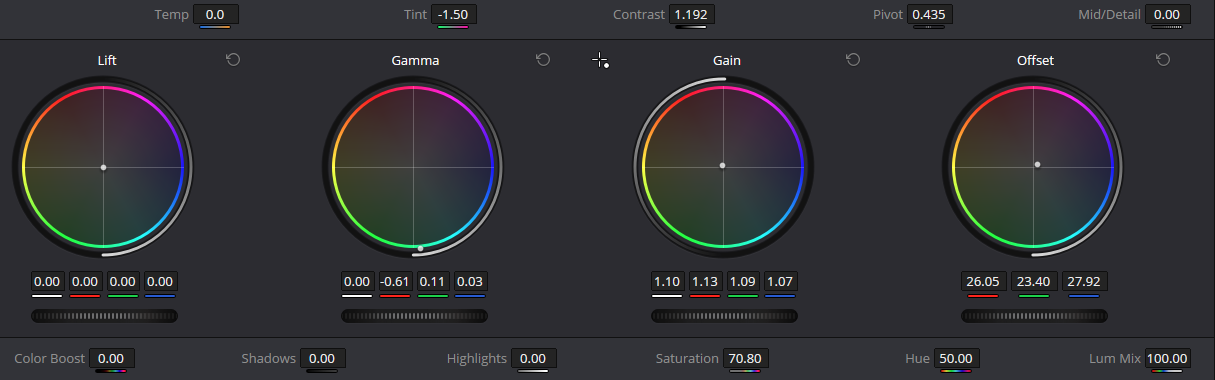
It is an iterative process. Adjust offset for low levels, then gamma for grays, then gain for whites, and repeat until you get all three (RGB) color-neutral.
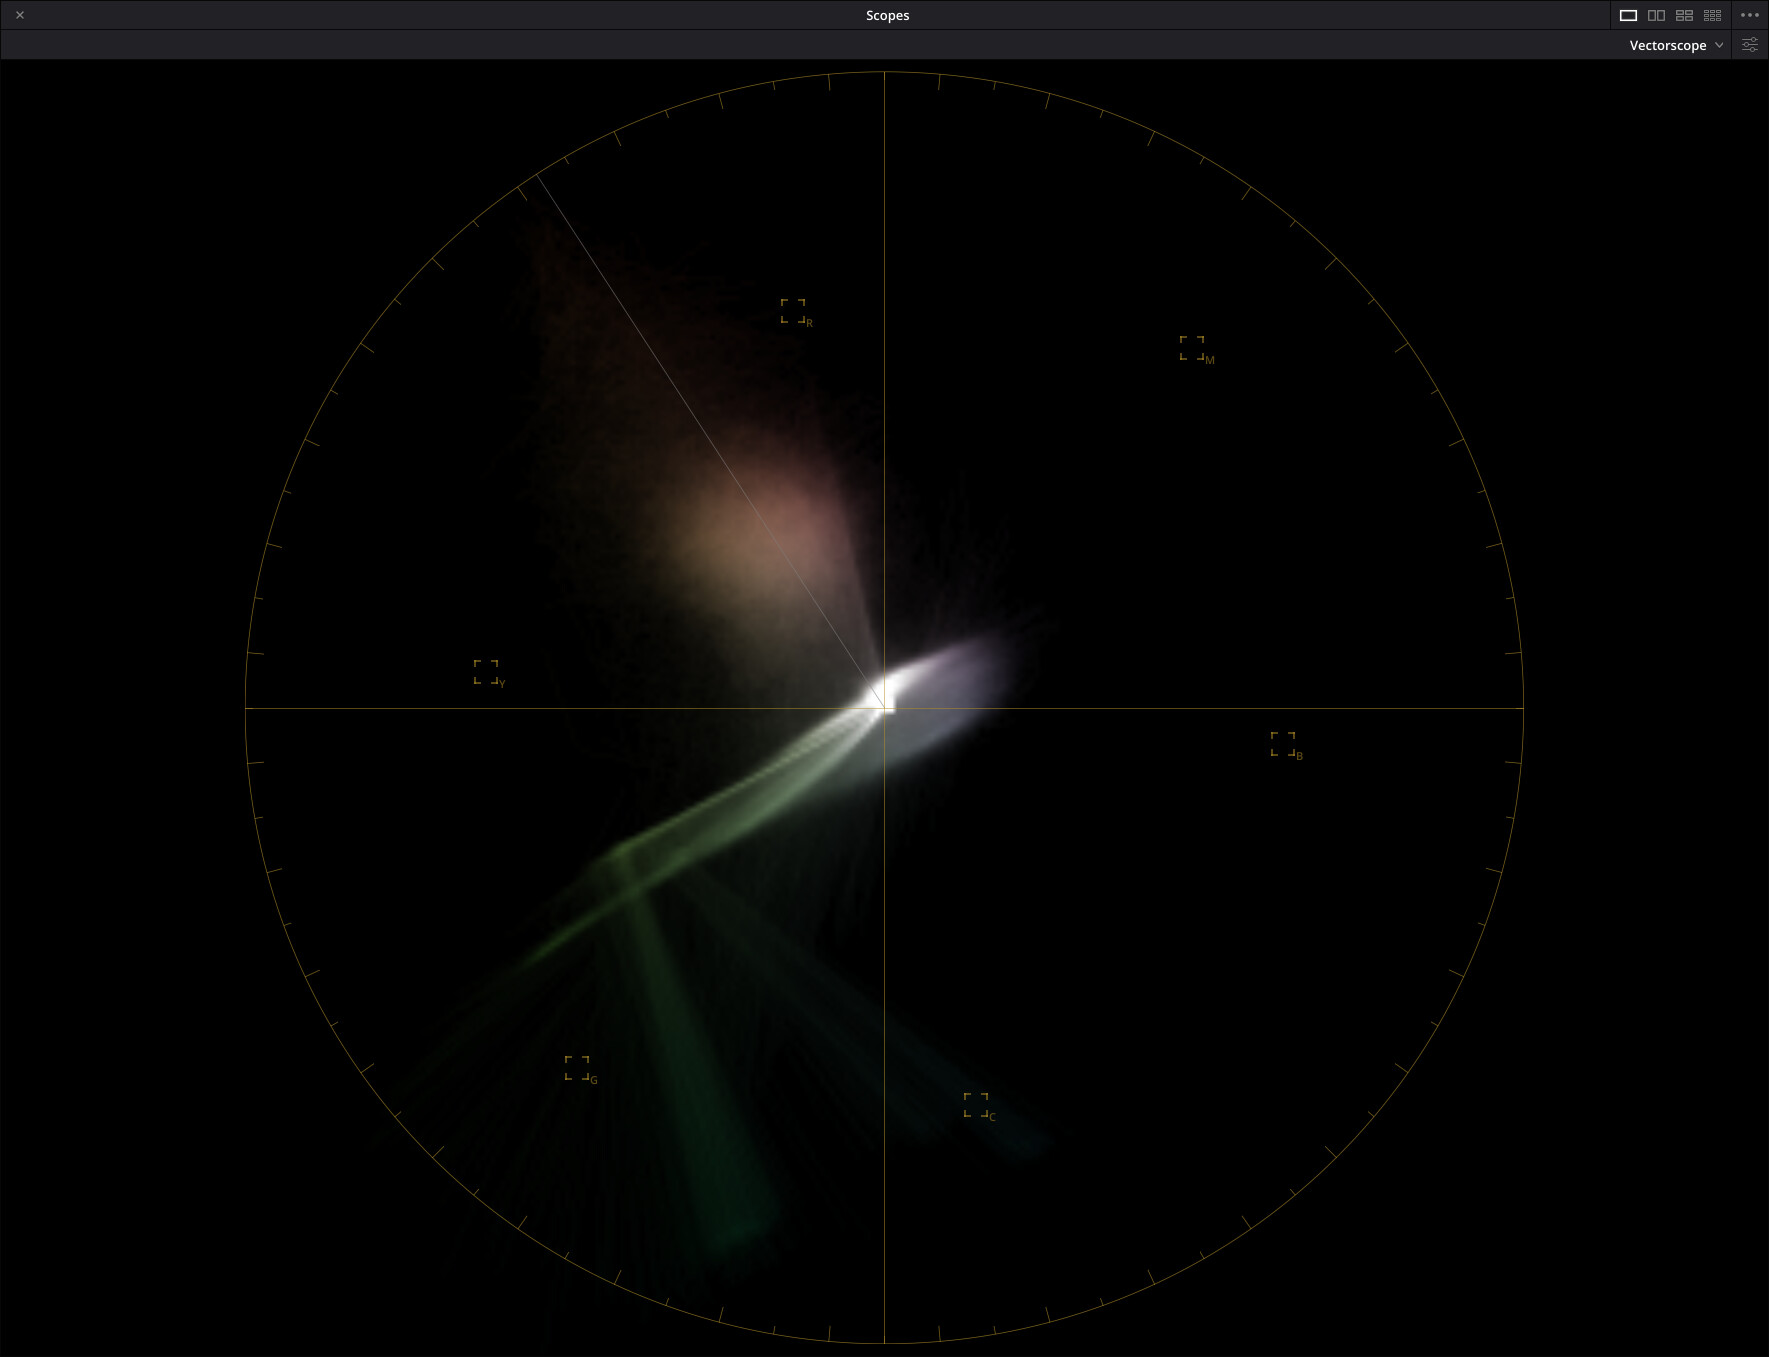
When films are faded, a touch of hue will bring the skin-tone to the vector skin-color-marker.
Always keep in mid human-color-perception. If you look at an unbalanced image long enough, the human-eye will white balance, so switch between a known well balance image and your color correction screen periodically.
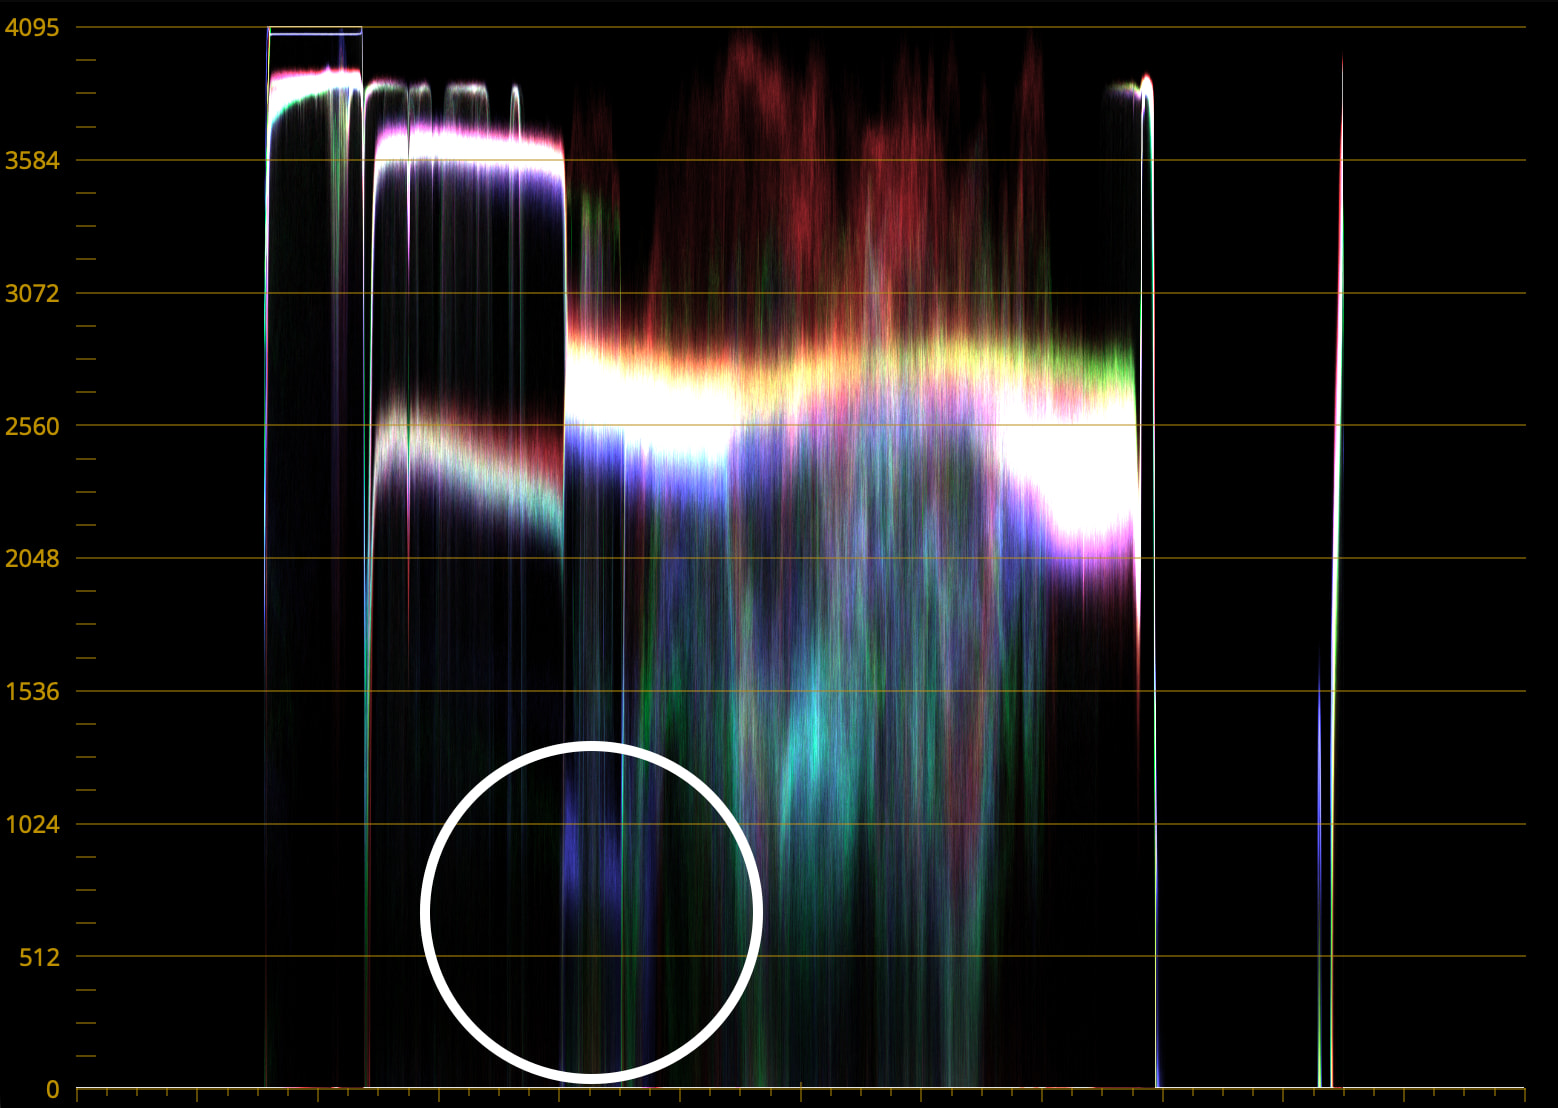
Getting there. Raise the offset a bit and confirm the lows are balanced.
Guessing… you may need to trim a hair of red offset
How do I tell if the lows are balanced?
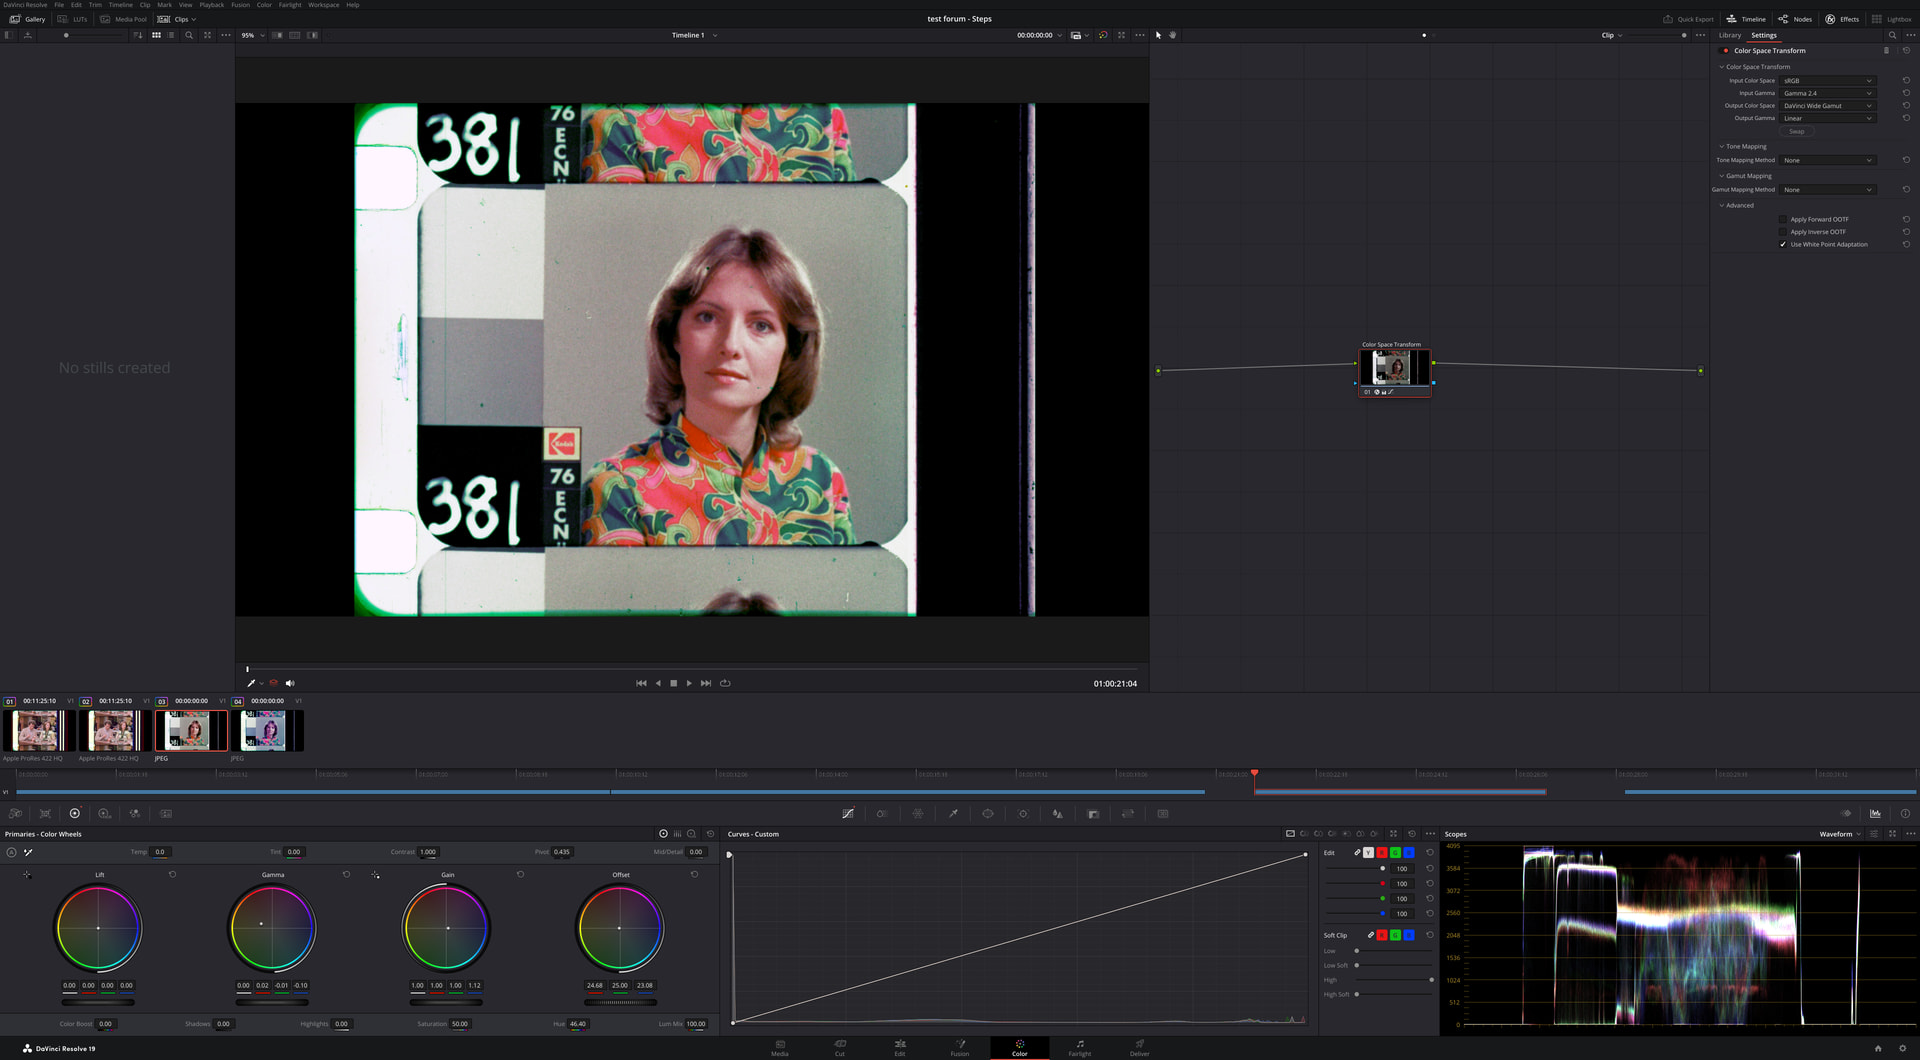
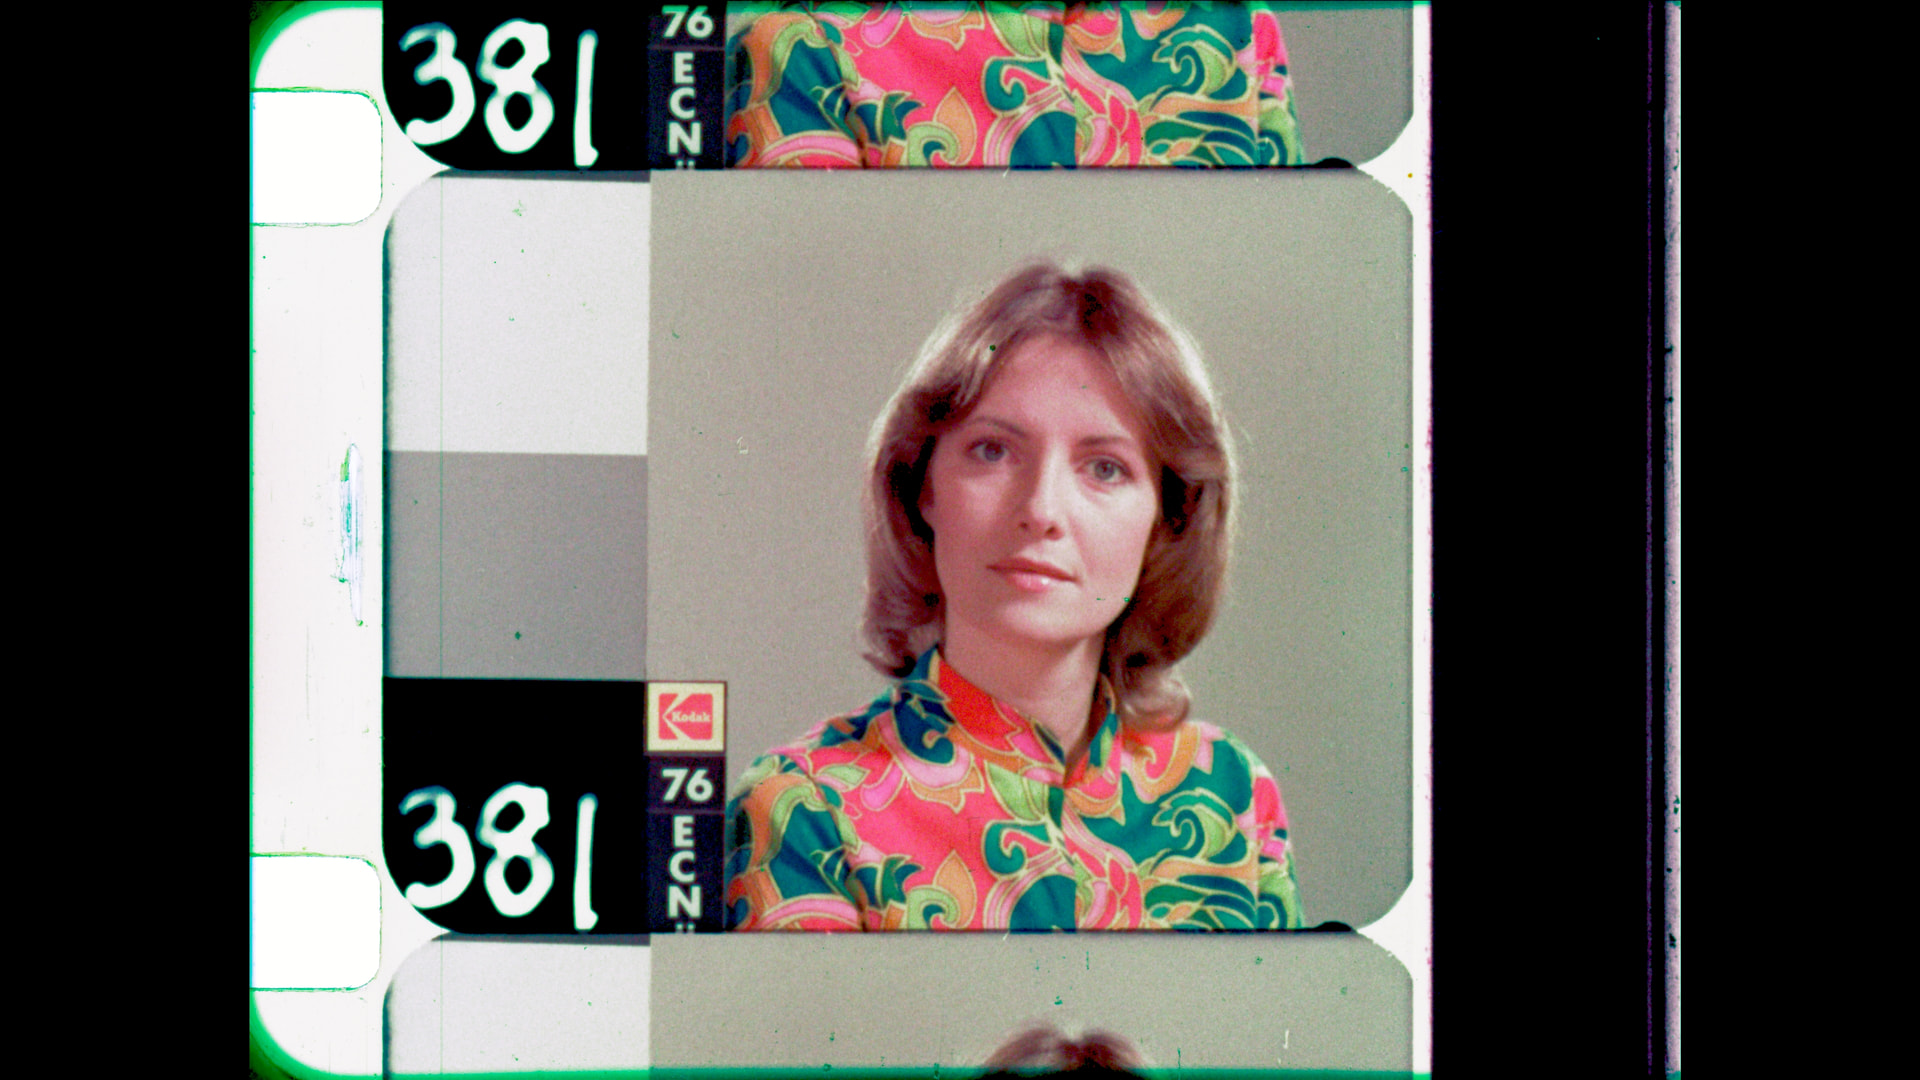
Here’s an MOV file with part of the program and a DPX file of the China Girl before the third node is added:
… and when selecting low on the vectorscope, it will be centered.
Looks like the DPX was generated with Resolve, and the DPX file has the very dark levels clipped (bottom flat-line).
Here is the DPX Girl node (the second node does not make any color changes, only adjust the level down a bit).

So this area of the waveform needs balanced? Would adding a node achieve that? How are levels adjusted?
Yes, the black levels affect the overall image, even if these are not showing because of black clipping.
Another node may not be necessary, since it is iterative, it is best to adjust on the same node:
Offset → Gamma - > Gain → Repeat until Dark->Grays->Whites are balanced.


I’m seeing a magenta cast.
I don’t have any good examples at the moment, but this is how I’ve gotten decent results:
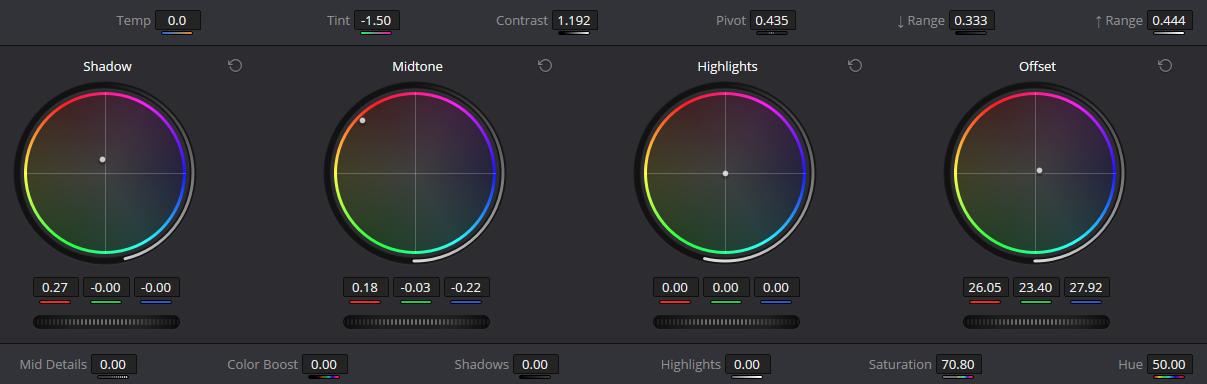
I have multiple Vectorscopes open (each showing either Low, Mid or High at 2x zoom), plus Parade and Waveform. Then I push around Gamma and Gain until the High and Mid are as centered as possible. Then I go over to Log Wheels and adjust the Shadows (Low).
If there’s still a color cast, I’ve found that by changing Range to 0.444, you can use “Midtones” to subtly change the overall tone.
…Then I usually become color blind and have to let it sit for a while. ![]()
1 Like
I would point out that one of the biggest issues with color correction is that you shouldn’t look at the image for more than a few seconds at a time because your eyes are constantly white balancing what you’re looking at.
Really, can’t stress this enough. Doing color correction in a room with neutral gray walls, lets you reset your eyes. If you don’t have that, having a patch of neutral gray that you can look at periodically really helps. There are formulas online for paints you can have custom mixed at places like Home Depot, or you can spend a lot of money to buy pre-mixed paint online. Doesn’t need to be perfect, but it really does help. The human vision system is terribly unreliable when it comes to this kind of thing.
This is why learning how to use the scopes and relying on what they’re telling you is so important. You can do most of the basic color balance work on an image without ever looking at it, once you’re familiar with the scopes and how to read them.
In this case, the magenta cast on the face remains, and should show up in the vectorscope as an bit of a blob heading in the direction of M.
2 Likes
That’s really interesting and makes perfect sense.
I just created a neutral grey image, and I think I have a little grey card for photography lying around somewhere…
Also, it’s possible that the monitor isn’t well calibrated or that it does some kind of adaptive color routine (one of my notebooks did that when running on battery…). I don’t have a proper calibration tool either, but I’ve used this (ancient) image to balance out the colors with sufficient success, I think.
The idea is to make both sides of the displayed color match as closely as possible. I don’t know if it’s applicable for HDR displays, but I’ve found it pretty helpful.
https://web.archive.org/web/20180809141651/http://www.skpphotographers.com/pt_gamma (Images are gone, unfortunately).
1 Like
I mentioned it earlier, excellent suggestions @friolator
It also helps doing color grading when there is no mixed ambient light temperature, so I prefer to do final grading at night when light can be controlled, and use the gray on the monitors.
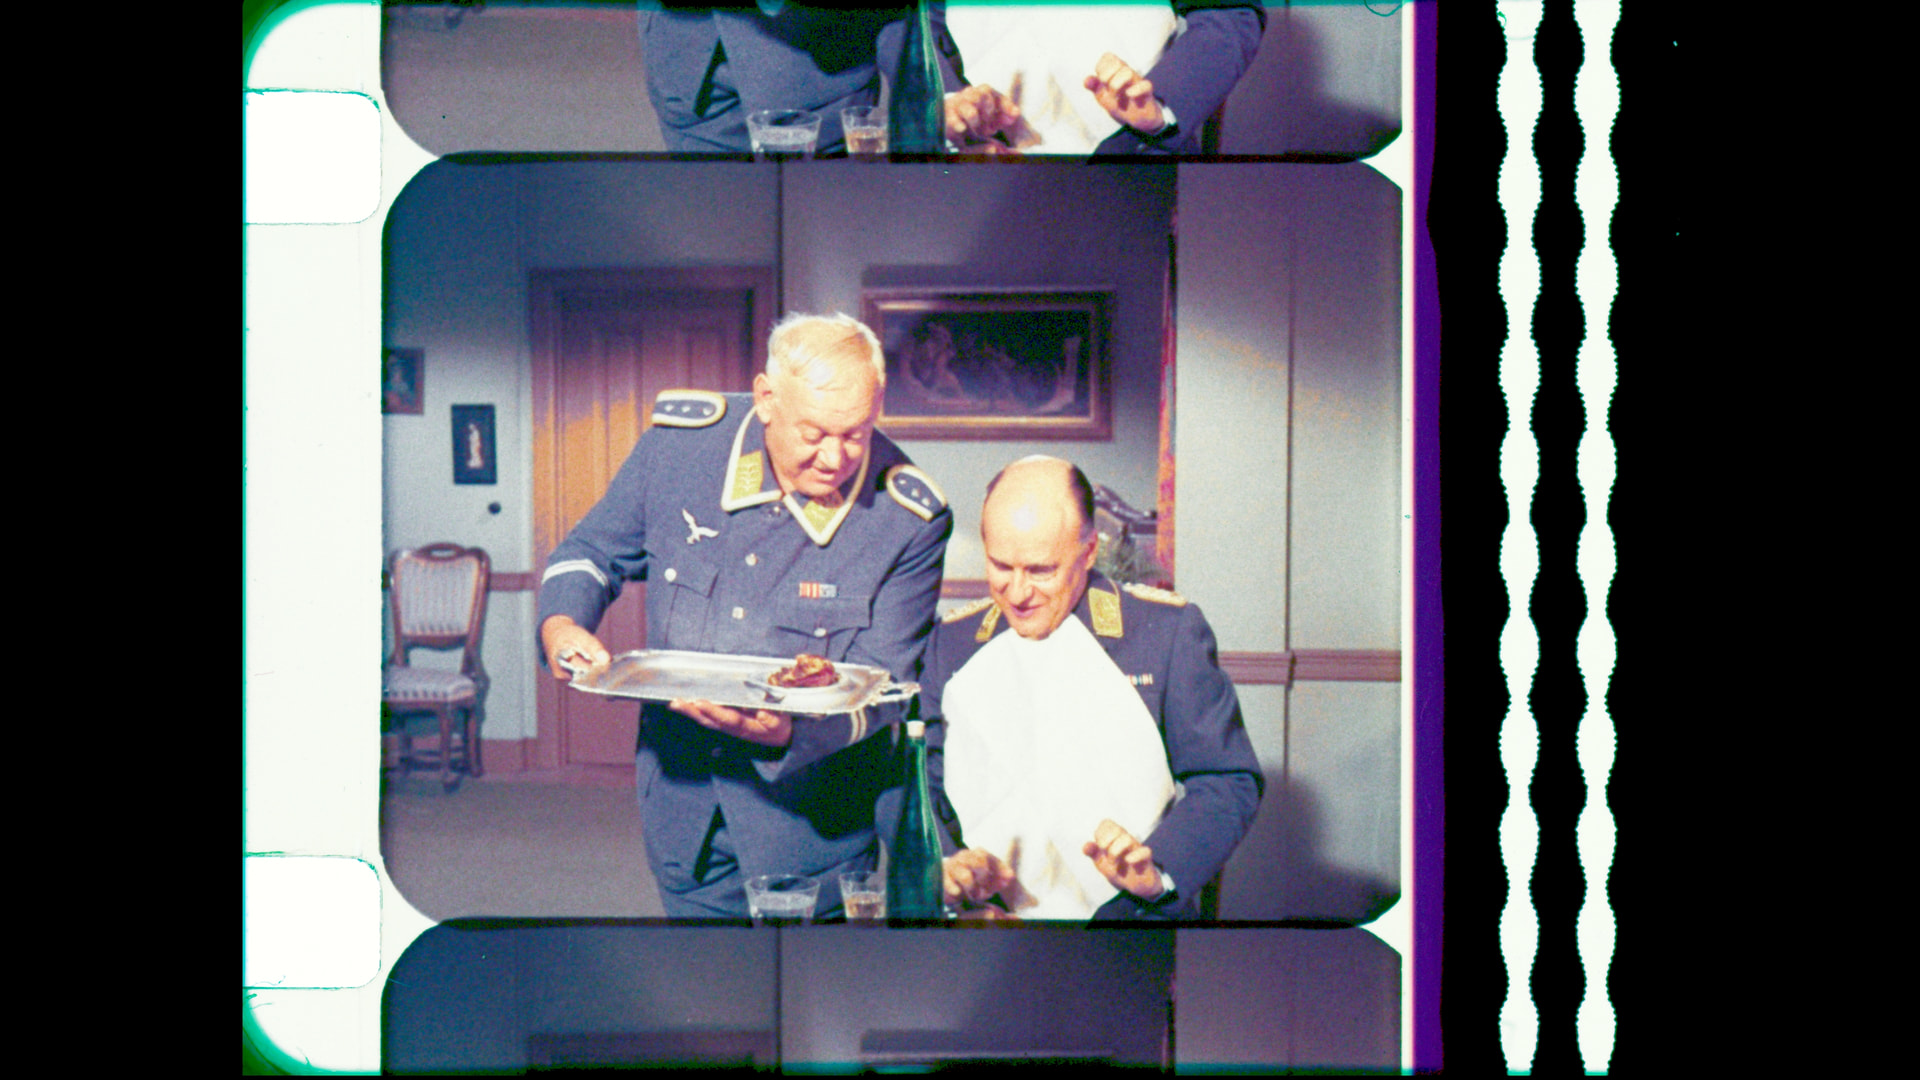
I included a link to a Drive folder with a sample PR422HQ file from a faded scan. I would appreciate if some others could take a look at that and see what they come up with.
Does this file work?
I’m not a professional, so better listen to the others in this thread. ![]()
I actually think that this looks fantastic, much better than what I’ve been able to get. Much less green. Thanks!
1 Like
Thanks. ![]()
I’ve noticed that I’m doing better when I zoom into the frame so I (and the scopes) don’t get distracted by the film borders.
You can do about an 80% correction or so in-scan and it’s safe, going beyond a certain point will degrade the quality of the scan. What professionals do is they test those setting thoroughly so that they know where the “safe” threshold is.
Scanning too fast will give you motion blur and soften the image. I’m guessing the one you’re working with does not have HDR, so try doing some tests with different film at different speeds and compare the output. 30fps should really only be for proxy scans or “access copies”, generally speaking you should run it at 15fps or slower.
Make sure you switch off the artificial sharpening. In the software it’s called “filtering/aperture correction” and the default setting is 0.3 IIRC you need to set it to 0.0 to disable the sharpening. You can sharpen up the scan as much as you like in post after the color correction (and grain management) and achieve a better result.
In terms of documentation, it may be worth reading Blackmagic’s documentation. Even though they are very different machines, the documentation may still be useful.
I’ve been using ProRes 422 HQ for scans. I’ve been reading about ProRes 4444, which is intriguing, but will of course take up more storage space. I kind of want to stick with 422 HQ, but I’ve read that 4444 would be much better for color grading and correction.
A recent 27-minute 16mm scan encoded in 422 HQ, scanned at 5328x3840, totals around 348 GB. What would the file size be if that scan was encoded in 4444?