If you apply a proper rec709 gamma-curve (which my script above would do), you are going to end up with a result different from the libcamera-output, given you used the standard tuning file during capture. Only if you use the scientific tuning file, the colors of libcamera should match the colors obtained by developing the raw data.
Again: do not use the standard tuning file of the HQ sensor for such experiments. It’s screwed…
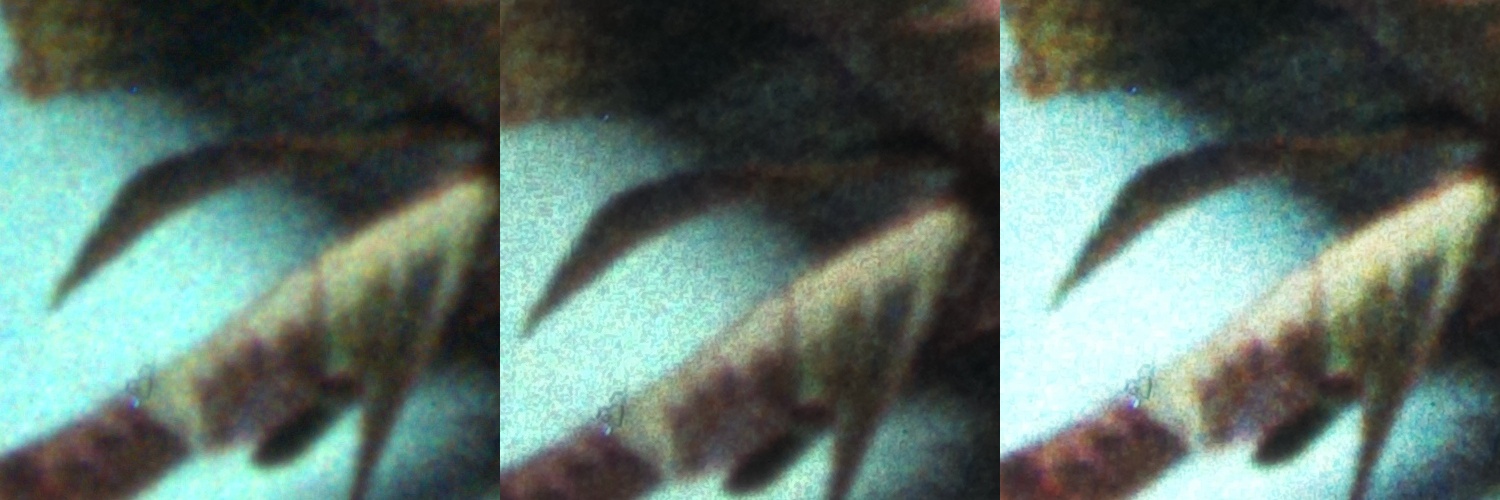
From left to right DNG, JPEG scientific, JPEG default
Yes indeed with imx477_scientific.json the overall contrast between dng and jpeg is similar. But there remains this impression of a greater local contrast and a better resolution, I do not understand why?
@dgalland – the results of the two jpegs are exactly as I would have expected it. How did you develop the raw? For example RawTherapee applies (without asking) a presharpening step on the Bayer data. As I mentioned, different software will yield different results, even if the steps are the same, due to implementation details.
The dng seems to be based on my “poor-man”'s debayer. If so, note that libcamera is using a much better approach for debayering and the full res image as a start. (Not only half of the sensor’s resolution as in my script.)
In all cases, raw development starts from the full resolution DNG image, I tried various methods, rawpy with different algorithms, Rawtherapy, Adobe Photoshop (cameraRAw), the results are quite similar despite slight differences but never with this increased local contrast of the native jpeg image.
So it would seem that the debayer algorithm on the PI (hardware in the ISP and RP1?) significantly increases the local contrast, not sure that this is a good thing for subsequent post-processing?
Hello again!
…Had a half-written reply before the forums went down which seems kind of obsolete now, so I’m butting in with another question regarding stabilization.
Meanwhile my scanner is running again (a few minor tweaks left, I guess), and I successfully scanned my test reel. When stabilizing the footage, for some reason, if I don’t set the cropping ratio <= 0.96 the stabilization turns out verry jittery. I didn’t have that with the filmed footage from the projector, probably because the frame was already stable at the perforation and I had very little border surrounding it. I feel like I also have to zoom in quite a lot, which I’d like to minimize. And I’m not quite sure what “zoom” picks as the center of the frame.
Is there a resource-friendly way to kind of two-pass stabilization in DaVinci? First pass would be on the perforation-area only (as cpixip does, but without leaving dng territory), and afterwards on the actual film, so I could decide how much of the original shakiness I want to preserve. I did look for tutorials but couldn’t quite find something that worked for me… (Or maybe I just really need to finally upgrade my PC).
@Roland: You mentioned running a “second stabilization pass”. Is that somehow “on top” of the first, or just different settings?
I tried using the stabilization tab on the color page with two consecutive nodes, but it seems you can only have one round of stabilitation on a single clip. How do you do two passes?
Edit: the answer is probably “Fusion”, I’m just wondering whether I can get around it.
I simply split such things in independent processing paths, that is different timelines. I do one thing in timeline01, store the result (rendering frames out) and reload the result in a second timeline02, doing other things I want to do. If you use 16bit tif-files as intermediates, this assures no noticable loss of image quality. Probably a simpler approach than going through Fusion…
Yes I followed all the discussions on this subject. These are only researches to better understand the sensor/ISP/libcamera operation. I was only wondering if to obtain a classic 8-bit JPEG it was better to go through ISP/Libcamera or to convert the RAW ?
I’d opt for the later. Because when developing from the RAW, you have usually more choices (what type of debayer, adjustments to exposure and color temperature/tint, shadow and highlight adjustments, to name a few) compared to the choices made automatically by the libcamera-software.
The choices made by libcamera are governed by the tuning file you are using.
Now, the standard tuning file has a few entries (most notably the lens-shading section) which does not make sense at all - with whatever lens you are going to use (the scientific tuning file lacks this section, by the way). So for best results, do not use libcamera to generate JPEGs - do it yourself with an appropriate RAW developer software. Trying to summarize:
HQ sensor/libcamera-output with standard tuning file: bad - because the errors in the standard tuning file.
HQ sensor/libcamera-output with scientific tuning file: kind of ok for 8-bit output. Faster than RAW development.
HQ sensor/picamera2-RAW output with normal tuning file: not that perfect. (Color matrix probably suboptimal - not checked recently).
HQ sensor/picamera2-RAW output with scientific tuning file: preferred way.
Images with intense cyan/blue may distort the lower levels of the red channel (worst for standard tunning file, but also present with scientific tuning file).
I agree with @cpixip. A PNG or JPEG out of libcamera2 is a lottery. When time/storage/computing power is not an issue, capturing/developing raw with the scientific tunning file is the way to go, especially given that resolve provides a great menu of options to develop the dng.
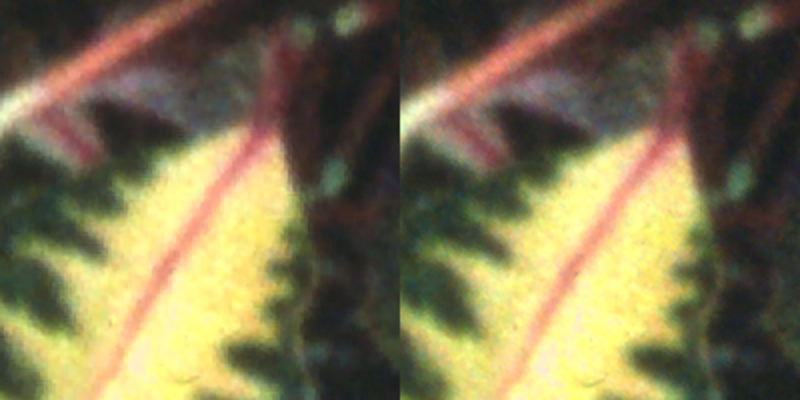
It is indeed the libcamera sharpen algorithm that is responsible for this exaggerated local contrast.
To disable an algorithm in the configuration file:
Both images are good and very close. At the pixel level the DNG image shows a regular structure (film grain !!) that does not appear in the PNG image (thanks to the micrometric focus)
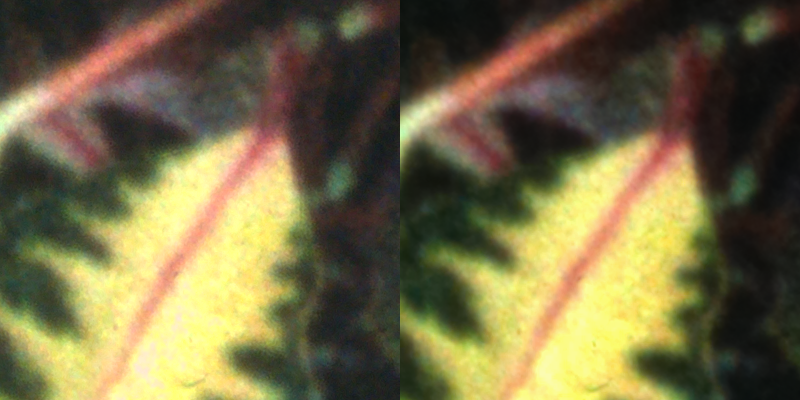
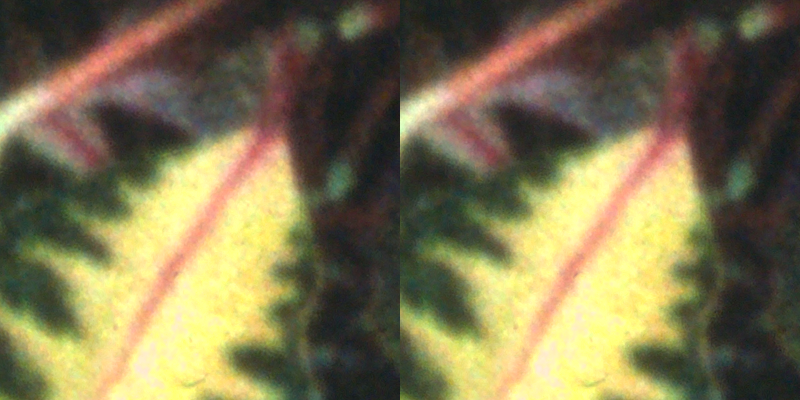
Comparison of DNG without or with compression (CSI2P)
The advantages and disadvantages of this compression have already been discussed. At the pixel level it does indeed seem visually lossless
For me none of these images are really bad. The full resolution seems to bring an advantage, it is the only one that highlights the underlying grain. If we pay attention to the parameters of the configuration file the libcamera JPEG or PNG image is satisfactory. The compression of the raw CSI2P does not seem to degrade the image, it is interesting because of a better fps and a smaller buffer but be careful in this case the conversion to DNG is very slow. The idea would be in client-server to transmit the raw sensor buffer compressed (12.5MB) or not (25MB about 4fps on the network) and to perform all the DNG, JPEG, PNG, … processing on the PC
@dgalland
Concurrently with your posting, I have been experimenting with 12 bit capturing raw and binning the resulting R-G1-B-G2 as a 16 bit TIFF.
My focus is not great as it is manually done by separating the camera stand from the scanner, but for the comparison all captures were virtually the same.
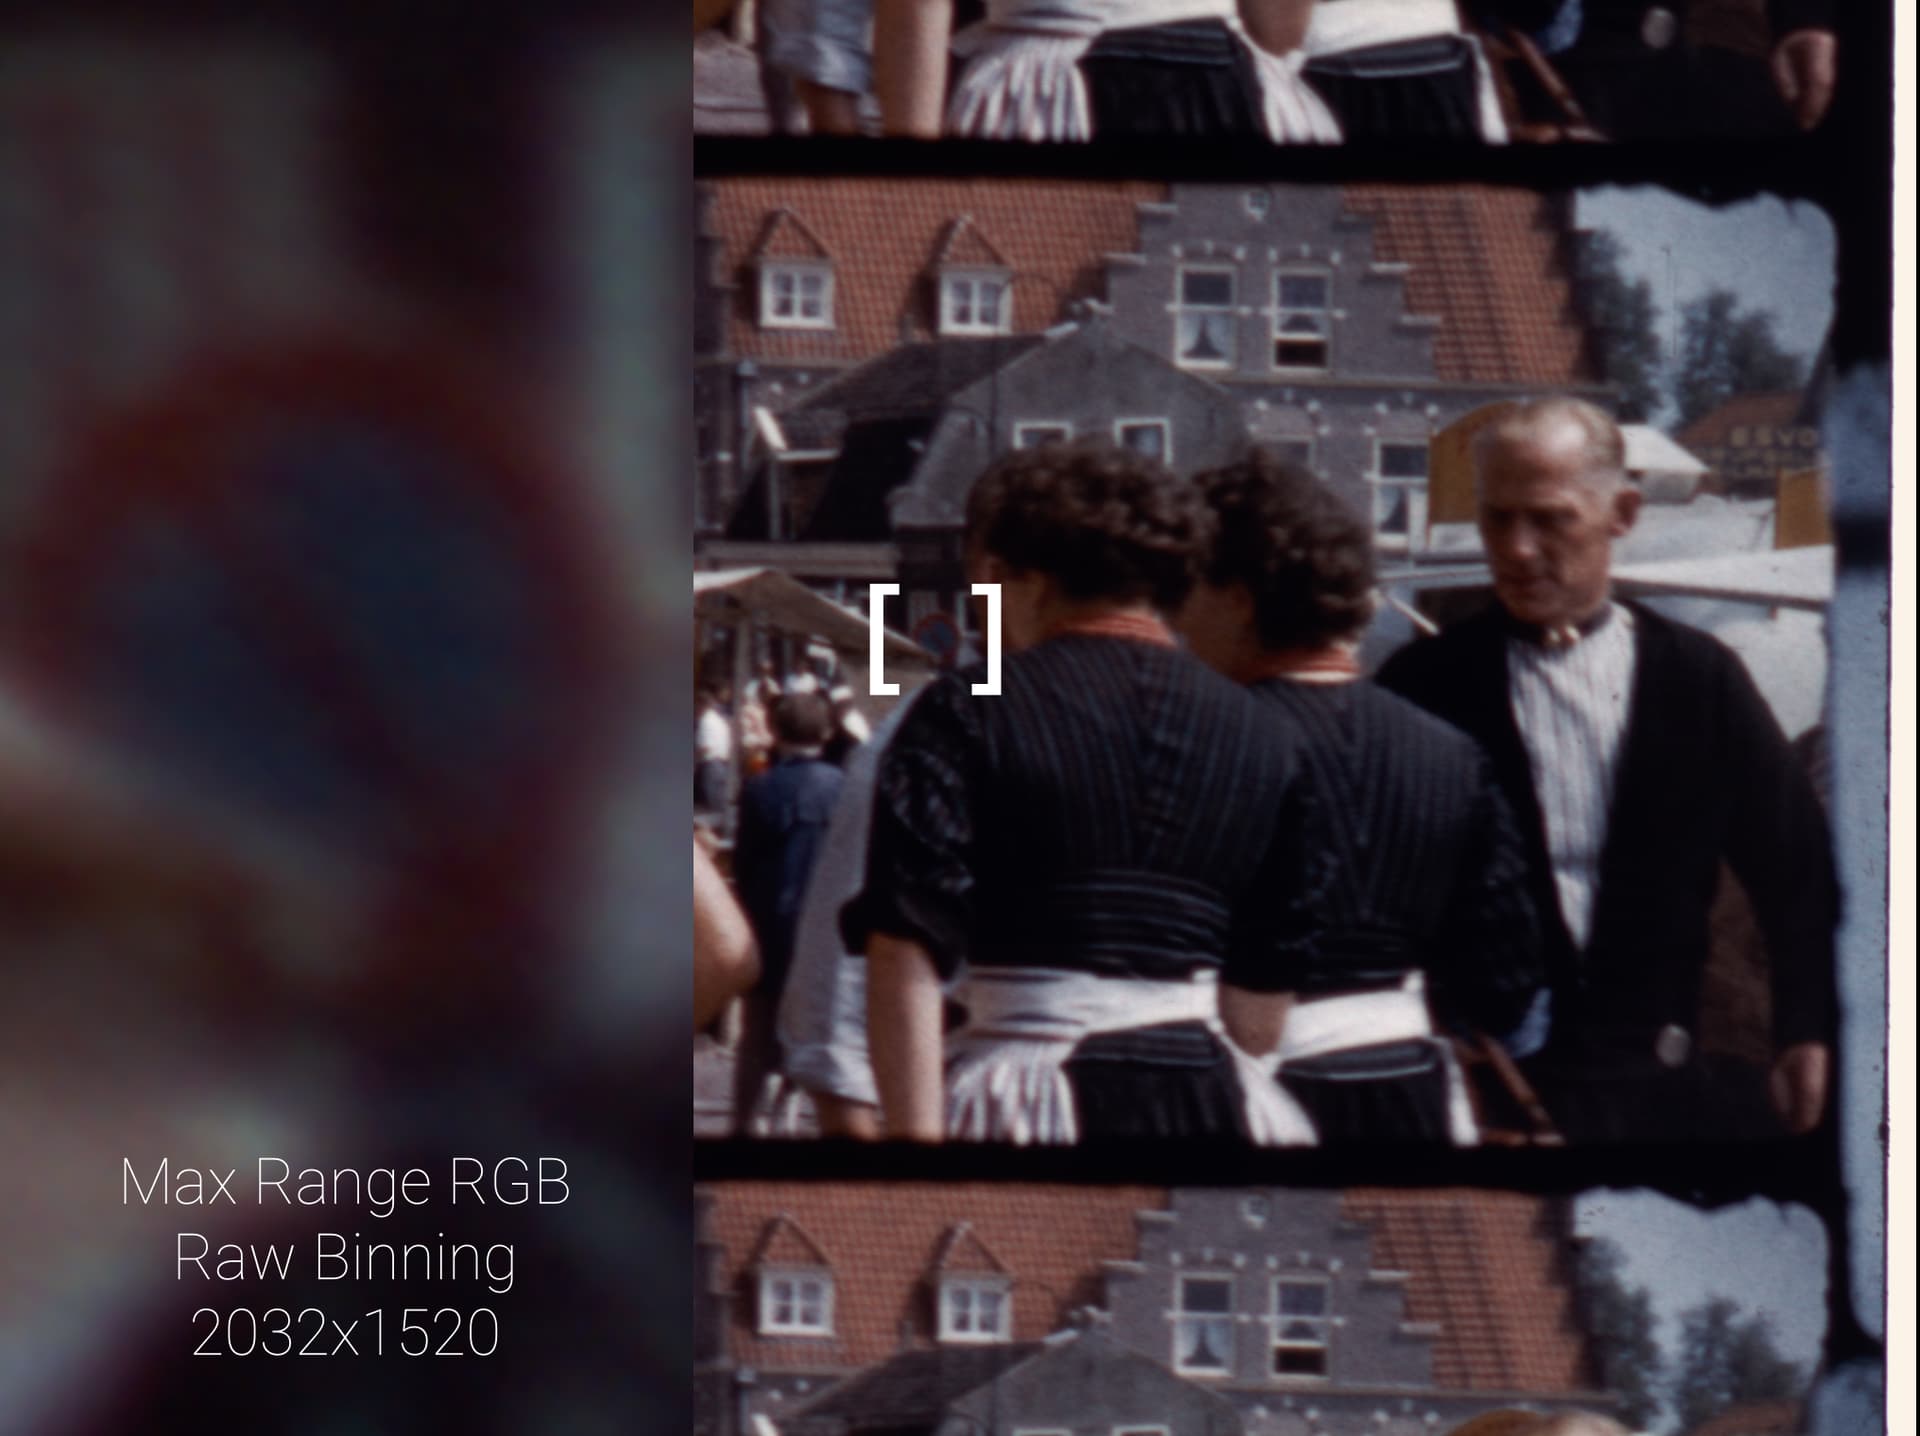
The first raw capture is done all channels at once, aided by the G1+G2 addition, results in unbalanced RGB, with red and blue significantly smaller.
For the second capture, each channel is captured with light adjusted to capture the best range of the image/channel. In this case, the red and blue would have a higher level than normal, which is also unbalanced.
Each raw array captures above are saved as a linear TIFF.
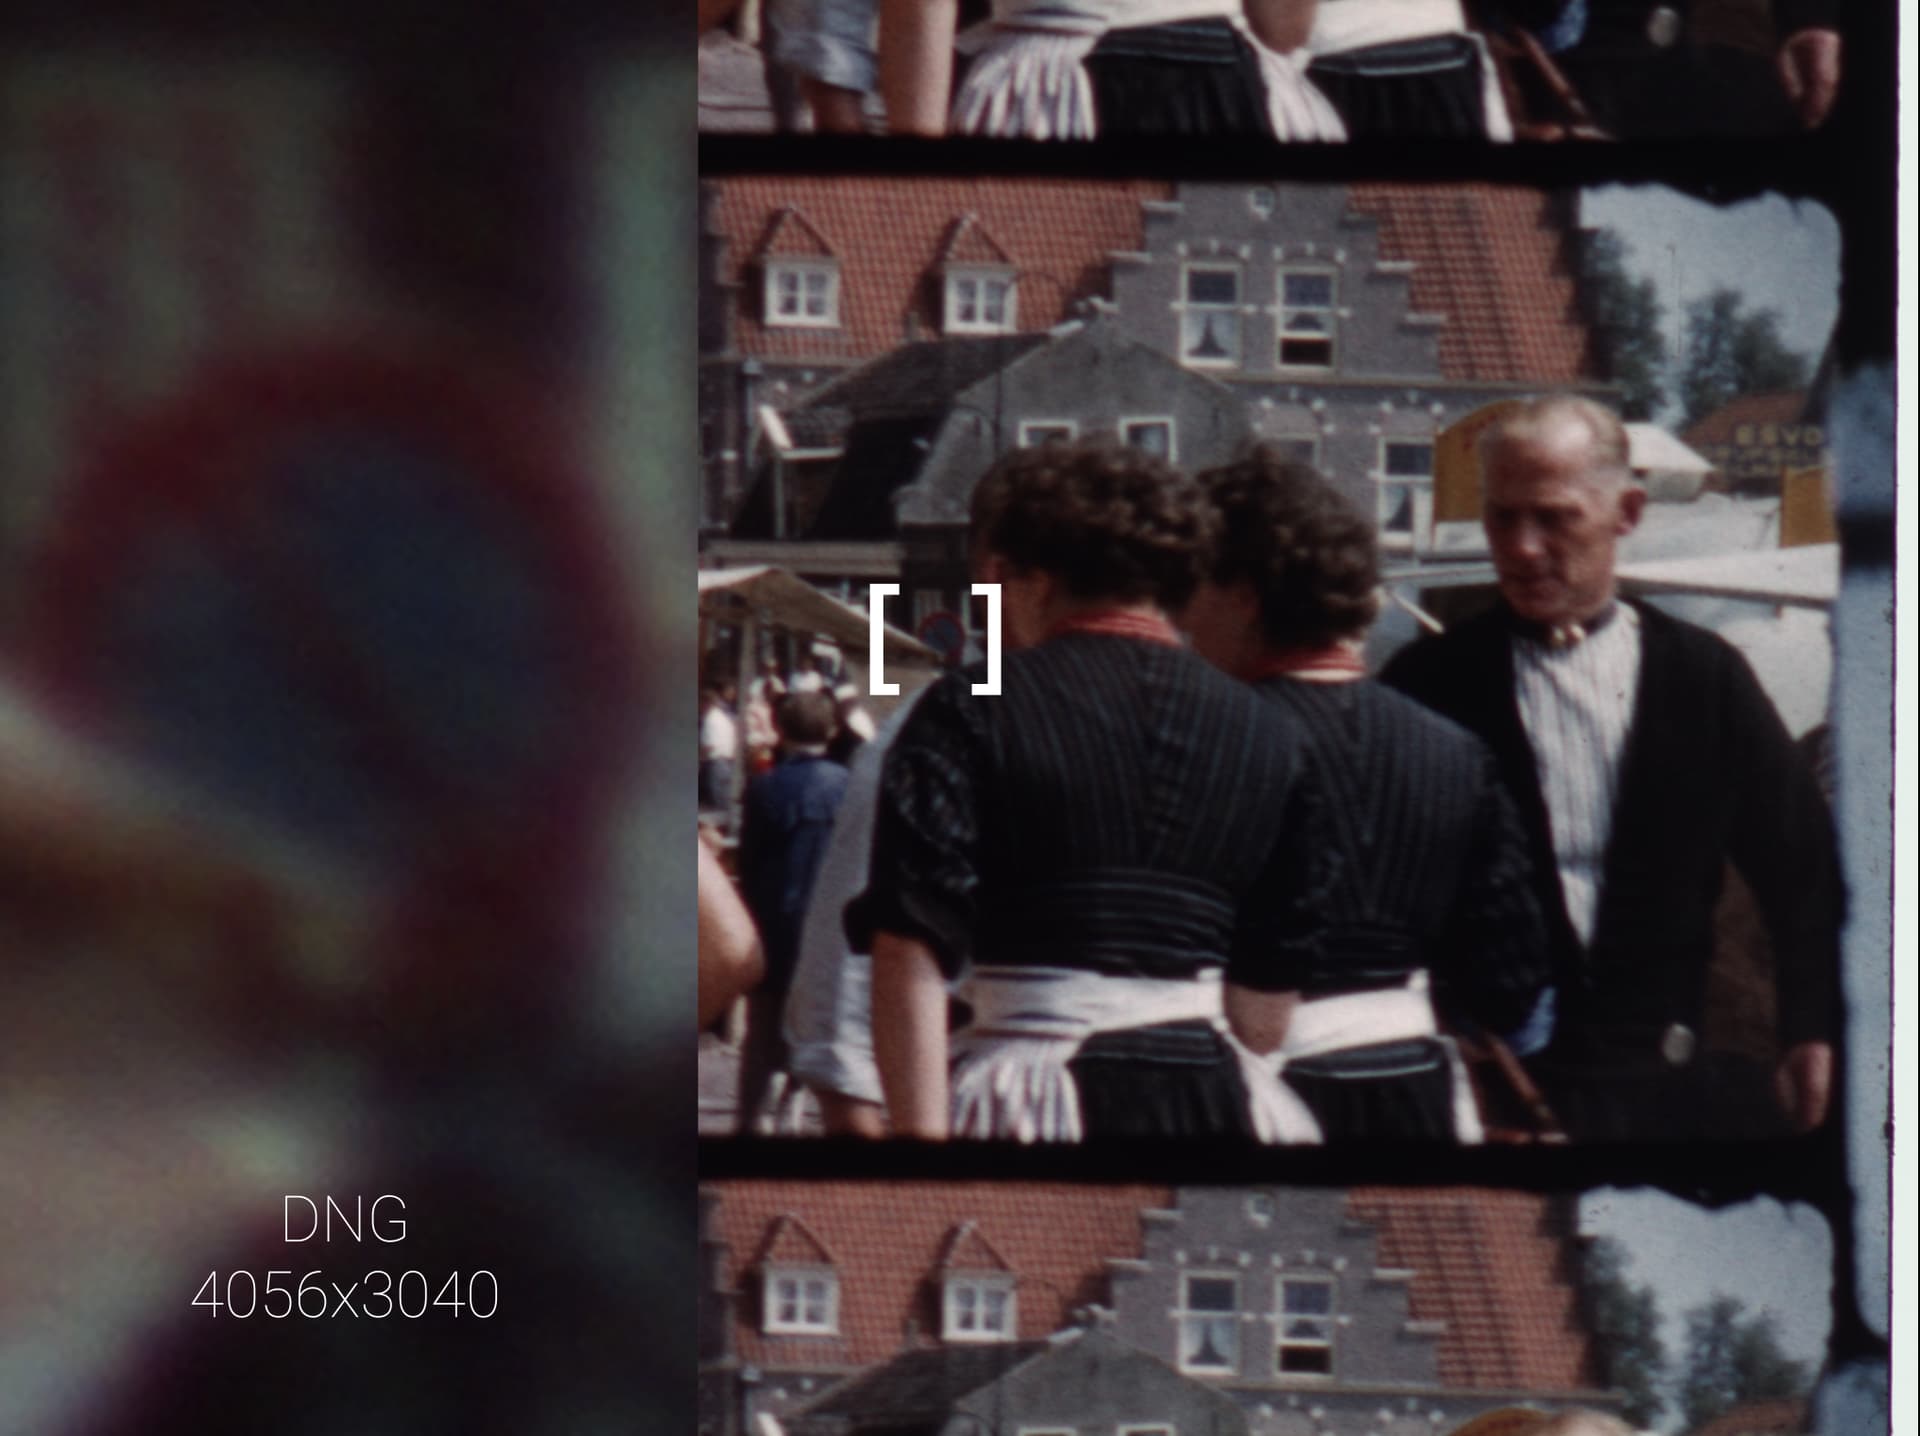
The DNG is captured with the same lighting setup as the first one, adjusting R and B gains in the setup.
All images are then imported into resolve.
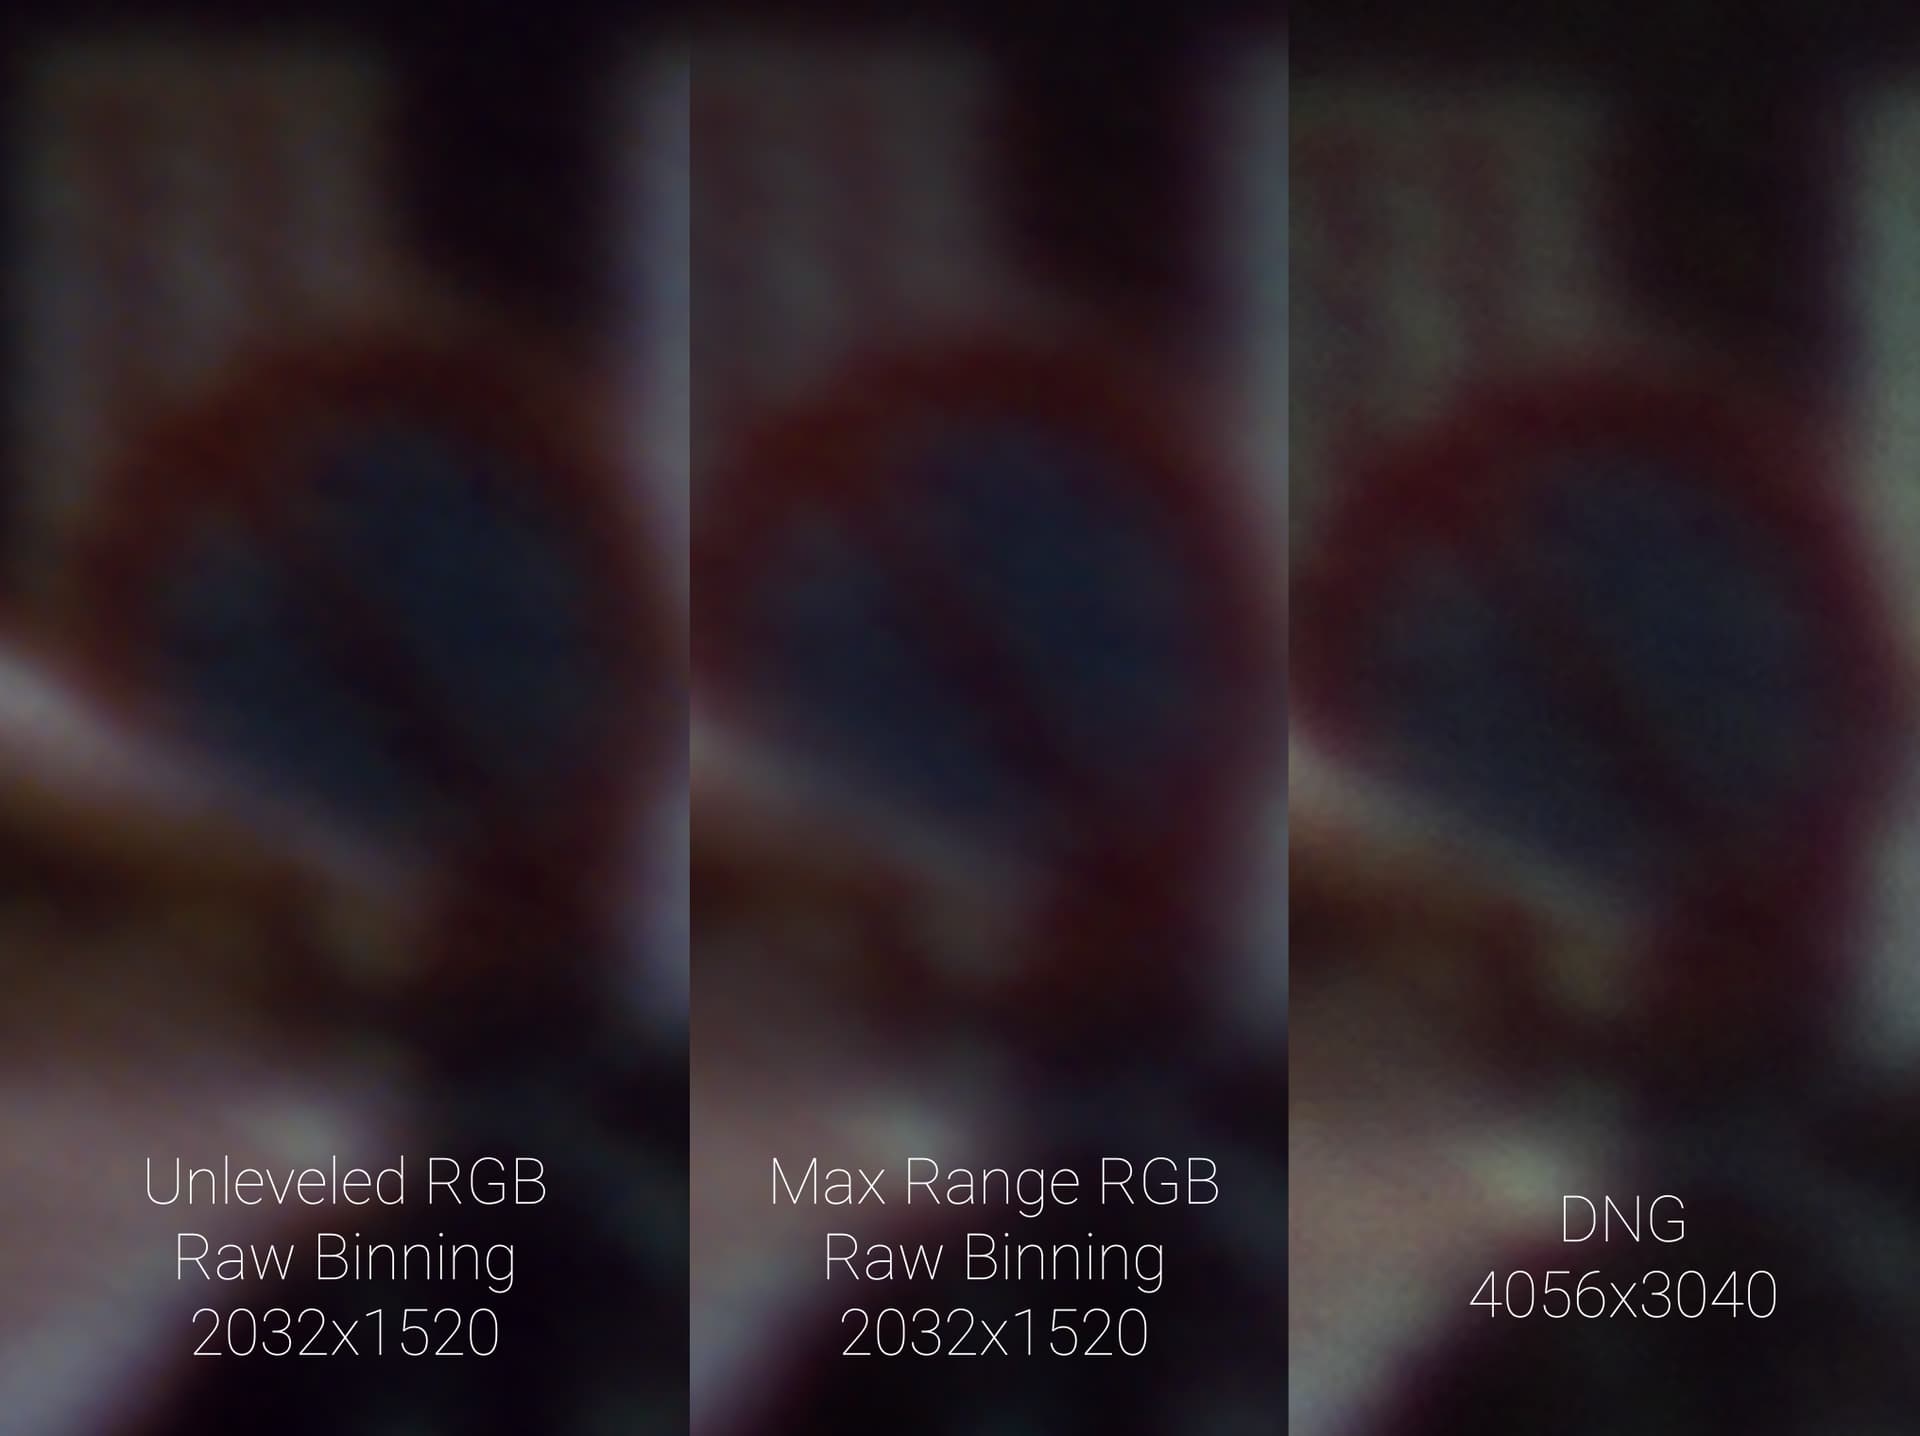
For color balance, the second capture was adjusted using the Autolevel (amazing), and the unleveled raw and dng were manually adjusted for best color match.
The timeline resolution was set to 2032 x 1520, the zoomed section for the dng is directly from the full resolution, but the full frame would be resized to the timeline resolution.
The composition of the images was done in Resolve, and all 4 images posted (png) were the output of resolve (The forum makes the conversion to jpeg).
I purposely selected a colorful dark detail, since the idea of capturing the raw channels separately came about on trying to work a film which had impossibly dim red channel information, and the exercise was to gauge the pros and cons when capturing a reversal film with good colors.
The 16bit TIFF raw is similar in size to a DNG. The capture and debayering/binning were done at the raspberry pi 4 doing the capture.
As I had finished all my scans I did not update my yart project but I did some experiments with picamera 2 as in my posts above. I also wondered about using a DSLR instead of the Raspberry camera as seen in some DIYU telecine. So I mounted my Canon EOS 90D (APS-C sensor) with a 23cm extension tube and the same 50mm Componon and obtained the image below JPEG 6960x4640 (automatic exposure and AWB). I find that the result is really very good, better resolution at the pixel level and better dynamics, the details in the dark are clearly visible without “burnt white”. I also did some software tests with the Canon EDSDK.
Interesting comparison…
Can you confirm how the Rpi HQ was set? jpeg or raw? standard or scientific json?
I initially did all the scans with a Nikon DSLR D3200 (24MP 12bit Raw).
The more pixels, the more bits/pixel (I think the D90 is 14 bit) the “more better”
In general, the DSLRs have also extensive image processing built in, and that also makes a difference to take advantage of the range of the sensor dynamic range, even if it is 12 or 14 bit. Having the double or more pixels of the target video (4K for me) made a difference.
On the other side, working around of the limitations of the HQ with separate exposures per channel and/or stacking, is helping stretch the 12bit/channel/pixel limitation of the HQ IMX477. Primarily on dynamic range improvements. The red channel of the Rpi is quite noisy, so channel stacking makes a significant improvement.
The extra exposure time is a drawback is regained a bit in post. Resolve handles well 16bit uncompressed TIFF image sequences (even in my circa 2011 machine). It does not handle real time 12bit NEF image sequence.
Here, the PI/HQ is in JPEG/Scientific JSON.
So yes, capturing in DNG can improve, as explained in other posts. Below is what I was able to achieve in DNG (processed by RawTherapy) It’s a little dark but if we increase the exposure we get burnt whites
Thank you.
The jpeg of the Rpi HQ lacks the benefit of the image processor of the DSLR. It is a huge advantage even if it was the same resolution/pixel depth. And certainly the work around is the DNG with adjustments.
So I am curious, it seems in the PiHQ camera vs. DSLR, we are talking worlds different sensors, lens requirements and just physical space. One can go with an industrial camera (black fly has been mentioned, Basler, etc.) . These are not inexpensive options and you are still having to get the lens system. I don’t see much talk about Black Magic Designs much. It would seem they have a lot of the desirable characteristics on is looking for, and a used cinema 4K is relatively affordable. Am I missing something?
Not that this fits in with the overall Kinograph mantra. I think anything that requires buying used components is a bit of a non-starter. Modifying old projectors for example, just seems like a bad idea. Unless one found a stash of new-old-stock, of say 1,000 Elmo projectors in a warehouse, it’s alway going to be a lot of overhead sourcing components, modifiying them, etc.
Among all the solutions, everyone must make their choice based on the desired goal and budget.
The first choice is to modify a projector while keeping its drive mechanism or to build a device with its own mechanism, like the Kinograph.
Modifying a projector is a DIY solution that’s not too difficult to implement and can produce good results at a vey low cost, for example with a Raspberry HQ camera.
Obviously, there are limitations: no multi-format support, problems with damaged films, frame-by-frame capture with intermittent movement and therefore low FPS, …
Finally, as discussed in the posts, the HQ camera produces good results, but not the best possible and the software stack isn’t yet stabilized, a DSLR might be preferable.
Obviously, all of this doesn’t match the objectives of the Kinograph project, as Mathew explained well, it is absolutely not comparable. But still thanks to Mathew for hosting us on this forum !!