Sprocket Registration

Wow I never thought of that! The video was really helpful. In it he mentions the “high contrast” of the material under the mouse. I wonder if it would work with film and how close it would need to be. It’s worth a try! I’ll pass this on to Brooklyn Research to throw into the mix of solutions we’re exploring.

Thanks for sharing!

@PM490 here’s what the contractor had to say. I agree with him (although I think you could probably mount the sensor at the gate without contacting the film directly). I would put this mouse idea in the “someone should definitely try it at some point” bucket for now while we move ahead with what we have more confidence in.

This is an interesting DIY approach, and something I would be interested in pursuing for future projects. However, there are a couple potential issues with this approach.

1.) Optical mice are calibrated to be on/touching a surface. If we are to track the movement of the film, we would either need to modify an optics and mounting of the sensor in order to work on the film directly, or we would need to have a secondary encoder that the optical sensor system would be reading. These aren’t deal breakers in and of themselves, but a potential challenge.

2.) The speed of sensor may not be calibrated for the speed of the film. While you do get a good deal of accuracy, it could be that when you are running at the full film speed you get errors in distance compounded over time. I’m only guessing this based on the video, and variable readings HomoFaciens is getting when changing the motor speed.

@matthewepler makes sense to not change while you are making PCBs. I was genuinely curious if this had been tested, I am certainly intrigued by the possibilities.
Please note that I have approached the DIY scanner sacrificing speed for quality (frame-by-frame), so I should have mentioned that the approach may not be suitable for high frame rates. But when looking at your video about making multiple exposures for the same frame, it would make sense that the target frame rate for the scanner would be slower than real time.
At this time, I have a harvested gate of an old 8/Super 8 projector, so I am improving other areas. Ultimately (if I continue to put time on it) the next step would be to replace the gate, and that’s why I am looking at other ways to achieve accuracy and quality. Also because I am terrible with mechanics, and the tolerances of 8mm are hard to handle with bad mechanics. So if you have a cheap sub mm sensor, there is a lot of things that can be done in the programming side, hence my curiosity on these kind of sensor and this sensor type would really make sense for the patent approach (but probably not for real-time scanning). Thanks for looking into it and appreciate the consultant good feedback.

I know there was a thread around here a while ago about how transmissive certain film stocks are in IR, but now I’m wondering if there’s data floating around about absorptive or reflective they are in IR (from either the front or back).

The old Imagica scanners don’t have a problem with clear film and they use sprocket sensors. The model they use is Keyence FS-T20, which is long since discontinued. But Keyence is still around, so I’m sure there’s a replacement out there. What’s nice about these is that they’re fine-tunable. You get feedback in the form of an LED meter that works like an audio meter. As you adjust the sensitivity, the lights light up or turn off, depending on the change you’re making. This lets you dial in a setting for the film. We tested it with neg and print and it worked great, even with clear leader.

Attached is the datasheet for the FS-T20.

FS-T20_SG_en-GB.pdf (467.6 KB)

1 Like

I contacted Keyence regarding the unit that would work best. As mentioned elsewhere in the forums, the recommended units are:

Sensor: FU-20
Amplifier: FS-N41P

Here is the quote I received from Keyence for those units. Together, the cost is $370 (minus whatever discount they throw at you. In my case, 15% for “prototyping”).

That’s a steep price. If we can get the same data from a reflective sensor at a fraction of the cost (our current plan), then I’ll gladly take that over this.

Quotation_11827482.pdf (63.8 KB)

That’s similar but a little higher than the price I got from MotionUSA for the SensoPart laser/sensor pair + cables, ~$309 before shipping. These are the ones used by the previous generation Muller HDS scanner:

Receiver
Transmitter

1 Like

@cpixip have a question regarding your experience with 8 film sprockets. The samples of damage/distortion shown in this thread consistently show the damage on the (pictured) lower side of the hole. Would you say that damage is consistently on the one side? Thanks

@PM490: well, that the damage in the examples I posted is only on one side is probably just a random occurance. There are various ways to destroy a sprocket. In every Super-8 projector I have seen and dismantled, there are at least two sprocket rollers with nice teeths which grind into the film should anything happen during projection. Than there is the claw which advances the film frame by frame - it usually makes contact on only one side of the sprocket (it is smaller than the default sprocket size). However, in most projectors, these claws are mounted on rather long beams and the mechanical force exercised on the sprocket is therefore rather limited. In addition, sound projectors have rather long and winding film paths below the projection area which feature nasty stuff for destroying the film as well.

Actually, that analysis shifted me away from using an old projector as basis for a film scanner. These machines can destroy fragile material in seconds.

My stock of Super-8 material is rather limited - it is made up of my own Super-8 movies plus several commercial advertizing reals of the late seventies and two movies I sourced from Ebay for experiments. That’s only a small sample (some hours of footage at most), but broken sprockets are actually very rare. Also, while I was afraid of substantial color shifts with these about 40 year old material, such a thing is actually not so frequent as well. Actually only a few non-Kodak reals I bought in the beginning of the eighties in the US do show noticable color shifts as well as shrinkage and warping.

So, to set the record straight, here’s a nice example of a sprocket where the damage is on the other side of the sprocket: :smile:

2 Likes

Thank you @cpixip that’s what I would expect but it was puzzled on the coincidence. I am thinking about building an 8/super 8 transport. My present built uses a gate/claw combination harvested from a canon projector. Among the things I am curious about it is using non conventional methods for film movement, particularly an optical flow sensor. My background is electronics, so working the mechanics on the tolerances of 8 mm is going to be a major challenge for me, reason why I would like to rely heavily on electronics/software and keep it as simple as possible. My target is frame-by-frame speeds, but would like to do some testing at 24 fps of the sensors.

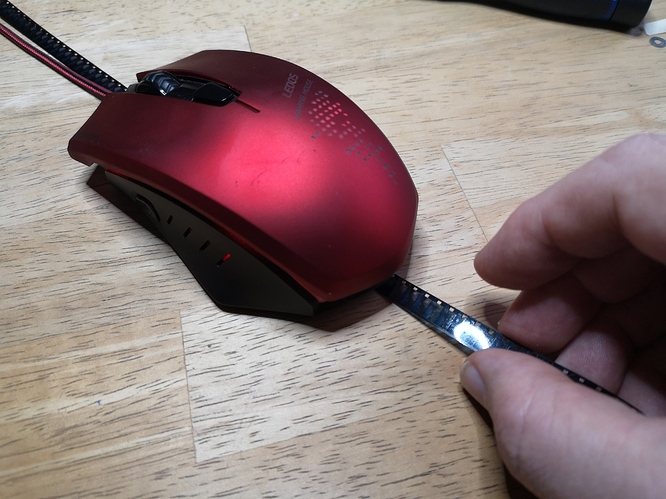
Hi @PM490 - actually, your comment about optical mouse sensors prompted me to do a very basic test of this idea. I simply pulled a piece of scrap film back and forth under my computer mouse, like here:

… and observed what happened to the cursor on the computer screen. Turns out that I see the mouse moving corresponding to the movements of the film. It seems that the sensor is less precise when it’s looking at the smooth surface of the film stock, compared with using the emulsion side.

Given that the actual mouse sensor hovers a few millimeters above the surface, and that there are interfaces available between old mouse sensors and the Arduino-family, one could imagine utilzing something like that as an optical flow sensor. At least there is plenty of headroom for the sensor (it would hover a few millimeters above the film surface), and it seems to generate a useful signal. The advantage of using an optical mouse sensor would also be that all the realtime computations and other design challenges are already taken care of by a mass-market product.

Actually, I think placing for illumination purposes a secondary LED opposite of the sensor-film-stack, in order to illuminate the film from below, could improve the tracking by the mouse sensor. The little camera in the sensor needs some structure to lock onto for tracking, and especially very clear or very dark film parts might be a challenge.

In your setup, where the frame position will be primarily defined by the gate/claw-combination, I think one should get a fine signal for a camera trigger out of such a setup. There will possibly be a limit on the fps with such a sensor, no idea how to estimate or test this…

Here are some additional thoughts with respect to a setup which does not use a claw to position the frame (continous film motion - not your current use case). In such a setup the camera needs to be triggered just at the right point in time to catch a frame.

Any optical flow computation can be expected to drift away from reality over time (that’s my experience from working extensively with optical flow algorithms some years ago, in another life… :sunglasses:). Also, if you are using optical flow algorithms, you are not tracking the sprockets, but just the film itself. So you need to somehow generate a secondary signal in sync with the sprockets in order to trigger the flash and the camera at the appropriate time.

One possibility to handle that challenge and still rely mainly on an optical flow sensor for tracking would be to use directly the frame+sprocket as seen by the camera and do a fast enough sprocket detection on the current frame. Once the sprocket position is detected, you can use the optical flow signal to predict the sprocket position in following frames. Then, after some time, the sprocket detection algorithm is run again on the current frame to resync the estimate of the sprocket prediction by the optical flow algorithm. In this way, the computational load stays limited.

Such a scheme is actually similar to the approach I am using in my own film scanner - which is a slow beast compared to your goal. I scan only about 18 frames per minute (doing stop motion and taking several exposures of each frame). Due to mechanical deficiencies, the sprocket position tends to drift over time. Actually, it is moving up and down quite a bit.

So after each frame is taken by the camera, the current frame is analyzed and the number of the steps moving the film forward is adjusted to keep the frame more or less centered in the camera view. For the sprocket detection, I am using the algorithm described here which is computationally fast enough for that purpose.

This gives me a coarsly registered sequence of frames which I correct for in later processing steps, basically using by the same algorithm in the post processing pipeline again.

I think something similar might be feasible to combine with a predictor for the sprocket position based on an optical flow algorithm which is once in a while resynced with the actual sprocket position

Hi @cpixip thanks for the great pointers. To clarify my posting, my present scanner is with claw, looking to build the transport without it. And it is just as slow as yours (about 20 frames per minute capturing 24MP RAW).
I am going to stick to slow frame-by-frame, mostly because I do not have the budget, but understand that the goal of kinograph is to be closer to real time, and while playing around will at least try to collect some useful info.
All pointers well taken, and yes my thinking about the light source is the same. The optical flow sensors at the end register light, so a light source through the film should produce good results. I am going to test this board which is the same type of sensor as a mouse/trackball. The specifications of the chip are impressive(6400 frames per
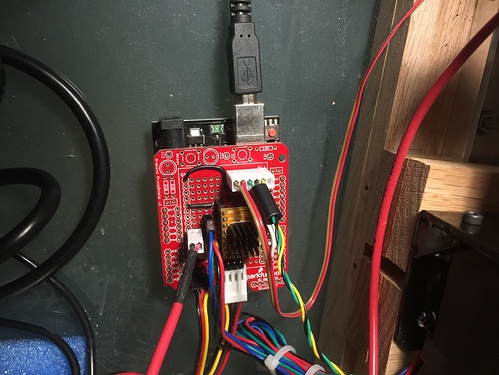
second), which will put the limitations on the arduino processing/transfer speed. The lens can be removed, and perhaps setup a different lens (optics is another handicap for me), but I was considering mounting the sensor close enough to the film, and setting a led or laser opposite to it. My initial thinking is if this can be made to work precisely enough, the idea would be to use it to measure film travel distance to control direct drive motors (steppers). I have great results on working with steppers and the quiet stepper drivers (TMC2208).
And yes, the idea would be to do forward prediction of sprockets, and having the control system catch a few frames of displacement and adjust accordingly downstream on the camera target.
While this overall concept may be harder for larger film, given the smaller dimensions of 8/S8, it should be sufficient. Again, as you can see, I am a better swimmer in the electronics/firmware space, so this forum is great to see other ideas.
Have a bit of challenge on available time, stay at home family with a toddler is consuming a lot of cycles… so it may be a while before I get it done, but using the time for thinking things through before start cutting and wiring. Appreciate all the great pointers.

Hi @PM490 - the sensor you linked to is an optical flow sensor for multicopter. That thing has optics attached for a view far away. Of course one could design a new optic part, but actually, I think a standard mouse sensor would make your life easier, as there is no need to figure out a new optical setup.

If you google “Ardunio mouse sensor”, you will find all kind of discussions as well as software examples. The last time I was concerned with similar stuff was when this part was still sold, but there should be newer options.

Yes, the trusted TMC2208… - I actually use these drivers in my own setup, which is very similar to the setup you described in your post. So let me go into some details of how my scanner developed.

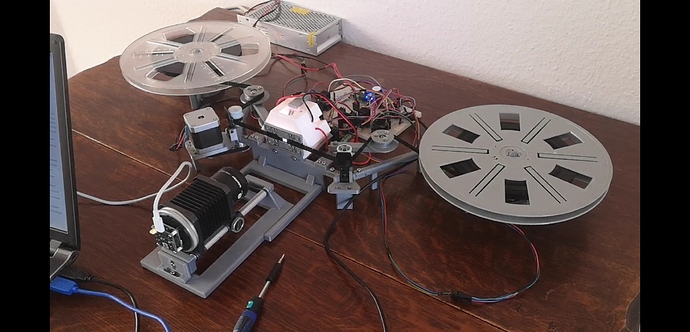
Here’s an overview of the system:

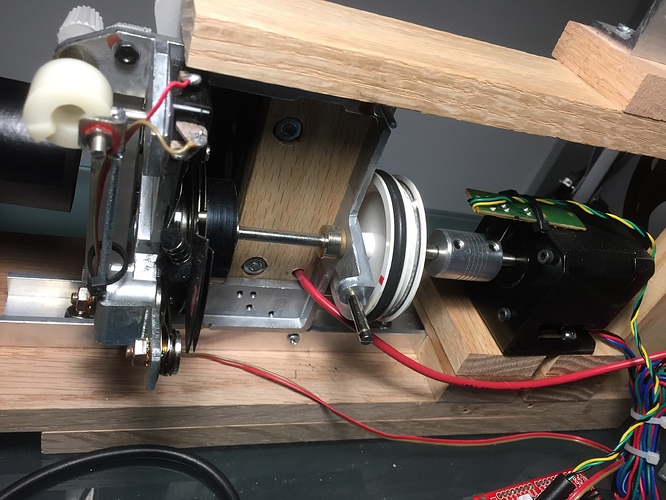
It’s a mostly 3D-printed scanner. The only parts - besides steppers and camera - which I did not succeed in printing are two tiny sprocket rollers which are visible in the above image left and right to the film gate. They were originally part of an Eumig Super-8/N-8 projector and sourced from an Ebay buy.

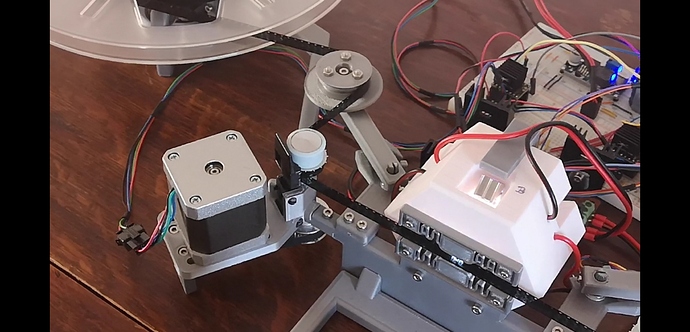
Here’s a closer look at the transport mechanism with the Eumig rollers:

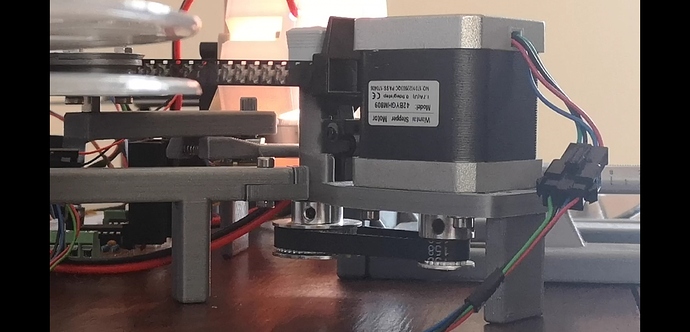
The roller is driven by a stepper motor via a belt drive:

The ratio of the belt drive was chosen so that a movement of one Super-8 frame corresponds exactly to 400 step pulses.

The initial idea was to send after each capture 400 steps to the motor to advance exactly one frame. For initial frame adjustment up and down, a smaller number of pulses would be used. And indeed, that was my original setup and it kind of worked ok.

What I discovered too late in the whole design process was the fact that the sprocket teeths were substantially smaller than the film sprocket itself. So they were a bad choice for defining the sprocket position precisely. While the film frame stayed in the camera view, it was dancing up and down noticably from frame to frame. That was mainly due to some slight variations in friction between the film and transport mechanism.

Initially, I tried to solve this problem by varying the tension between the takeup spools, but that didn’t really improve things (except tearing some film stock apart :partying_face:). So I developed the sprocket registration algorithm linked in the above post to solve this problem in the post production. Well, this solved the issue, basically. I still had some too large deviation of the Super-8 frame at the positions of some (badly performed) cuts of the material.

Only in hindsight I realized that the sprocket registration algorithm is so fast that I could run it in realtime during capturing. So the procedure I implemented is the following: once a stack of images is captured by the camera (I capture 5 images with different exposures for each frame), the darkest of these pictures is run through the sprocket detection algorithm. The darkest picture has always the best definition of the sprocket. The detected sprocket position is now compared to the center of the camera frame. If there is a deviation, a correction in the opposite direction is applied to the next 400 steps send to the stepper (remember, that’s one frame advance).

In actual scanning, the correction is quite small, it usually does not get larger than +6 steps or smaller than -6 steps.

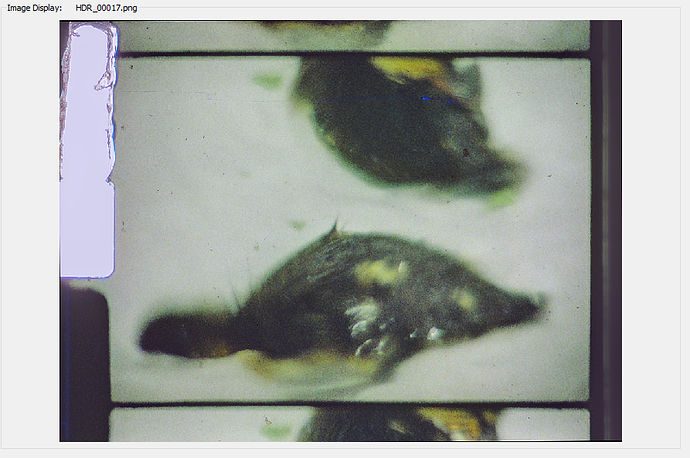
So far, I did not have a failure of the sprocket algorithm on badly defined sprockets. The reason are some build-in sanity checks on the detected sprocket position and sprocket size. If any of these checks fail, the correction is simply skipped during that specific scan. An example for a frame where the sprocket detection failed is actually the HDR_00017.png image shown in one of the above posts. That’s the actual scan, and as you can see, the (missing) sprocket is approximately centered in the image anyway (utilizing that the change between the previous and the current position is usually small).

This approach gives me a quite stable scanning environment, mastering, as planned, also some unprecise cuts which were originally a problem for my setup. It’s not perfect, the frame is still moving up and down a little bit in the scans, so I still have to add another frame registration step in post production.

Have fun with your family in these weird times!
@cpixip in short: what an awesome build! extraordinary work, thank you for showing it.

Thank you also for pointing that kit from sparkfun, will look some more.
Regarding the sensor I picked for testing, the reason was I actually was looking for a breakout with something like the ADNS-3080, at a reasonable price for an initial test. The lens base is held by two screws, and if removed, essentially it is the sensor on a board. The lower price is actually because it is a mass product, and I believe it may be already superseded by a new part. This video shows a bit of the view of it testing it as 30x30 camera (linked cued to that part). Knowing that I didn’t care about the light source, it was the perfect breakout for testing.

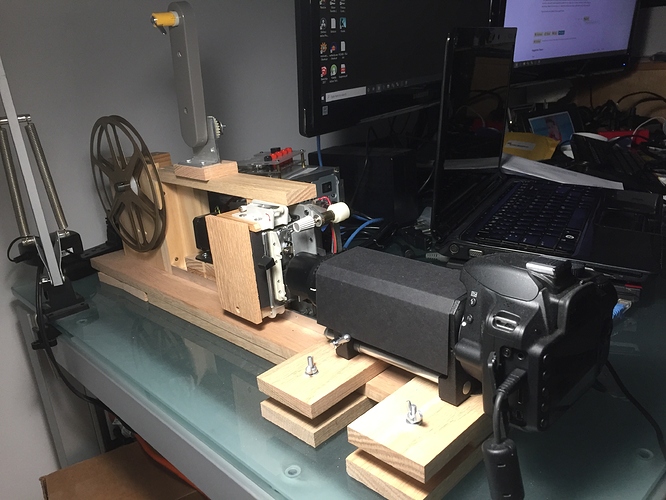
If you have not come across of it, my first build is here, and the second version is an incremental improvement on it, but same block components (better stepper driver, better optic, better below, better camera support).

Regarding your comment:

the fact that the sprocket teeth were substantially smaller than the film sprocket itself. So they were a bad choice for defining the sprocket position precisely. While the film frame stayed in the camera view, it was dancing up and down noticeably from frame to frame. That was mainly due to some slight variations in friction between the film and transport mechanism.

While the results of my second build are noticeably better, I so have a little bit of wobbling on the sprocket holes. This gate work for 8 and Super 8, and the way it is switched is by sliding the gate plate so the sprocket holes align with the claw.

So here I am, starting to building a transport from scratch. My first thought is to move the film without capstan or sprockets… I also know is a tall order, but will give it a try. In my case, I have about the same amount of 8 and super 8, both are the same width, but different height, so there is the added complexity of different frame sizes, different travel distance per frame. Thinking of using the micro-stepping capacity of the stepper driver.

My thinking is that this would only work if the mechanics and sprocket detection is amazing (which given my mechanical limitations is a bit stretch) or… very accurately measuring what is happening with the film displacement and software the problems out.
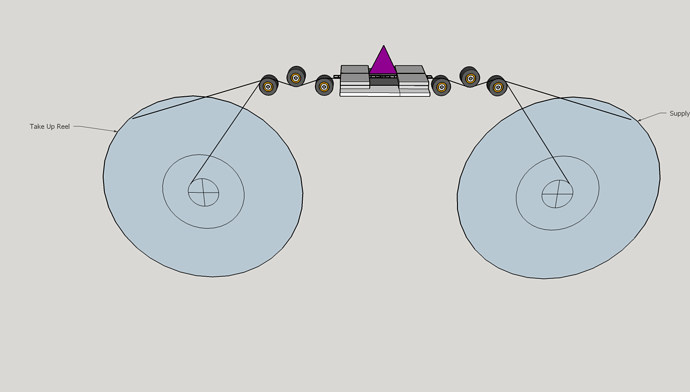
Here is the first thought on the transport, thinking of one stepper motor per reel.

Still in the brainstorm mode, so all the pointers you have provided are very well taken. Thank you!

@PM490: well, this is what I call a massive, stable machine! Impressive.

Some comments with respect to your remark “one stepper motor per reel”, as I am using a similar approach:

My initial setup was using rather low torque stepper motors, namely the famous 28BYJ-48, simply because I had them available. The film tension is measured and a signal for each stepper motor is calculated in order to keep the film tension within a small window of values. For this to work, I need a rather fine angular resolution of steps, which this geared stepper motor supplies.

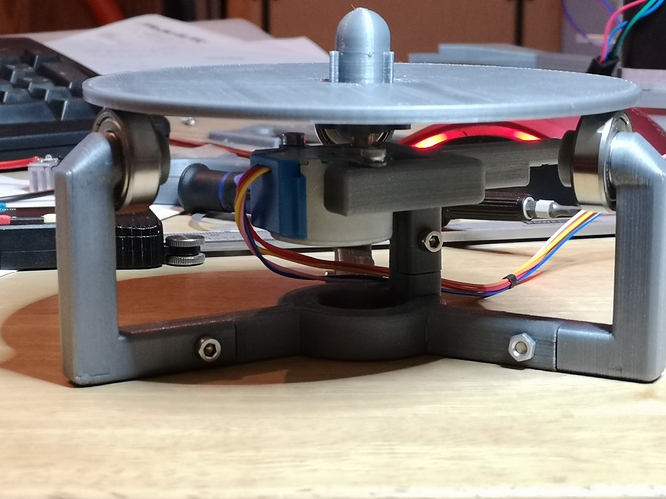
Here’s an image of the original design:

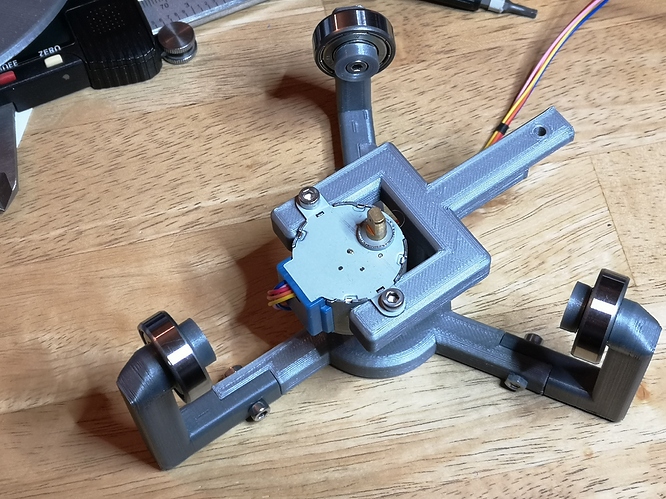
The actual reel is supported by three bearings, the motor just needs to generate enough tension to wind up the reel. Here’s another view to clarify the setup:

These stepper motors are geared and have therefore a very fine angular resolution per step. This is important, as even a small turn of the reel might increase the film tension substantially.

However, for large reels, the motors chosen turned out to be too weak to reliably move the reel. (They are fine for 15m- and slightly larger reels.)

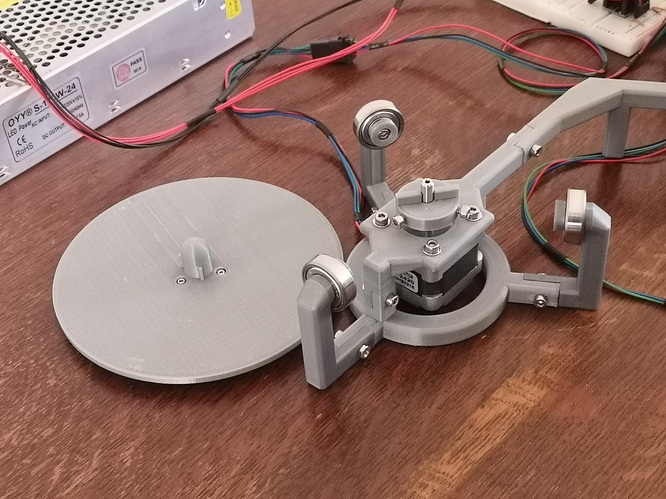
Therefore, I “upgraded” these rather weak stepper motors to stronger, faster Nema-17 motors. I opted for a direct drive, as I reasoned that with micro-stepping I could get a similar good angular resolution than with the geared motor. Here’s the current setup, for comparison:

As it turned out, the micro-stepping did not really work as envisioned.

The amount of torque the motors are excerting on the reel and film, seems to vary noticably depending on how close the micro-stepped position is to the raw stepper position. I am using TMC2208 for driving the steppers, but I must confess that I am not familiar with all the fancy settings of this driver…

The torque variation introduces an oscillatory tendency on my tension-algorithm, most noticable with large reels. It does work, but barely. If there ever will be a next iteration of the design, I will introduce a gear- or belt-based reduction in order to increase the angular resolution of the stepper again by mechanical means.

Of course, I have seen well working designs which simply use an on-off micro-switch for advancing the stepper motors at appropriate times. The variation in film tension from such an approach would however lead in my design to more unwanted frame movement in the film gate, as the film position is not that well defined by the sprocket rollers.