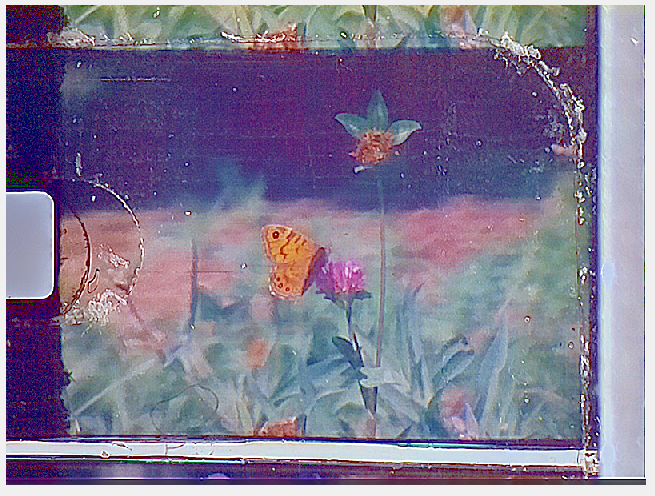
@matthewepler suggested that I describe a simple frame registration algorithm I am using for my Super-8 film scanner. So here we go.
This is a registration algorithm which is designed to try to register within a few pixels deviation. So it is not a pixel-perfect registration. But at least with high scan resolutions, it is within the precision of pin registration a standard camera/projector combination would have achieved in the old days. If you want perfectly stable imagery with Super-8, you need to frame-register your footage. I actually do this in a second path, once the pin-registration has achieved a somewhat stable frame.
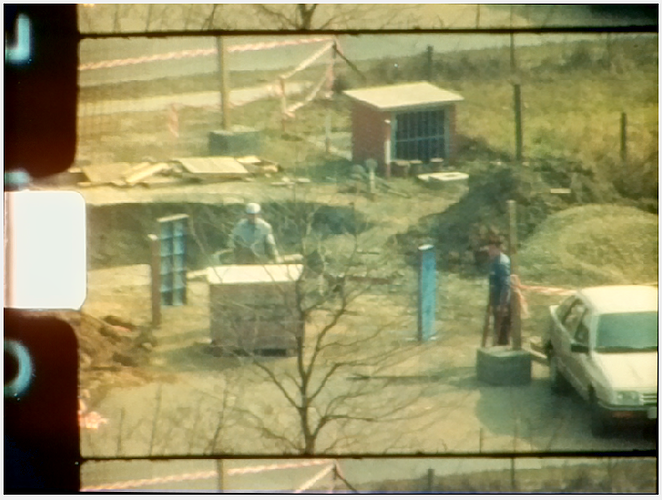
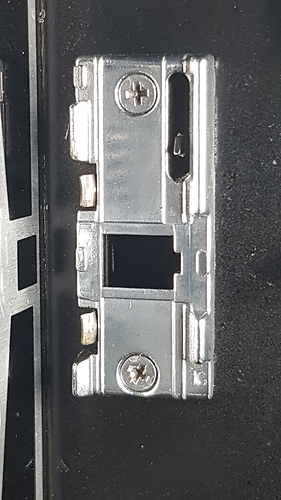
Here’s an example of a Super-8 frame:
The goal is to locate in every scanned frame the sprocket area and align the scans accordingly.
One could approach this goal in various ways. Here’s a simple one. I include a sort of pseudo-code in Python. The first step is to cut out the relevant portion of the frame:
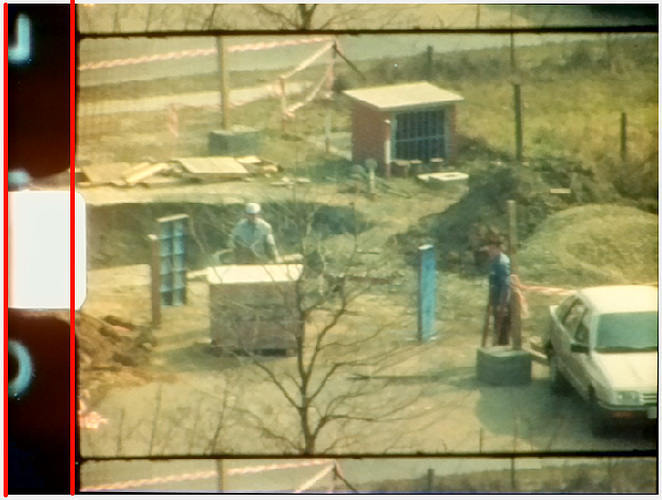
This is a vertical strip, as indicated in the following image by the red lines:
Flipping this strip for the sake of simplicity 90° around, this

would be the cut out sub-image to further analyze.
The next step is compute the edges of this socketStrip:
![]()
We arrive at something like this:

A sum in the presumed direction of the sprockets
![]()
reduces this small image into a single array. This data is smoothed again with a gaussian
![]()
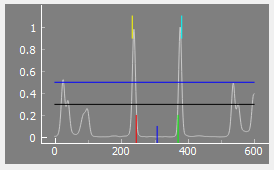
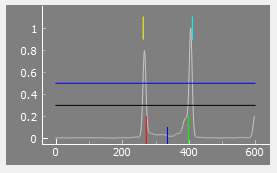
to arrive at the final data for analysis. The smoothedHisto for the above frame is plotted here
together with some small lines I will explain shortly.
First note the two promient peaks in the data - these peaks are actually corresponding to the edges of the sprocket we want to detect. There are some smaller peaks visible left and right of the sprocket peaks - these are the traces of the imprints of the film stock, still visible in the above cut-out frame.
The actual algorithm to detect the sprockets works with two passes and two corresponding threshold values. The first pass starts at the edges of the frame (in the plot left and right) and searches for the first data entry above the threshold. This outer threshold is indicated by the dark blue horizontal line the above plot. The outer sprocket positions found are marked by the short two top lines in yellow and bright blue.
This first search is ment to only locate the sprocket approximately. The average value between the two peaks is calculated and used as a zero reference. The center of these two positions (short dark blue line at the bottom of the plot) is used as starting point in the second pass, together with the second threshold (black horizontal line) to search for the sprocket borders. The search is done down from the small blue line towards the edge of the frame, and up from the blue line towards the other edge of the frame. Once the data value exceeds the given threshold, we have found our sprocket edges.
The detected sprocket edges are displayed in the plot above by the small red and green lines.
The algorithm can register the film as long as the sprocket holes are well-defined. It fails if the sprocket holes are heavily damaged. One could employ some heuristics at that point, but I have not implemented them.
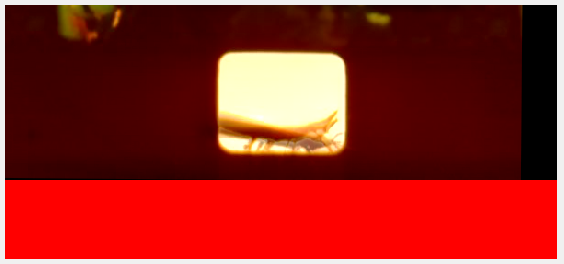
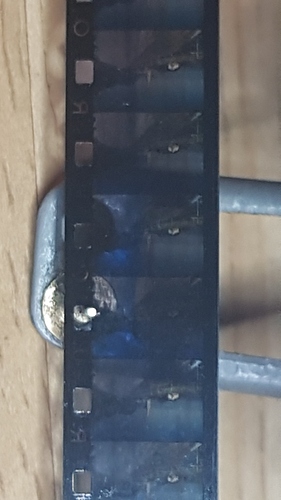
As described, the algorithm can cope with some substantial dirt in the sprocket holes. Here’s an example of an insect in a sprocket hole
and the corresponding detection plot/results
Even with dirt and dust, the sprocket is normally located.
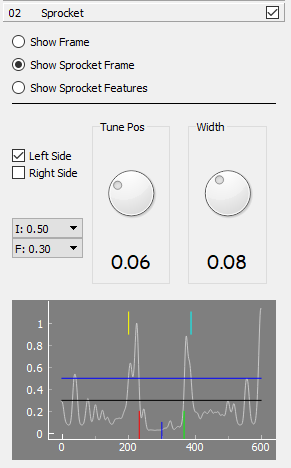
Finally, here is my current user interface
which gives you in impression of what you might want to adapt/change for a certain film. The algorithm seems to be rather robust from my experience - most of the time, only the location of the sprocket strip has to be adjusted (Tune Pos/Width).
Working with Super-8, my source is usually color-reversal film. So non-sprocket areas are usually black. I have only one film which mimics usual 35 mm copies with clear borders. It is a film advertizing Super-8 copies of (at that time current) blockbusters. I searched for the worst scan I have from this material. It features broken sprockets (which fail), initially unfocused captures (that works), partially massive desynchronization between film movement and camera capture (works sometimes) as well as drastic changes in illumination (works mostly).
Here
you can download the test clip. An (untested) Python script with more detail about the implementation can also be downloaded. Have a look.
