Well it’s fun to think and progress outside well-known paths. Let’s continue on some points.
It would certainly yield a different information in the Gw-channel. The problem I see: that additional information is (per image spot) only a single number. And while actual filter curves in digital cameras are designed to mimic closely what your visual system does (I again want to suggest the writings of Jack Hogan about that subject), ensuring thus that intermediate colors are recorded close to their actual position in perceptual space, your setup would not immediately yield such a feature. And I am unsure on how to obtain an appropriate color transformation. Note that you do not really have “additional information”, as still you are working with only three color channels. But it is certainly an interesting idea and one should try it out.
That brings me to another quote I want to comment on:
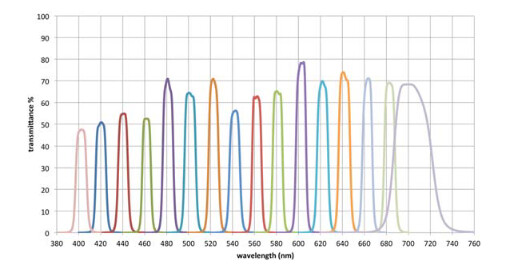
Well, let’s consider first the maximum possible information in terms of color. That is actually possible, namely by using a spectrometer - which would yield hundreds of numbers for each image spot. A little below that quality are hyper-spectral cameras, which yield at least data in several different wavelength bands. Citing again the paper by Flückinger et. al.,
Actually, such approaches have been used in the past to scan important artworks, and the multi-spectral data is usually sufficient to “illuminate” the scan in arbitrary illuminations, for example in VR-applications. For film scanning, the time required to aquire a full spectrum is prohibitive. And it is even not necessary, as the spectral information is anyway condensed in the human visual system into three numbers per image spot.
Next is maximum dynamic range - which is challenging if you are working with color-reversal stock. From my experience, even the 14bit raw image current-day cameras can supply are not able to fully cover the density variations of a Kodachrome or Moviechrome film stock completely. They come close so, and combined with some way of auto exposure will work ok. Besides, the information in the darkest part of a tiny Super-8 image is mostly spatio-temporal noise. That has to do how these film stocks work: they have layers with small crystals that are not very light sensitive, combined with medium and large crystal layers - the later being the most ligth sensitive ones, and the only ones exposed in a dark environment. Which brings me to the last entry of your list: maximum resolution.
Maximum resolution is an interesting subject. In well-lit, well-exposed image areas, the actual resolution you get from a tiny Super-8 frame is actually more limited by the optics of the camera you used when taking the footage than the performance of the film stock. This is quite different for darker areas of the film. Here, the prominent contribution to image corruption is actually film grain - spatio-temporal noise which obscures the actual signal you are after, namely the image intensity stemming from the scene you were recording.
This spatio-temporal noise “built into” film technology is implicitly handled by the viewer’s visual system being quite perfect at averaging out such noise.
I think anyone who has ever worked as a projectionist knows the quality change in image definition when you project a still image for a moment and then get the projector running.
So is it necessary to capture the form and variation of every single film grain? I would argue against it, as the information you are digitizing is in this case more or less noise, unrelated to the scene which was photographed. I am personally more interested in restoring the scene captured to optimal fidelity instead of the specific properties of the film stock used to capture the scene. I have the same approach with respect to color managment (so I end up in grading every single scene in postproduction, due to the variations described in a post above). I know that there are other, quite valid opinions on this subject, and I respect them.
That approach could actually yield an interesting opportunity - namely a better recovering of faded Ektachrome film stock. You actually did post here a nice example of such an endavour!
