You were right. Despite my hopes for around 14-bits on the Pregius sensor, I’ve since found a spec sheet that shows LUCID’s Triton camera lineup only uses a 12-bit ADC to read from it. Oh well.
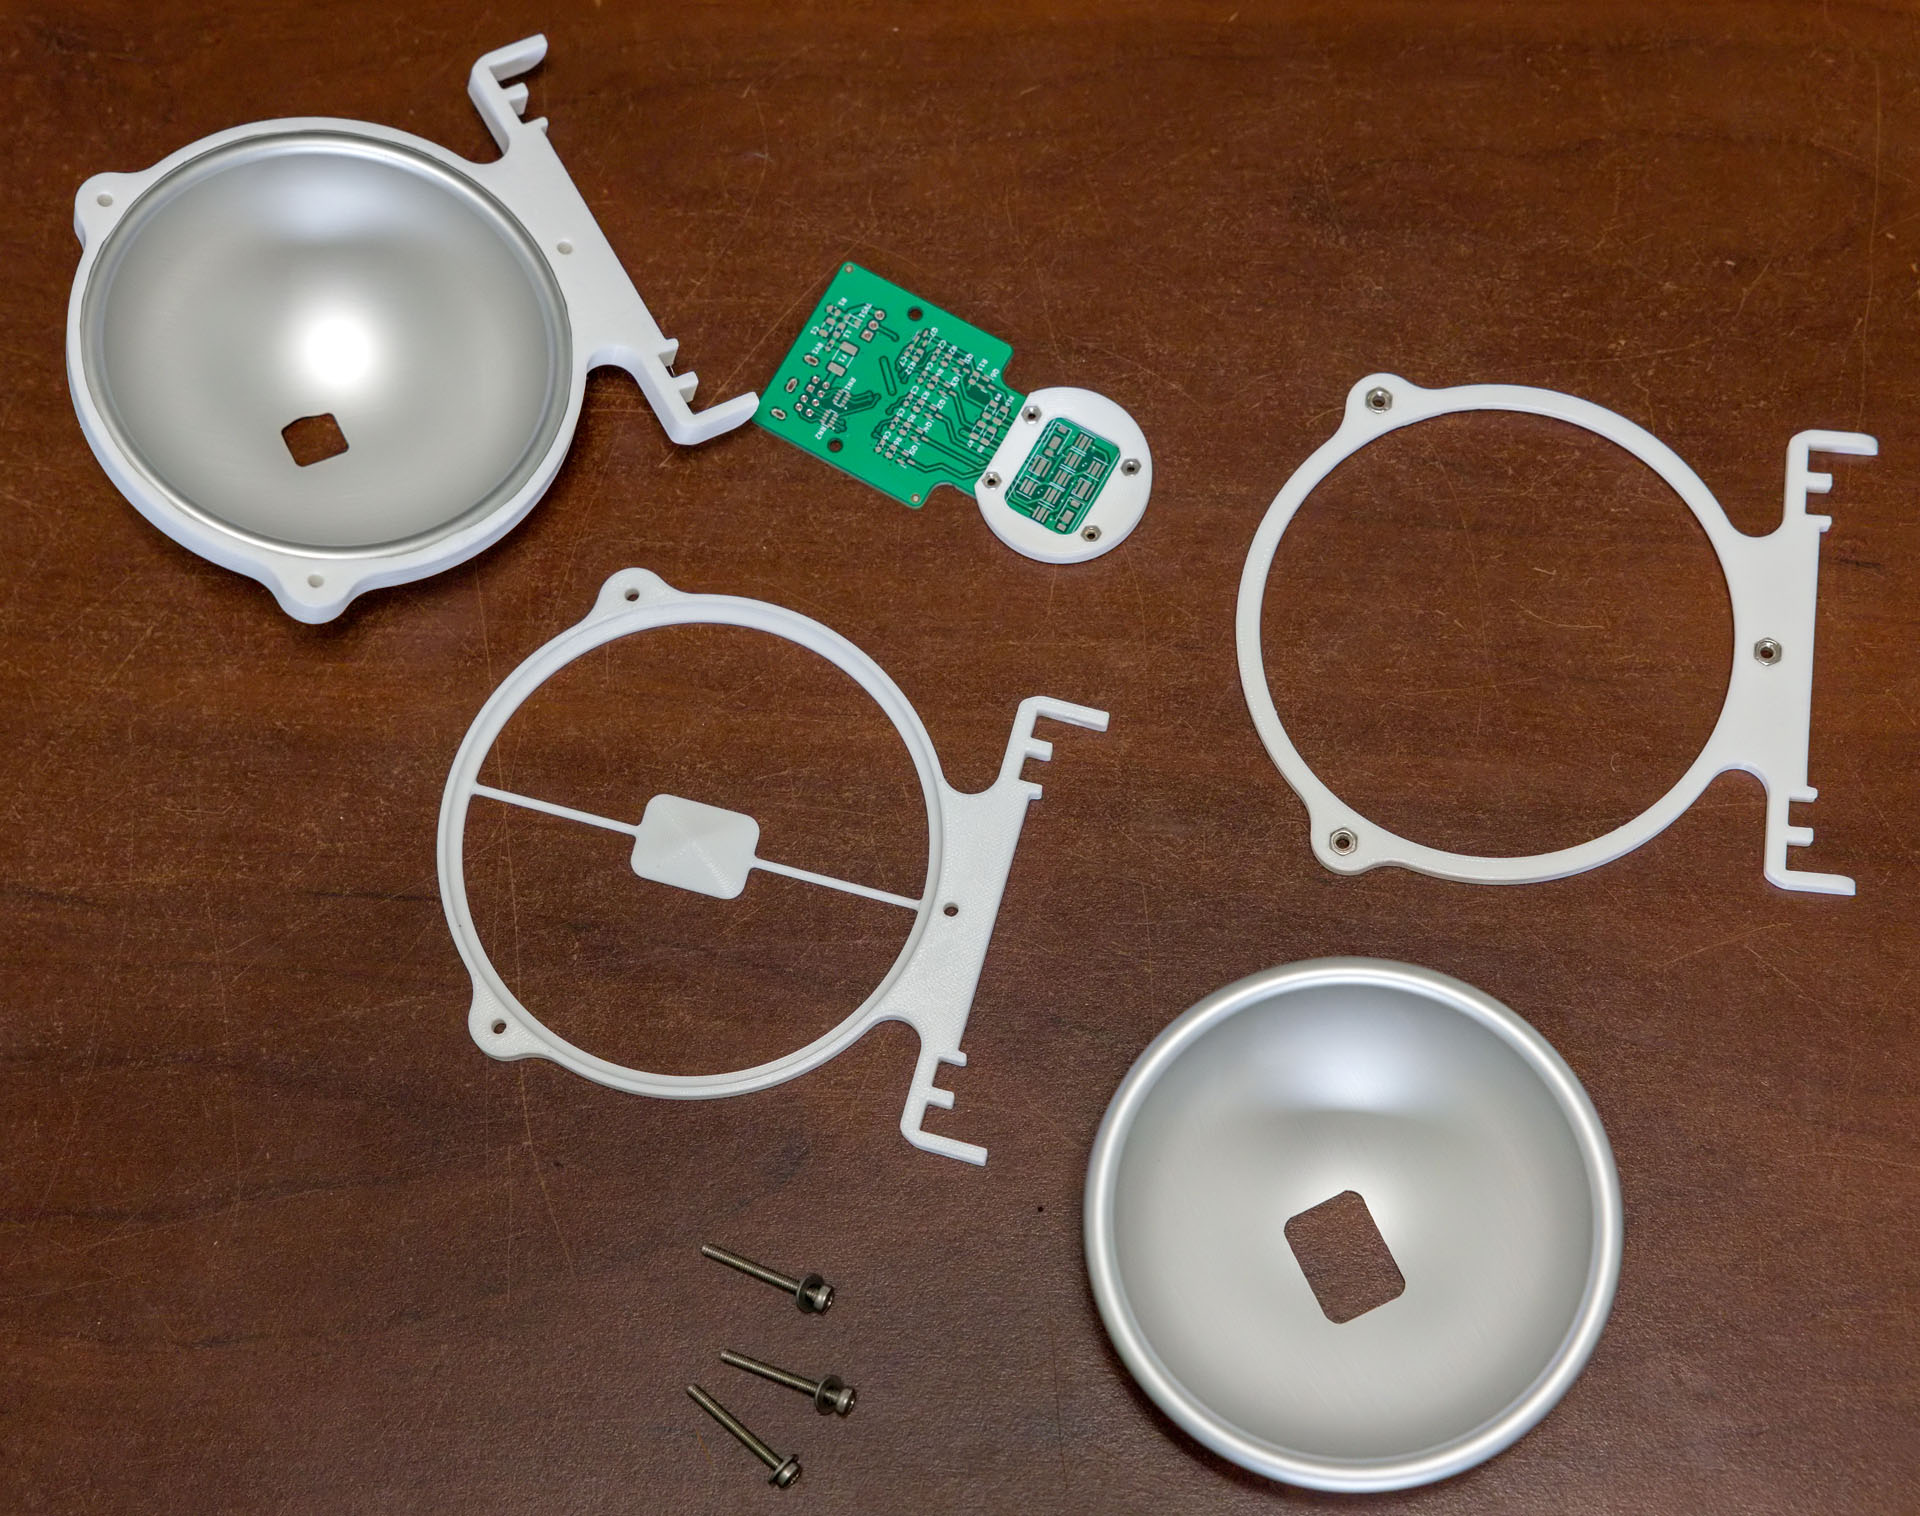
Those are some clean cuts. How did you do the off-angle cuts so nicely? When I was brainstorming how I might turn these cake pans into an integrating sphere, I couldn’t think of an easy way to hold them at those angles. As an alternative to off-axis ports, I took @cpixip’s advice that the sphere didn’t need to be perfect and instead optimized for the simplest construction steps: I put the entrance and exit pupils on a straight line and just inserted the smallest possible baffle between the two.
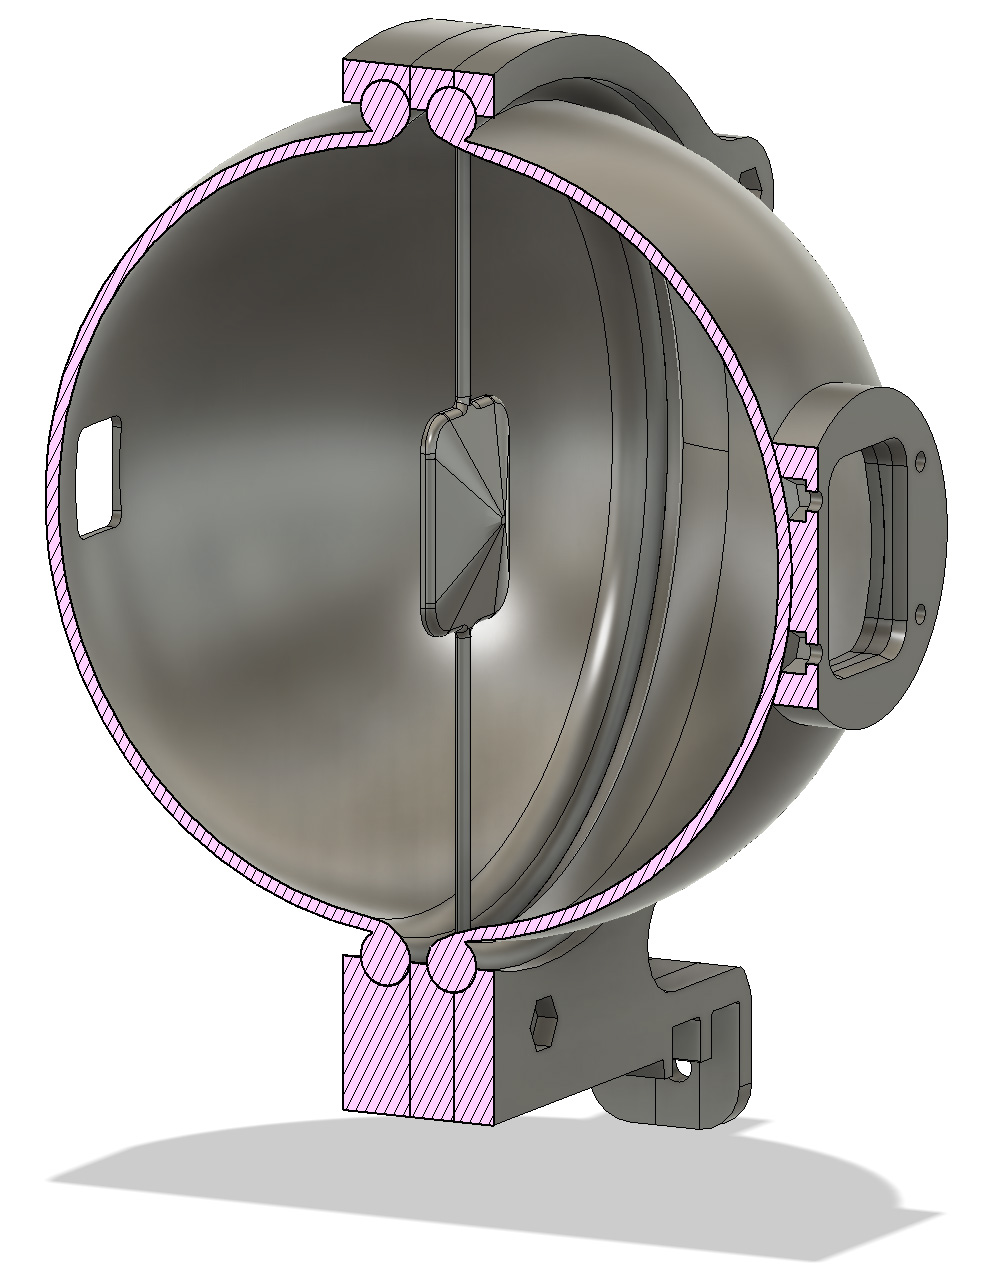
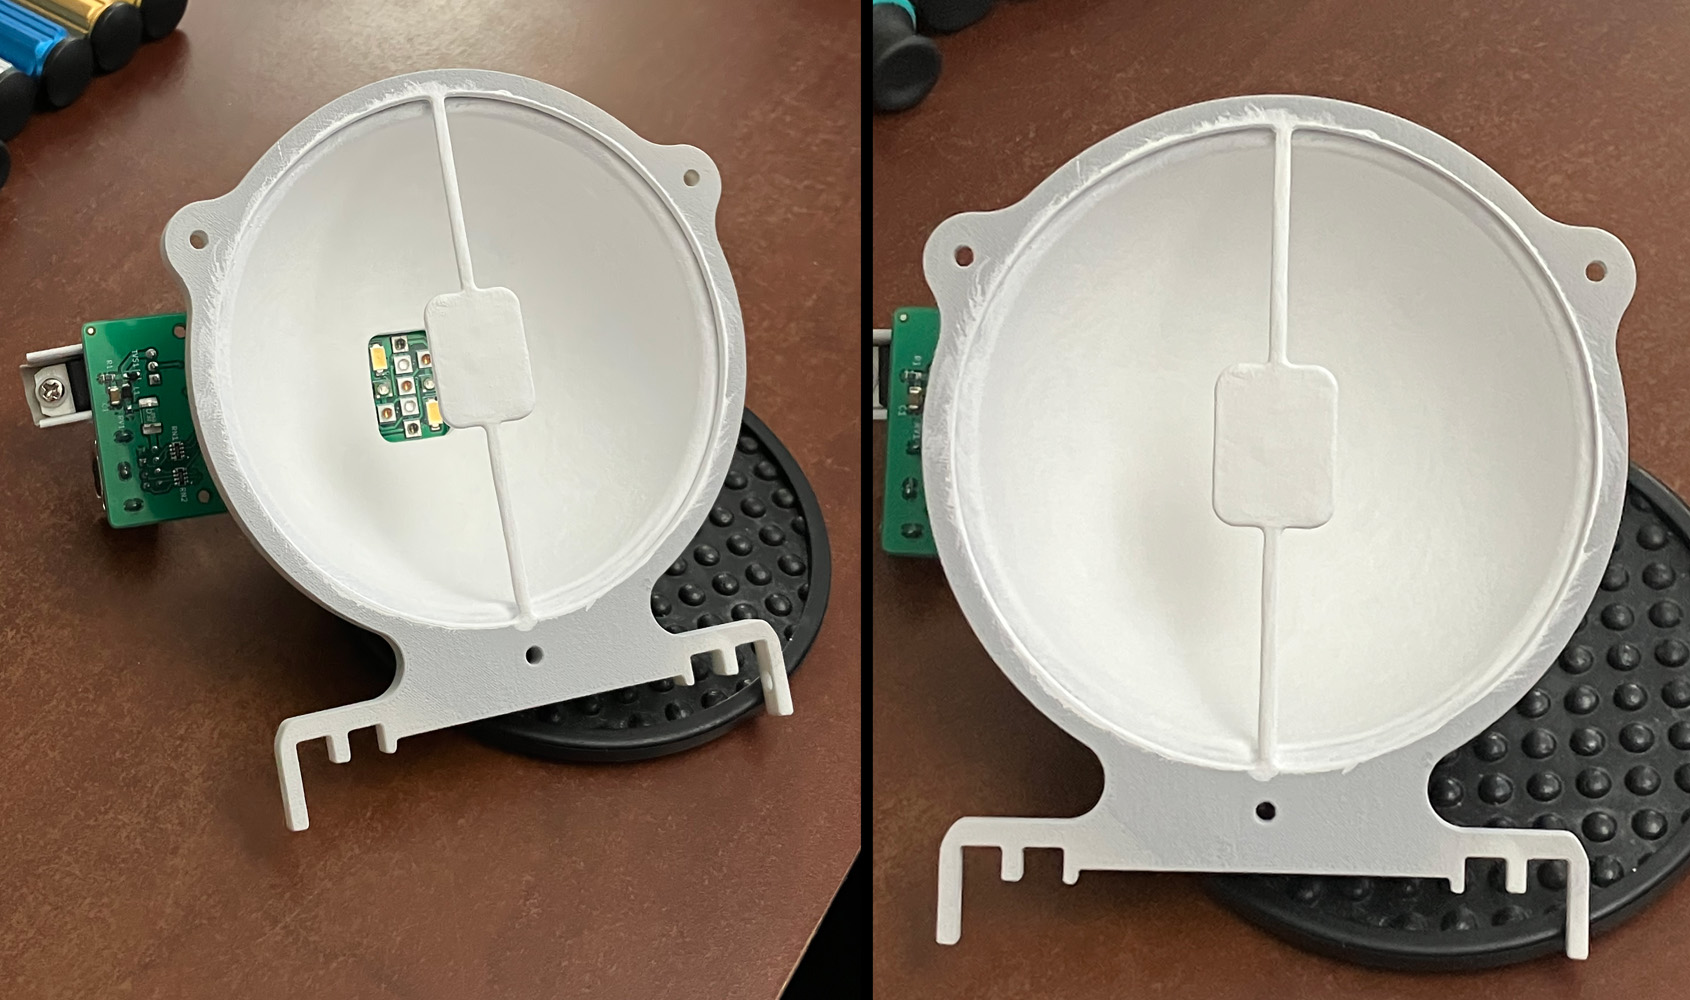
The little cone-like feature on the side facing the LED board is just to prevent the first light bounce from going directly back to the PCB. The other side is flat.
I overestimated the wall thickness of the pans a little. While milling the smaller exit port, it ended up with a razor-like edge and you can see a little wobble in the cutout where there just wasn’t any material left. I suppose the thin wall at the exit works out in my favor for getting it a millimeter or two closer to the subject.
The barium sulfate wasn’t as hard to work with as I was expecting. After some sanding, I sprayed everything with a white primer and then mixed a bunch of the powder into titanium white acrylic ink (mine was Liquitex brand). It still took 8 or 9 coats (and it probably wouldn’t hurt to do another five) before it was reasonably uniform looking.
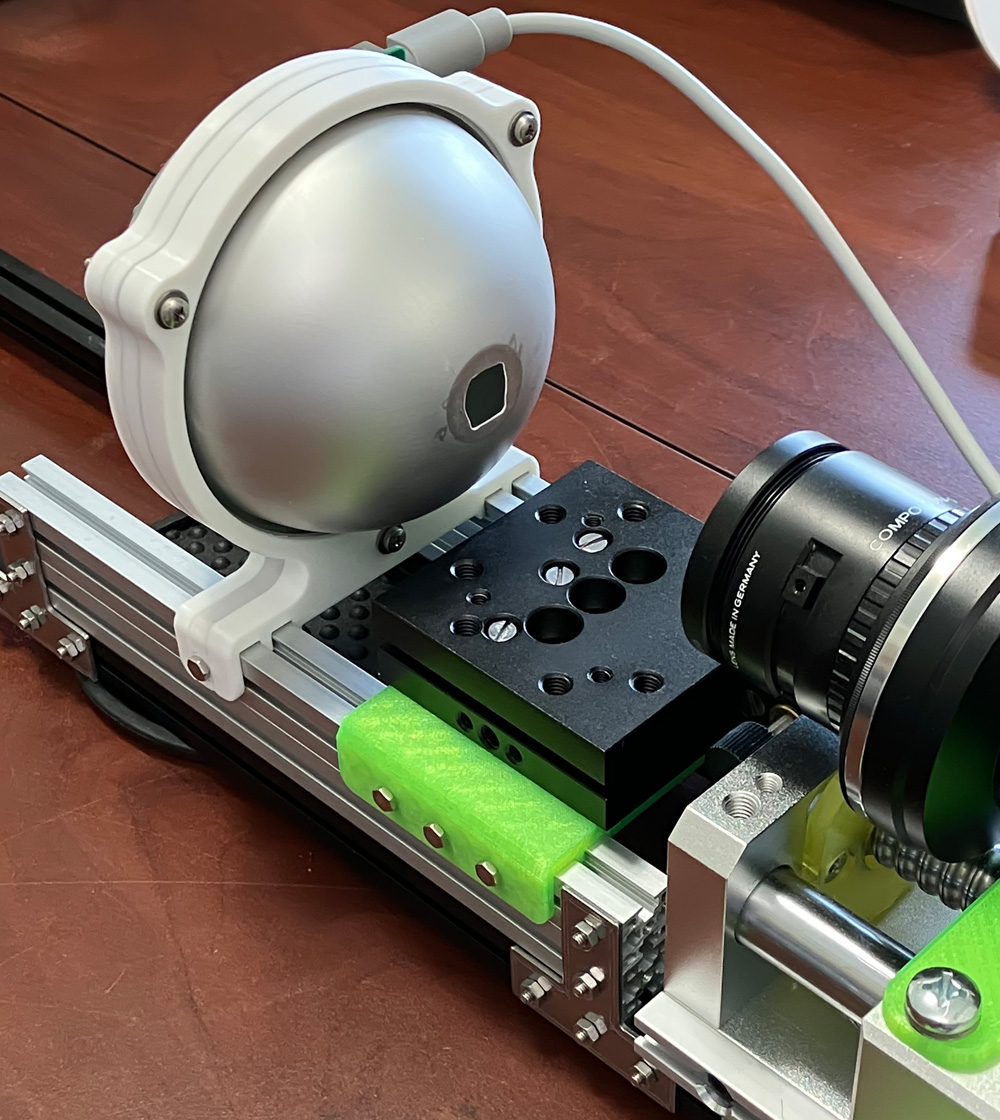
And here it is fully assembled, on the rails, showing the front of the exit port. The mount (with the captive nuts) for the PCB is just held on with a couple drops of super glue for now. If that doesn’t last, I’ll use epoxy. Again, I was optimizing for speed-of-build this time. ![]()
This was kind of an extra credit mini-project for June. During some early testing with the Köhler stuff, I saw how much the direct lighting was accentuating scratches and other oddities in the film. If I’m going to save the wet-gate/chemistry portion of this project until the end, I wanted to have a good proxy in the meantime to help hide those defects while I was still working out the rest.
I probably shouldn’t have put my eye directly up to the exit port with (the dimmest of the) LEDs on, but I saw exactly what I was hoping to: a completely invisible baffle. The only discernible features inside the sphere are a faint seam between the two halves and the two little “tick marks” where the arms holding the baffle divide the seam line.
I can’t believe how homogenous this light is! I focused on my calibration grid, put the sphere as close behind it as I could, then removed the grid. The resulting flat, gray image had a difference of only 2.6% brightness between the center and the darker two corners. I think I might be able to do better by tweaking the alignment a little. The other two corners were only 1.8% darker.
The histogram is just a single spike with an (8-bit) std dev of 0.79. When you auto-contrast that out to the extremes, you can see the darker two corners.

I think I found a few dust particles in the lens. ![]() That’s the aperture blade pattern of the Componon-S lens. I’ve already tried cleaning the front without any effect. I hope they’re just on the back. But I expect they’re actually somewhere inside.
That’s the aperture blade pattern of the Componon-S lens. I’ve already tried cleaning the front without any effect. I hope they’re just on the back. But I expect they’re actually somewhere inside.
It’s mostly a non-issue because everything in that image is taking place inside two (8-bit) gray values.