Laser-based sprocket registration

This has been brought up a couple times in other threads, but I think it was never properly discussed.

Specifically, @matthewepler mentions here that a laser worked well, until he came across some clear film, @johnarthurkelly uses a laser (at an angle) on his 8mm build which seems to work rather well, and @VitalSparks proposes a very cool concept of reflecting the laser off of the film rather than going through it, effectively working around the issue of clear film.

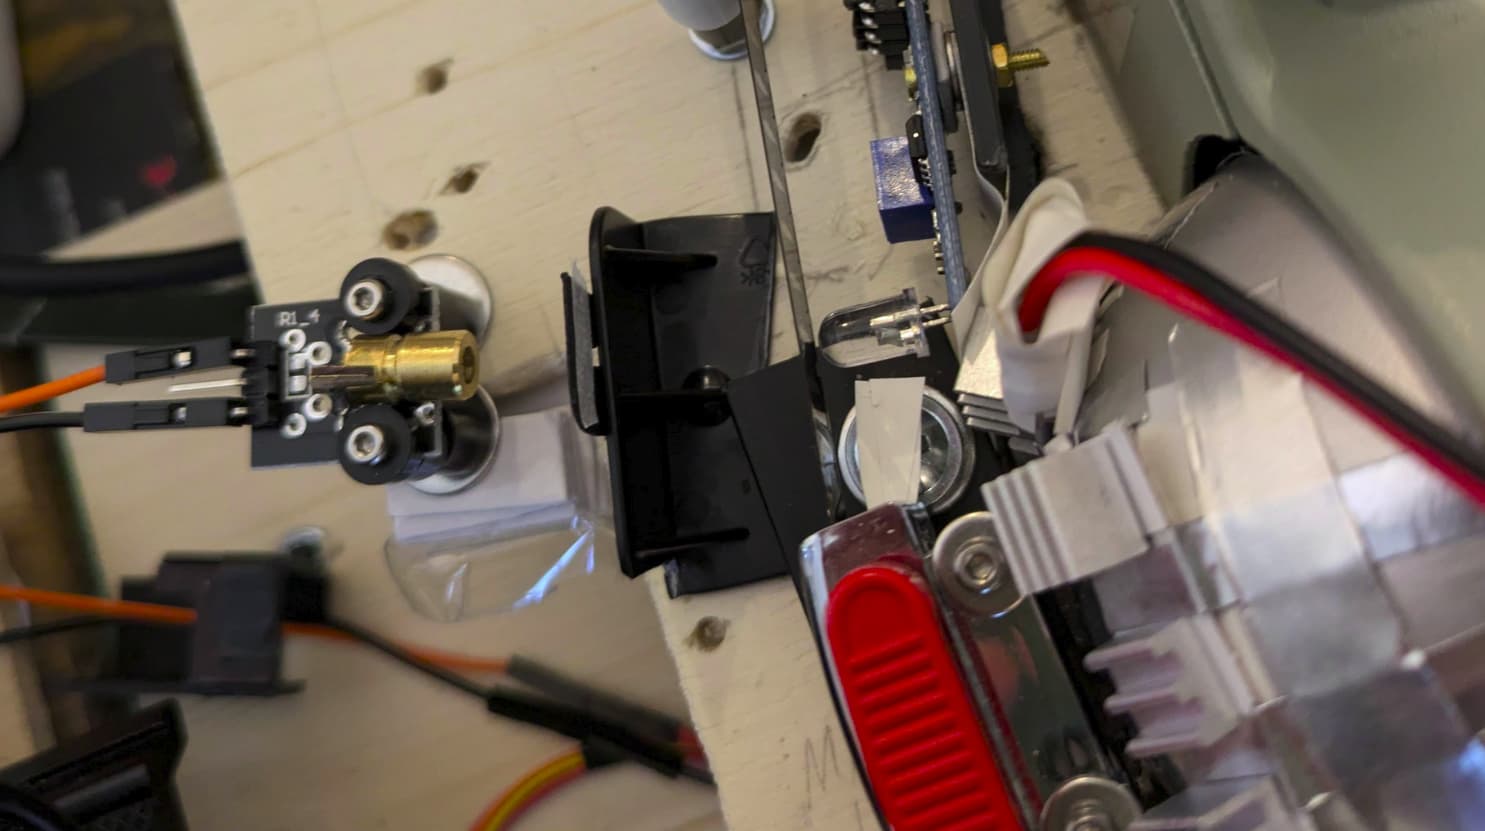
Now, the other day, I was putting together a shutter speed tester using an Arduino, this simple laser diode module, and this simple sensor module. They couldn’t have worked better, which led me to circle back around to the idea of using a laser for frame registration. I ended up testing these components on some 8mm film with less than ideal results. As of now, I’m not quite sure what I’m doing wrong.

Here is a list of the issues I found:

  • The cross-section of the laser beam is quite a bit larger than a Super 8 sprocket hole. I think @johnarthurkelly fixed this using a pinhole, though.
  • Despite my test film being black, the laser went right through as if it had been entirely transparent.
  • I wasn’t able to get the laser to reflect off of the celluloid, either. Again, it went right through mostly unaltered.

I really like the general idea of using a laser because of its simplicity, its very good on the film, and in my particular case would allow for much easier switching of film types (standard 8 and super 8).

Maybe you guys have some input or experience on how to get this to work, what I’m doing wrong, or possibly even why lasers are a terrible idea and anyone thinking about them is better off pursuing a different approach to frame registration.

I have bench-tested a Keyence retro-reflective laser. Here is a link to another thread here.

all my realtime continuos motion scanners 8,s8, 9,516 and 35 has laser to detect the perforation, no problem at all also with transparent films, negative or copy.
there are several example on my vimeo page
this is a s8 scan of a 1971 film I made yesterday, no post stabilization, 25 fps scanner, this is HD (more than enough for s.8) but there are also example till 6K (always in realtime)

I’m very glad to see that a laser is certainly a promising option!

@vintagefilm I must have missed your post in my search. I’m sorry about that! Great to see that it works, though. I wonder what is the key difference to my test setup that makes yours work. It doesn’t seem to be the wavelength. I assume there is a difference, though. Buying it new, your laser is certainly more expensive than mine (according to a quick Google search 300€+ vs. 10€).

@Matteo_Ricchetti your scans look great, certainly very stable! Using a laser would allow me to do the sprocket registration in the same place a projector or camera would place its claw, which I was in fact hoping would give me better out-of-the-box stability. Would you mind explaining how your sprocket registration works?

Quite simple just a cheap <5 mwlaser and a bpw34 pin fotodiode, the fotodiode feeds a LM311 comparator and the other input of the 311 to a potenziometer so I can choose the correct threshold

1 Like

the most important thing is indeed to use the correct perforation, this is why all the scanner that make post stabilization useng the visible hole in the image are unsteady (Lasergraphics and many others). A quite stupid error
here you can see how a bad perforated film works on my scanner and and with an optical stabillized perforation,

2 Likes

@Matteo_Ricchetti I am in the process of selecting a sensor for this purpose right now. I’d like to build and test your unit. Do you have links to the laser you used and a circuit diagram I could refer to?

Also, I’m not sure I explain your last post regarding using the “correct perforation.” Can you explain in a little more, please?

This is a great thread. :slight_smile:

Currently I’m talking with manufacturers of laser and fiber-optic sensors. We tried cheaper sensors but did not get good results. They are all suggesting fiber optic which costs about $300 per unit. I’m hoping @Matteo_Ricchetti’s design can help us save some money there.

That does indeed sound very simple. I think I will try my photodiode module on an analog input of my Arduino one of these days (not quite sure it supports that, though). Then I could possibly set a different threshold which might just get my test setup to work.

Did you have any issue with your laser beam being “larger” than the sprocket holes? Are you using a pinhole or something similar? Maybe this is also fixed simply by using a custom threshold.

Also, are you detecting your laser beam through the film or by reflecting it off of the film?

I don’t know if you are going to make a realtime scanner or step by step, in my case (realitime) the fire of the light source must be with 0 delay (ok a few ns) so I had to make the control all in hardware, microcontroller has not fixed lag even if you do all the code in assembler, and the lag is then unsteadyness. On micro I did all the pid of the synched motor. I use a very pin focused so I can find the point where the film is unscratched from previuos claws of projectors. Through the film detecting

I just tested my laser and sensor combination, with success this time!

To explain why, I will quickly describe both my setups:

  • In my original setup, I was really just pointing the laser at the film, saw that it was neither blocked nor reflected and gave up. (Not very thorough, I realise … I had other things to do but really wanted to test the laser idea :upside_down_face:)
  • So no, my new setup is a bit more thorough. I put the film gate from an old Bolex projector on a third hand tool. Then, I aligned my laser and the sensor using the same third hand tool, making sure the sensor does detect the laser through the claw-slots in the film gate. Next, I put the film through the gate, and *drum roll* the sensor easily detects the sprocket holes.

For all experiments the sensor was connected to digital pin 3 on an Arduino Uno, with both the sensor and the laser being connected to the 5V supply of the Arduino. The film used for testing was Kodachrome 40 (positive with black celluloid). Sensor and laser are the ones linked above and can be found just about anywhere that sells accessories for Arduino. I paid 4€ for the laser and 8€ for six sensors, but I have seen them offered from China for mere cents.

I will have to check how robust this is later down the line, but it seems to generally work quite well.

I’ve actually just designed a bracket for a reflected laser sprocket hole sensor to retrofit onto my build - I’ve had pretty good results with my setup so far with my angled “through the film” laser/detector but I’ve noticed some stability/reliability issues with some of my films and I’m planning to test a reflective design. This bracket would hold the laser on the left and the sensor on the right with the convergence point right in the film plane as it passes out of the gate. The next iteration of this design will likely have another guide path for the film since it floats in free space at the moment at the point of “detection”.

@jankaiser I did indeed use a pinhole to improve the effective resolution of the sensor - I’m planning on continuing to do that with this new build since it did seem to make a significant improvement in the result. Ideally I’d replace it with a condensing optic, but it starts to add more complexity.

You might have some tuning to do with the strength of the laser and the sensitivity of the sensor - mine definitely have a sweet spot that I’m not looking forward to having to “rediscover” with a different design :skull_and_crossbones:

A facebook posting by Denis Carl at his group show promising results using a general purpose laser diode emitter/sensor, specifically designed for object edge detection. I thought it would be good to share the datasheet.
Updated - with correct FB link.

@PM490 Thank you Pablo, could you repost the link to the facebook group? It seems both links above lead to the datasheet :slight_smile:

Thanks Chris, my bad.

These are the couple of FB post related, I also updated the previous post.
https://fb.watch/qWTF9LIFuL/
https://fb.watch/qWTM8eev5x/

1 Like

Thank you. Much appreciated.

1 Like