My 16mm film scanner

After some months of work, I am finally able to show my development. It took almost six months to complete this project, because my priority are the darkroom activities such as film developing and printing. Therefore I was able to work on this only in the remaining time slots I had.

The backbone of my 16mm film scanner is a Siemens 2000 projector. It is one of the oldest model, without sound, but characterized by a very precise film transport. There are just a few plastic parts and most of the components are made of durable metal.

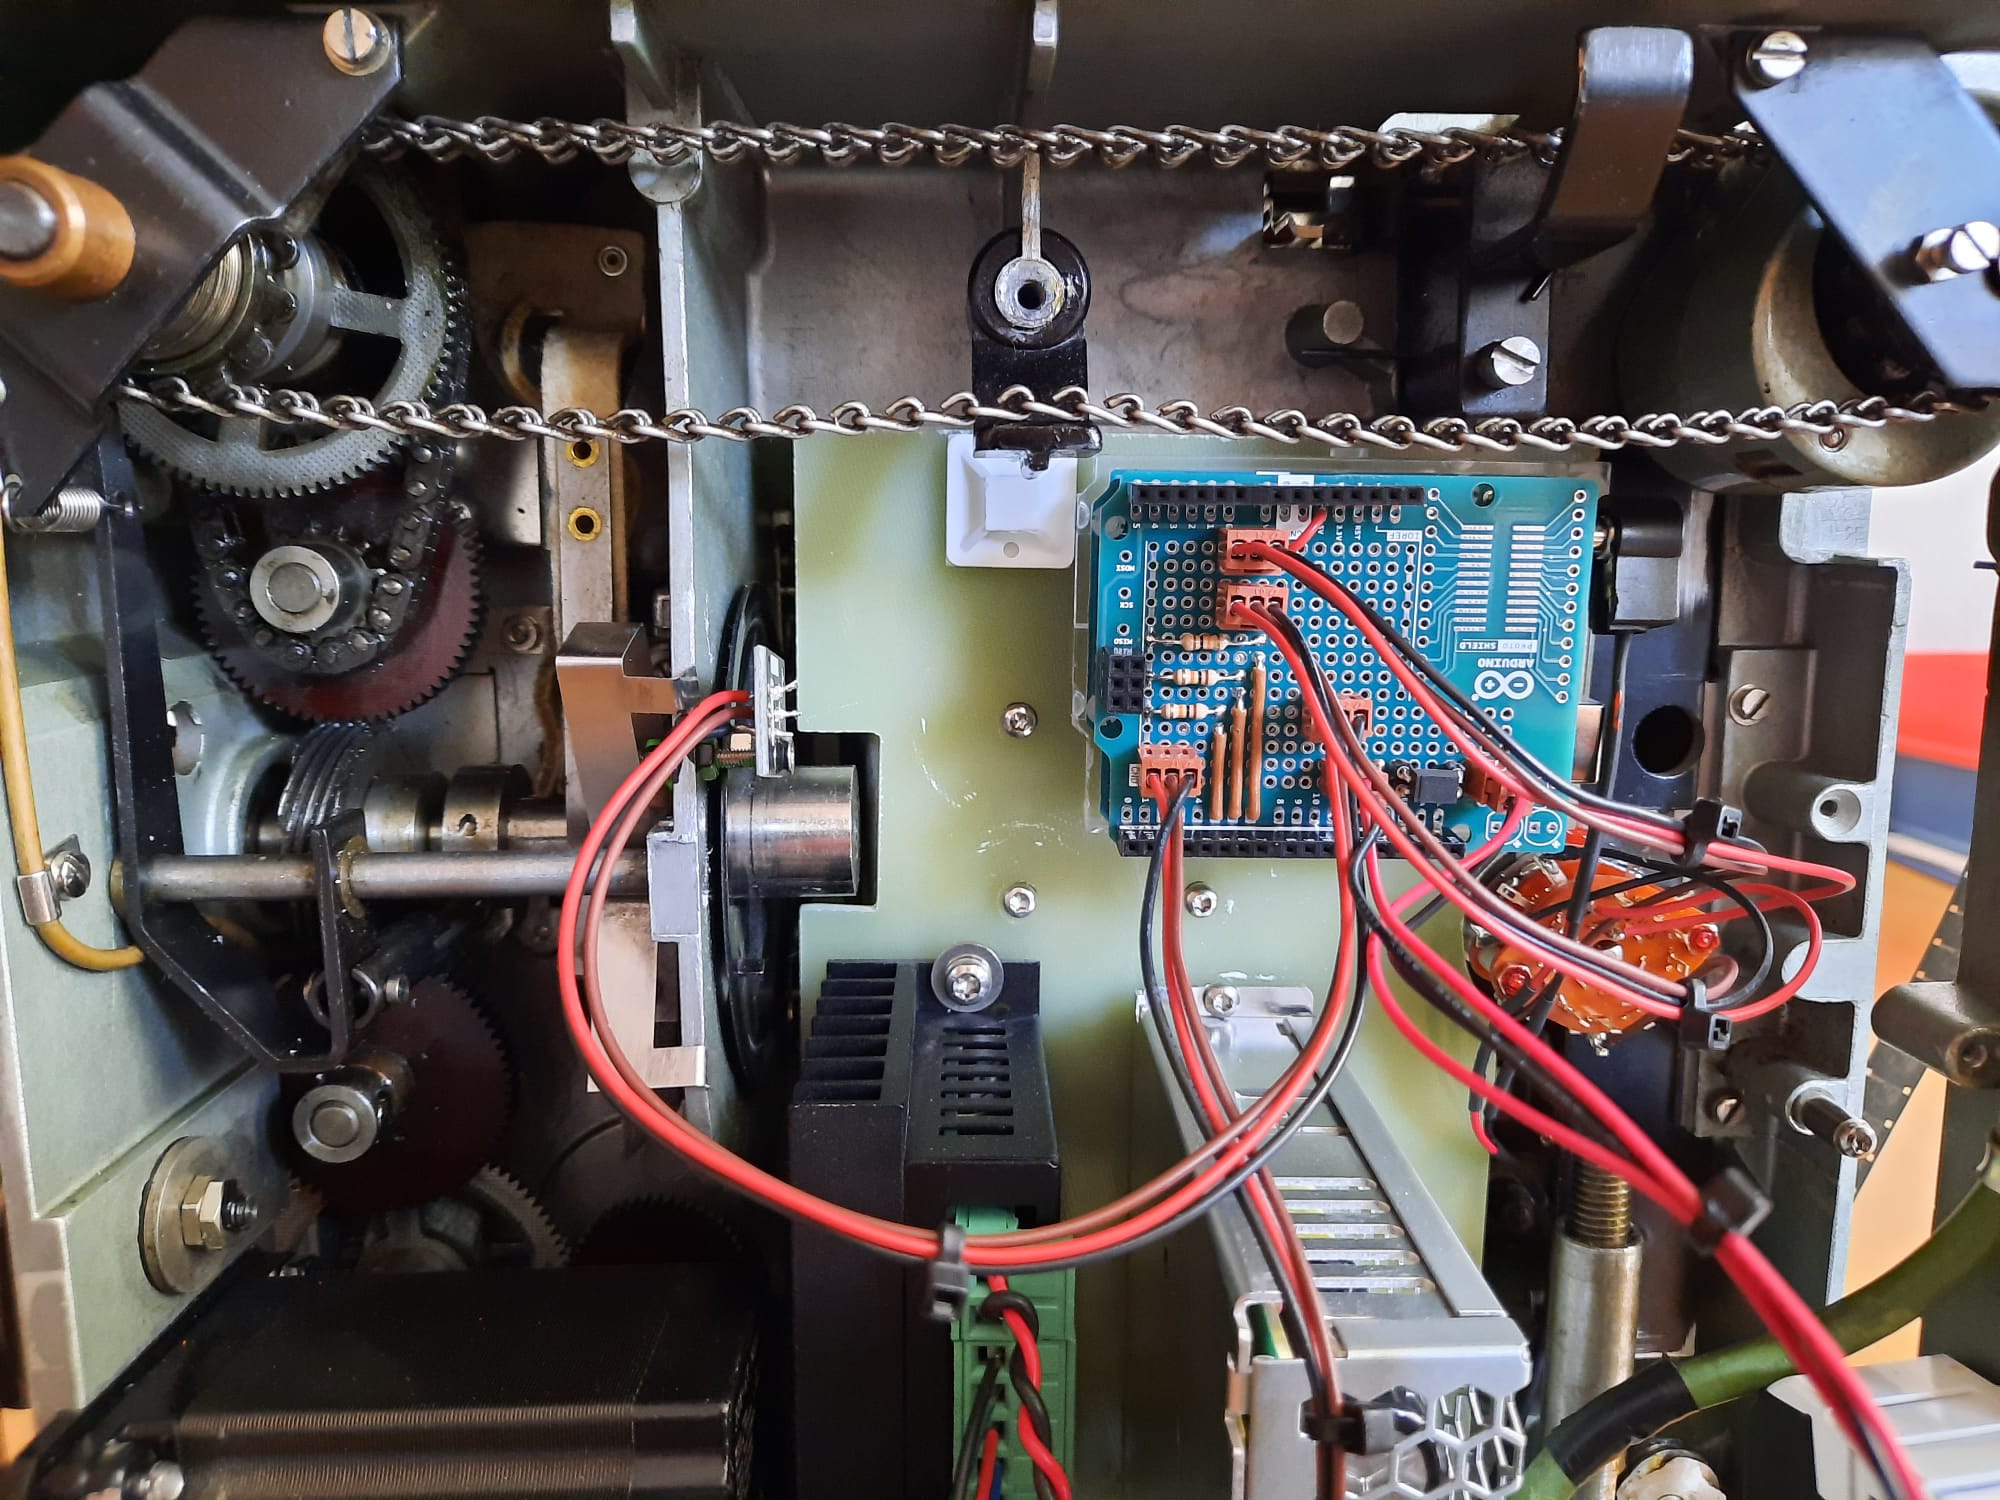
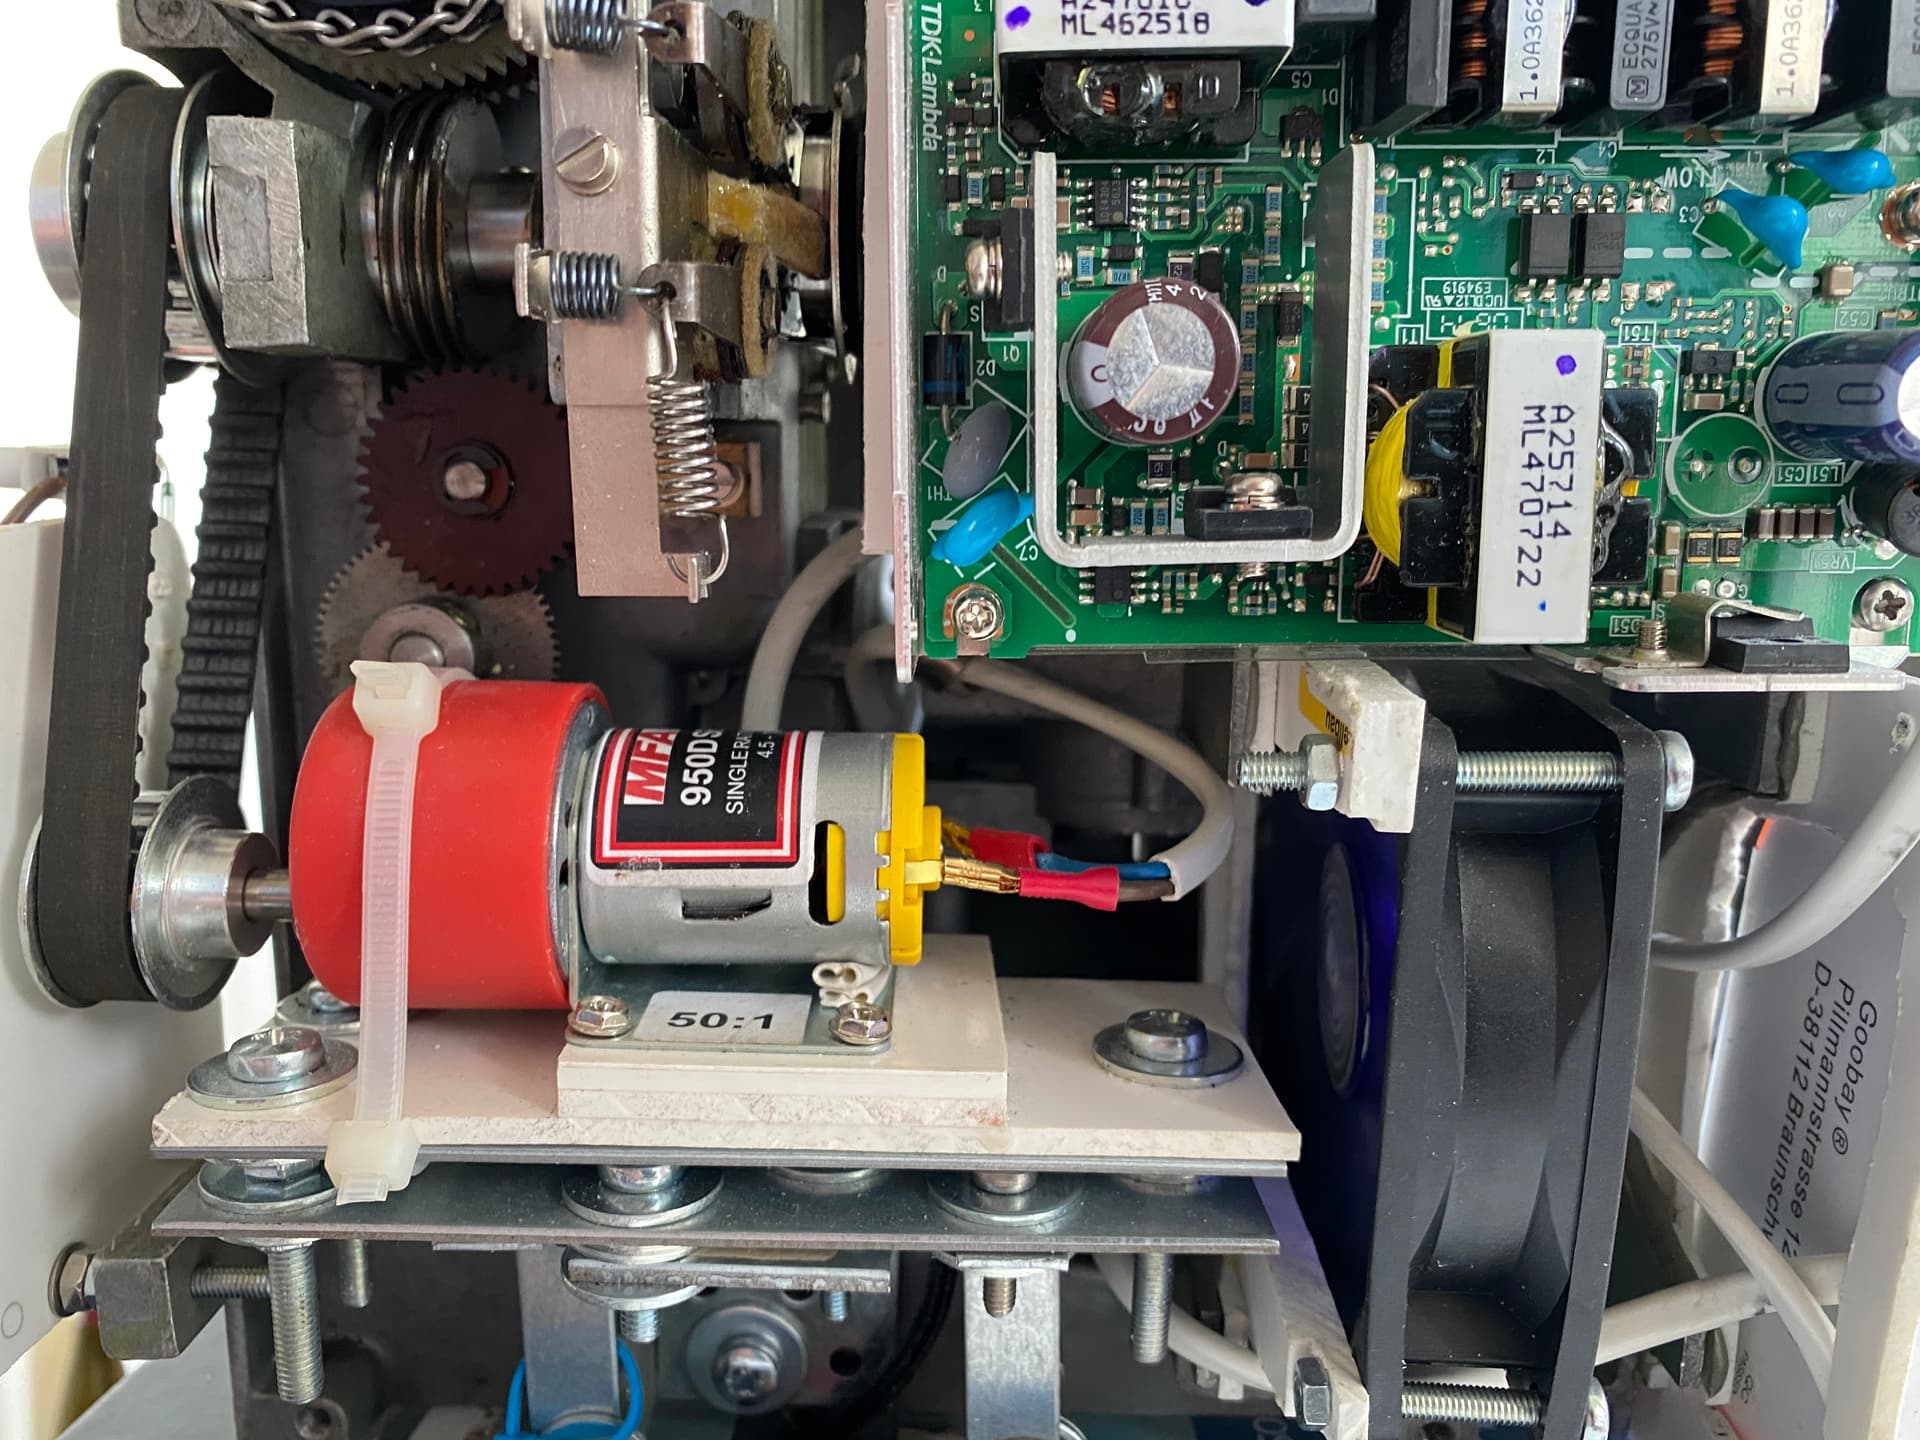
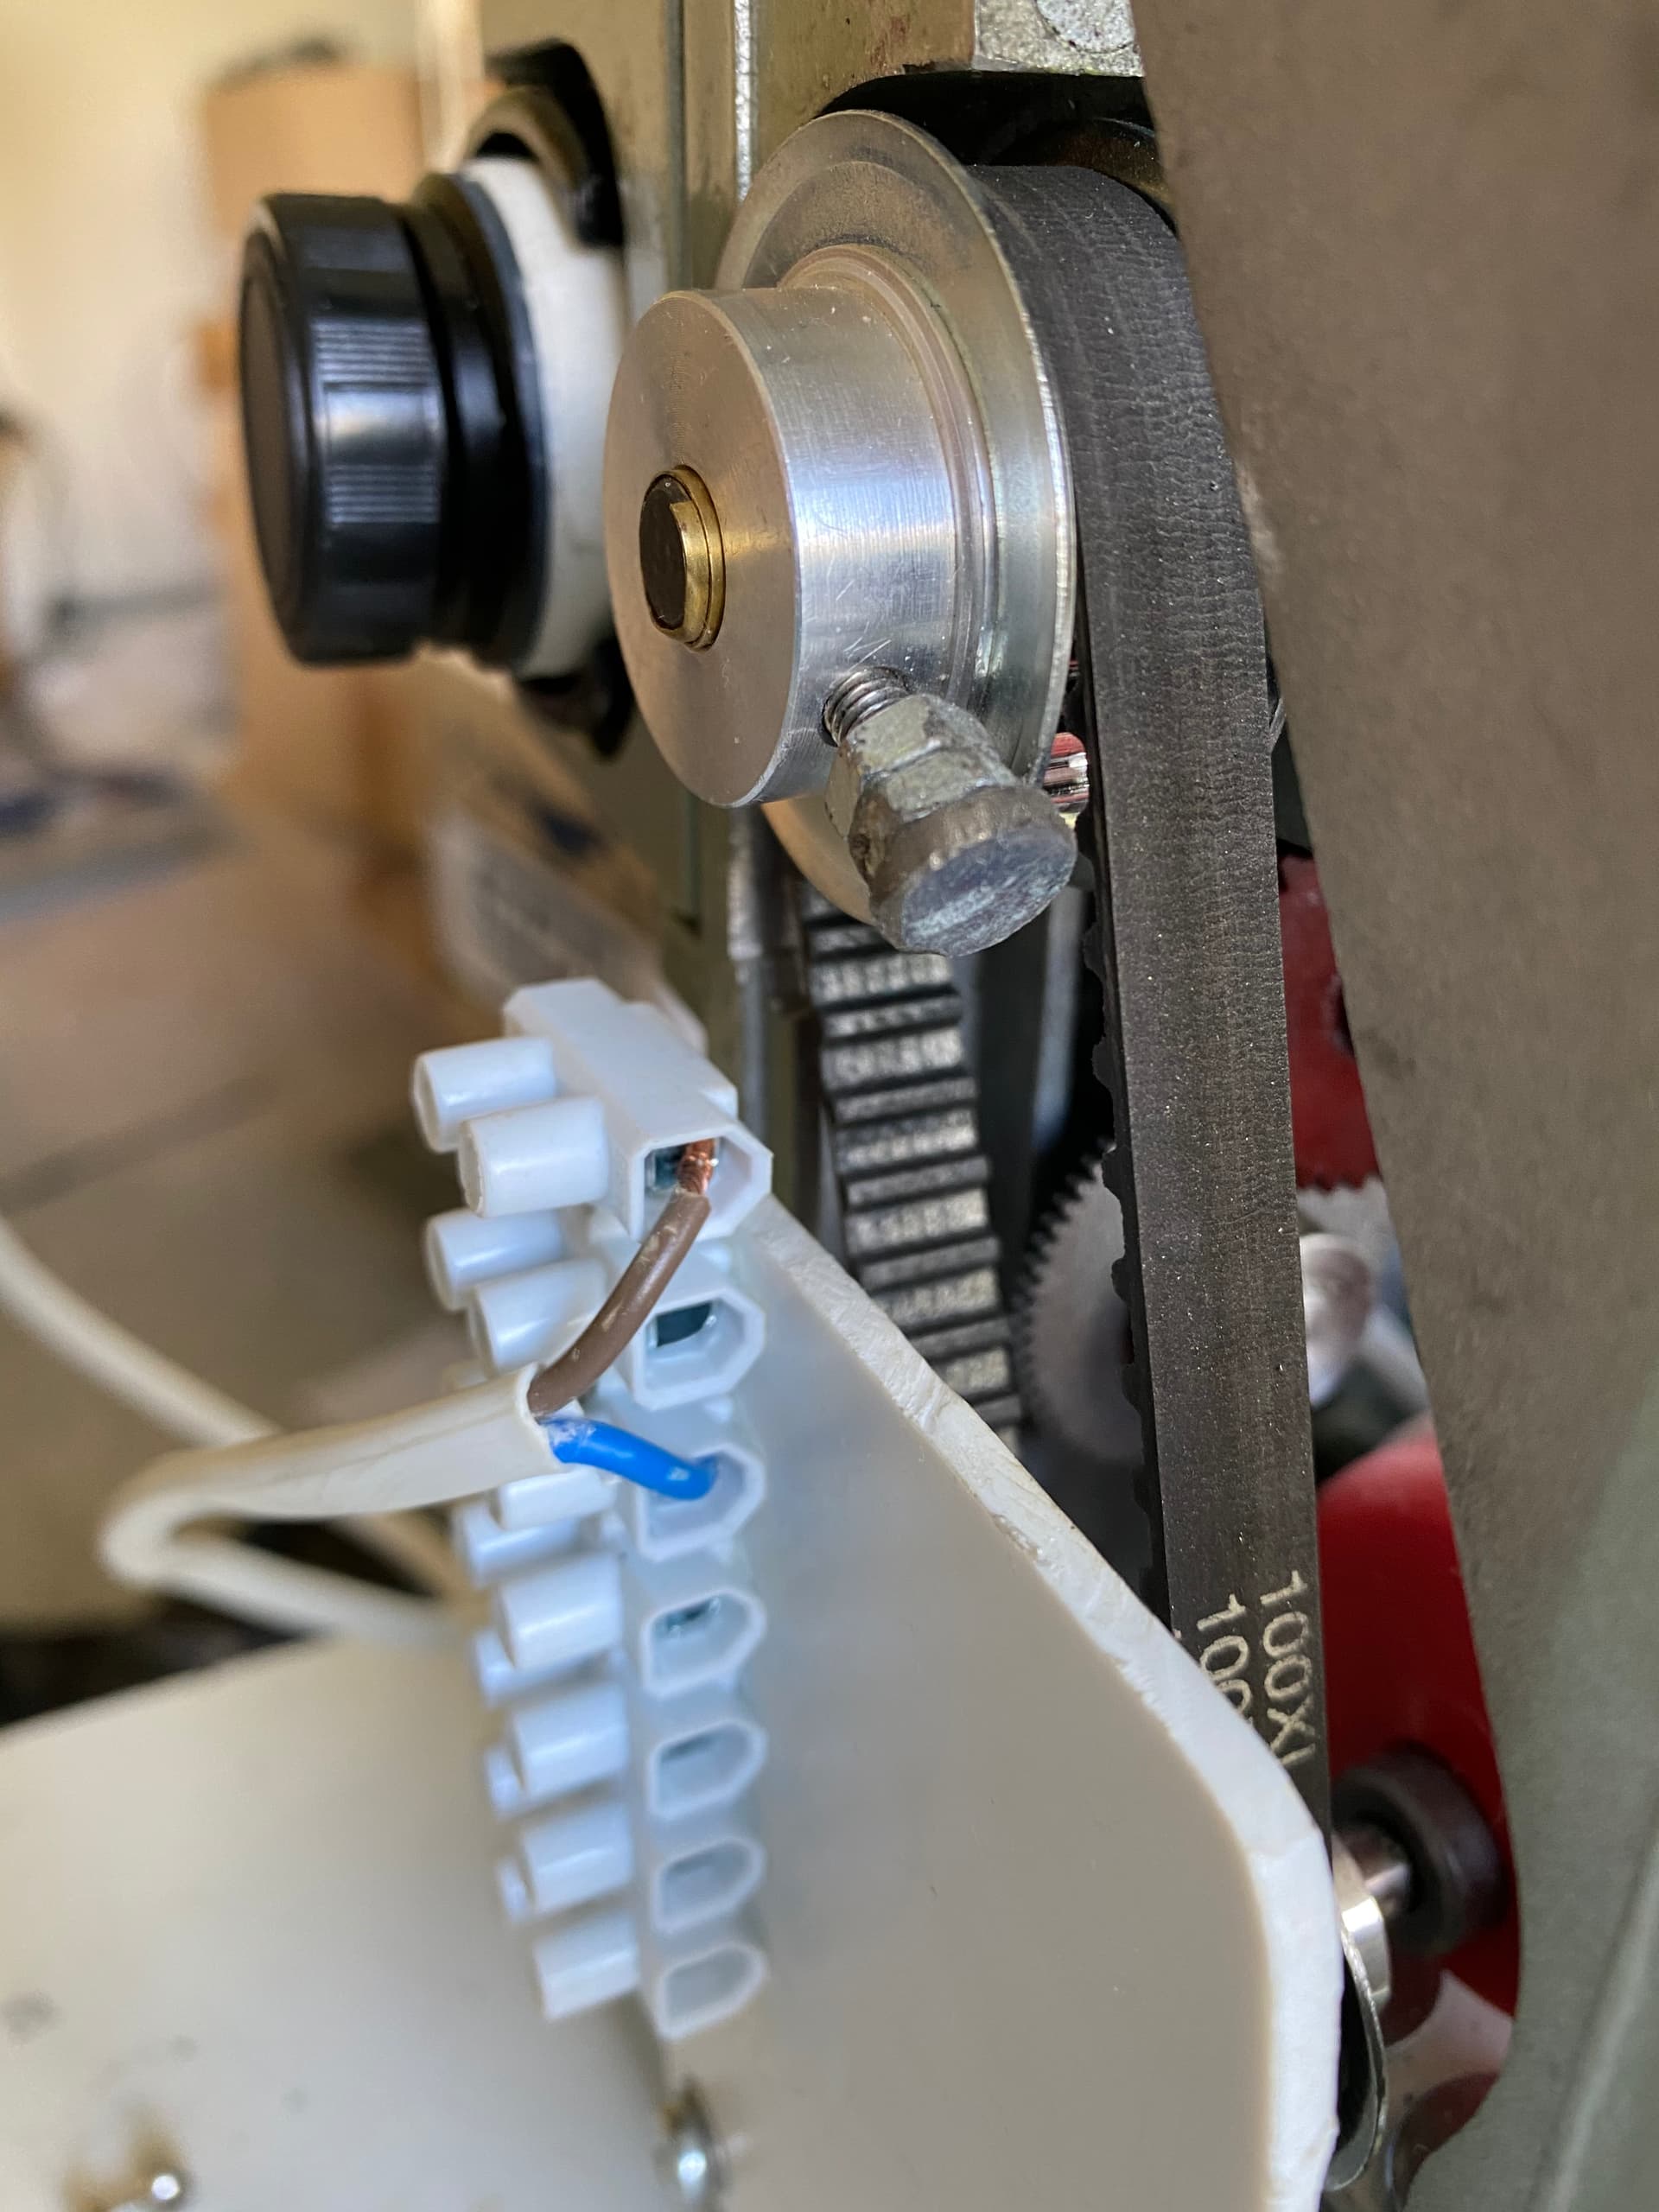
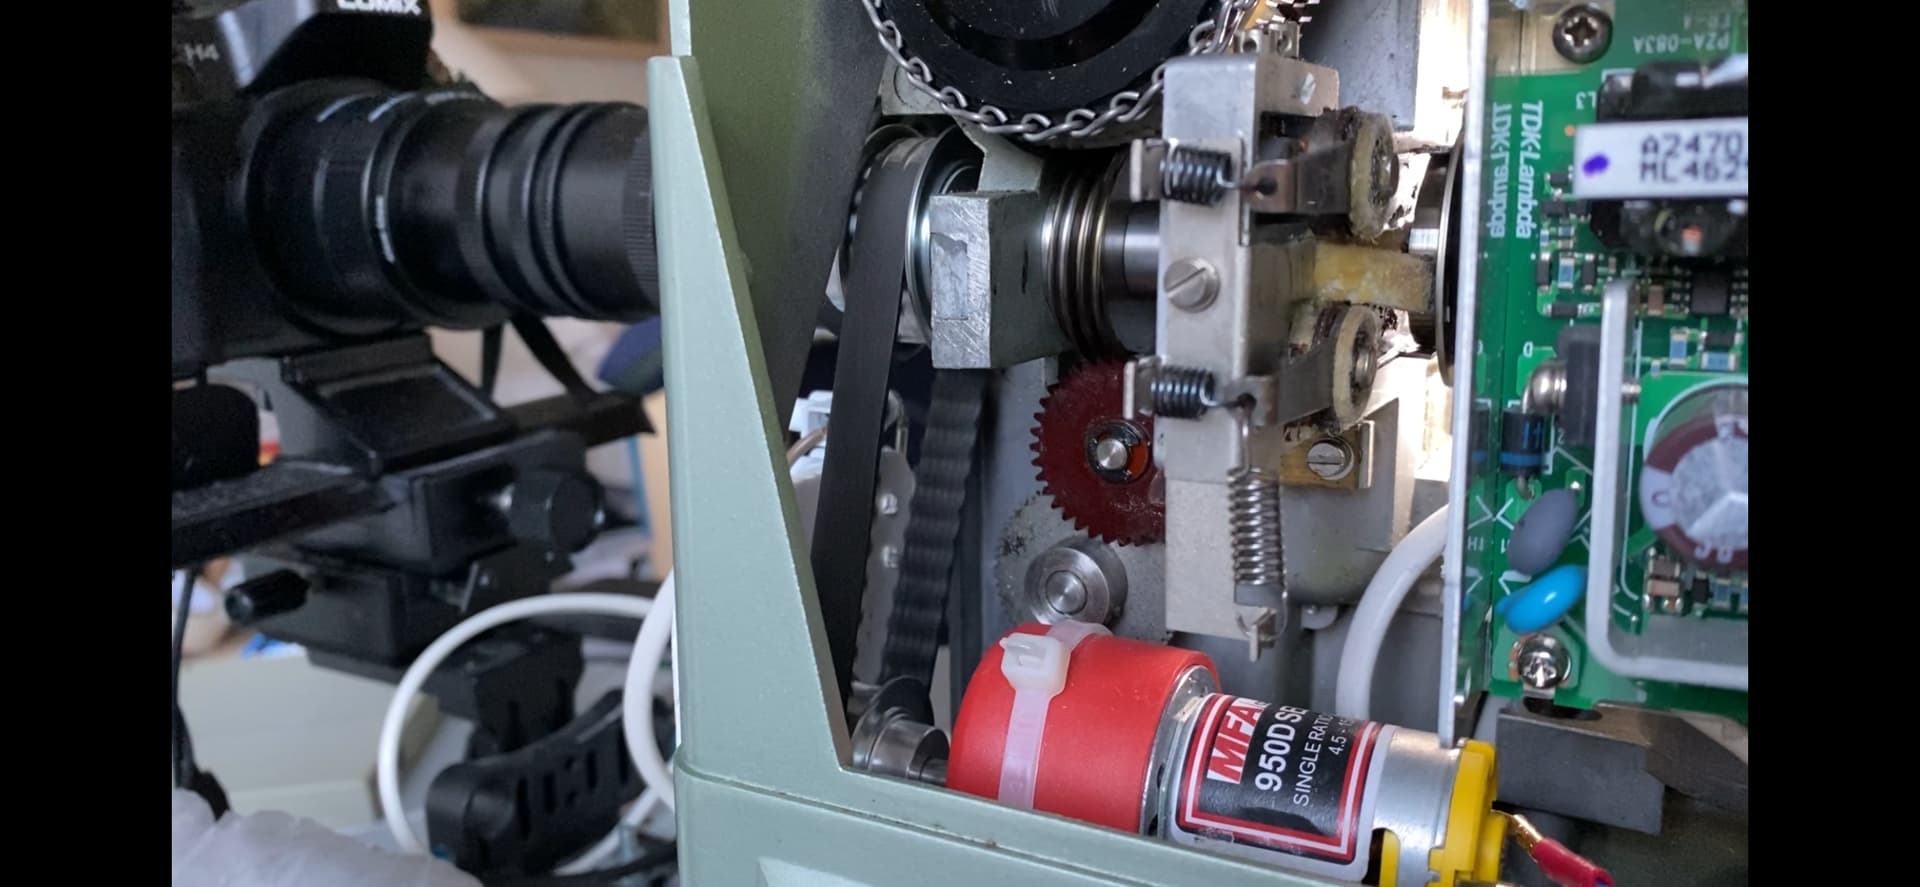
I removed all the original parts (motor, ecc…) and cleaned the mechanics, which was dirty after years of usage and decades of sleep.I have installed a NEMA 23 stepper motor. The motor is driven by a TB6600 driver. Inside of the original case the power supply find its place too. The operations are coordinated by an Arduino Uno board and all the additional components are soldered on top of a prototipe board, which is plugged on Arduino directly. The proper timing is given by an Hall sensor, mounted on the projector. On the main axis, a small magnet is rotating. The lamp used is a led one, controlled by a dimmer. I selected a bulb with good CRI index and E14 socket. I kept the original selector, which allows a fast forward and backward and to start the data-taking.
Some photos of the interior.

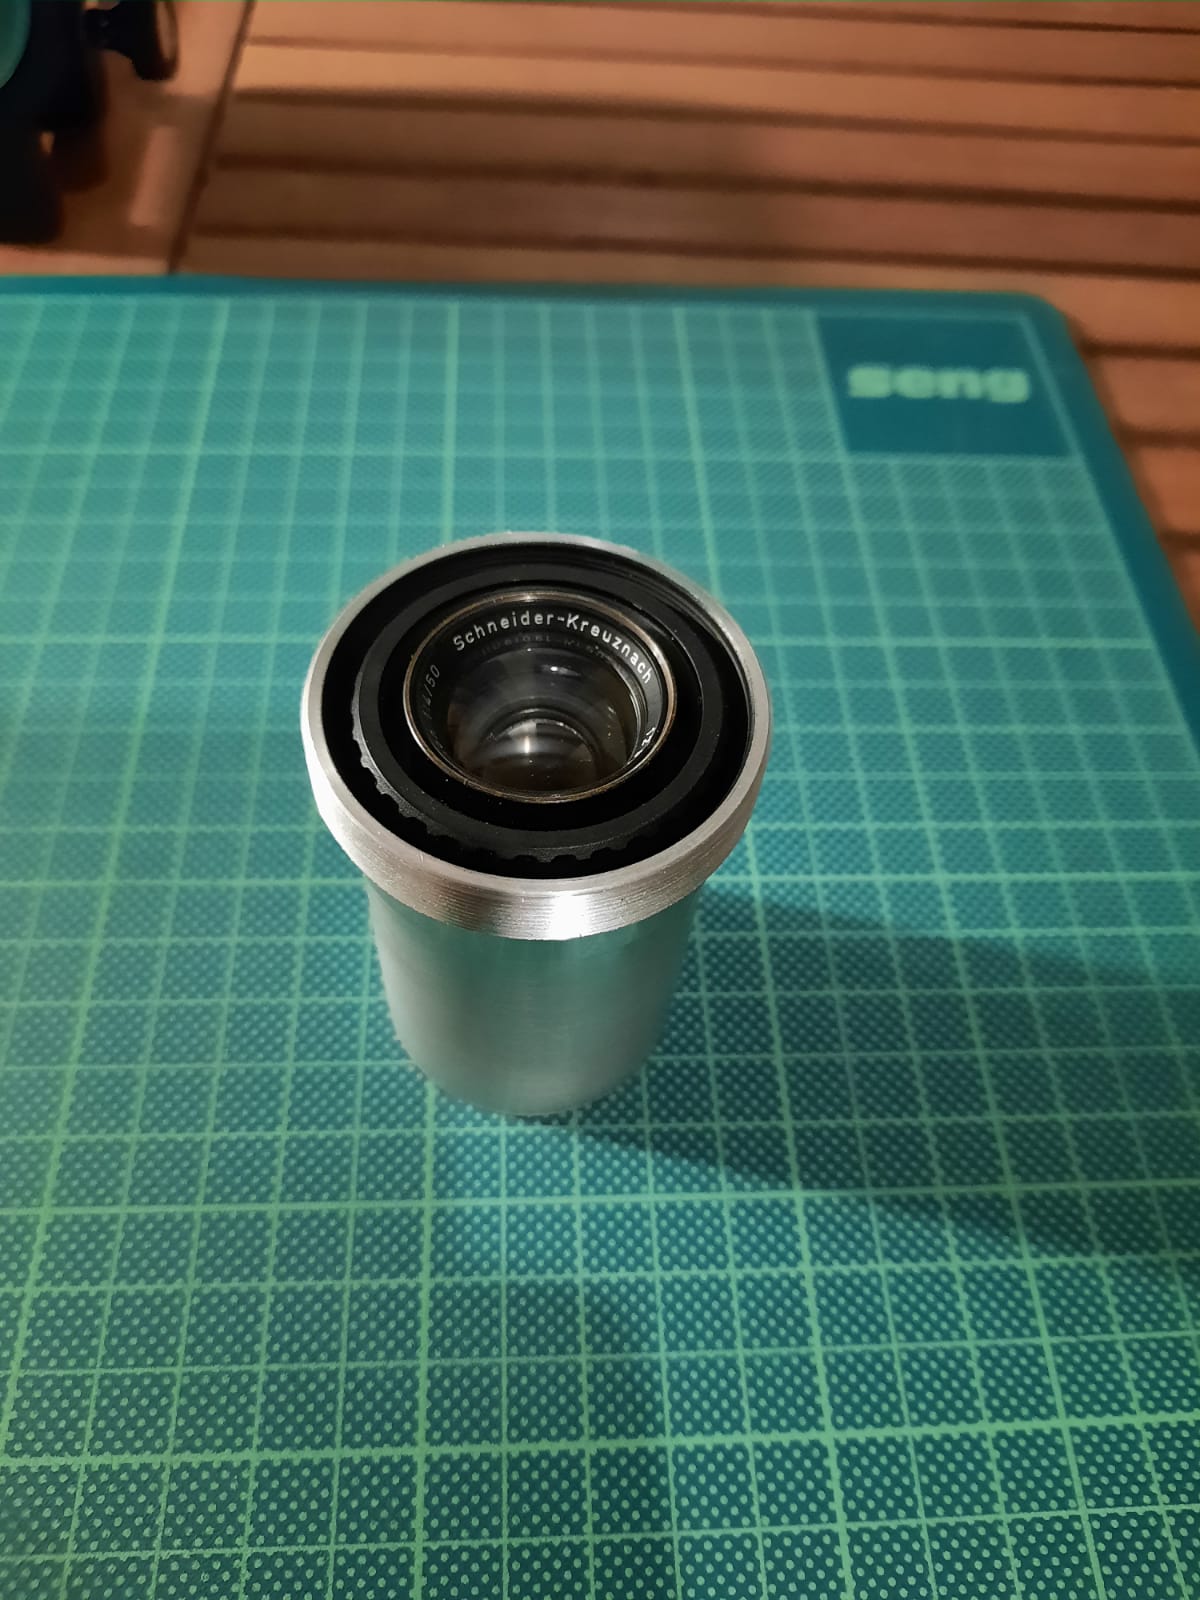
About the optics: I am using a Componon 50/4 which I was not using anymore in my darkroom. The lens is embedded inside a projector´s lens which was damaged (I sacrified it to keep the body only):

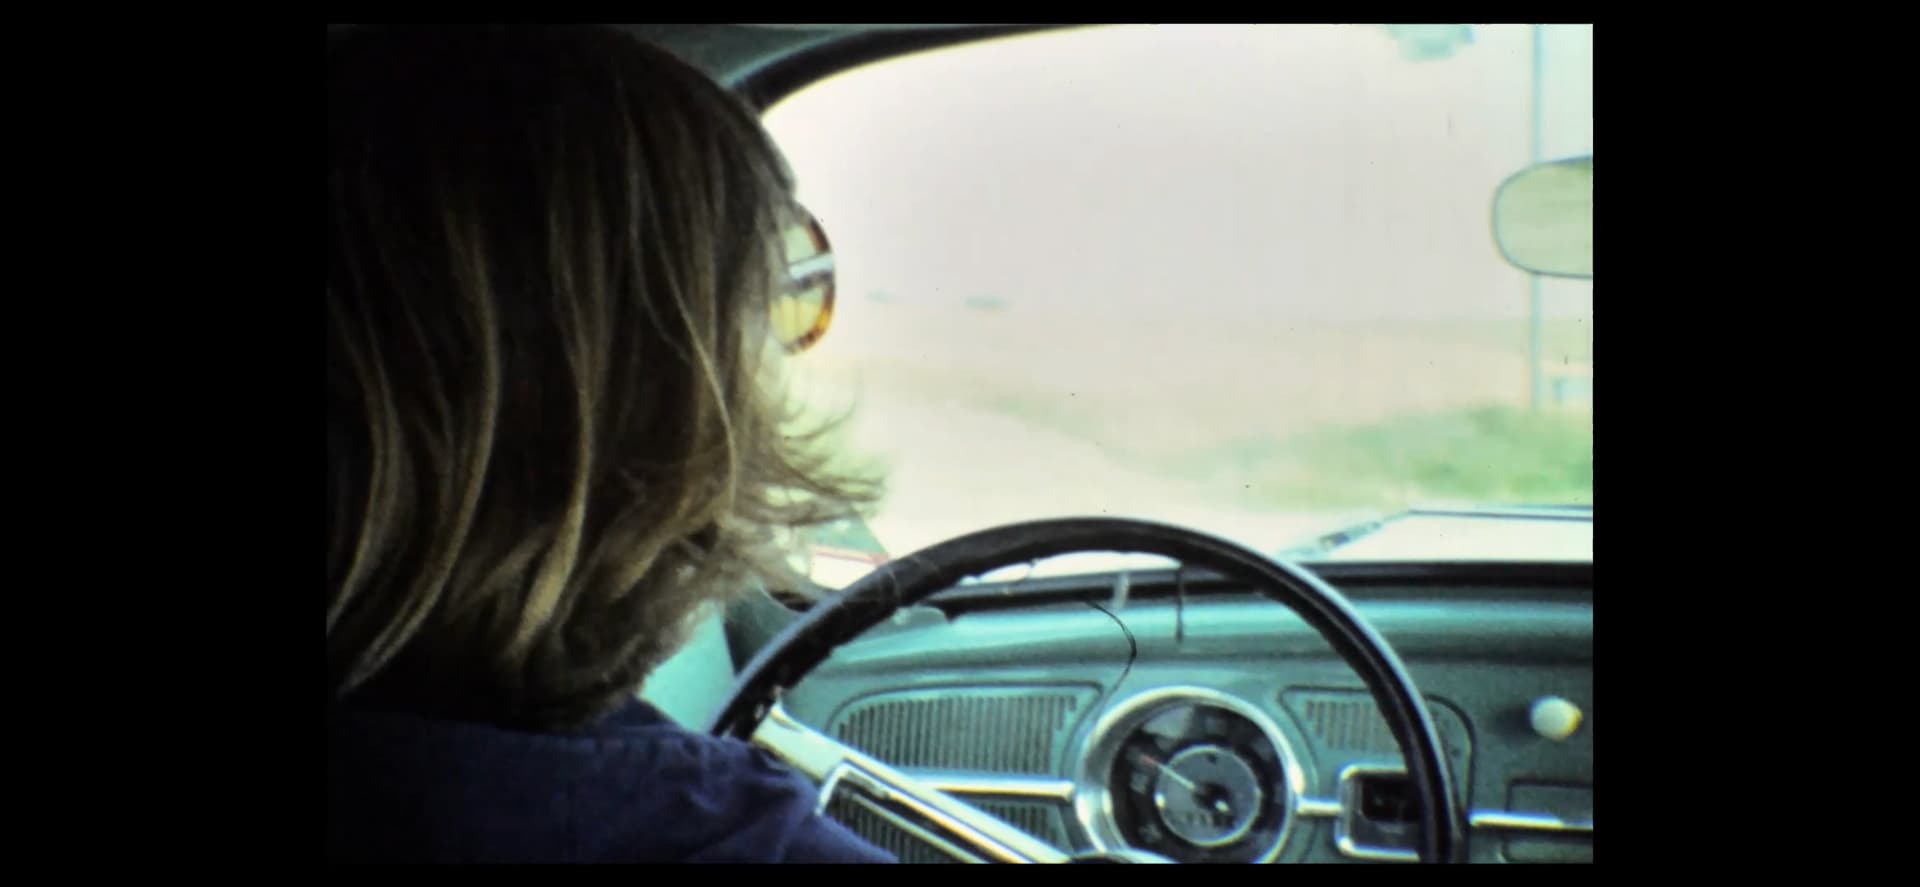
Here is the machine in operation: camera is a Lumix G6, with electronic shutter. The sound you can hear is not the shutter, but coming from the camera´s loudspeakers. It can be deactivated. I connected the camera to Arduino by using a PC817 optoisolator. The camera is powered by an external power supply.

The data taking is very slow, but it can speeded up, because when I was setting the delays in Arduino, I was very conservative. Next step will be to re-configure it to gain some time, even if actually, I don´t care too much about speed, since I need to digitize only my own film (and I don´t use kilometers of film).

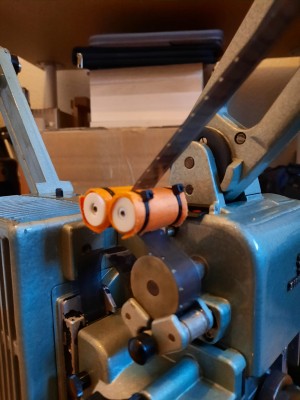
I have also added the following systems to distribute a tiny layer of Filmguard on the film. The microfiber cloth is mounted on the white cylinders, which can be removed and cleaned.

WhatsApp Image 2022-02-18 at 16.54.46

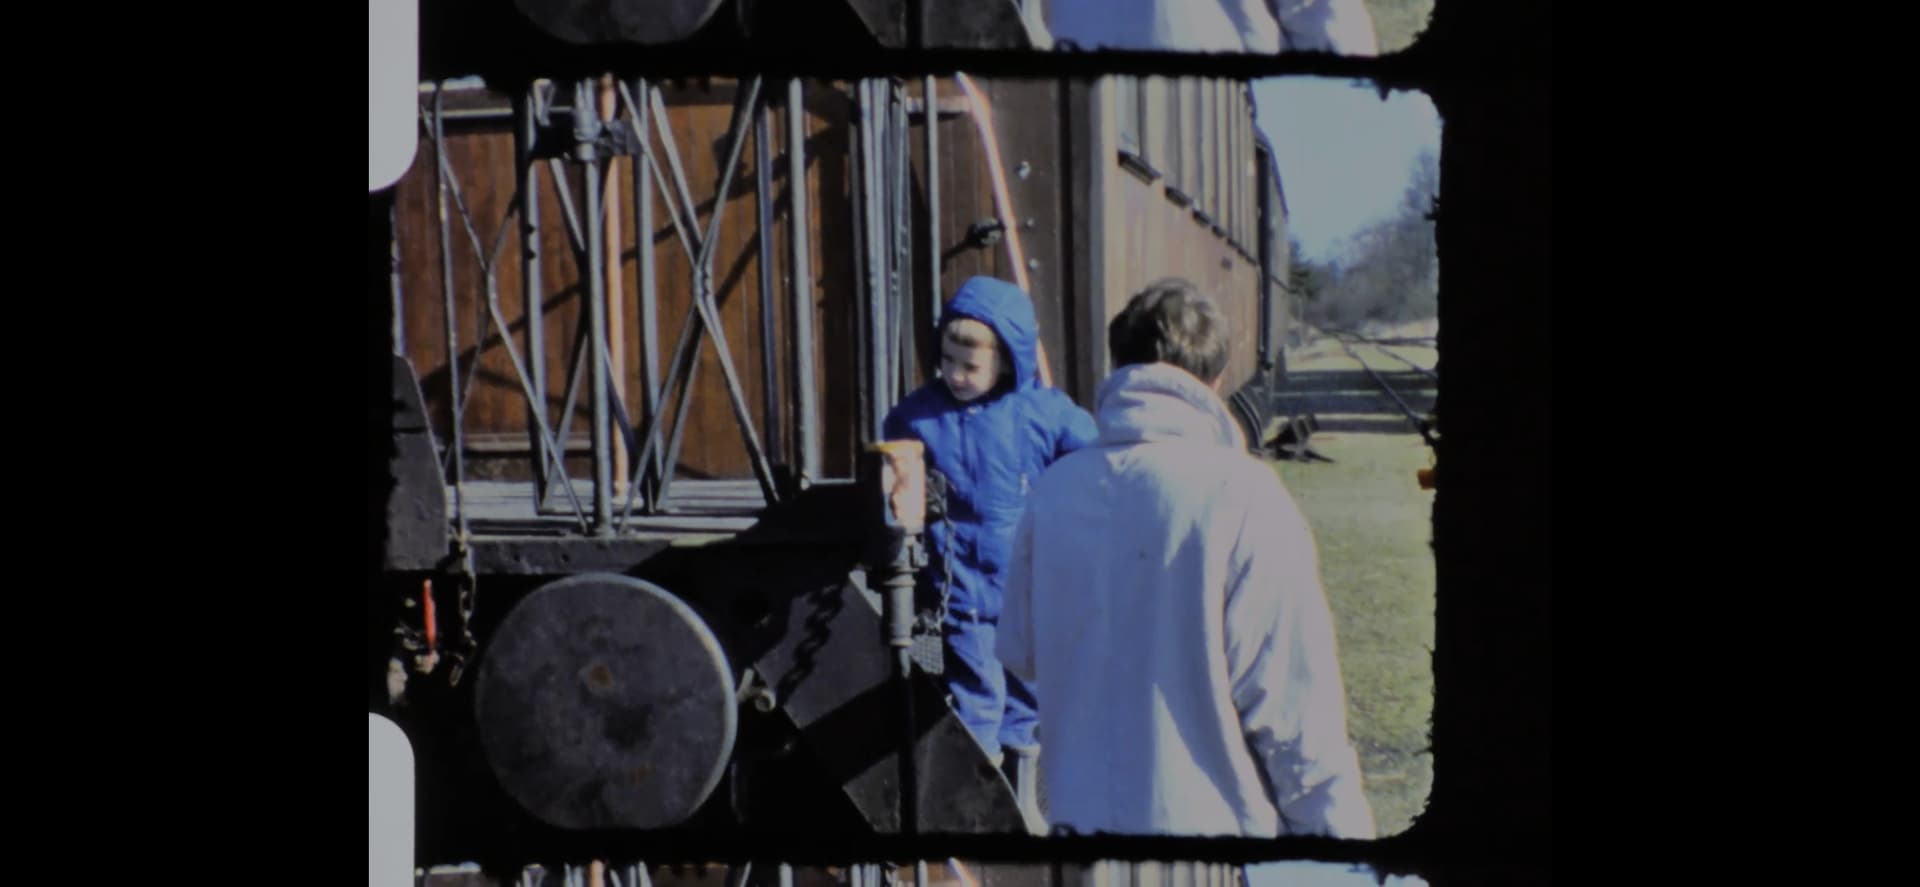
This is a first test of the scanner. I merged the frames, taken in monochrome and with the maximum resolution, with FFMPEG. With Shotcut I just adjusted brightness and contrast. No further corrections were made.

Make me questions if you wish, I think that I could have forgotten to explain some details which you wish to know. If you have any hint/suggestion to further improve the image quality, I would be grateful to you! Now I am using the Componon enlarger lens at f/4, perhaps it would be better to stop it down to f/5.6 or f/8.

Thank you for your space and for the motivation you gave me! Kinograph is a wonderful idea!

3 Likes

Hi Marco,

My congratulations for the excellent work done in the modification of the projector and the good results obtained.

Regards

Yes, this is very nice work. Really for a DIY scanner based on a modified projector if I start from scratch I will hesitate between using a DSLR or a camera like Raspberry HQ or something else. What is your effective fps, I don’t know how much you could increase it without synchronization problem ? Can you also indicate your resolution? From the picture it looks like the size of the sensor and the 16mm frame are about the same?
Beware a dimmer for the LED can have an undesirable banding effect
For the lens it is probably better to open it to 5.6, the film you show does not allow to know if there is loss of sharpness in the corners.
To be complete, you should also detail the software solution, DigicamControl + Arduino Plugin ?
For post processing ffmpeg is a good solution to merge the frames. There are two approaches, those who use a NLE like Da Vinci or those who rely on Avisynth (see my restore project)

Hi Marco, congratulations, great work on a very clean build.

A mirrorless camera is a good choice and the initial results are impressive, and with 16MP you have a good resolution for 4K.

I had very good results capturing raw (Nikon DSLR) and then balancing/encoding with Davinci Resolve -the free version.

I did notice there are hiccups on the water stream, it looks like a frame is repeated. That may be the result of the encoding, and not necessary caused by your scanning.

In regards to the Componon at f4, what I have seen is the best overall resolution is when it is set between 4 and 5.6, definitely will loose resolution sharpness if you go beyond 5.6. The gain of depth of field would make the center look sharp but the sides/corner will suffer. This website/test provides great information on the performance of the lens vs aperture.

Again, congratulations and enjoy!

Hi, in this case I was taking data at maximum size, which shall be 4608x3456 pixel with the Lumix G6. In the video I show I am using a very low speed to digitize (if it is this what you mean) but I have already reprogrammed Arduino to reduce the dead time. The Lumix G6 has a micro 4/3" sensor which shall have similar size compared to the 16 mm frame. At the moment I am not using Digicam since it seems that it cannot control my camera. I will try to learn more and to improve further!

Hi, thanks a lot! I am so ignorant that I don´t know what an hiccups is! Sorry, I am not really expert in this field. I am more devoted to analog… I will check better the working of FFMPEG, I think to remember to had some warning during the conversion, which I was not considering too much. But better to check more in detail! Thanks also about the information about the lens.

I am sorry if it seems that I made some mistakes, I am sure that the data taking is correct, because I was following it carefully. I think that I must go deeper with the tools like FFMPEG. I was very interested to see a result after months of work. However, I am pretty happy about the stability of the picture, which, to be honest I was expecting to be a bit worst. I will try to improve further!

No need to be sorry, you did great, it is an excellent build and the results are promising.
If there is no repeated frame in the capture (probably the case) I suggest to check at the frame rate used for encoding. If you are using 24 frames, I would suggest encode to the same.

What I see is that once a second the stream slightly pauses for (equal extra frames, and that’s what I called hiccup).

Since it is a very fluid scene is noticeable, if it was a static scene it would have been hard to see.
Again, great results, keep up the good work.

I was setting FFMPEG to 24 frame per seconds. Then I imported the video in Shotcut and I am pretty sure that I exported it to 25 frame per seconds. I noticed that later. Probably that was the mistake.

I think so too. Great work Marco.

I want to implement a sensor which tells Arduino to stop the acquisition when there is not film anymore on the front reel. The front reel stops to rotate when there is not anymore film on it. Please check this video:

I have some ideas:

  1. tachometer based on Hall sensor?
  2. IR sensor which detects if film is there (but perhaps the film is transparent to IR?)

Do you have some suggestion?

1 Like

That’s a very cool idea actually!

I think what I would do is to mount an IR proximity sensor (KY-032 or similar) to the arm that holds the reel. The idea would be that this sensor detects the spokes of the reel going by. If for a certain number of frames no spoke was detected, it is safe to assume that the reel is no longer moving and therefore no longer has film on it.
This has as a key advantage compared to a Hall effect sensor that it doesn’t require anything mounted onto the reel.

Great build by the way! :wink:

Thanks a lot! I have ordered a small IR transmitter and receiver. Let´s see if I will be able to implement it!

Hi….

Two minds, two continents…Same idea! .I made a transfermachine with the Siemens 800 for regular8 !! And like You, it works !
I use a Lumix gh4. My machine was finished spring 2021.
Regards Troels


I don’t know if You can see the Photos….
The transferspeed is appr. 4fps.
The advantage of Siemens is, that You can run the film reverse and get the emulsion-layer optical fixed. The Double-claw allows optimal run forward and reverse.
-Troels from Denmark
Ps.: I’ve tried to upload a piece of homemovies , I haven’t succeed yet….sorry !

Hi ……again

The upload of my results doesn’t work for me….so sorry.

I scan 5K resolution, and this fair: because the editsoftware costs! The result is a HD movie, that is beyond imagination of what You can espect from a Home-movie.
I don’t use fancy tricks, only imagestabilisation and crop.

Regards Troels


Congratulation! Very nice work!

Congratulation also to You !! Very nice bulid, and like mine Solid as Rock :smile:!

Hallo Marco…

Unglaublich, zwei Leute mit der gleichen Idee zur selben Zeit.

Das Ausschlachten war ‘ne mühsame Sache, doch wir haben hier eigentlich keine Verschleißteile mehr!
Ich hab’ bei Conrad die meisten Teile für den Projektor bekommen. Optik und Kamera im Netz gefunden.
Die Lichtquelle ist eine Großflächige LED-“Birne” mit viele Klein-LEDs und eine milchglasige Matt-scheibe zum Verteilen des Lichts. Farbtemperatur wird in der Kamera eingestellt und fixiert. Kein Nachjustieren nötig, doch die Möglichkeit besteht immer im Computer, hab’ aber keine Zeit dafür.

Ich hatte gehofft die Geschwindigkeit des Transfers sei schneller, doch das “Read-out” des Sensors der Kamera gibt’s nicht her, leider. Auch das “Schreiben” auf dem Stick, läßt bei mir nach etwa bei18.000 Bildaufnahmen….ca 256 GB. Ich mache nicht RAW-Bilder, denn daß sprengt den Rahmen und Kapazitet auf dem Stick und Computer……

Software ist Corel VideoStudio Pro, und ein NoName Videokonvertierungsprogram zum Downscalieren.

Auch bei mir sind es nur eigene Normal8 Familen-filme von 1963 bis 1985 (fehlen nur 1963-1972). Danach geht’s in Super8 und 4 filme in 16mm. Aber da wir die Optik und Kamera haben, werden es “nur” zwei andere Projektoren benötigen…und die habe Ich bereits.

Wie bereits erwähnt, Glßckwunsch mit deine Bemßhungen !! Toi Toi Toi !!!

MfG Troels

Hi Troels,

thank you so much! Siemens projectors rock! I have found a solution to detect the end of film with an IR sensor. I will implement that in the machine very soon!