Scan Examples of Super-8 material

Hi all,

I want to invite people to share in this thread scan results of their Super-8 scanners, to give us some ideas on how different old film stock is performing, as well as how good a sensor/lens combination is performing on the large contrast classical color-reversal film is throwing at the hardware.

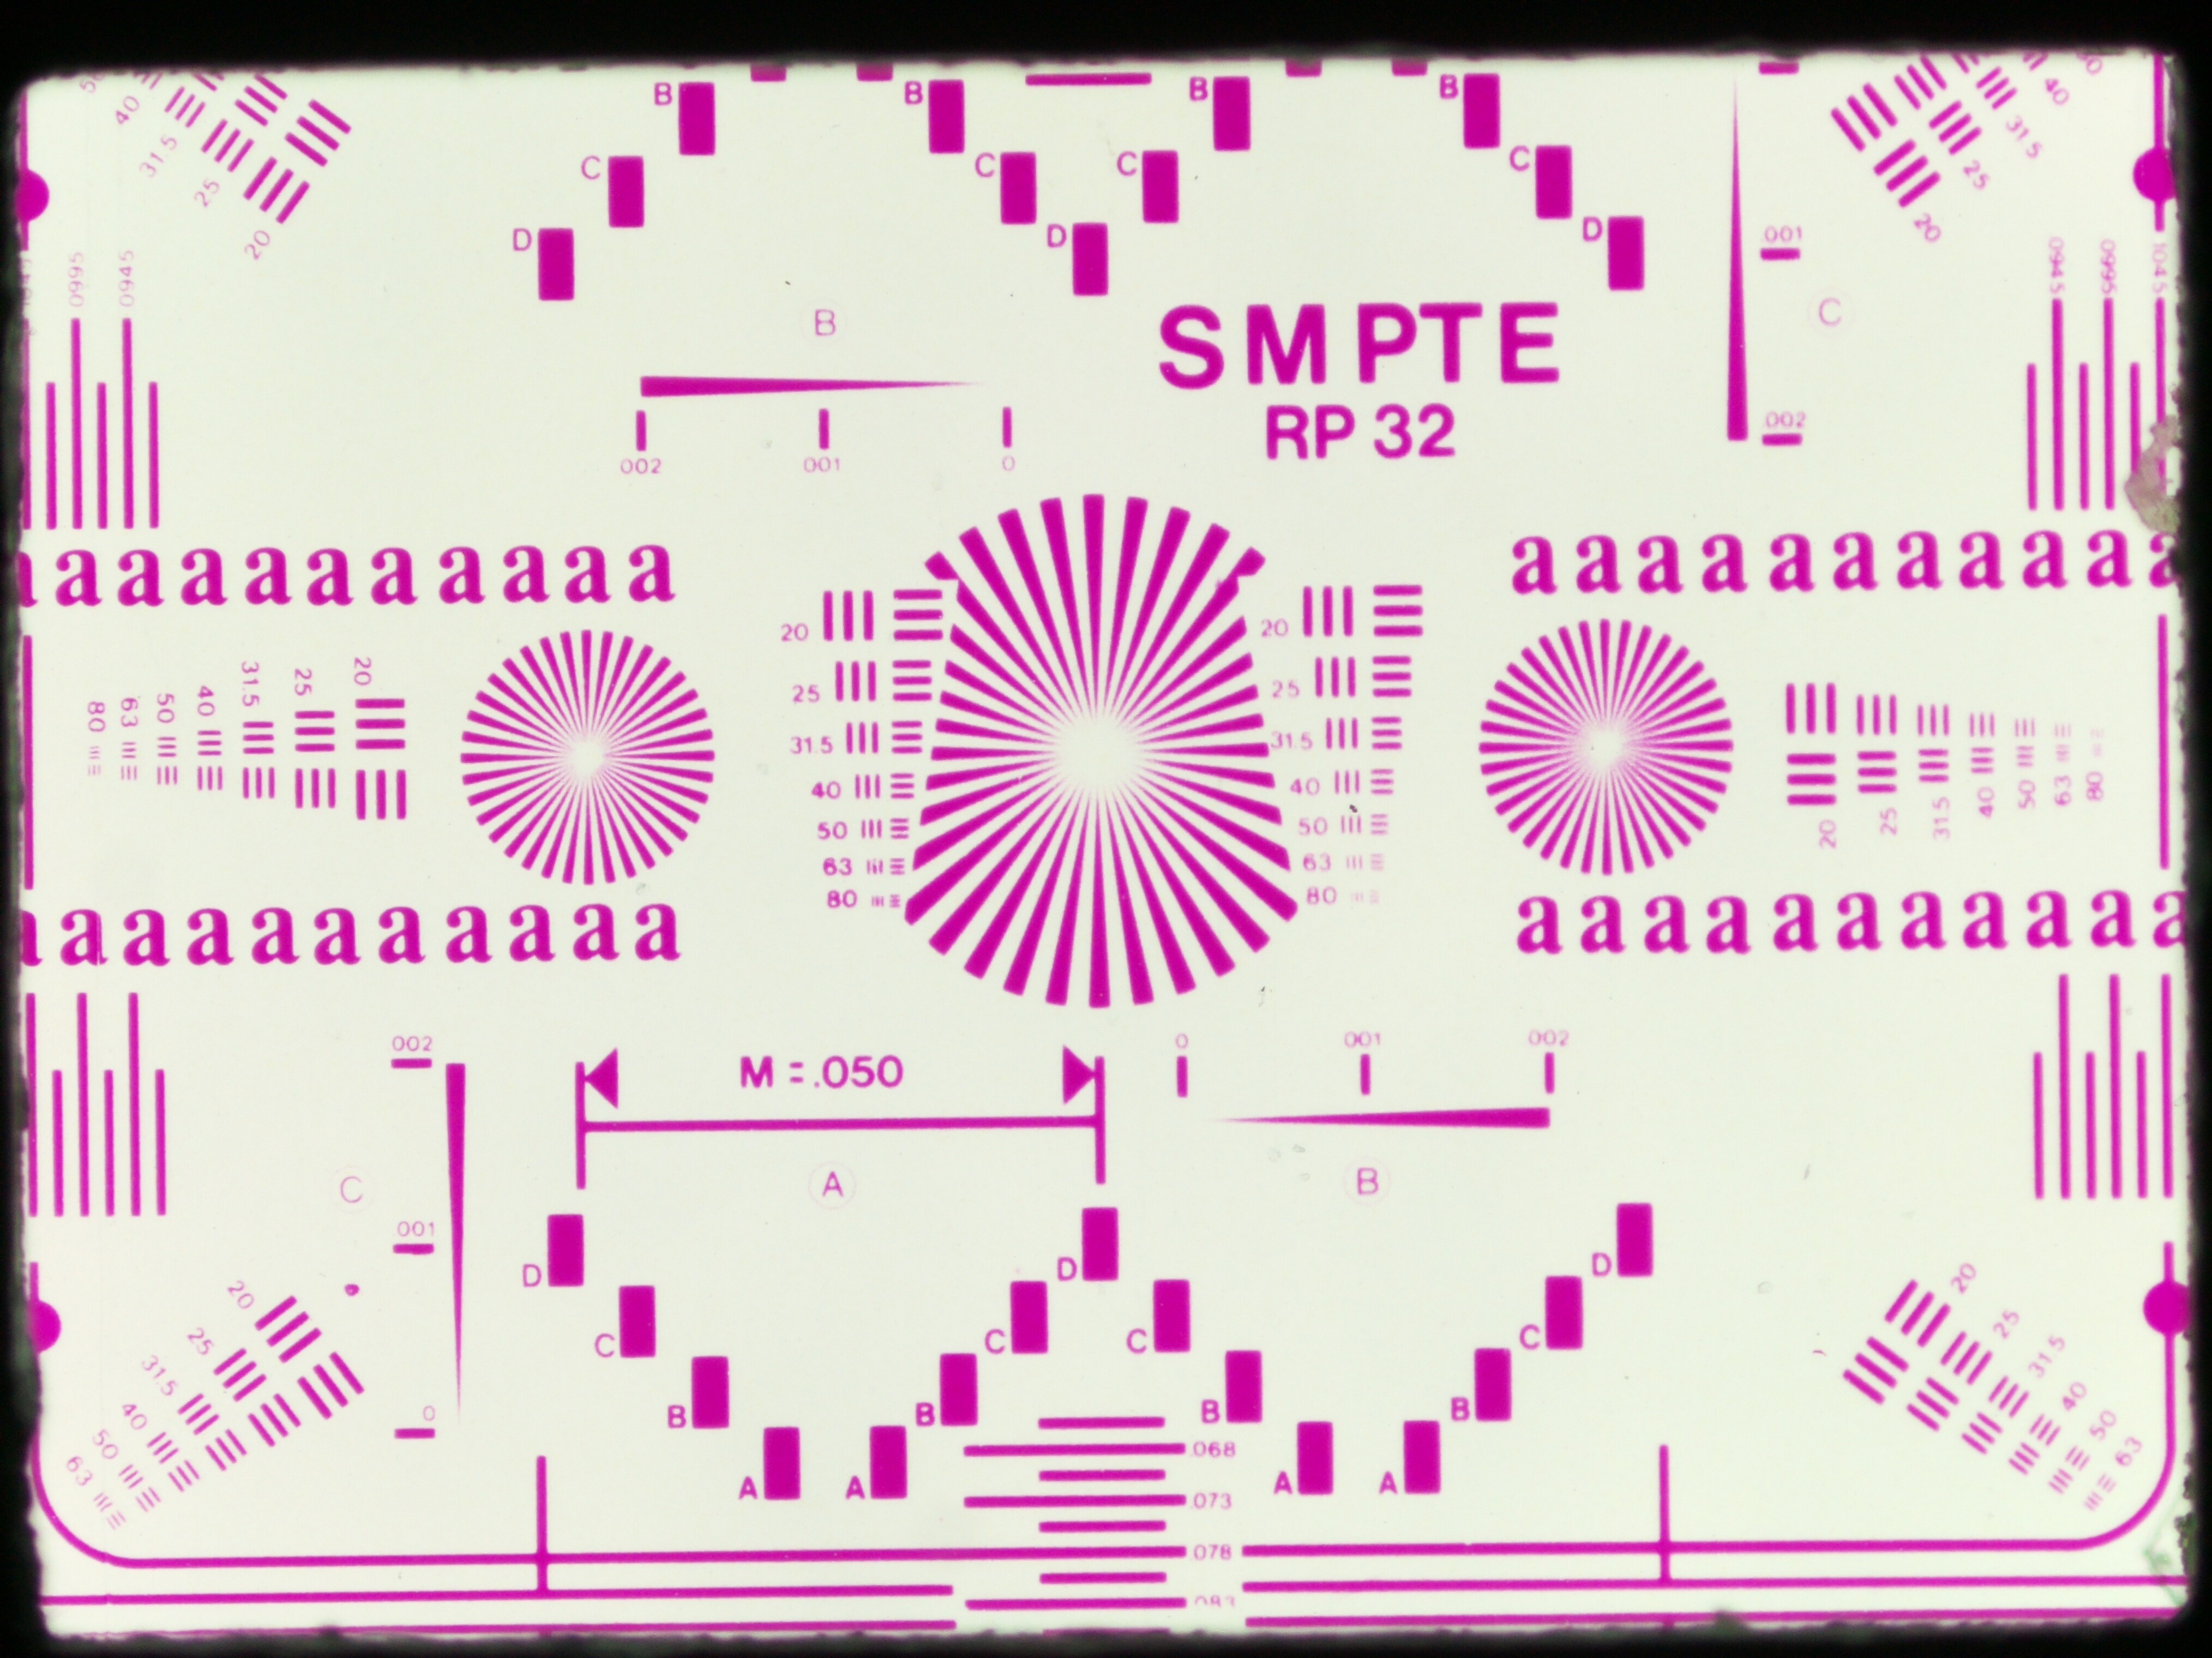
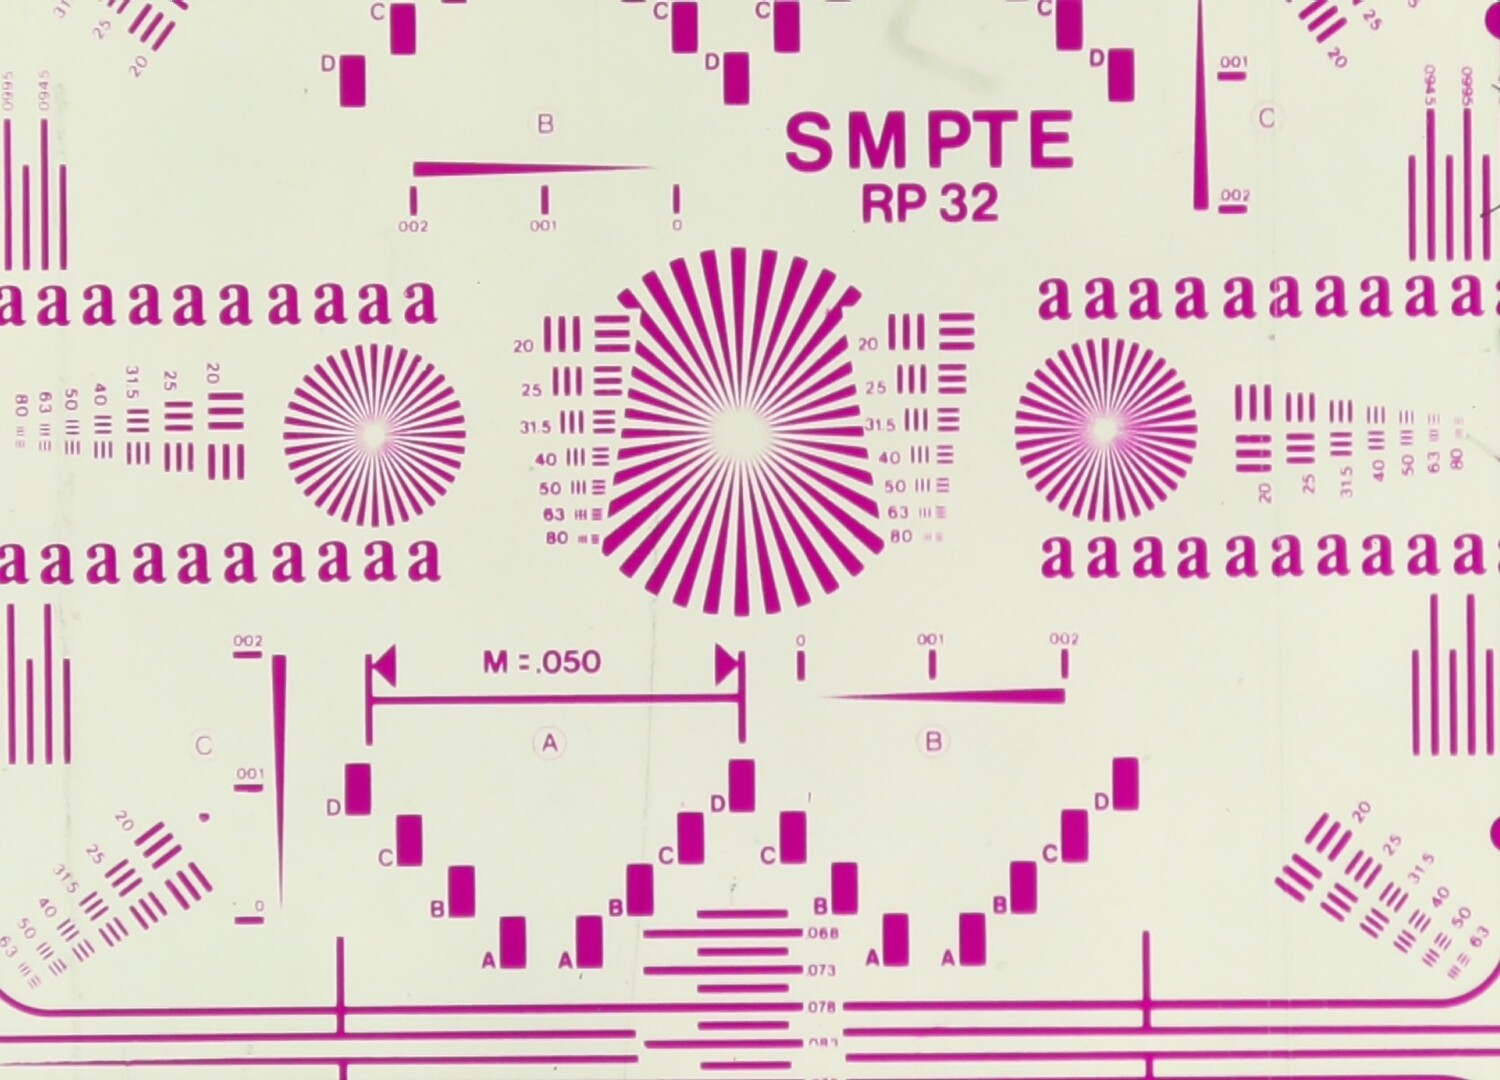
The focus should be on the unprocessed capture coming straight from the camera, not the end of a maybe elaborate and finely tuned post processing scheme. While there are already examples of scans of a SMPTE-Super-8 test film available here on the forum, I want to aim in this thread on real world examples. The SMPTE test film is not a color-reversal film, it’s resolution and density is in no way comparable to what is thrown at your scanner if you are digitizing old home movies.

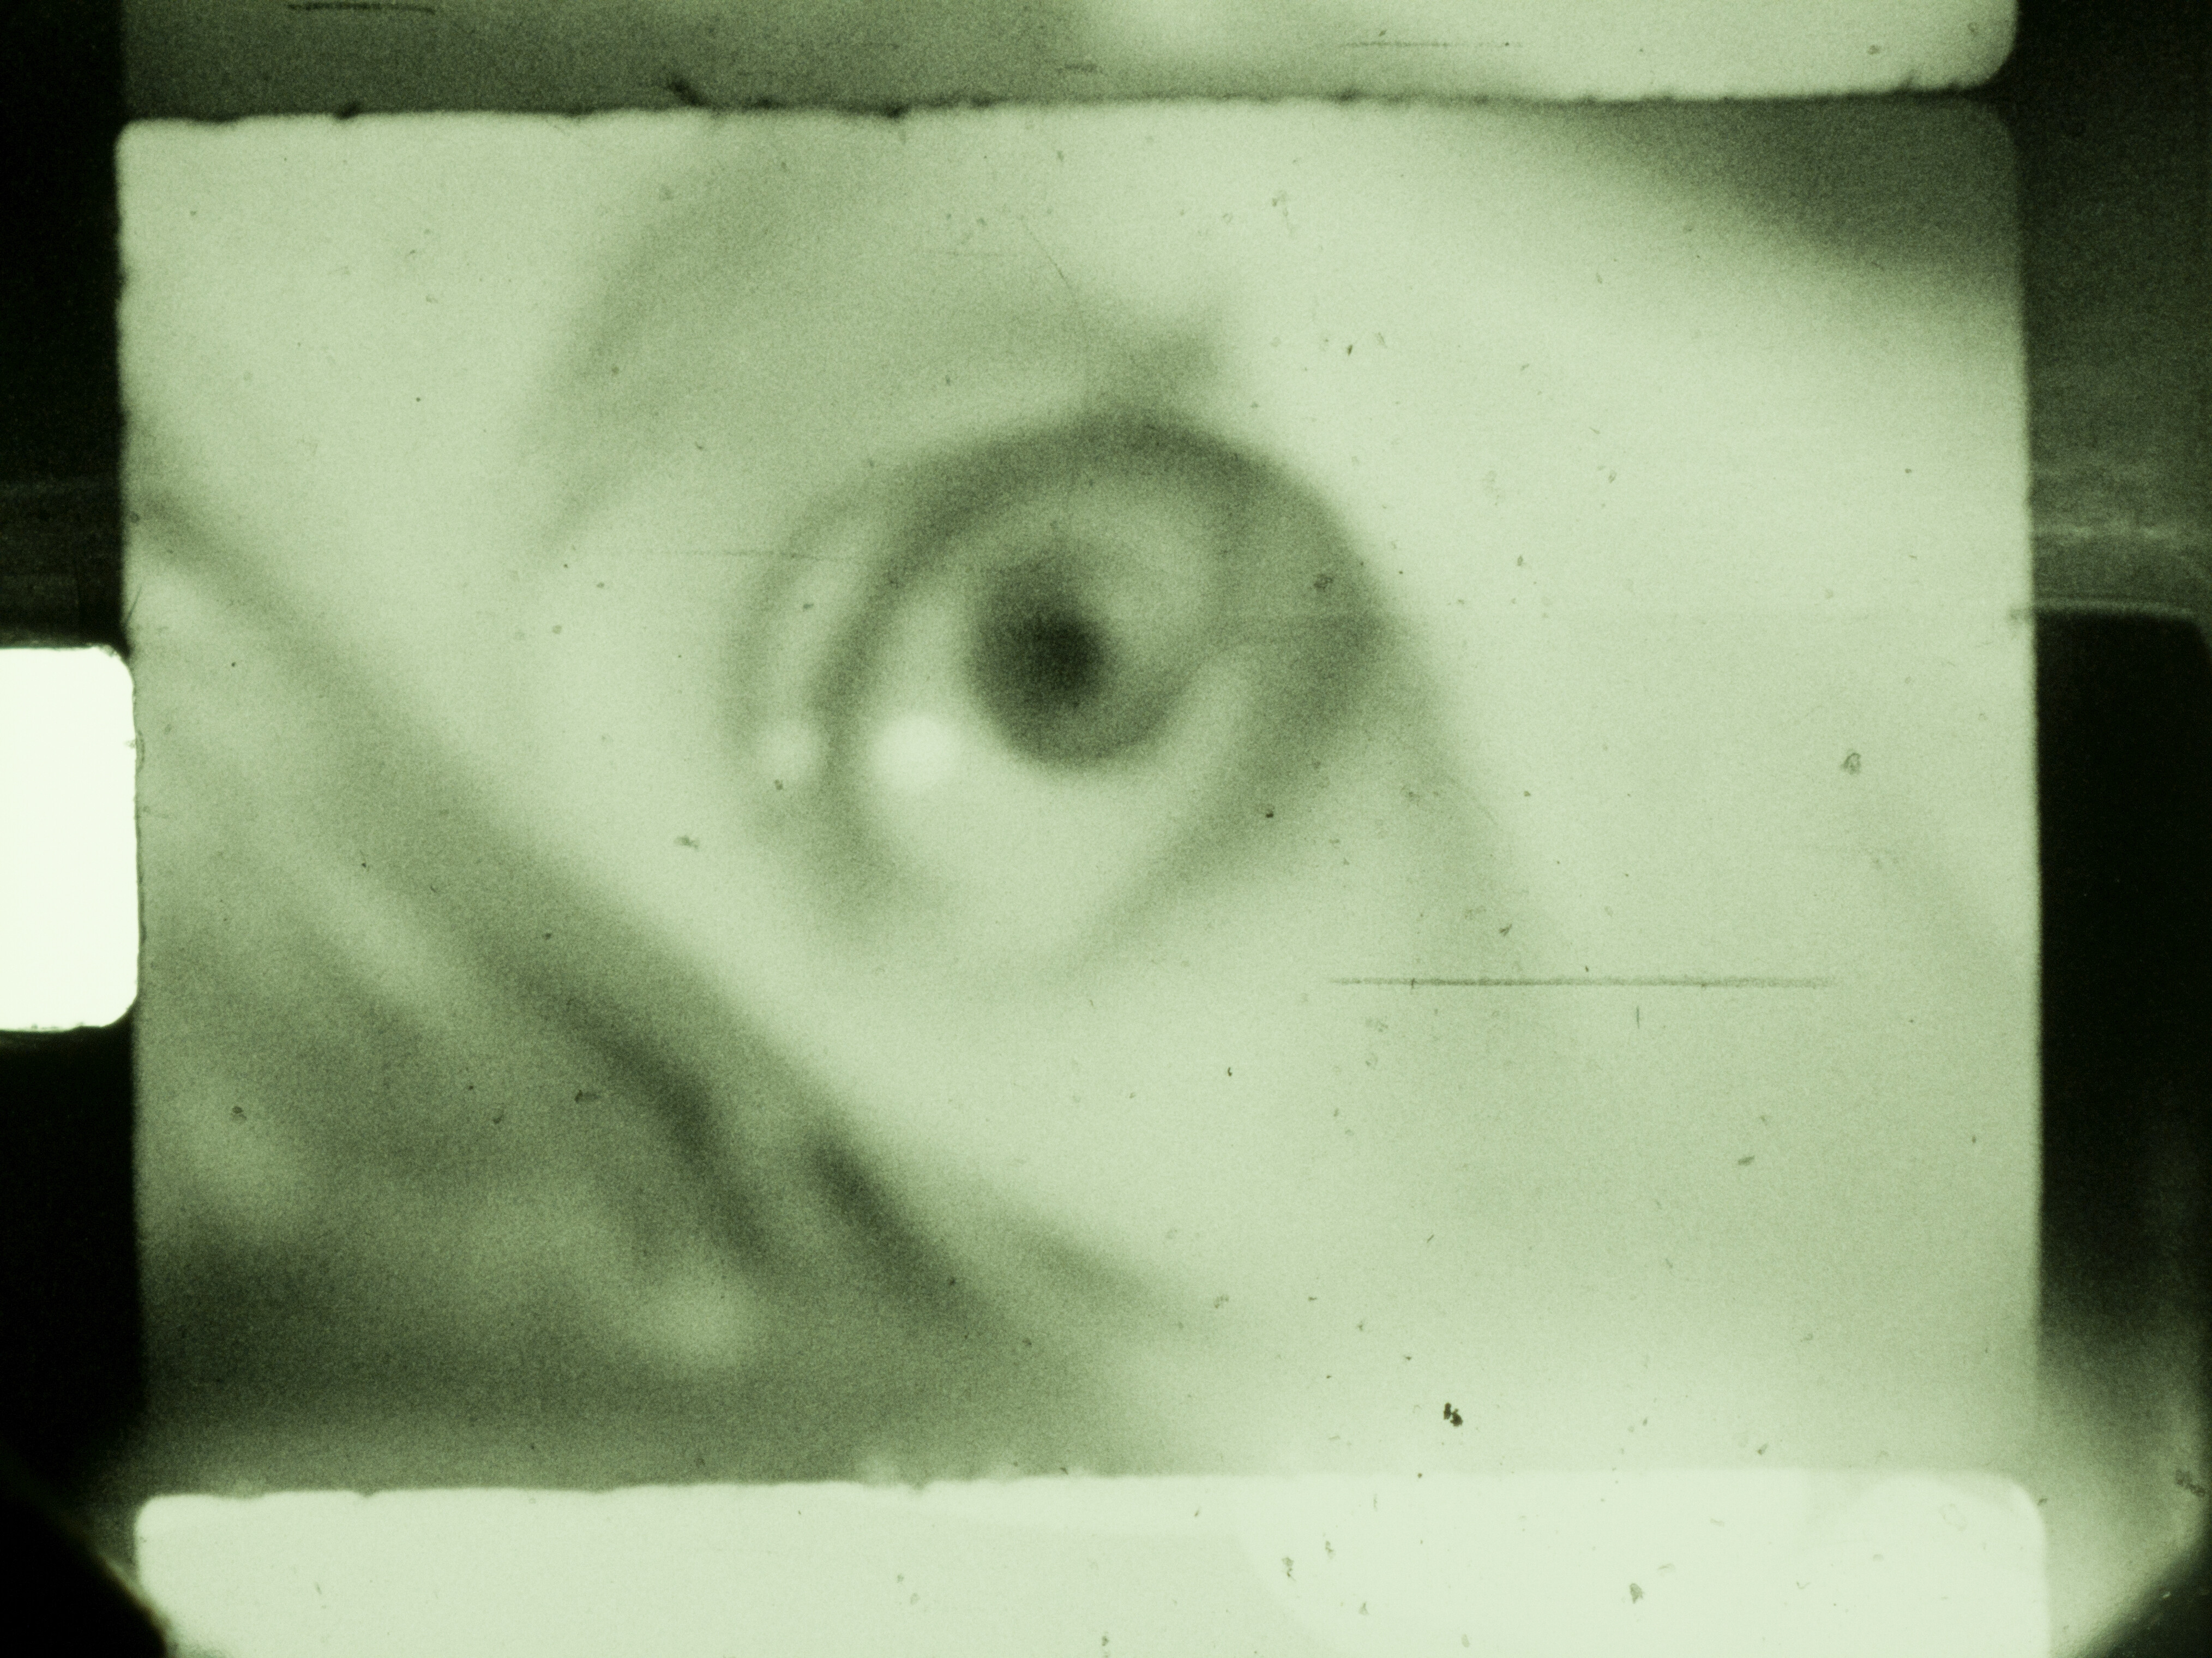
For judging in a coarse way the resolution of the lens/camera combination, one can try to use a frame which includes some dirt. A simple way to do this is to use a frame near a cut between scenes.

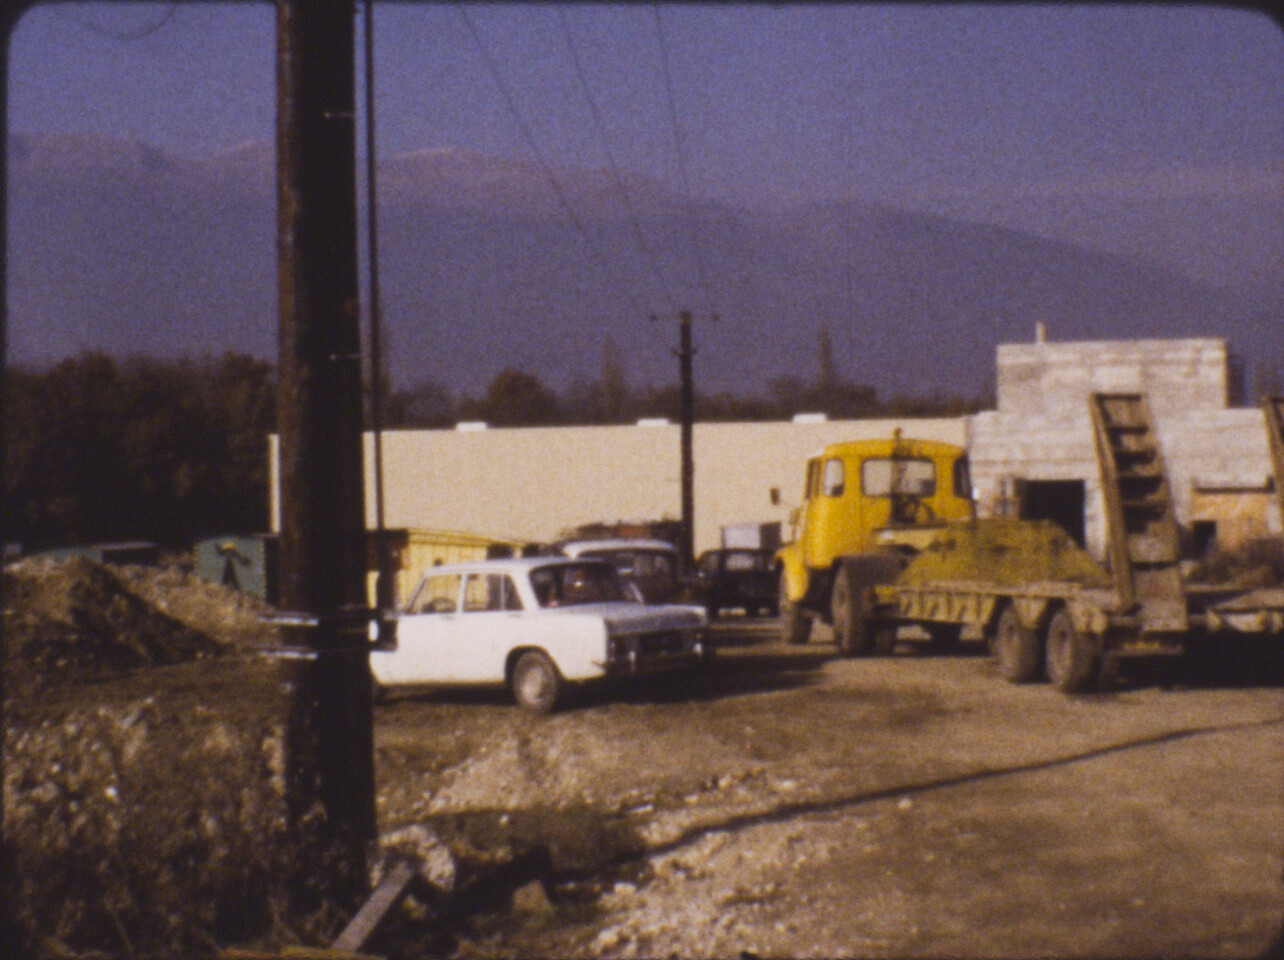
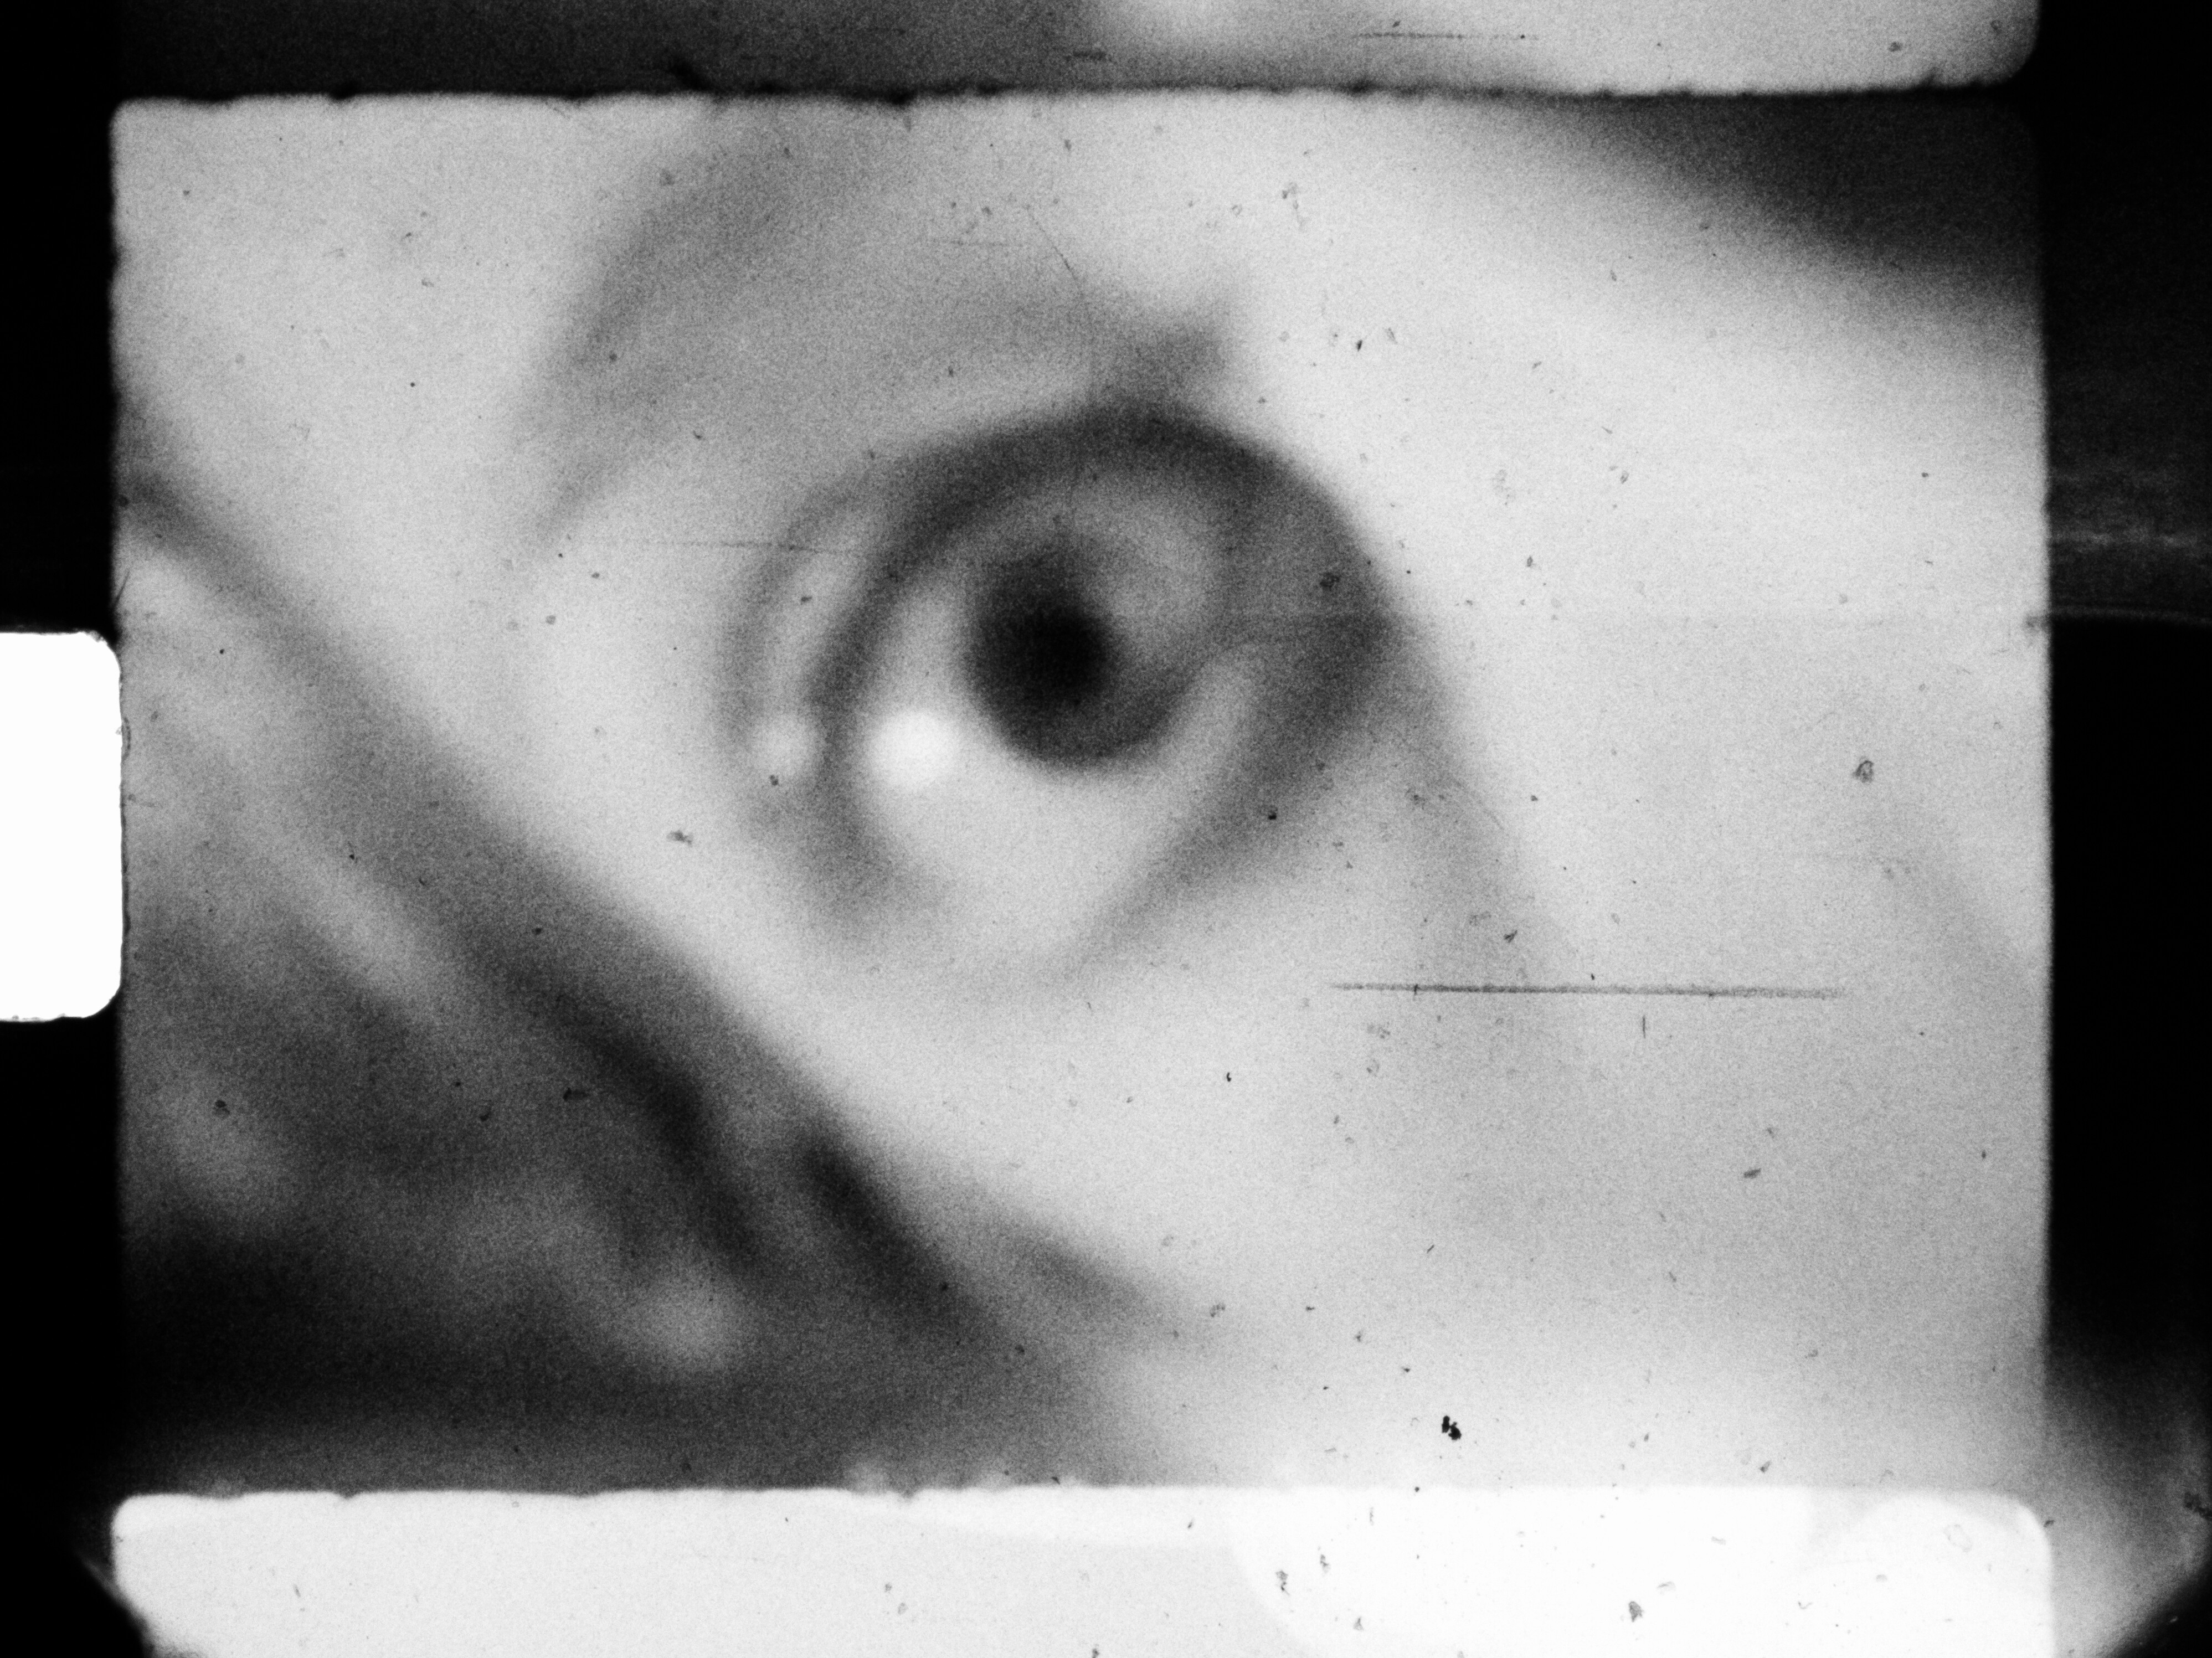
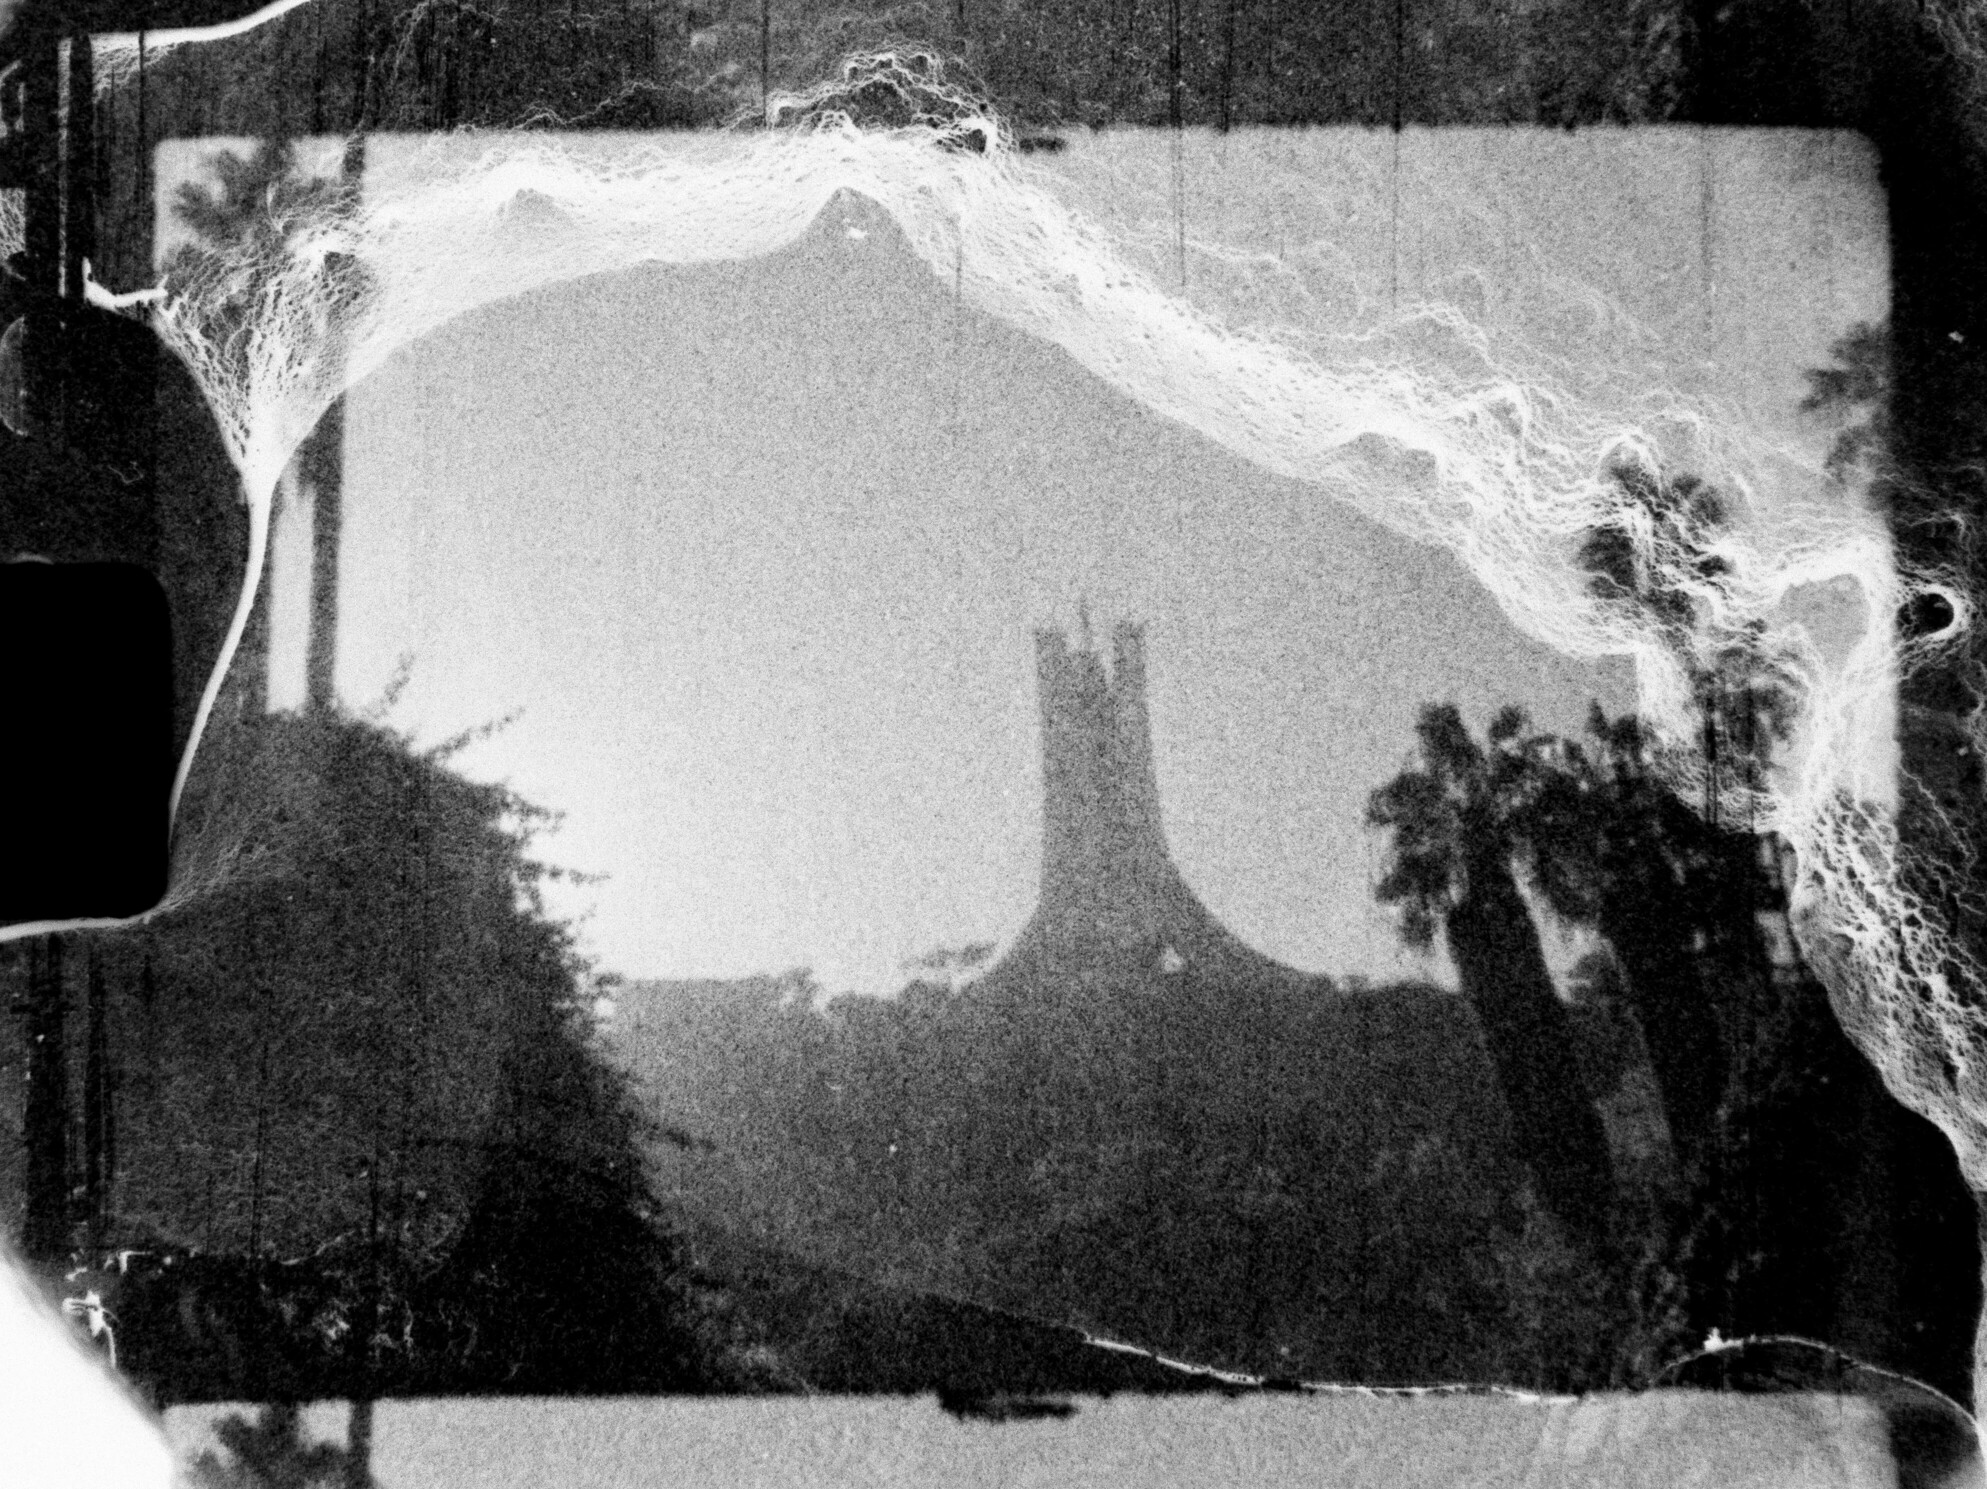
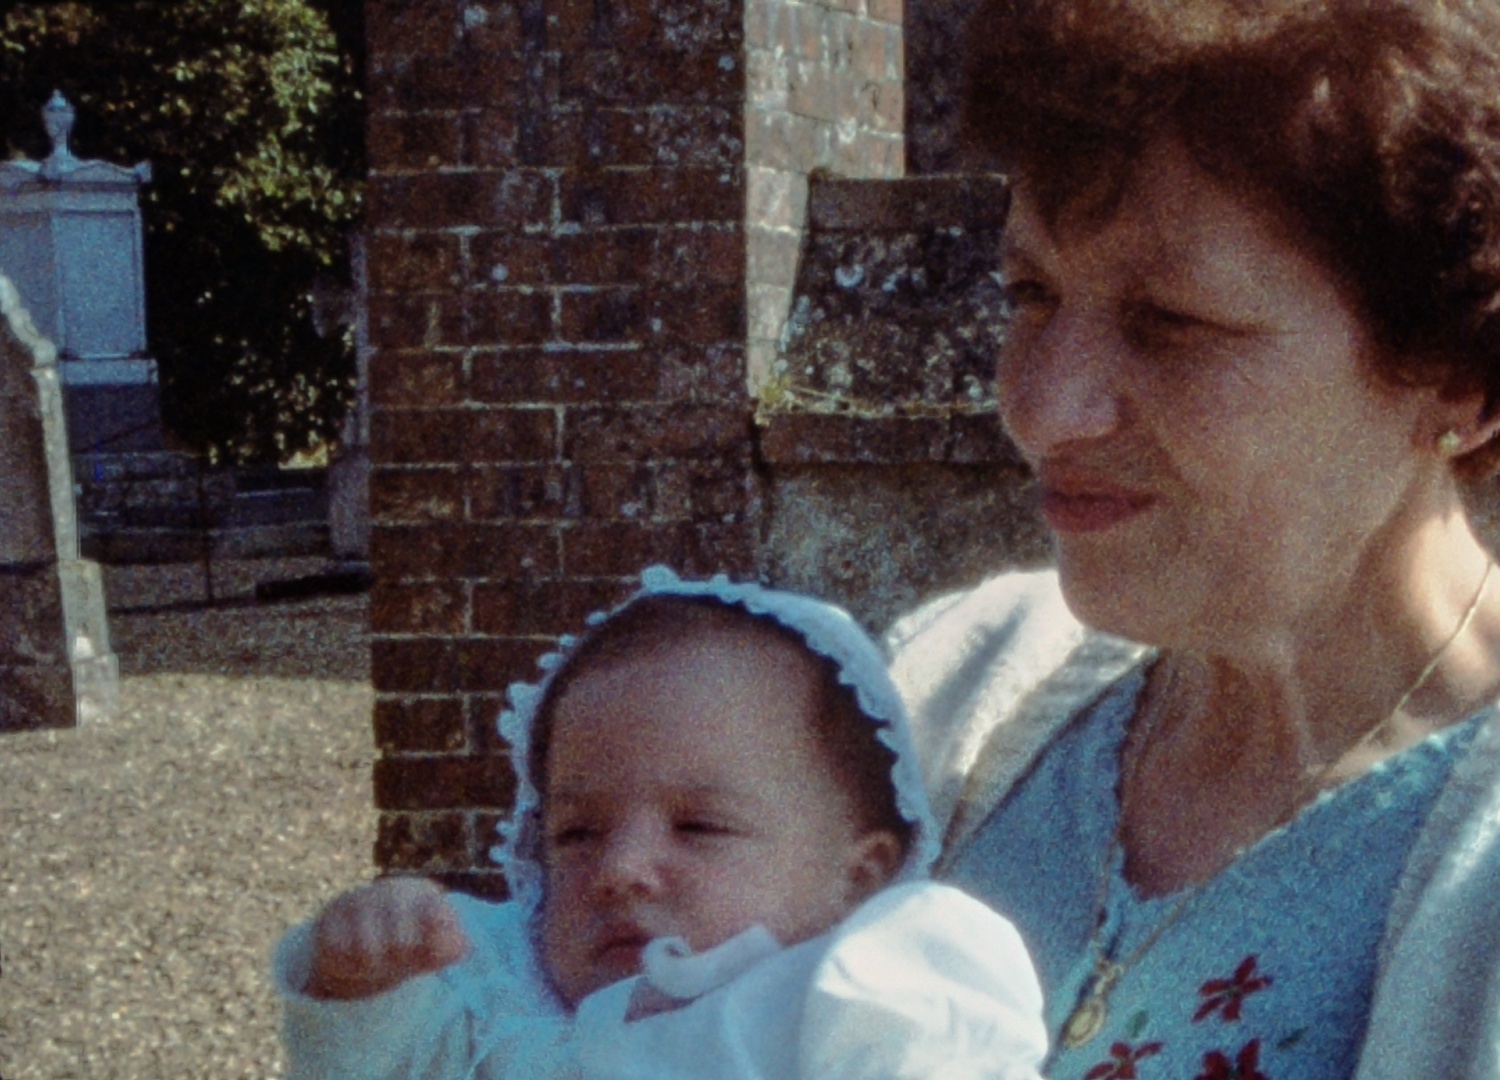
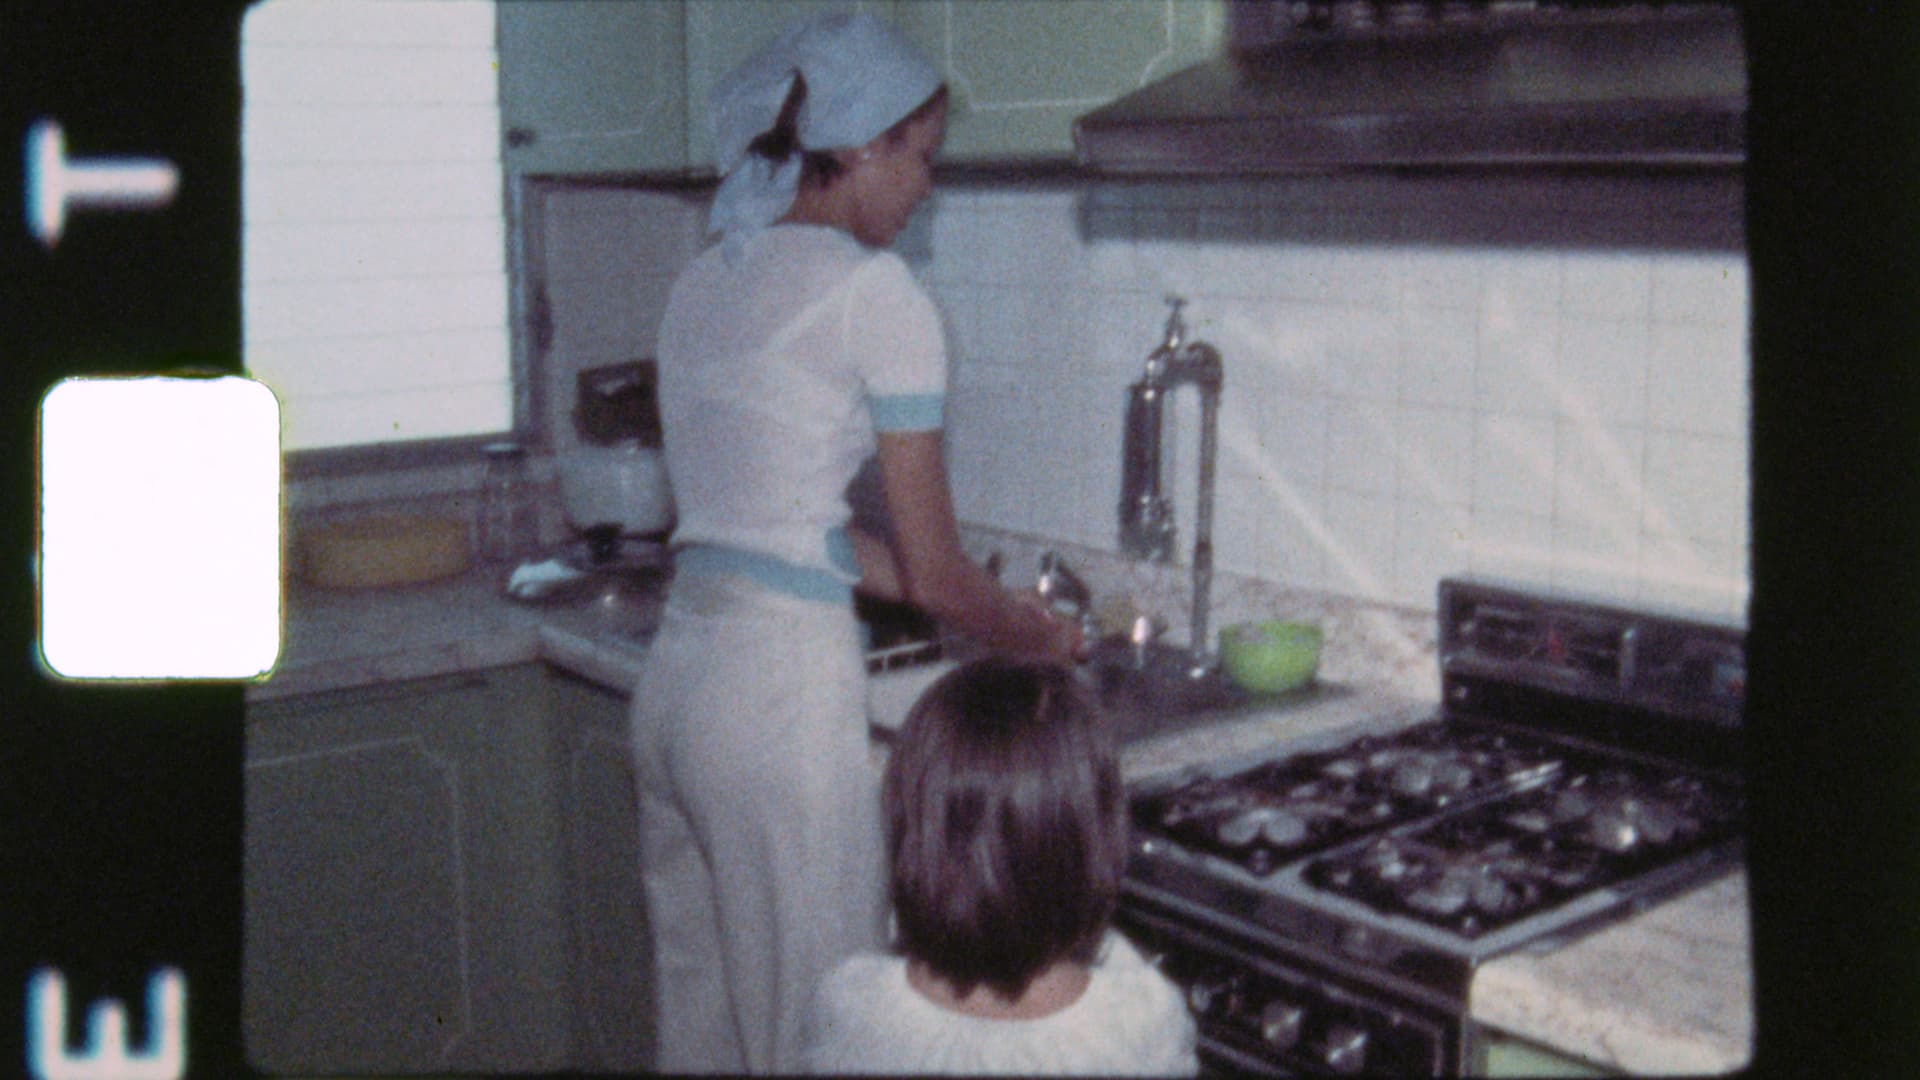
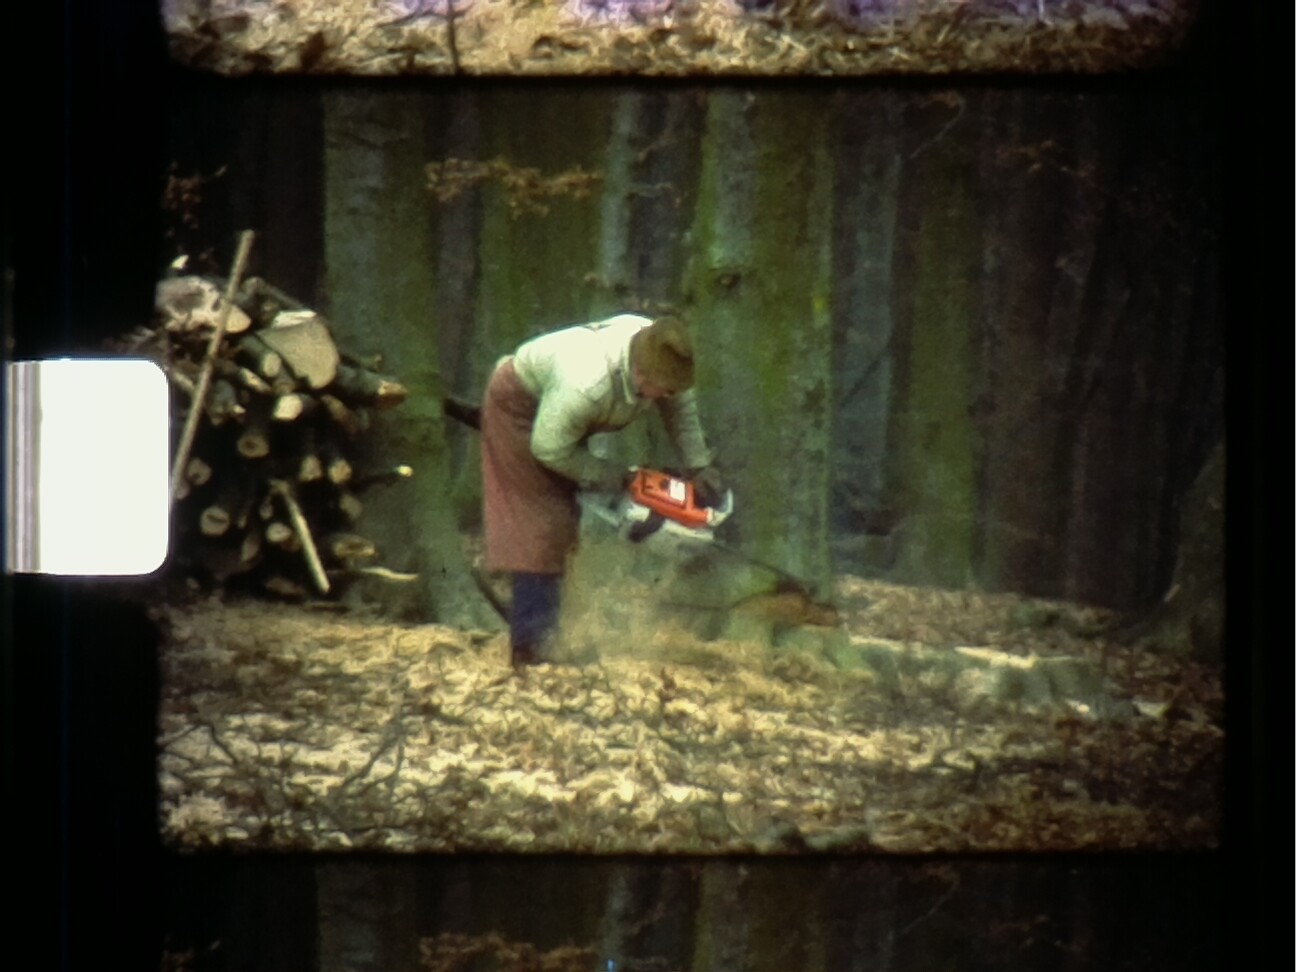
So, here we go: first is an example of a Kodachrome 40 film, scanned with a combination of a see3cam CU135 and a Schneider Componon-S 50 mm. The film camera used was a Revue S10 deluxe, originally made by Chinon/Japan with a Zoom F 1:1.7 f = 6.5-65 mm lens. This specific film was developed more than a year after the initial exposure. Endured during that wait time freezing temperatures as well as temperatures above 40°C (don’t ask :upside_down_face:)

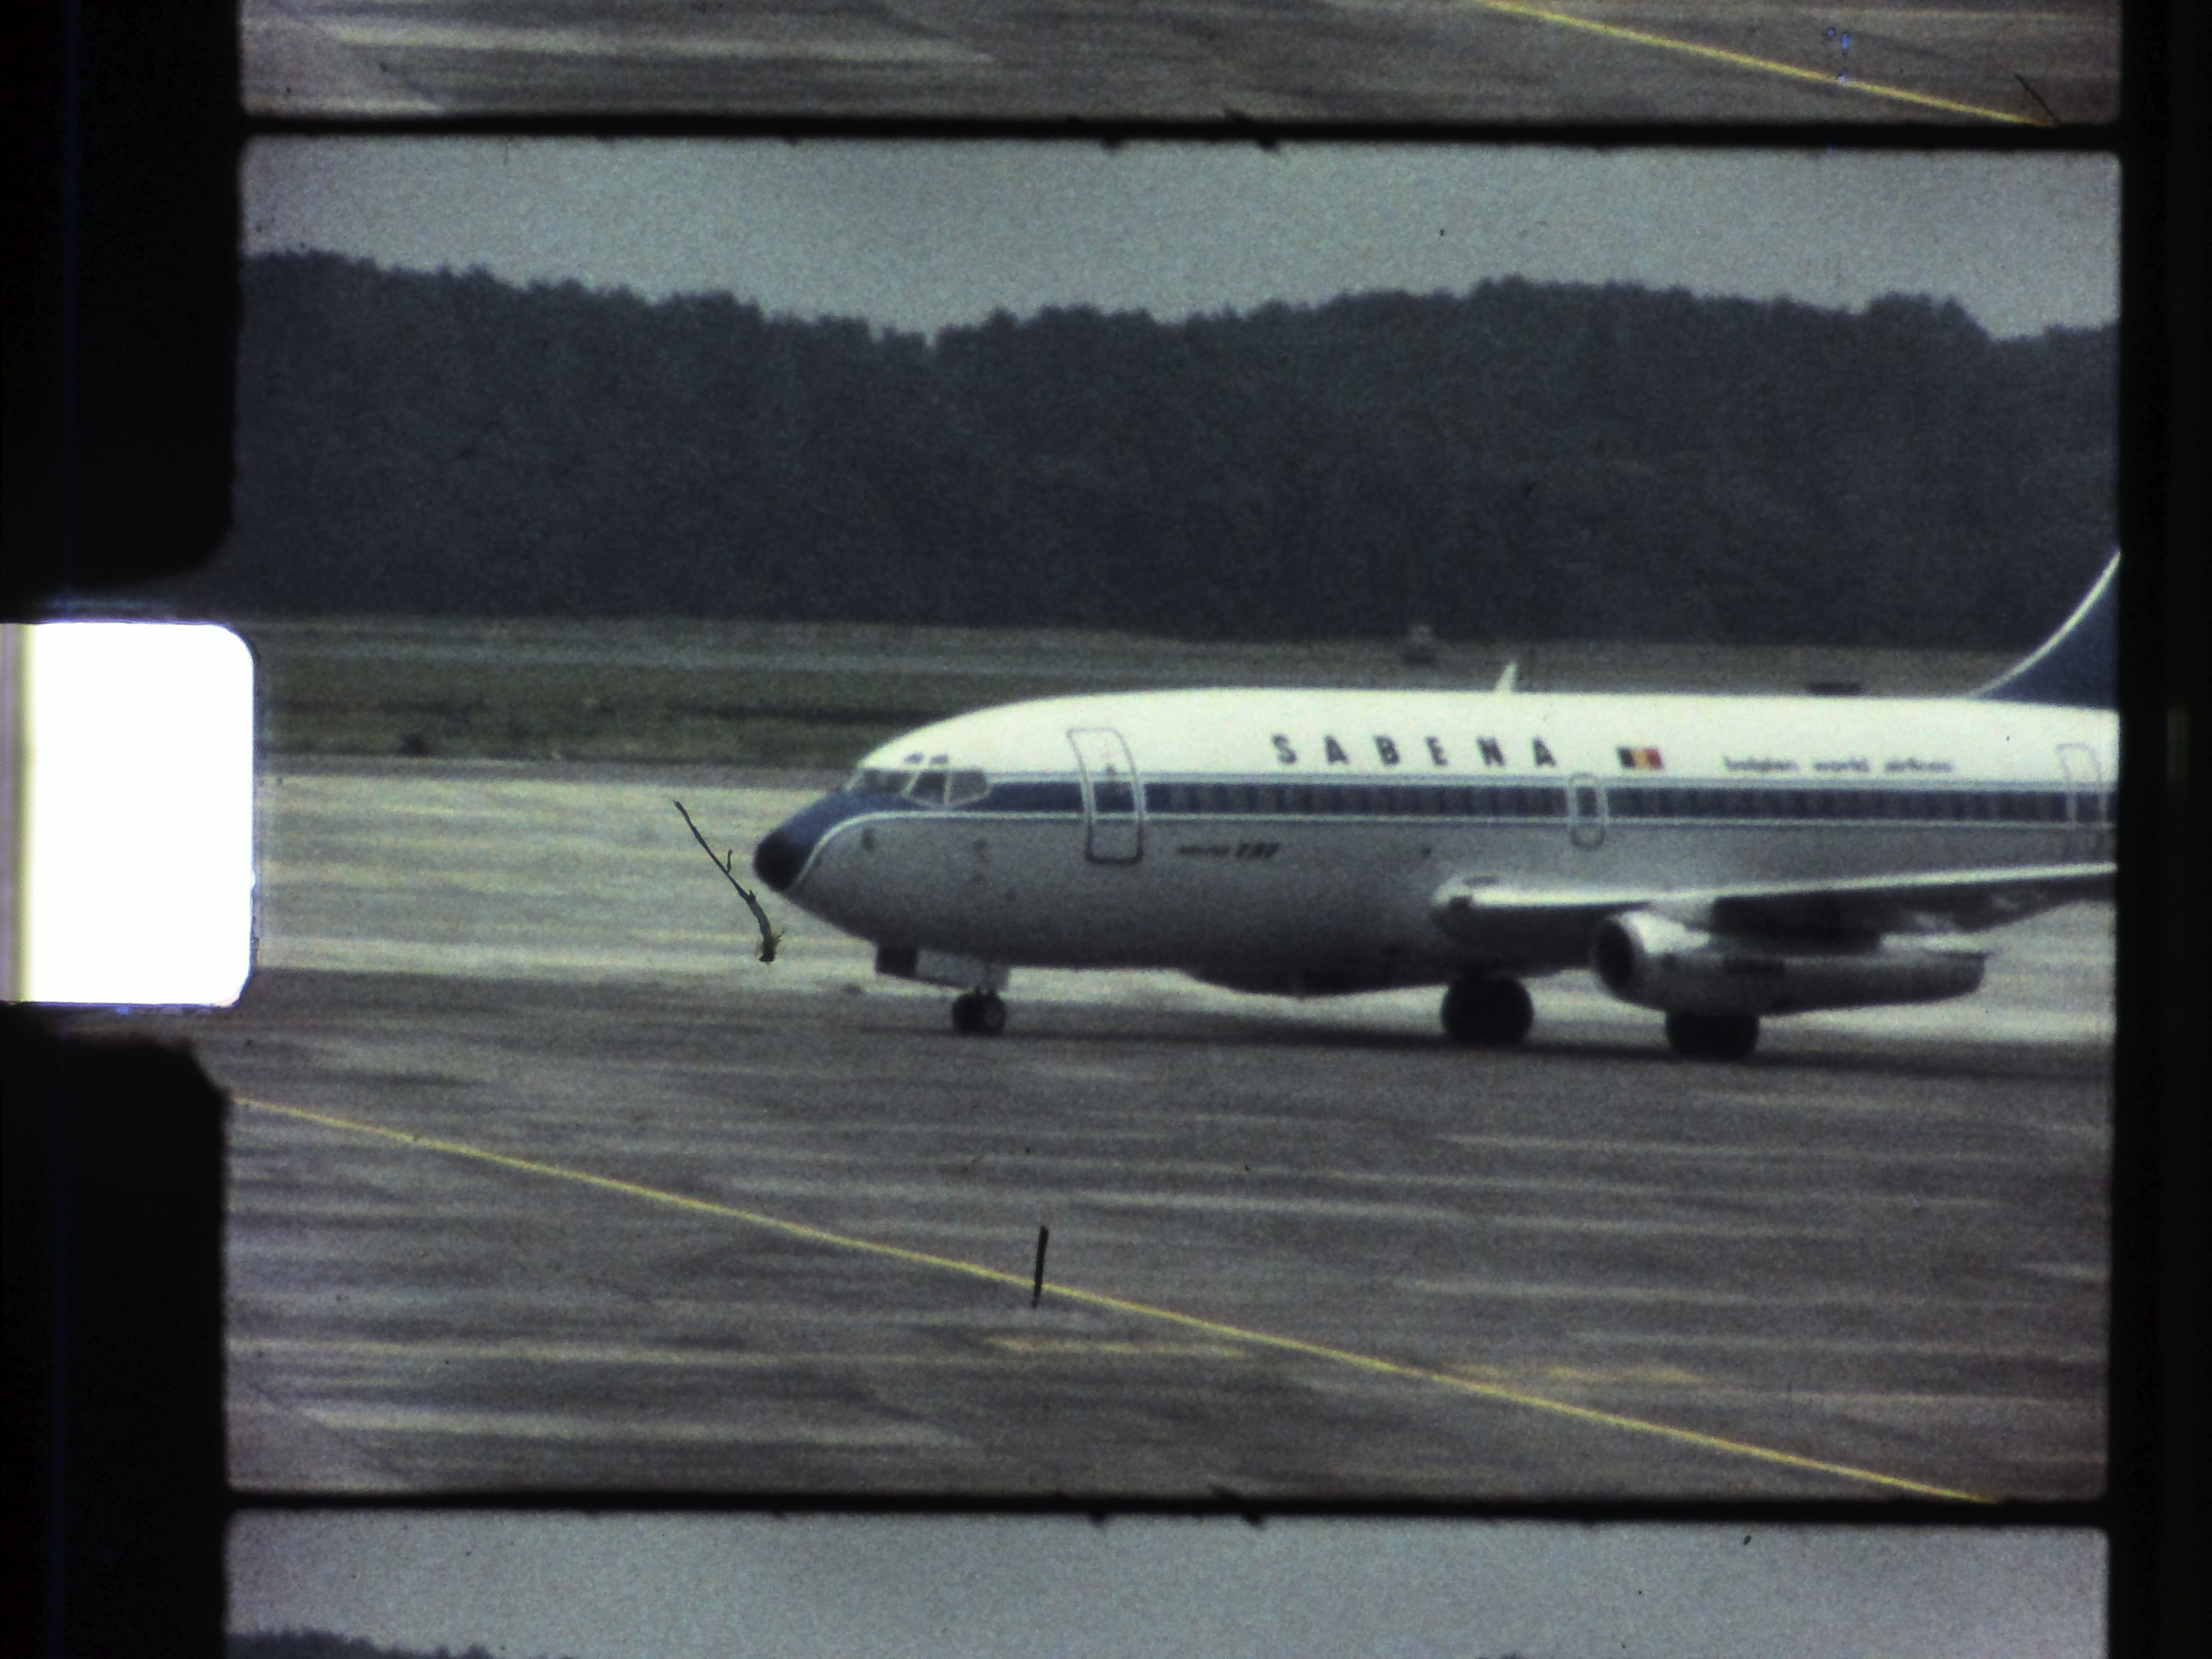
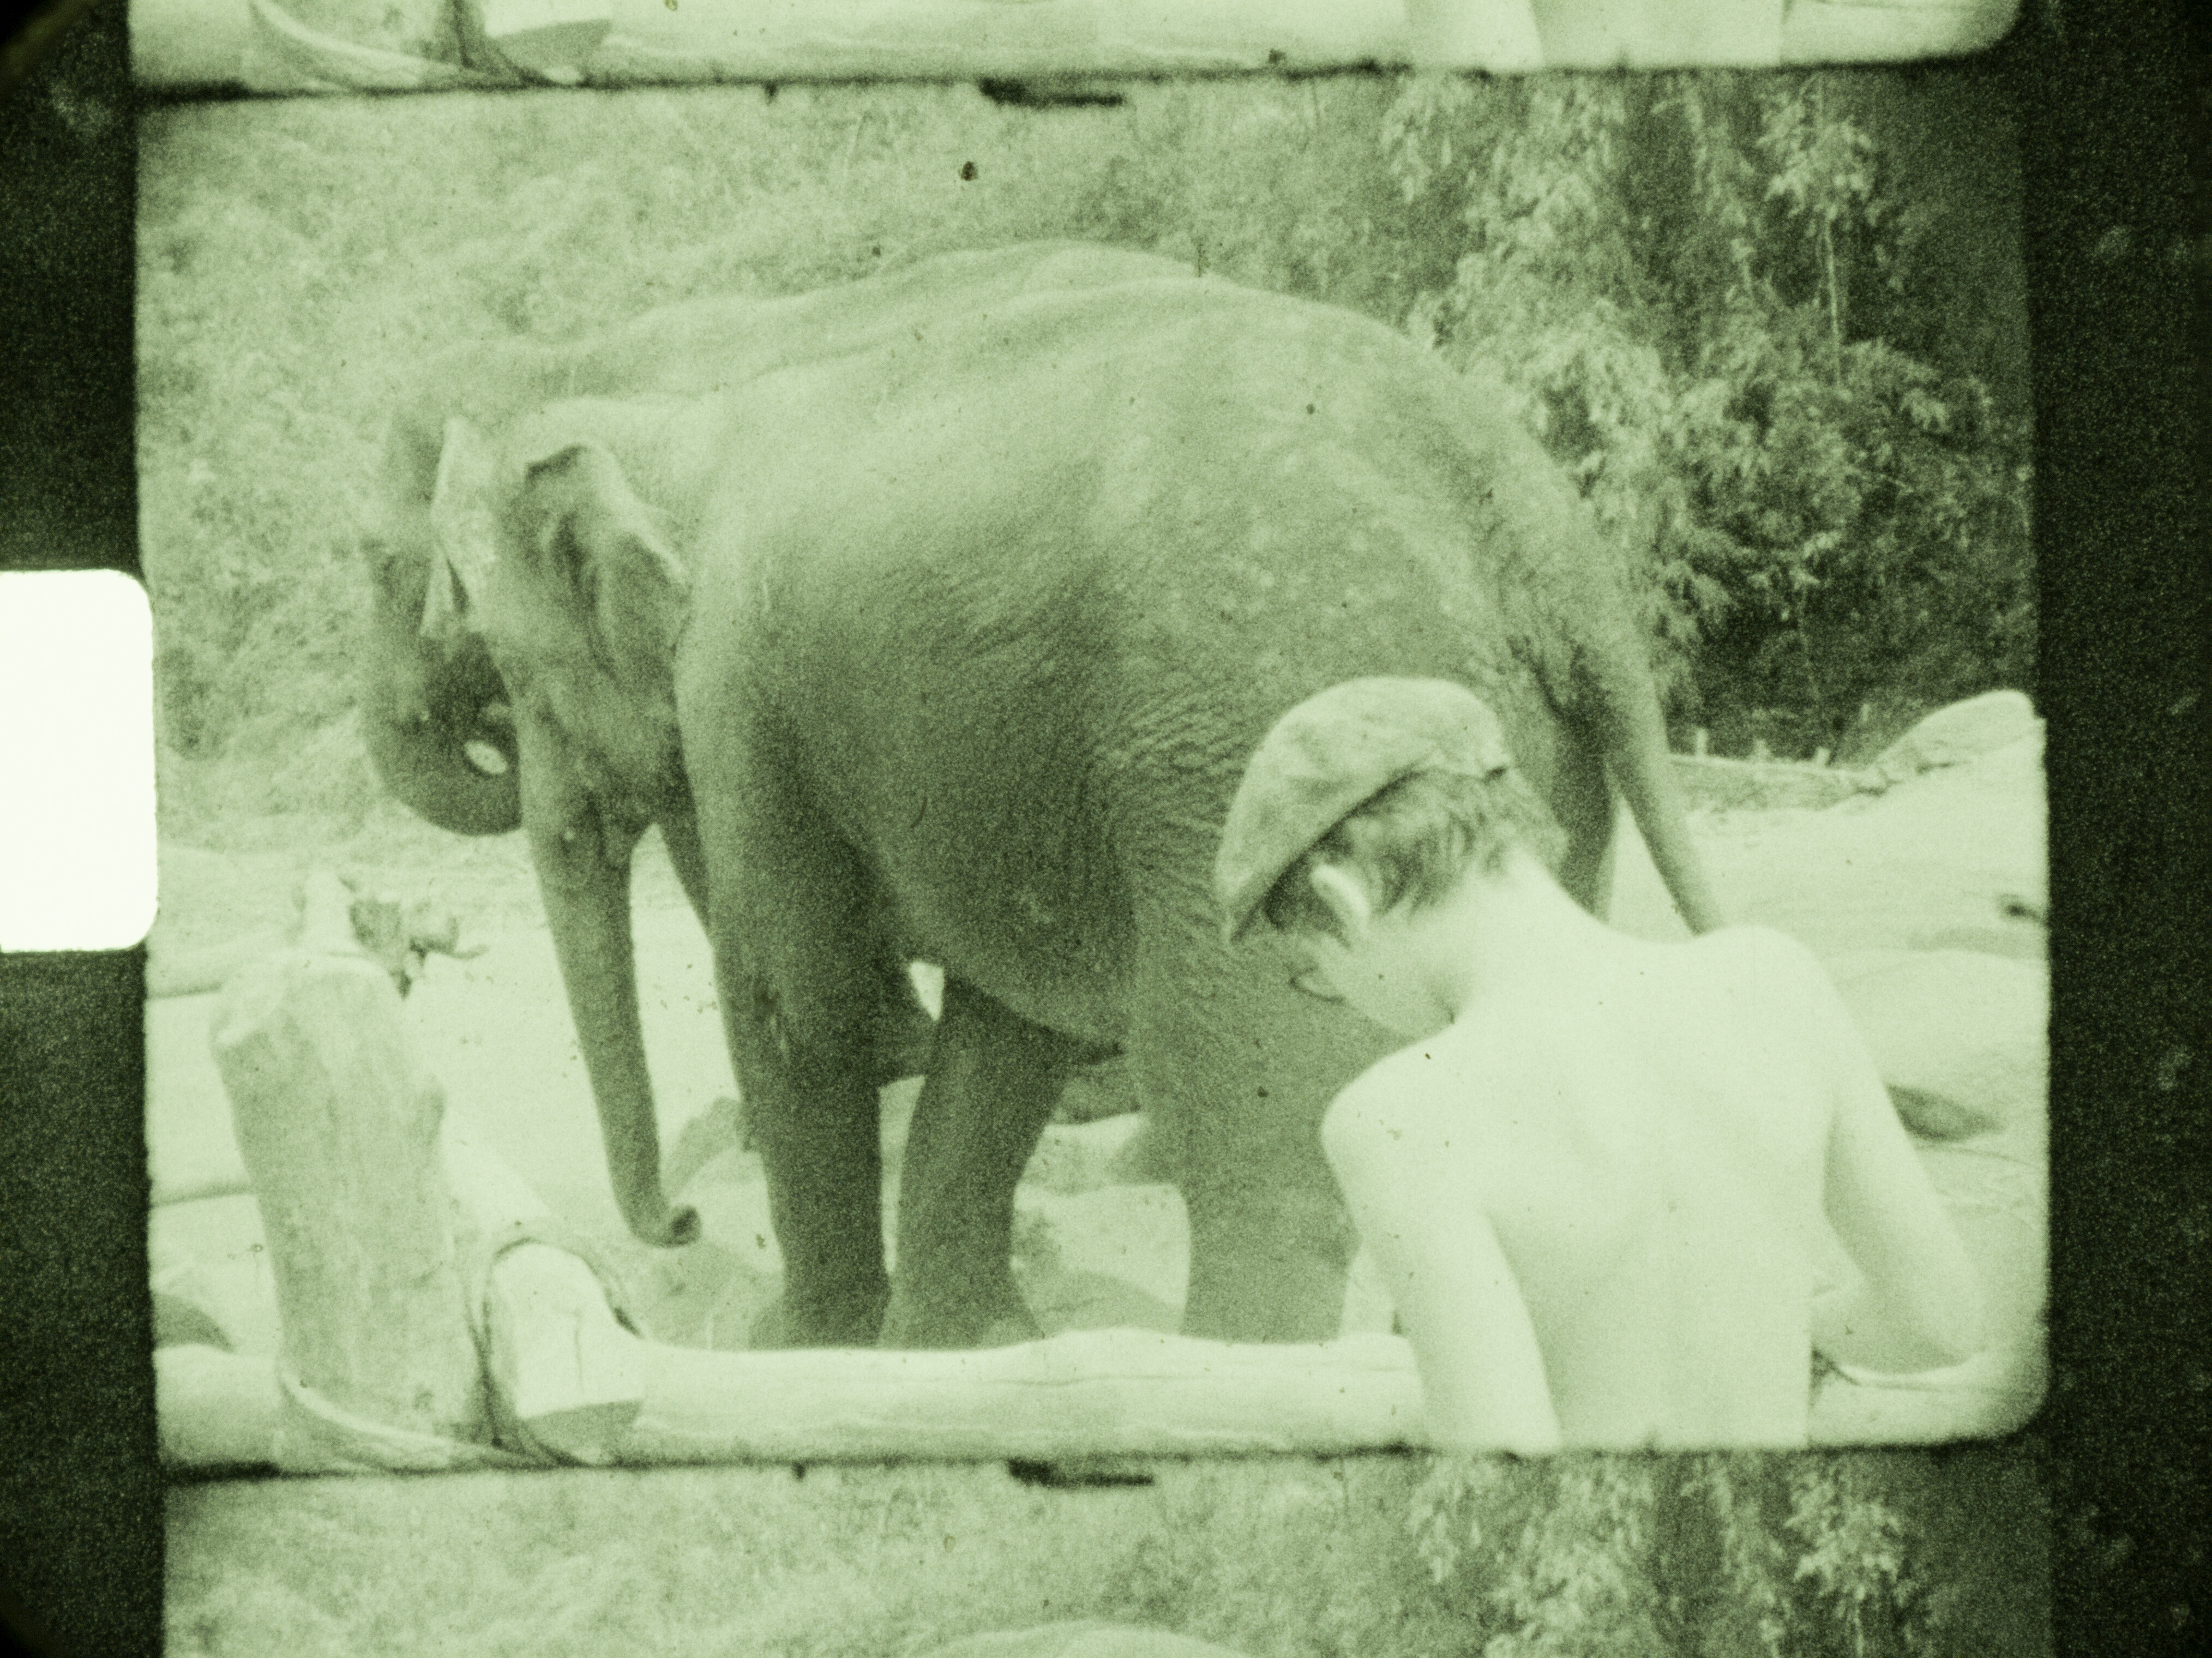
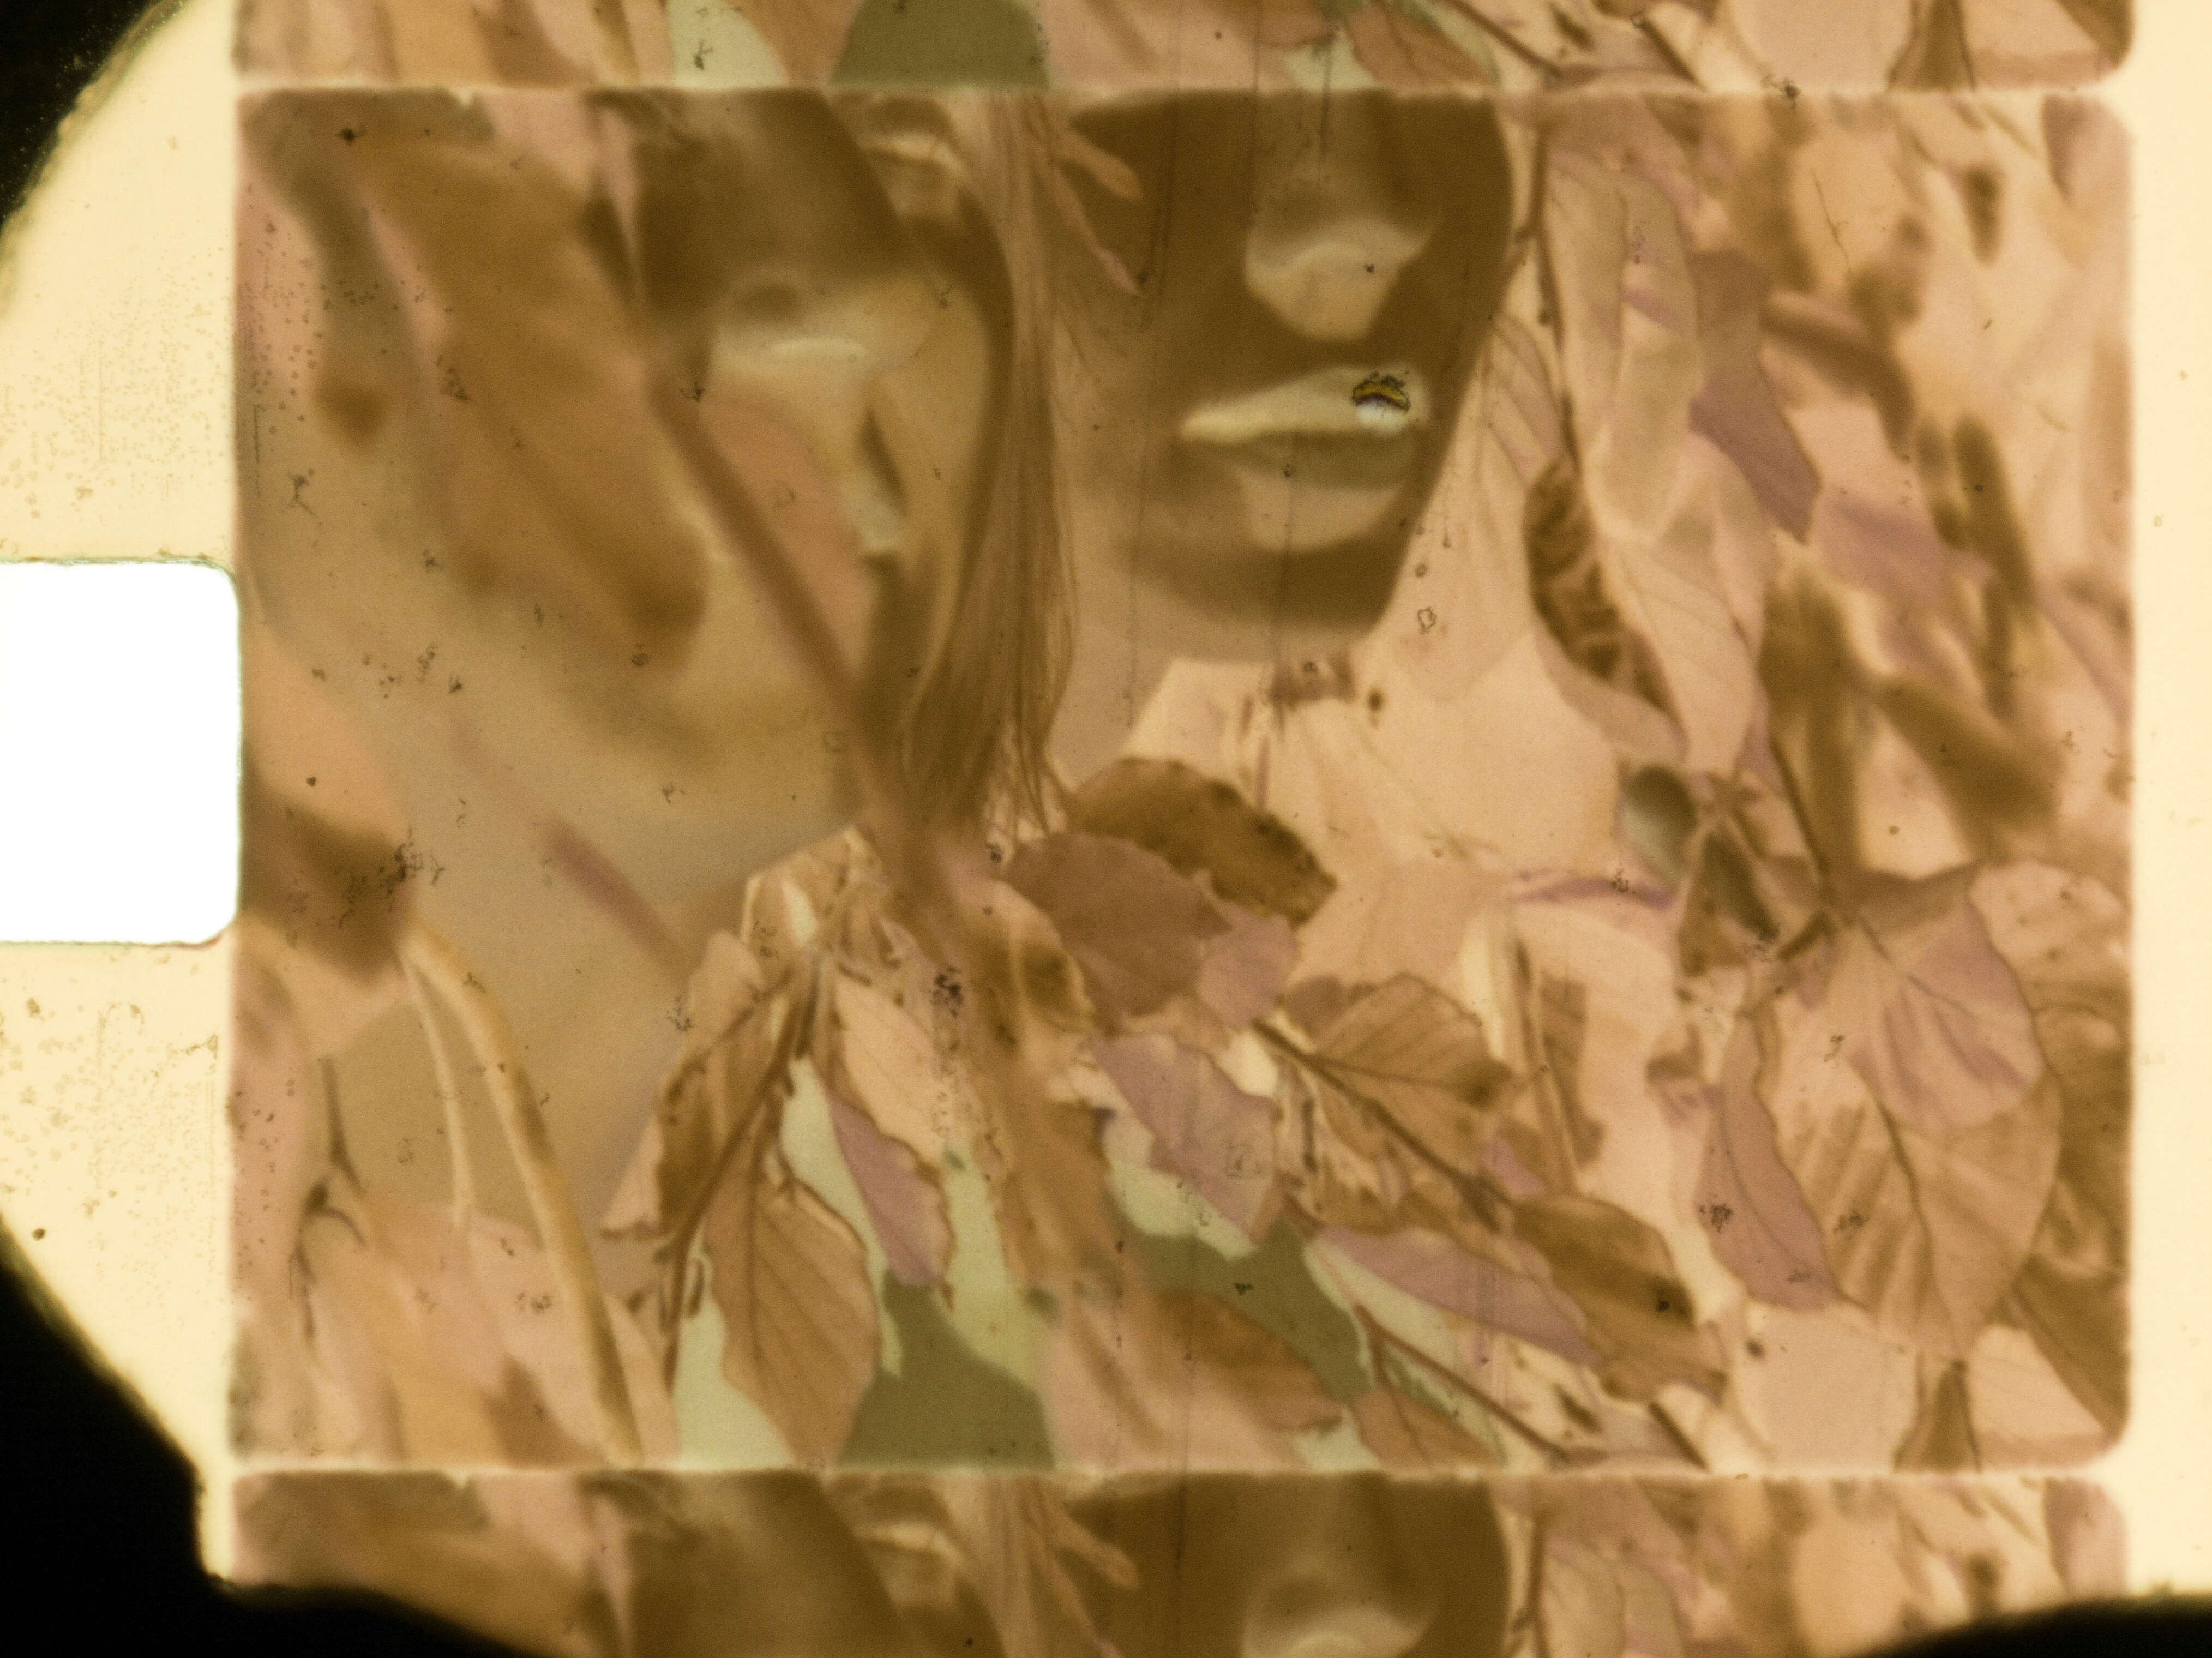
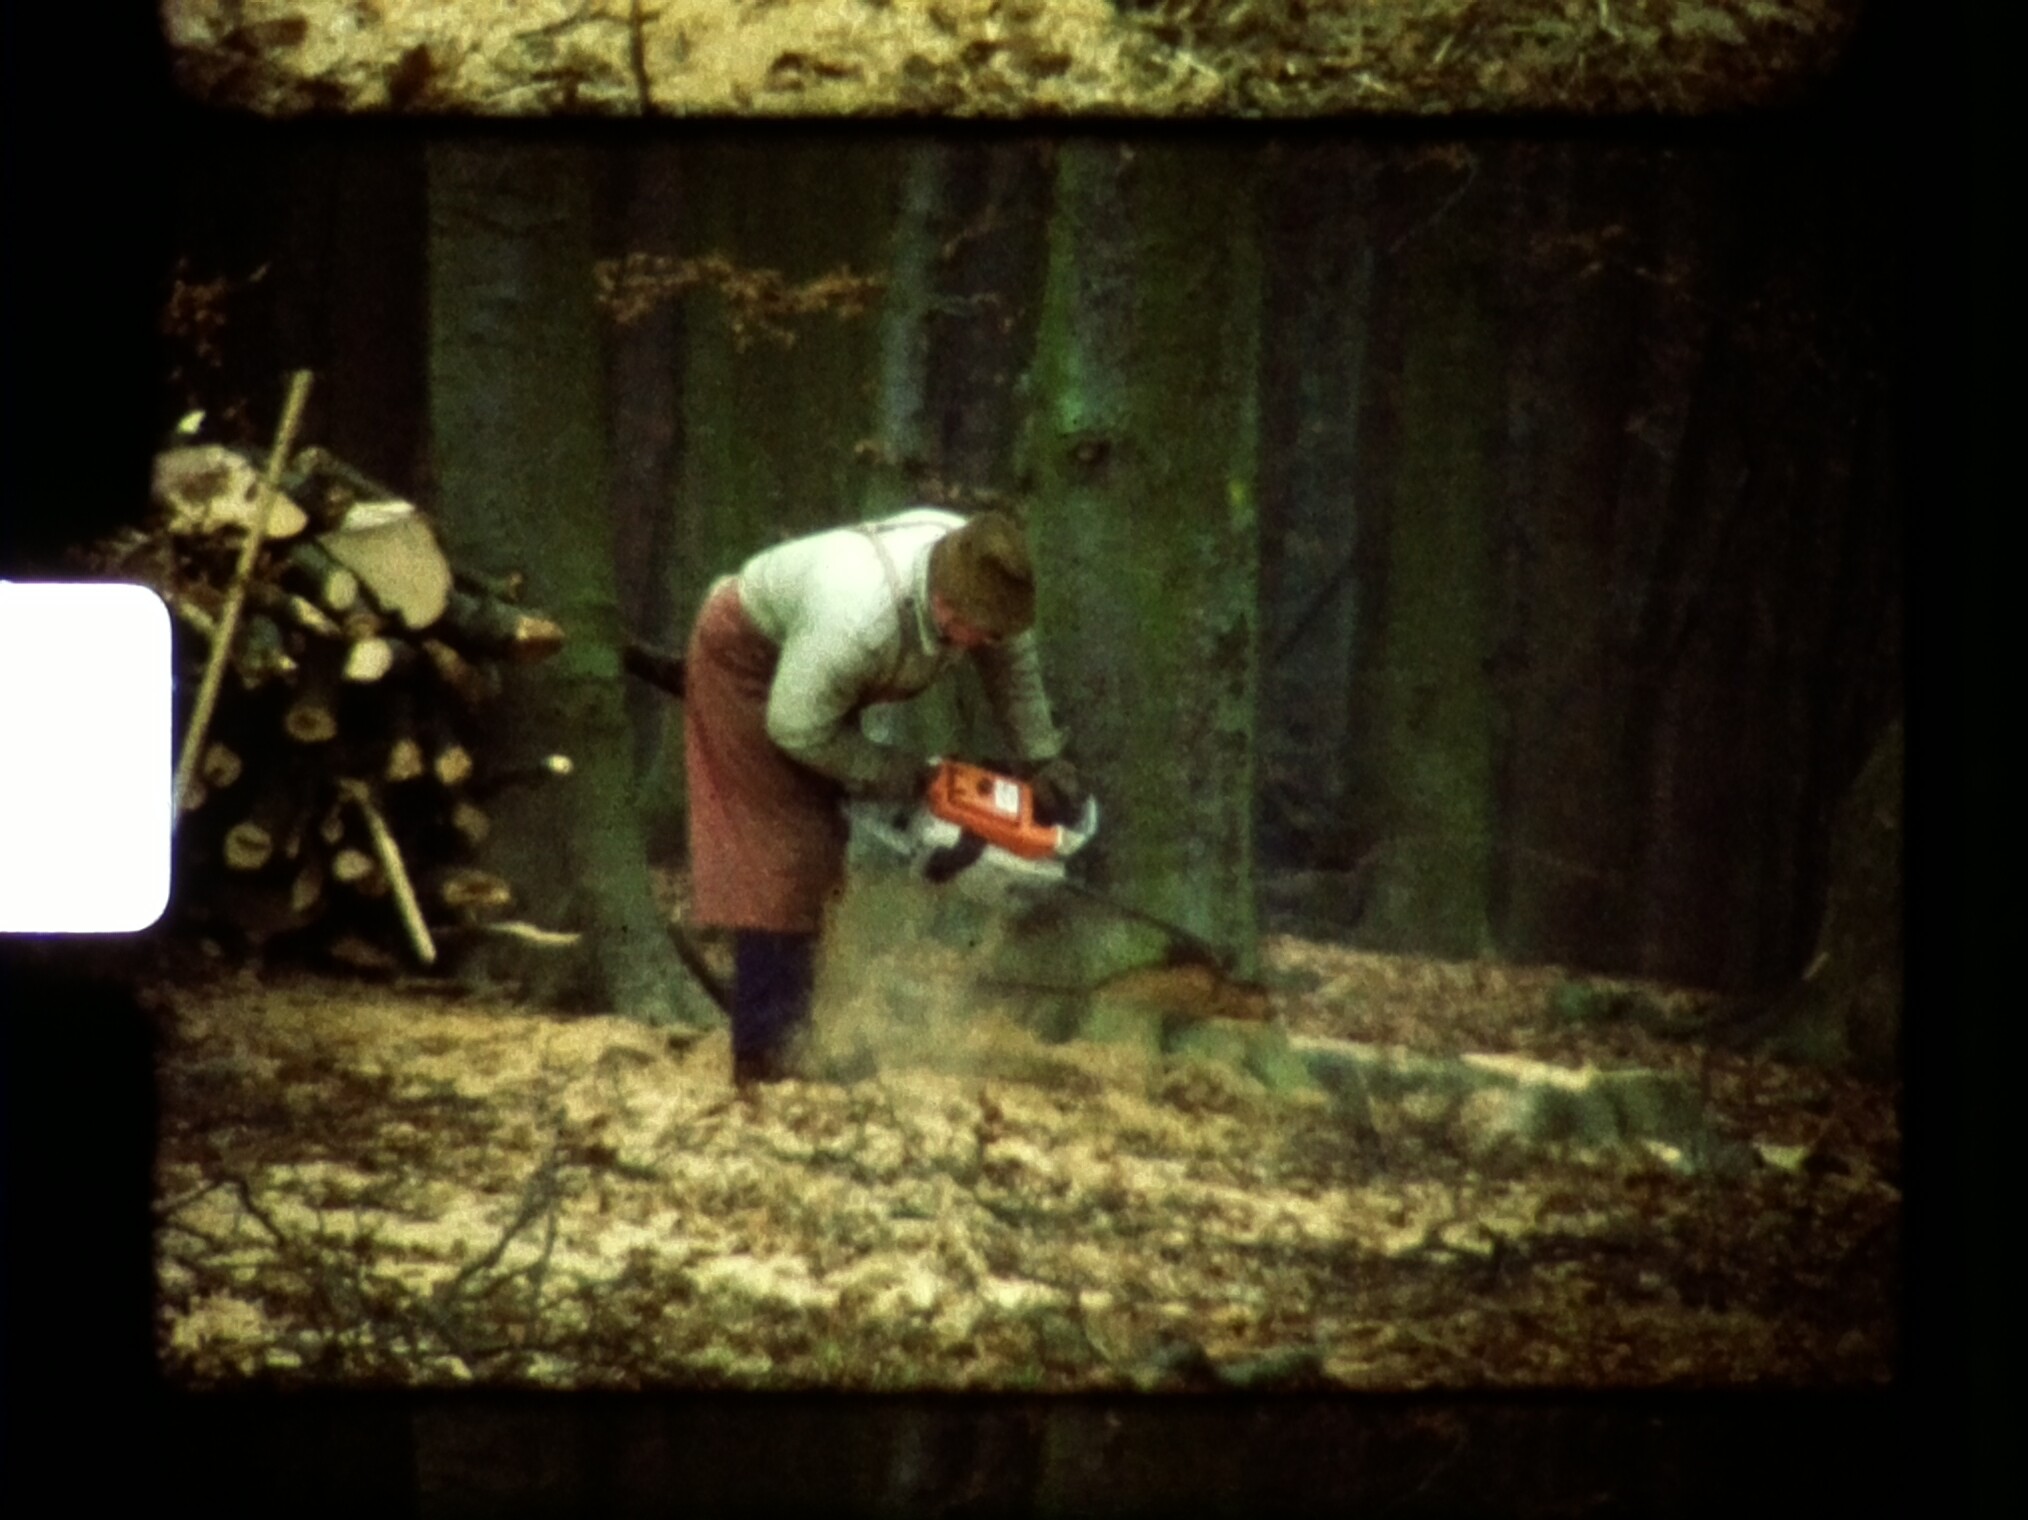
Same parameters as above, only filmed with a “Bauer C Royal 8E” and developed immediately after exposure:

I guess one can notice the difference in film camera resolution as well as the difference in film grain.

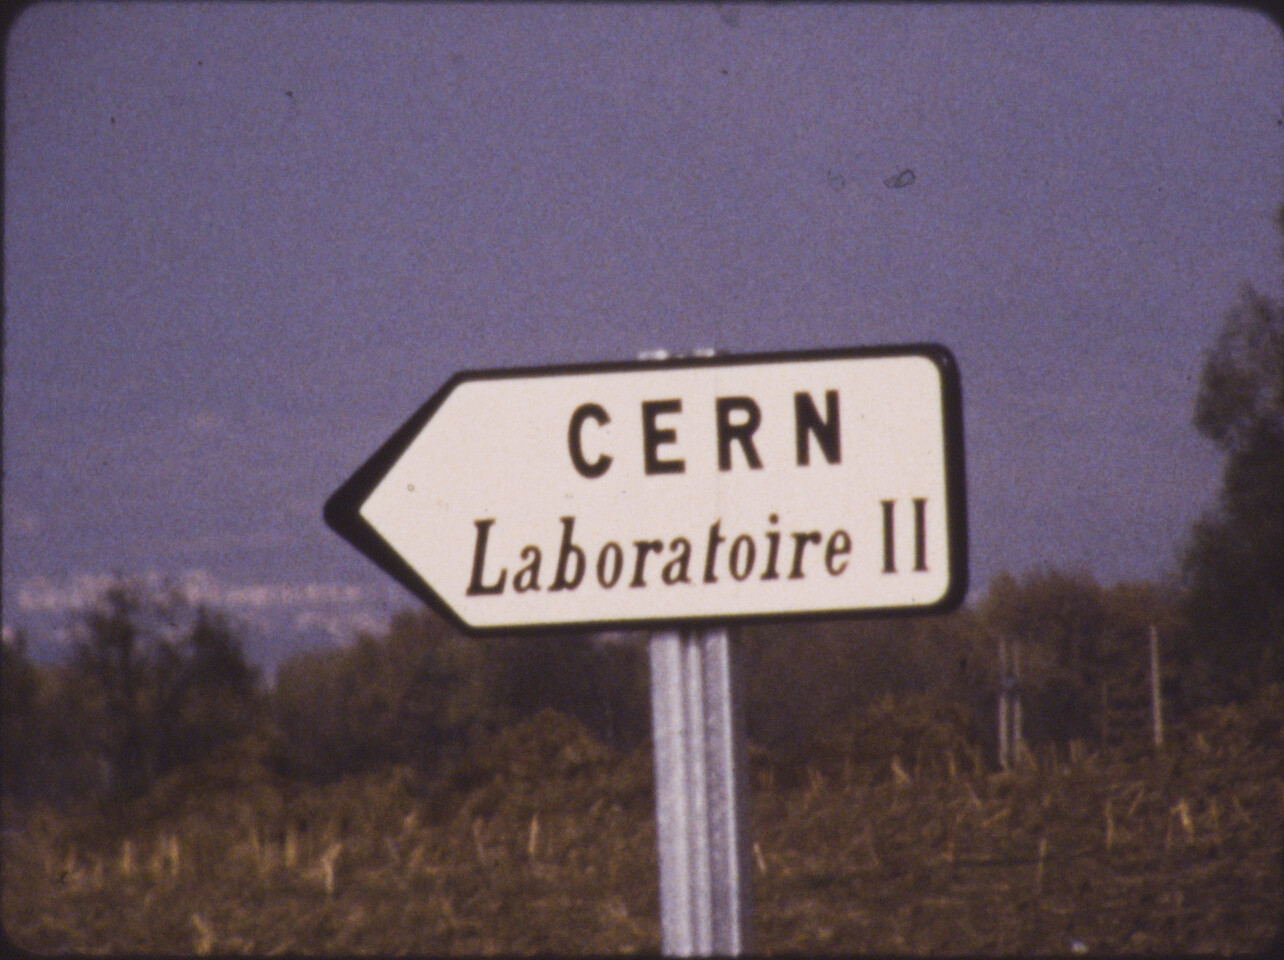
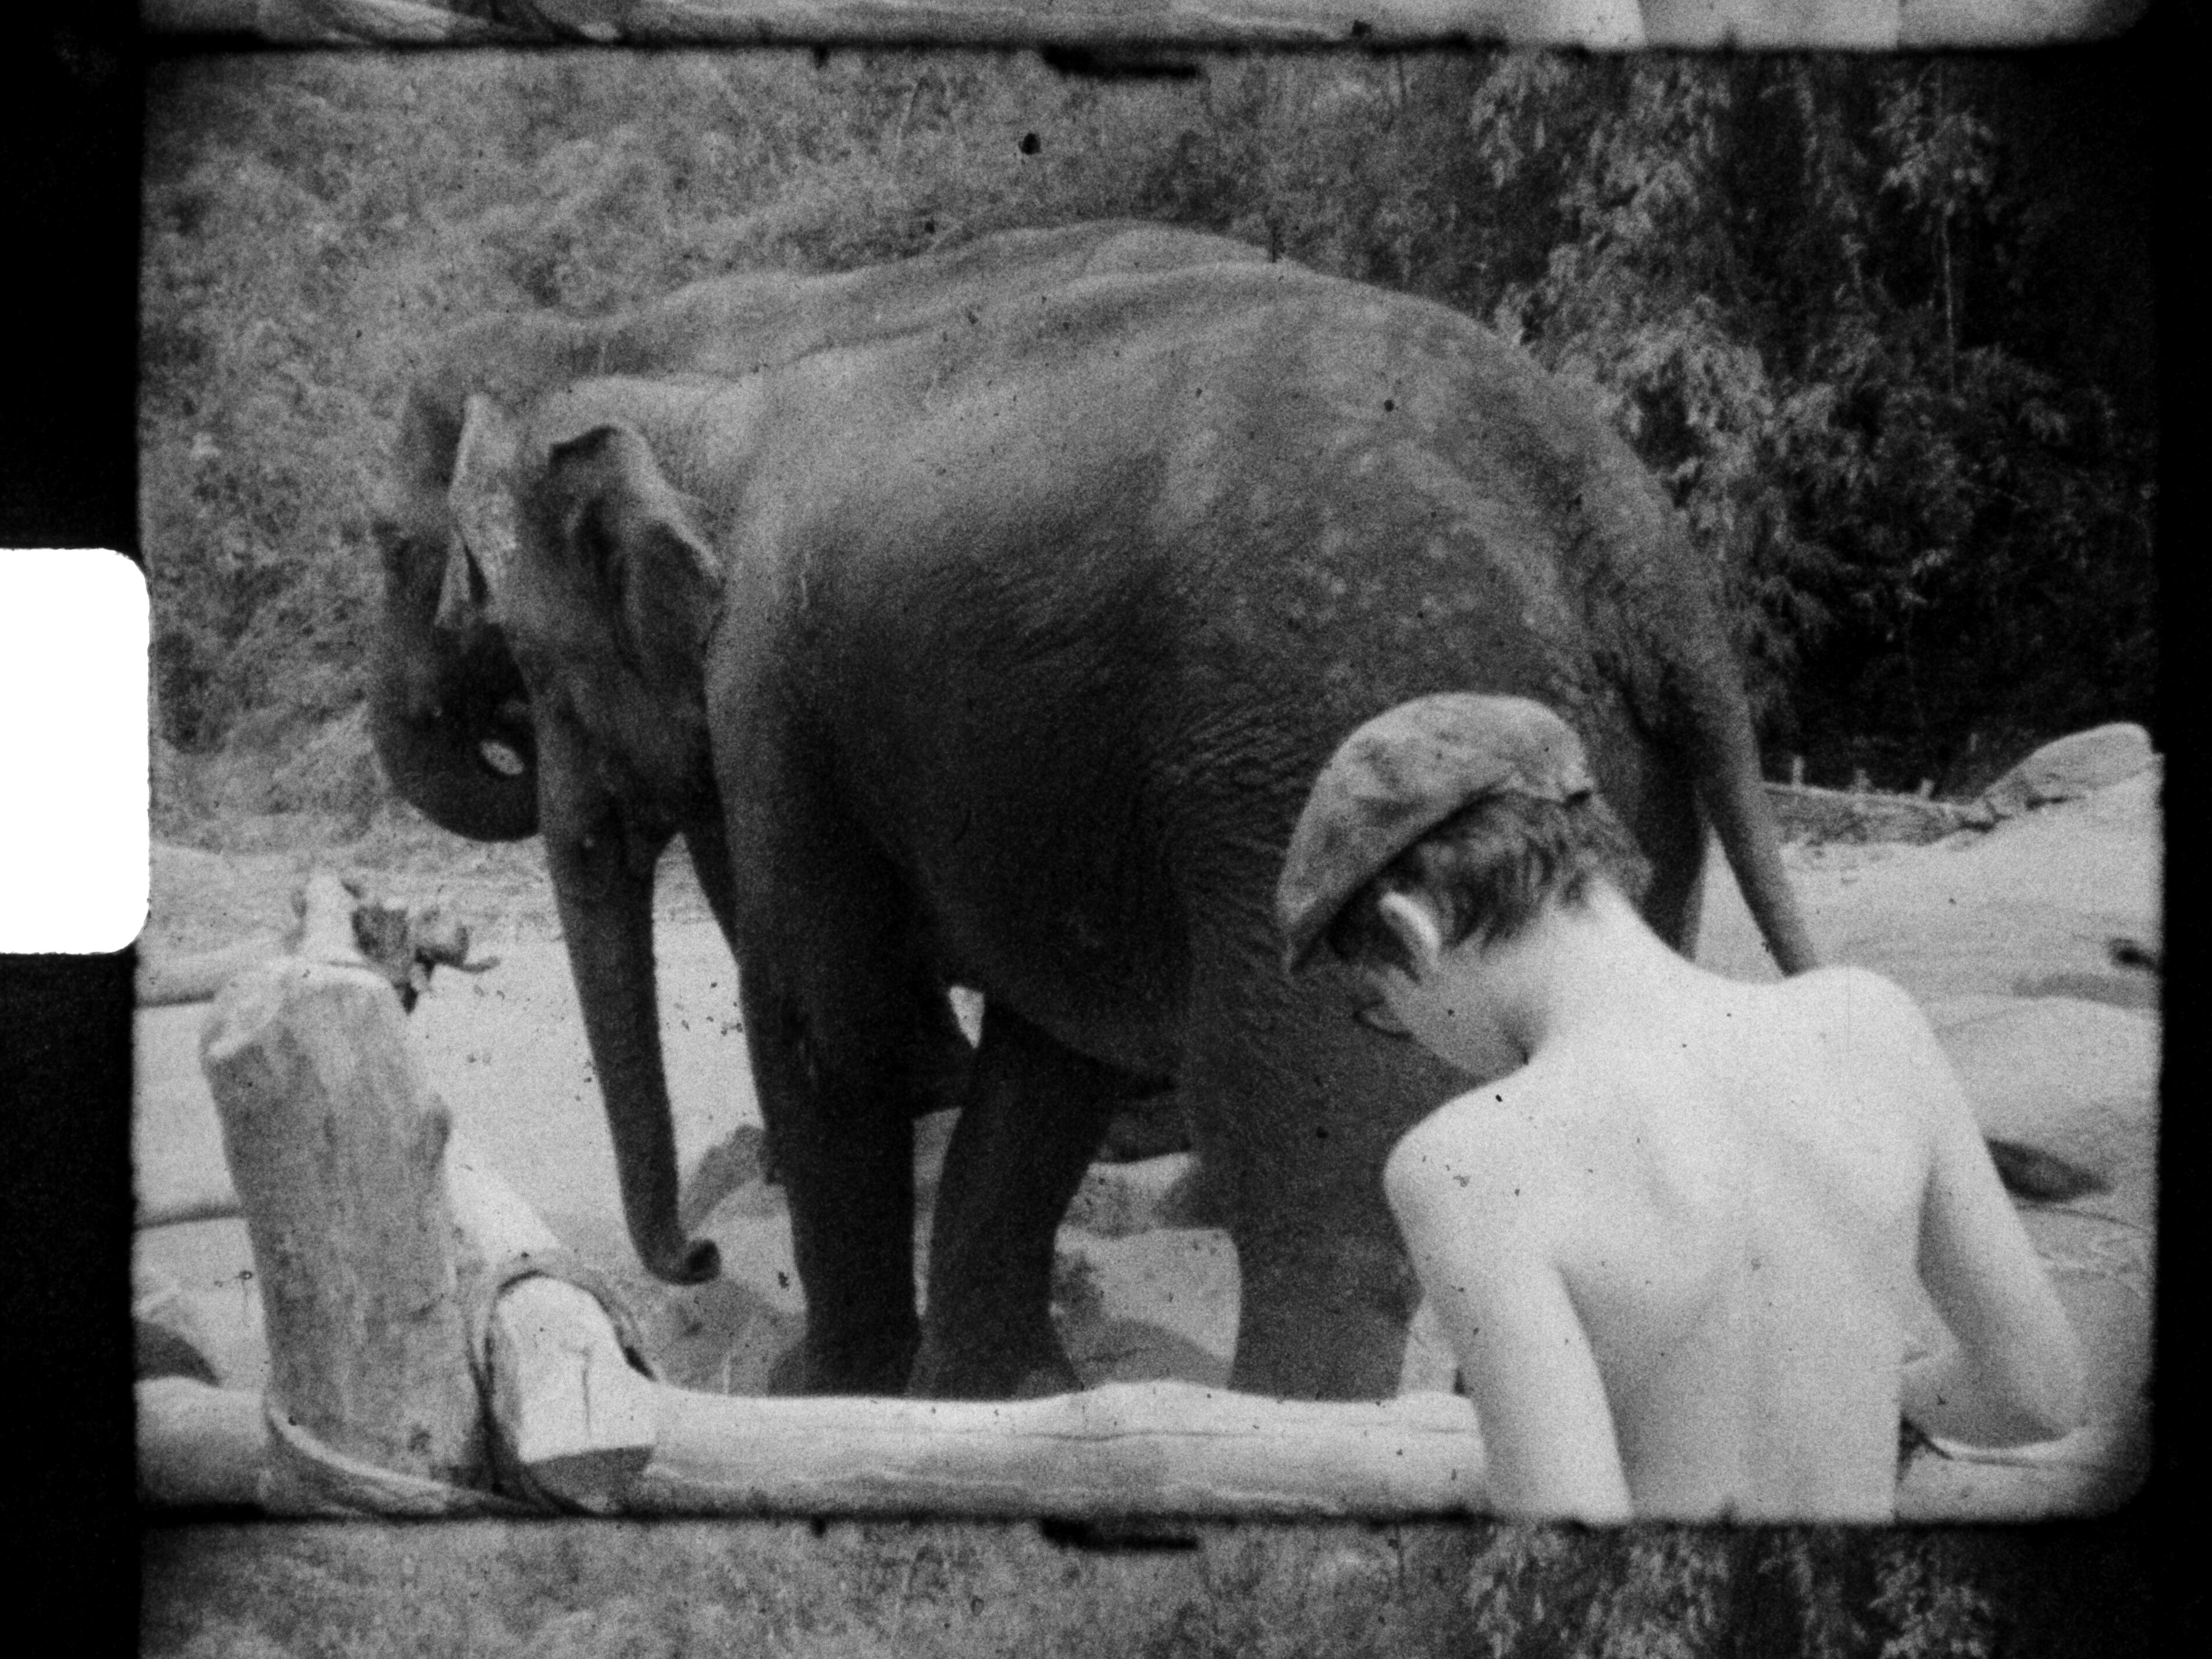
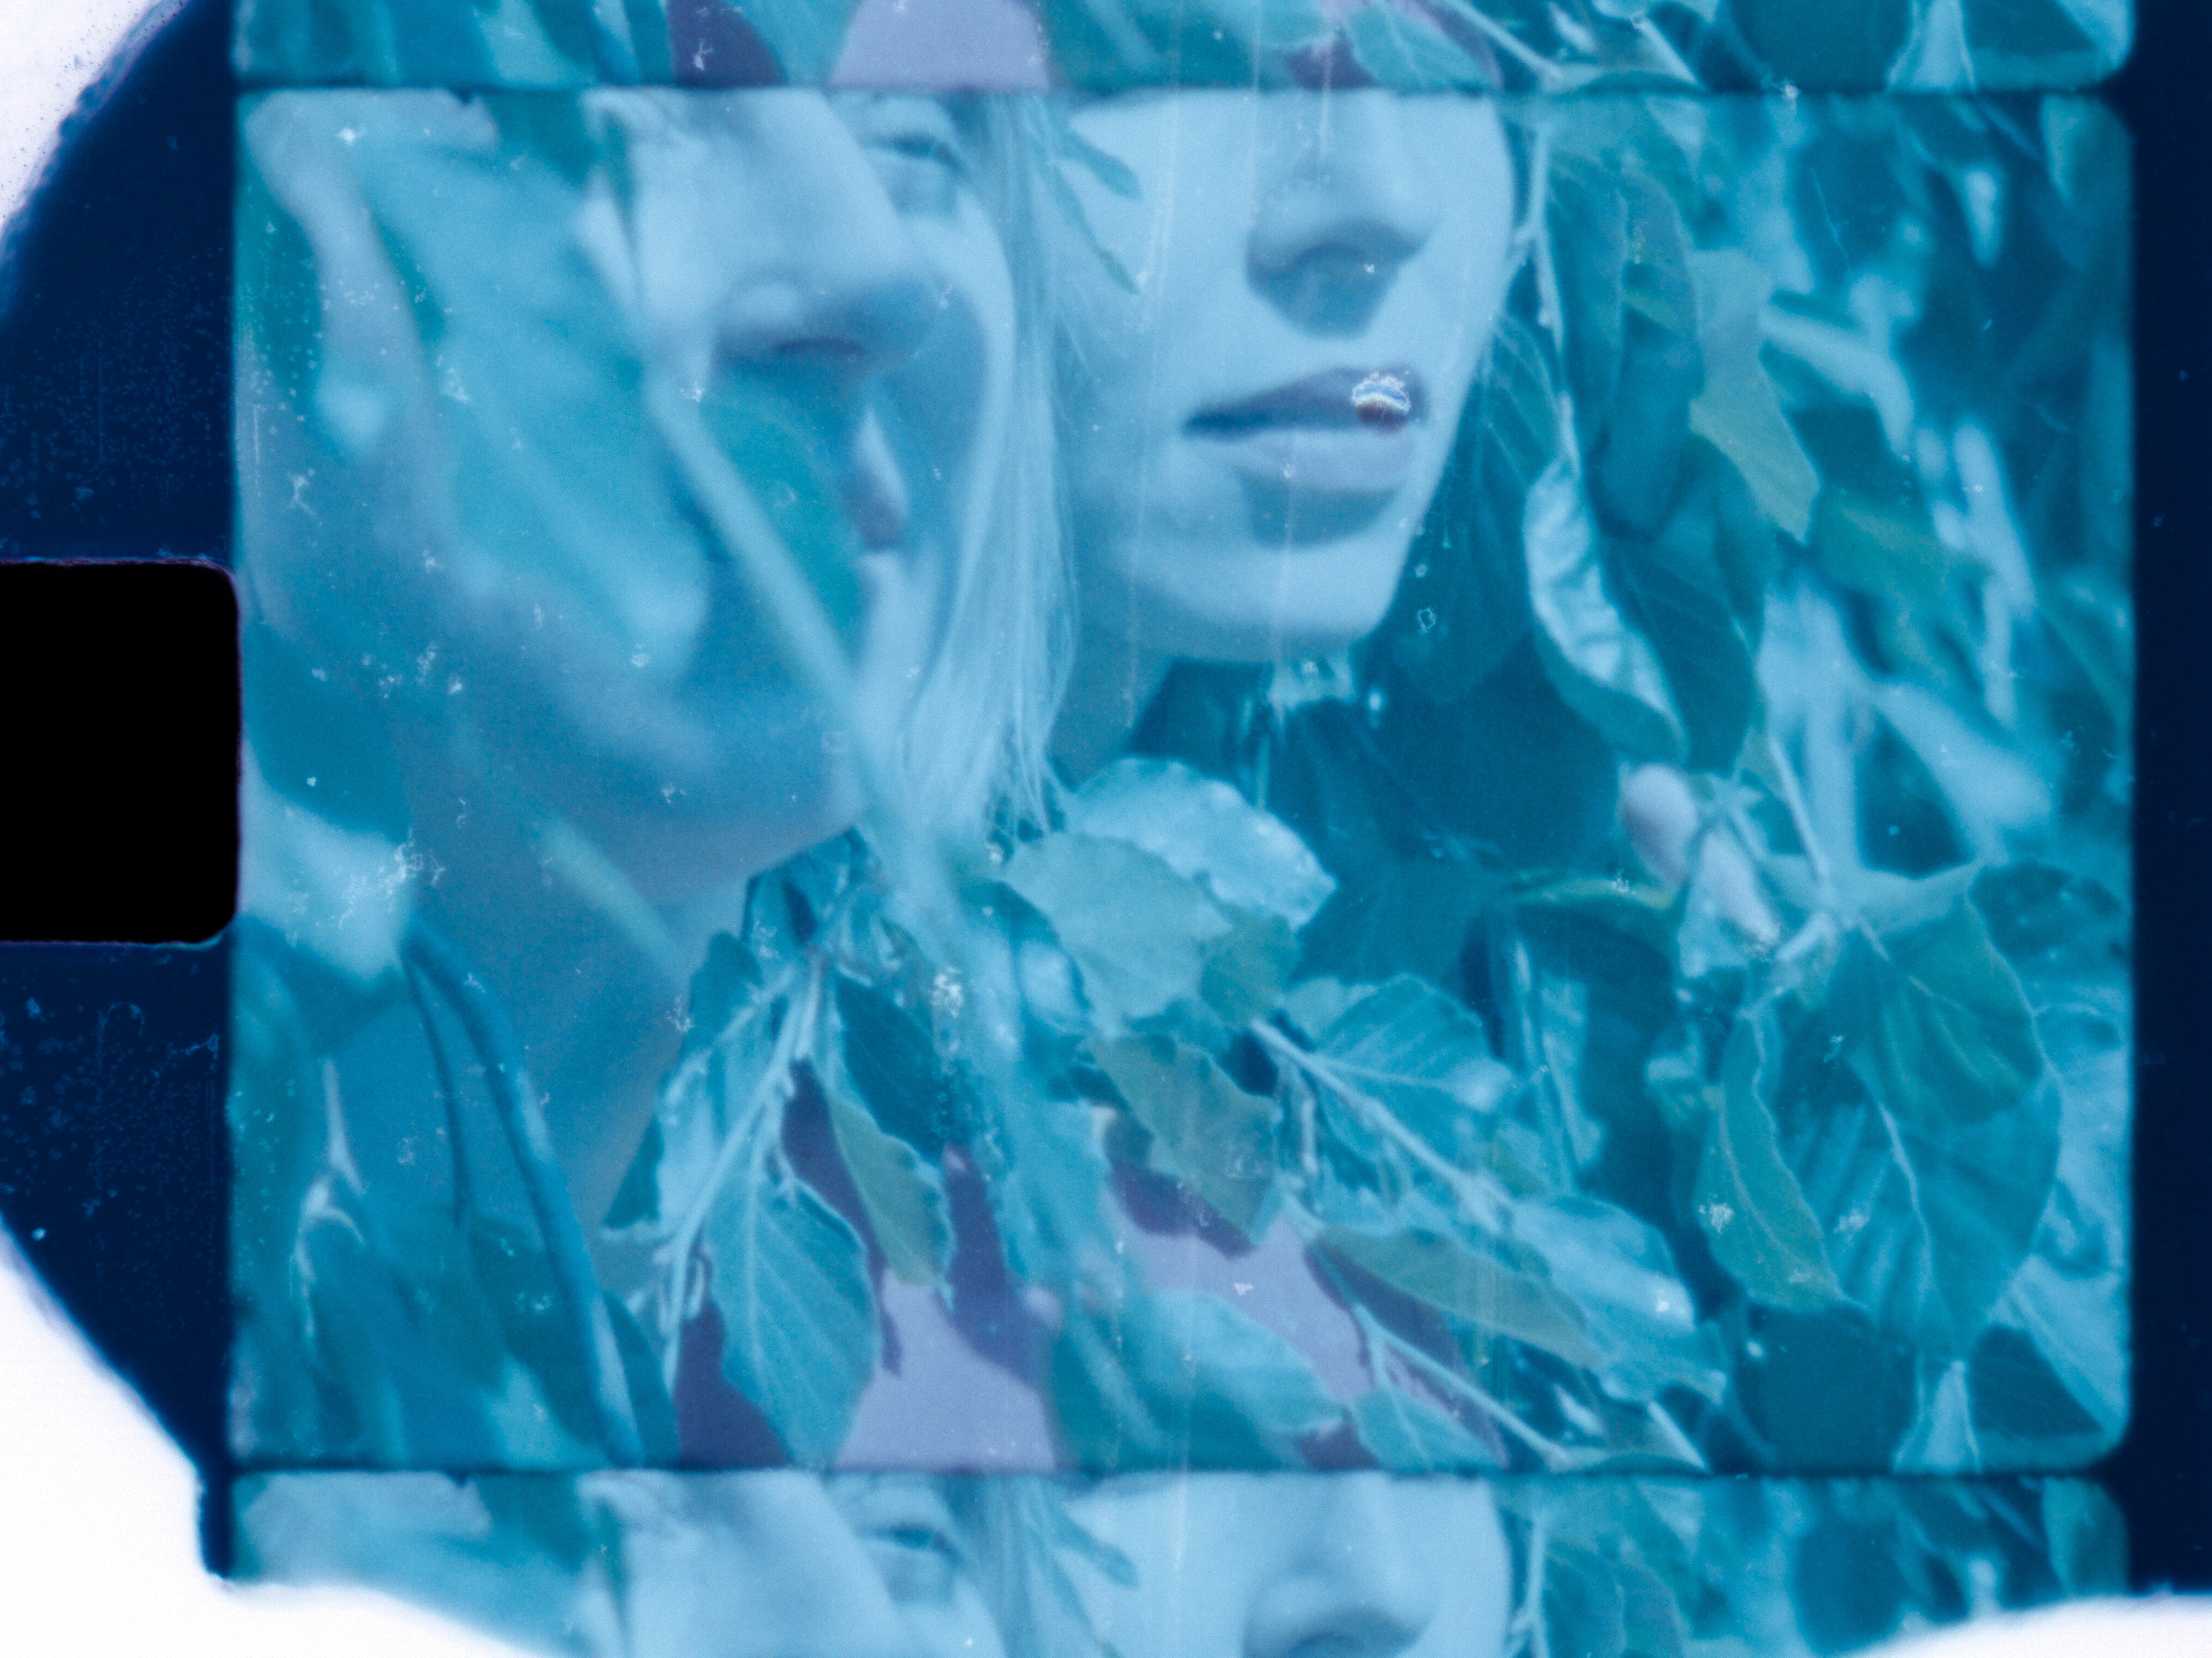
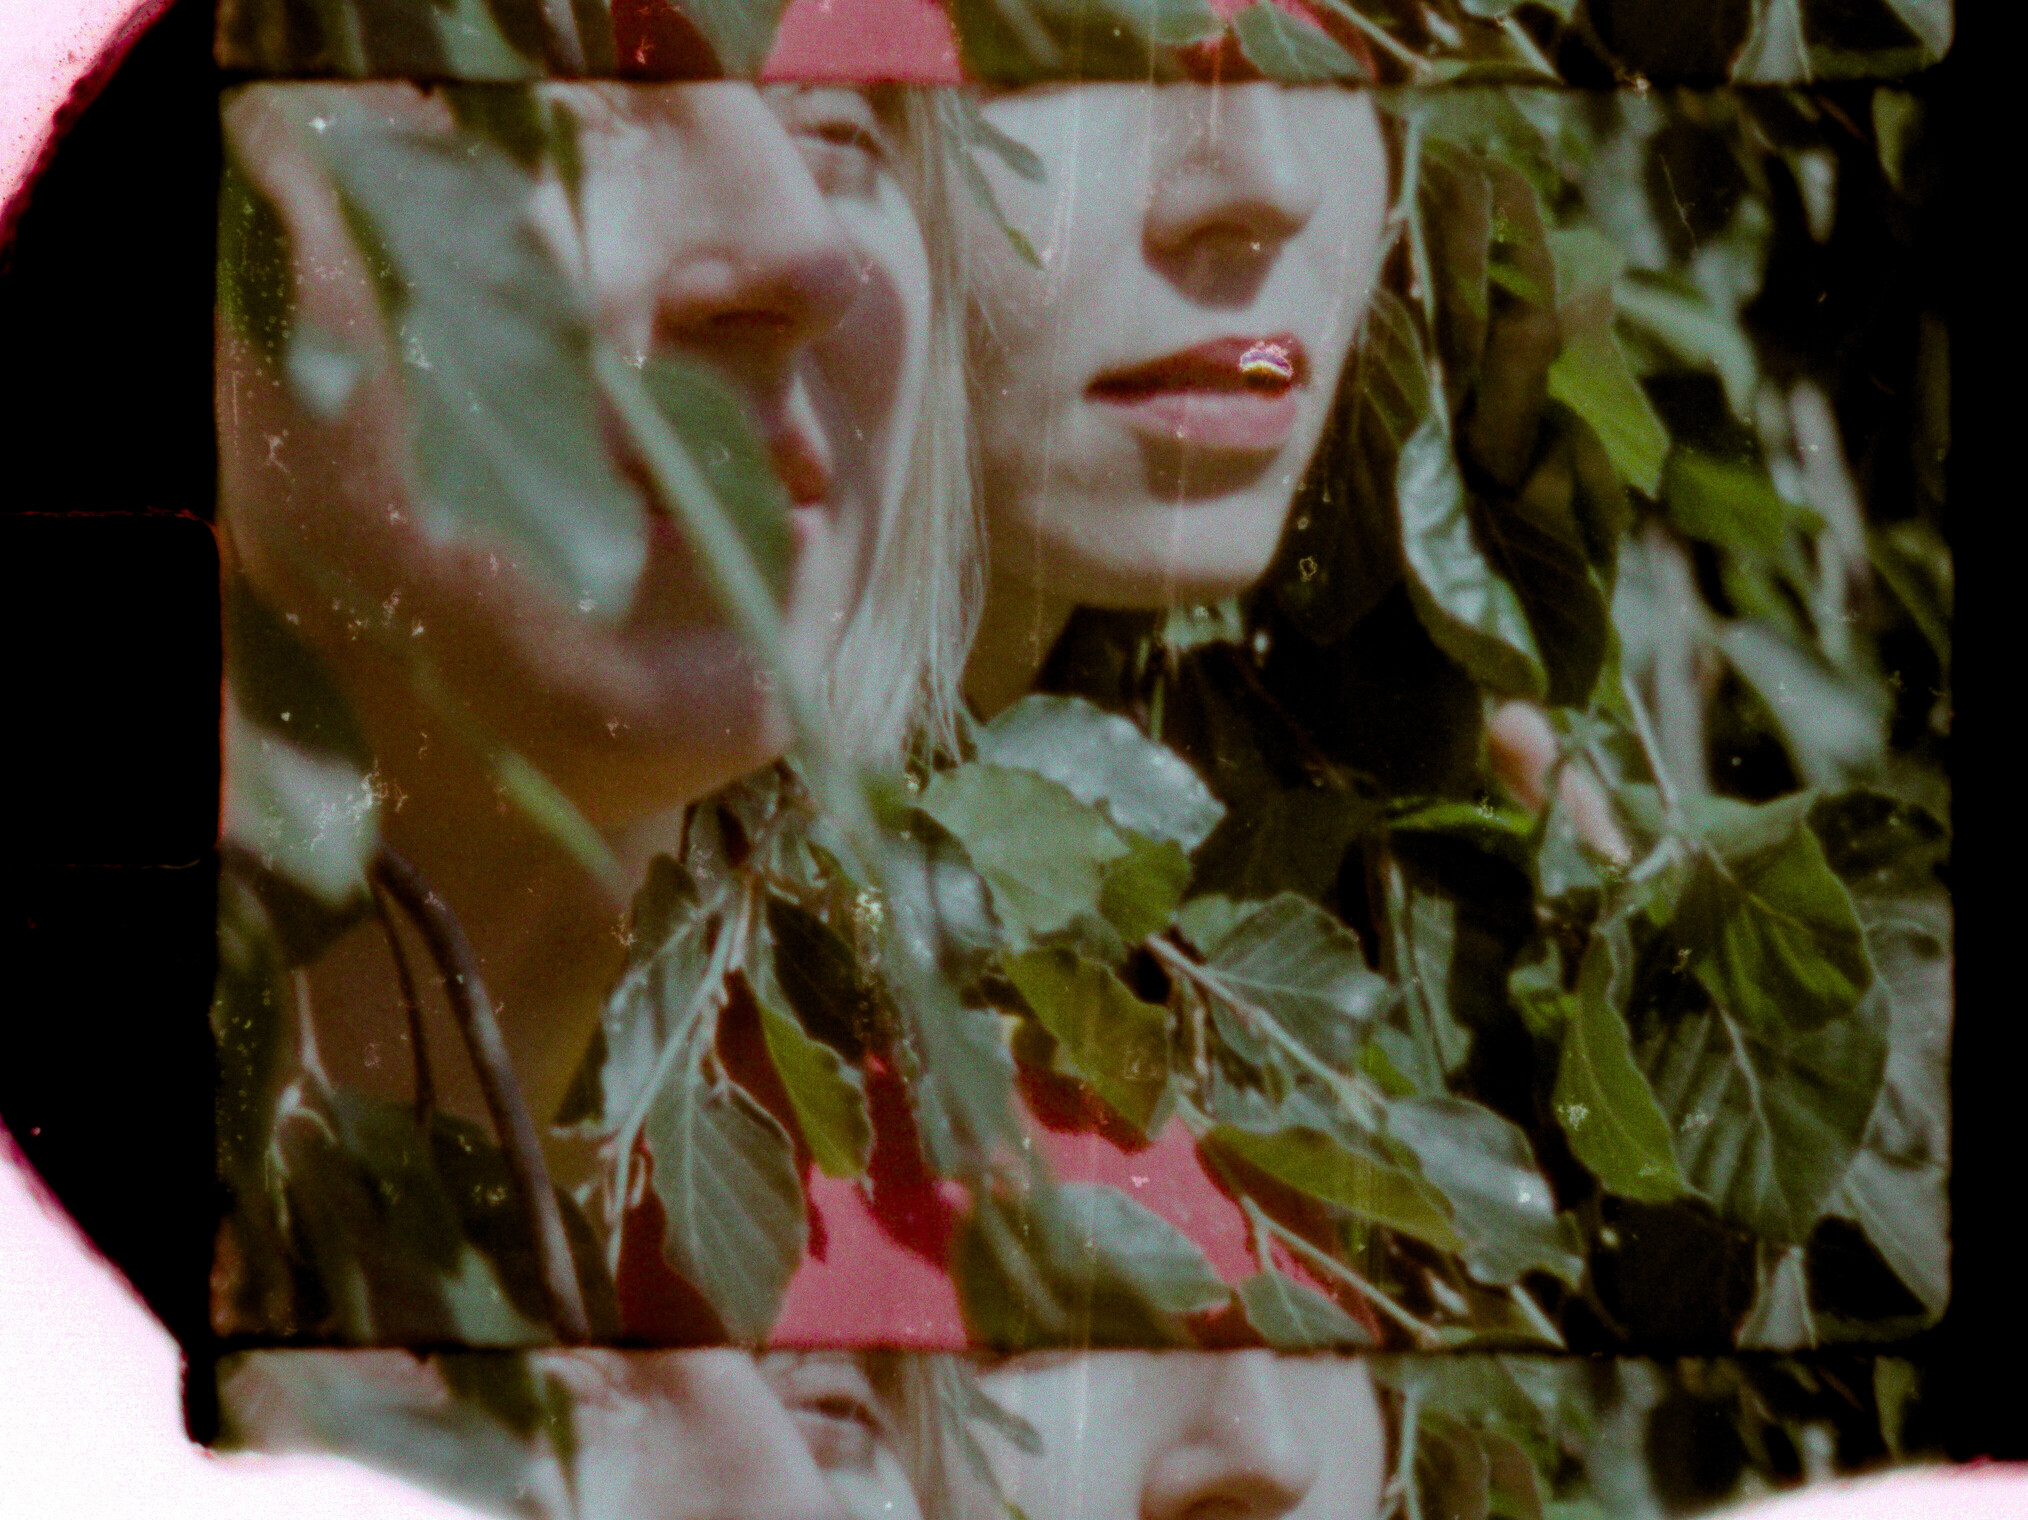
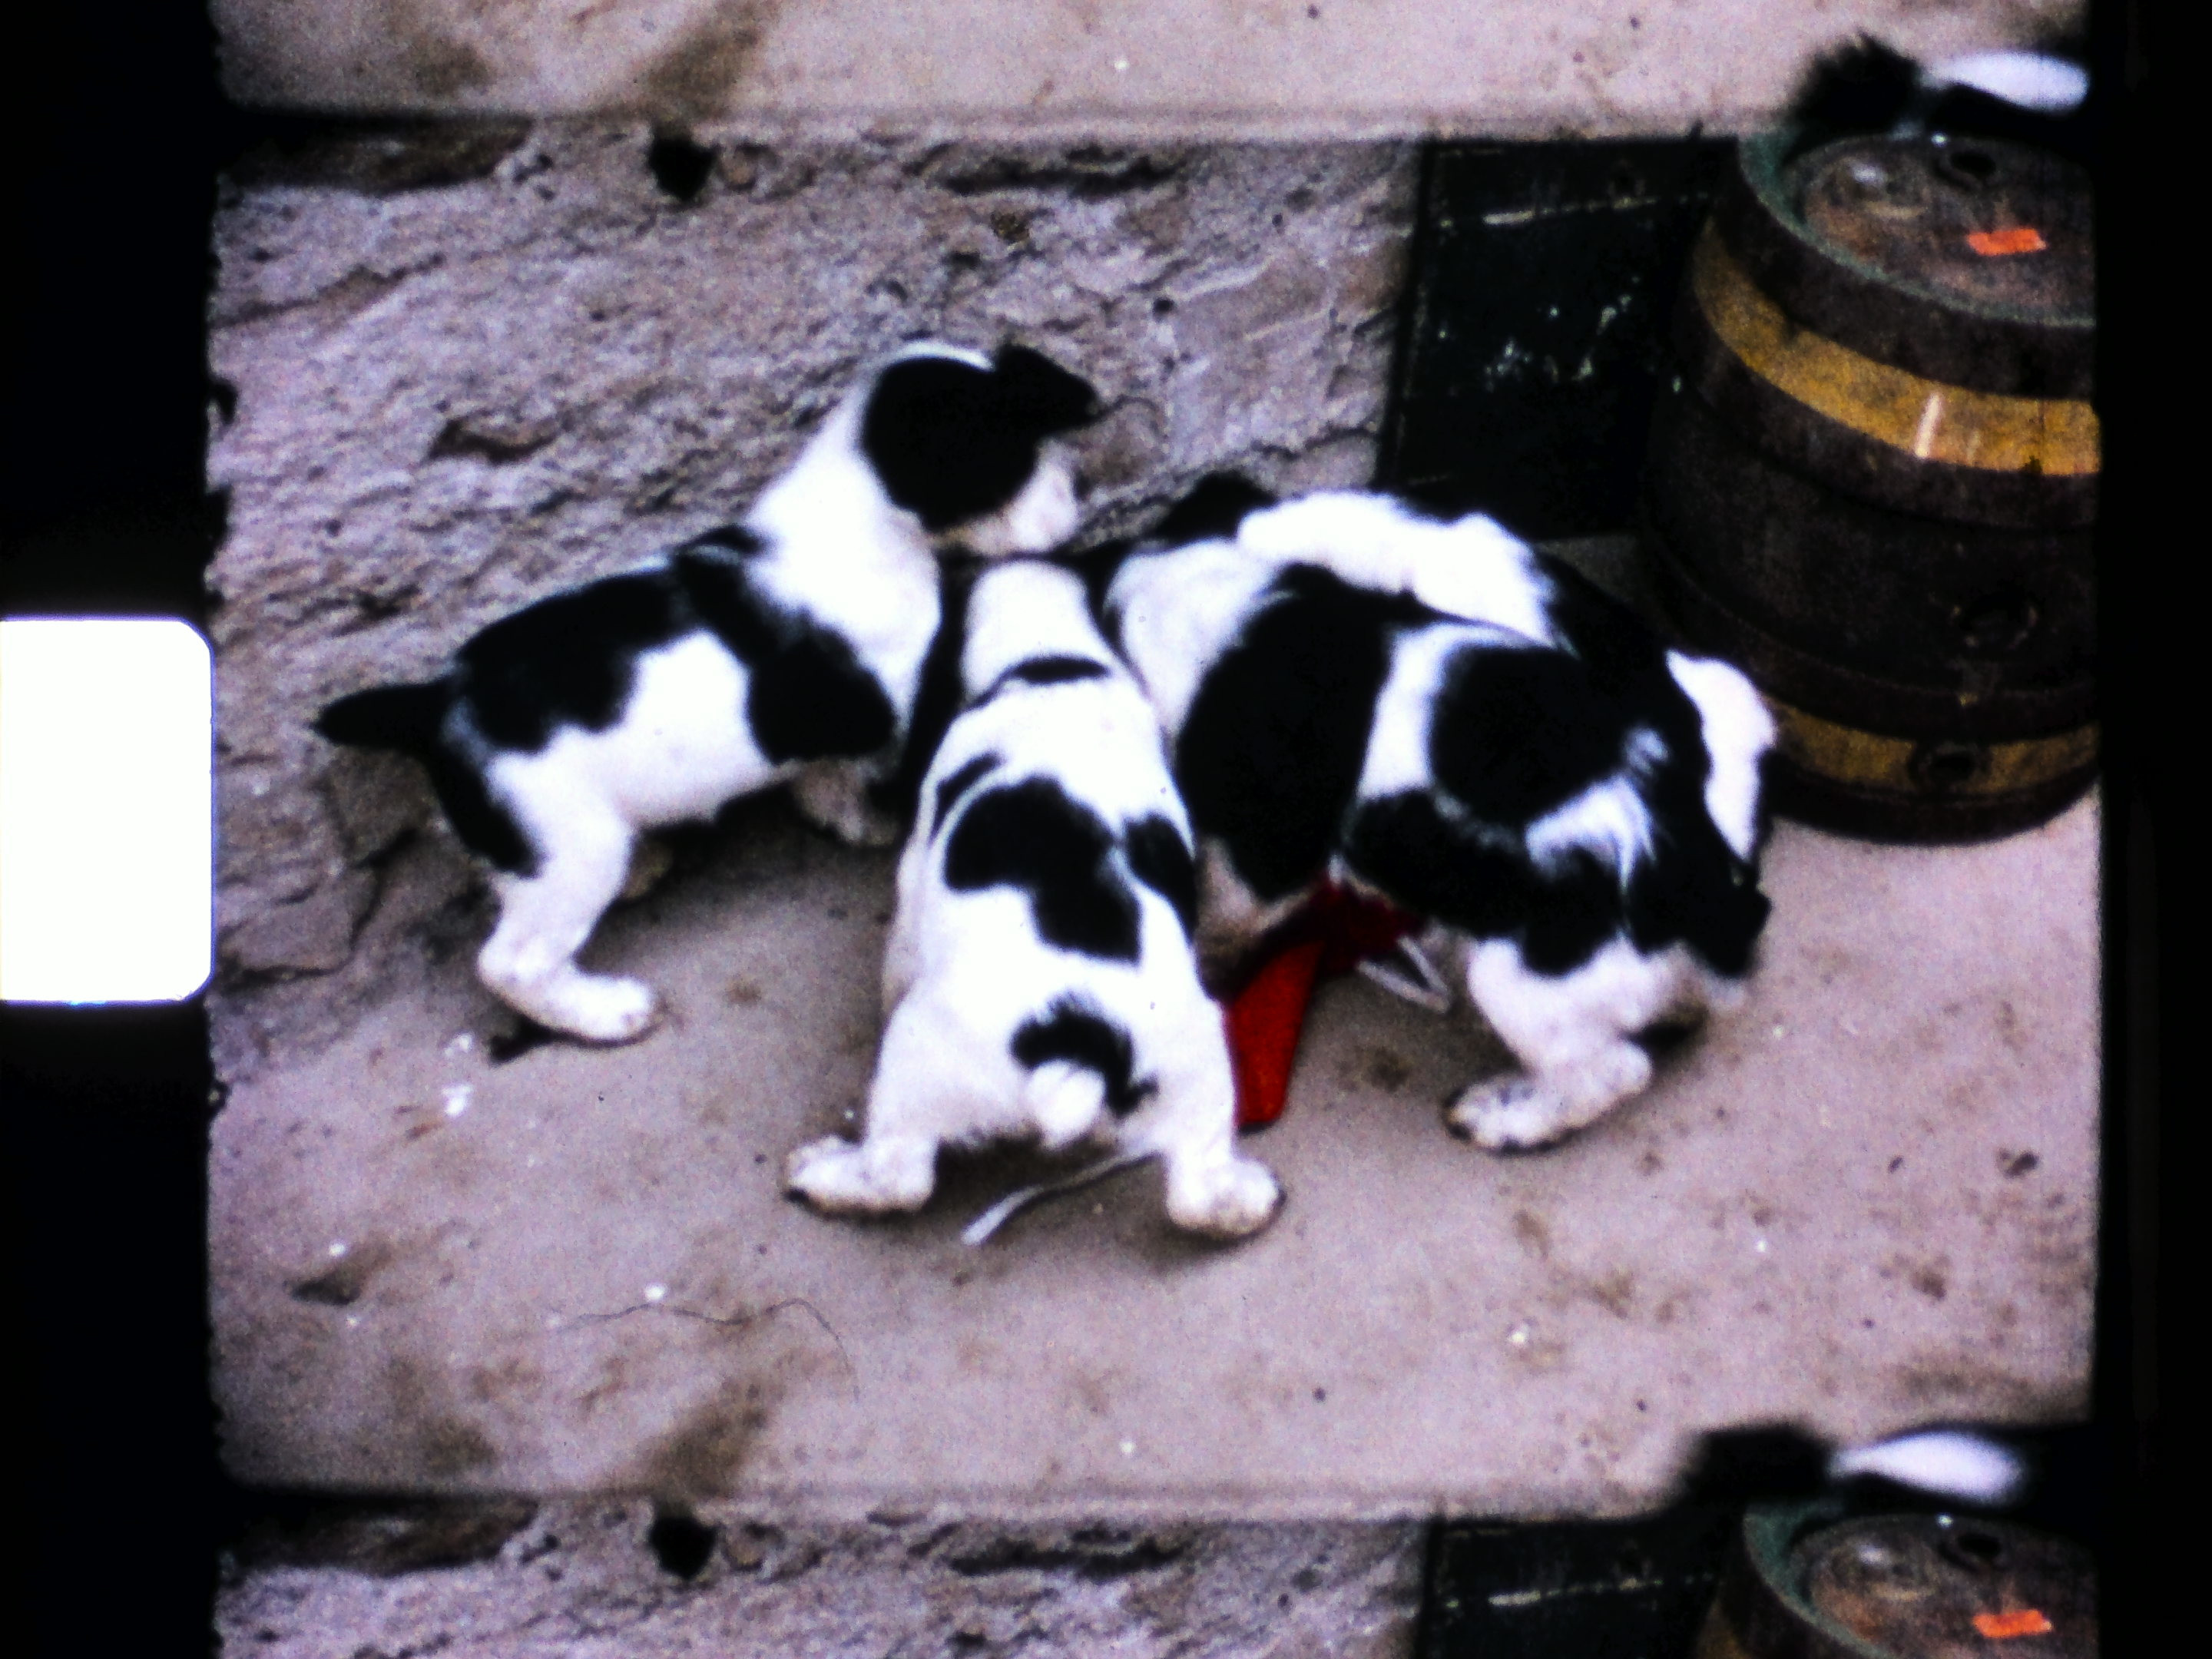
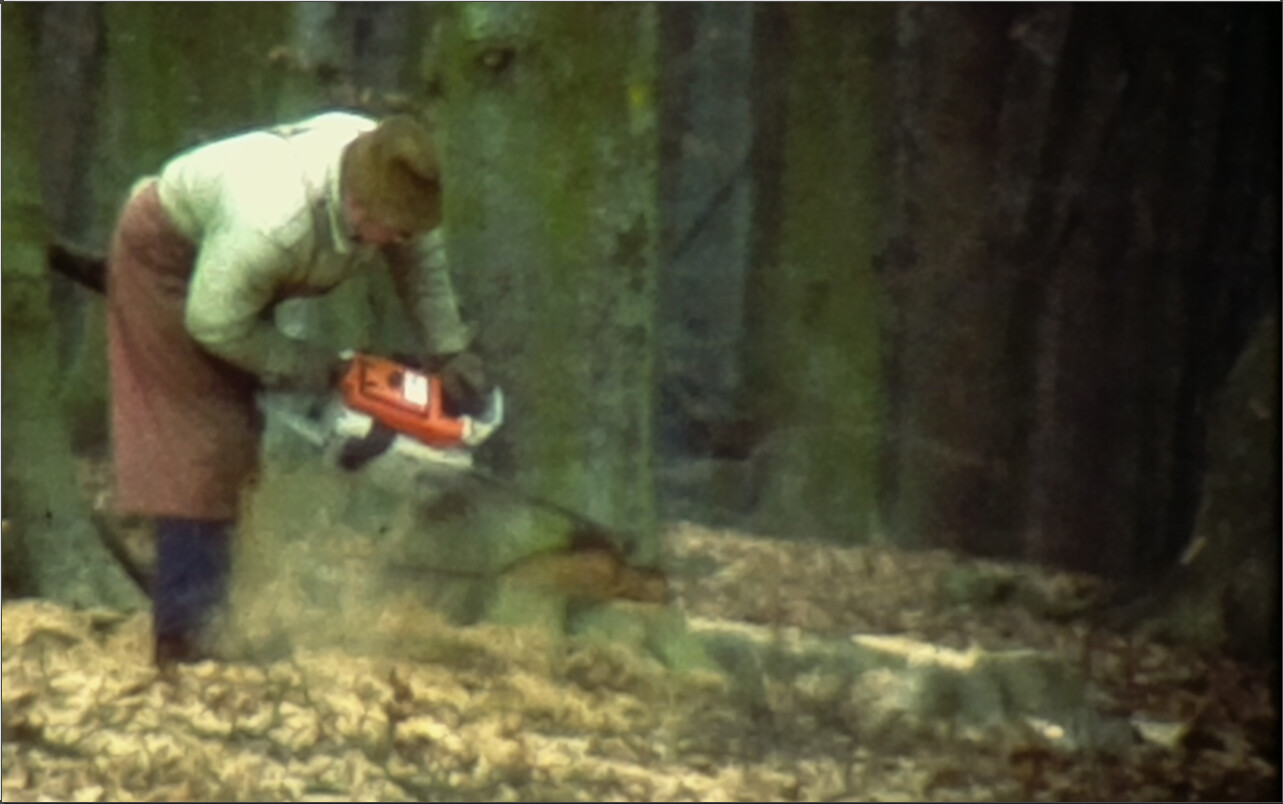
Here’s an example scanned again with the see3cam/Schneider combination, filmed with the Revue/Chinon camera, but this time, it’s Agfachrome

In contrast to the very first example above, the camera was here certainly operating at the largest f-stop possible, 1:1.7 and it shows in the sharpness of the original frame.

I think it would be interesting just to share other scan results, possibly, if available, with information about the film camera used, the scan camera/lens combination as well as other information available. The ideas is to build slowly a database of scan results which might help to design better systems, for example by showing minimal requirements as well as intrinsic limitations of the format. Super-8 color reversal film is probably one of the most challenging scanning situations, due to the small frame size and the huge dynamic range color-reversal film is showning.

By the way - in every frame I posted, there is some dust hiding, as promised, to judge the sensor/lens combination!

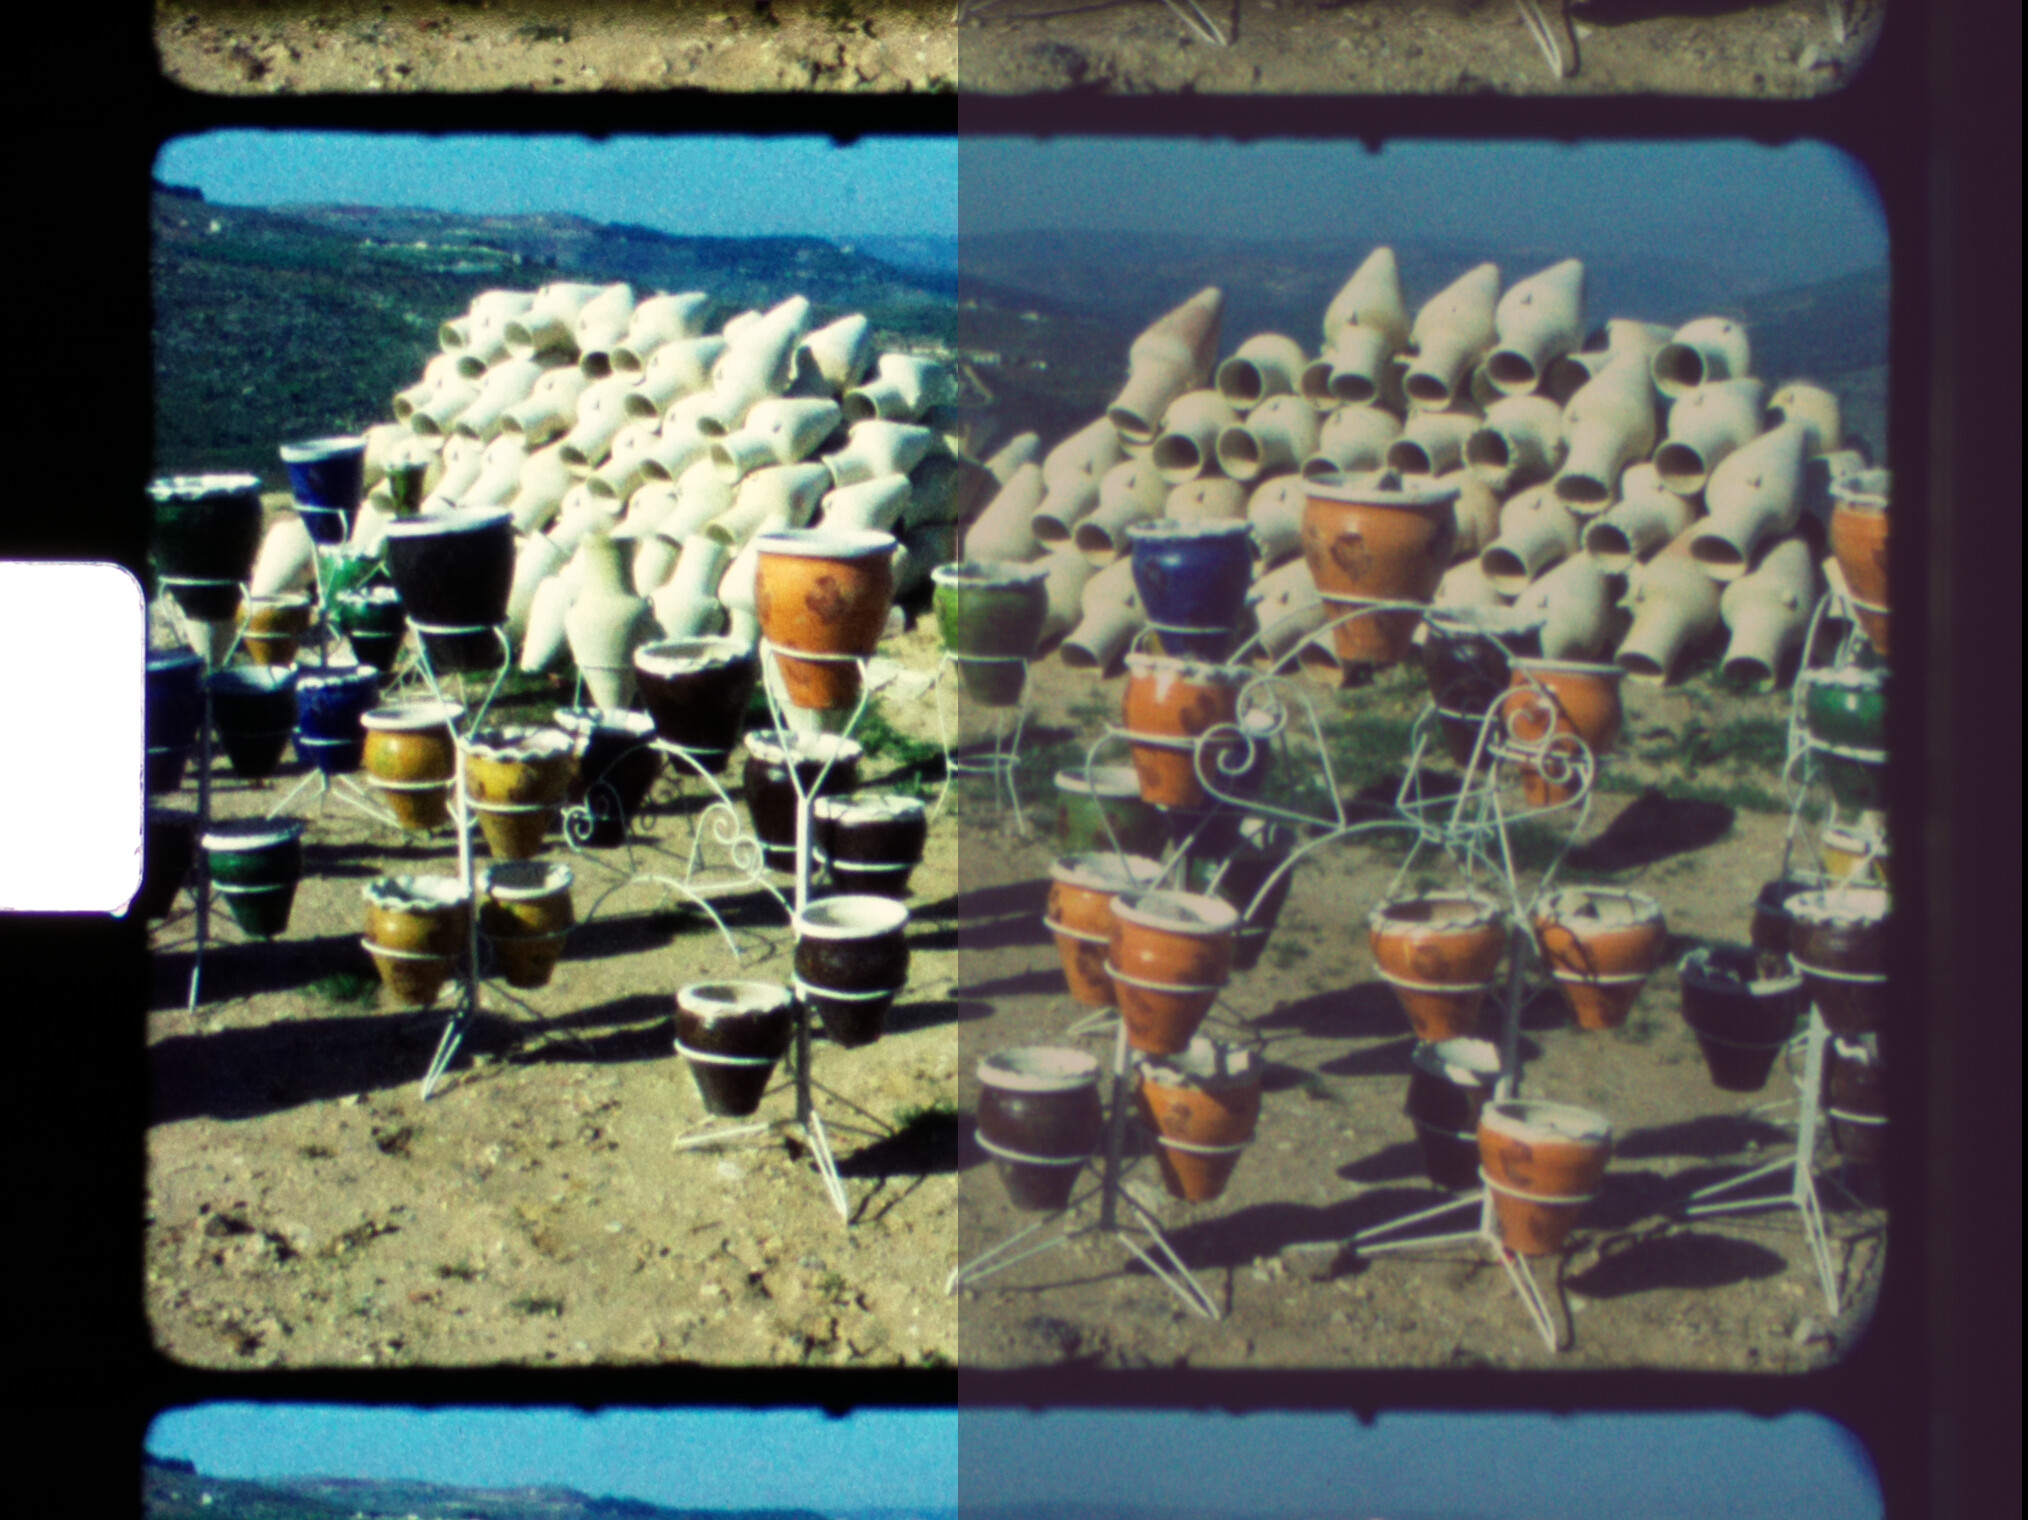
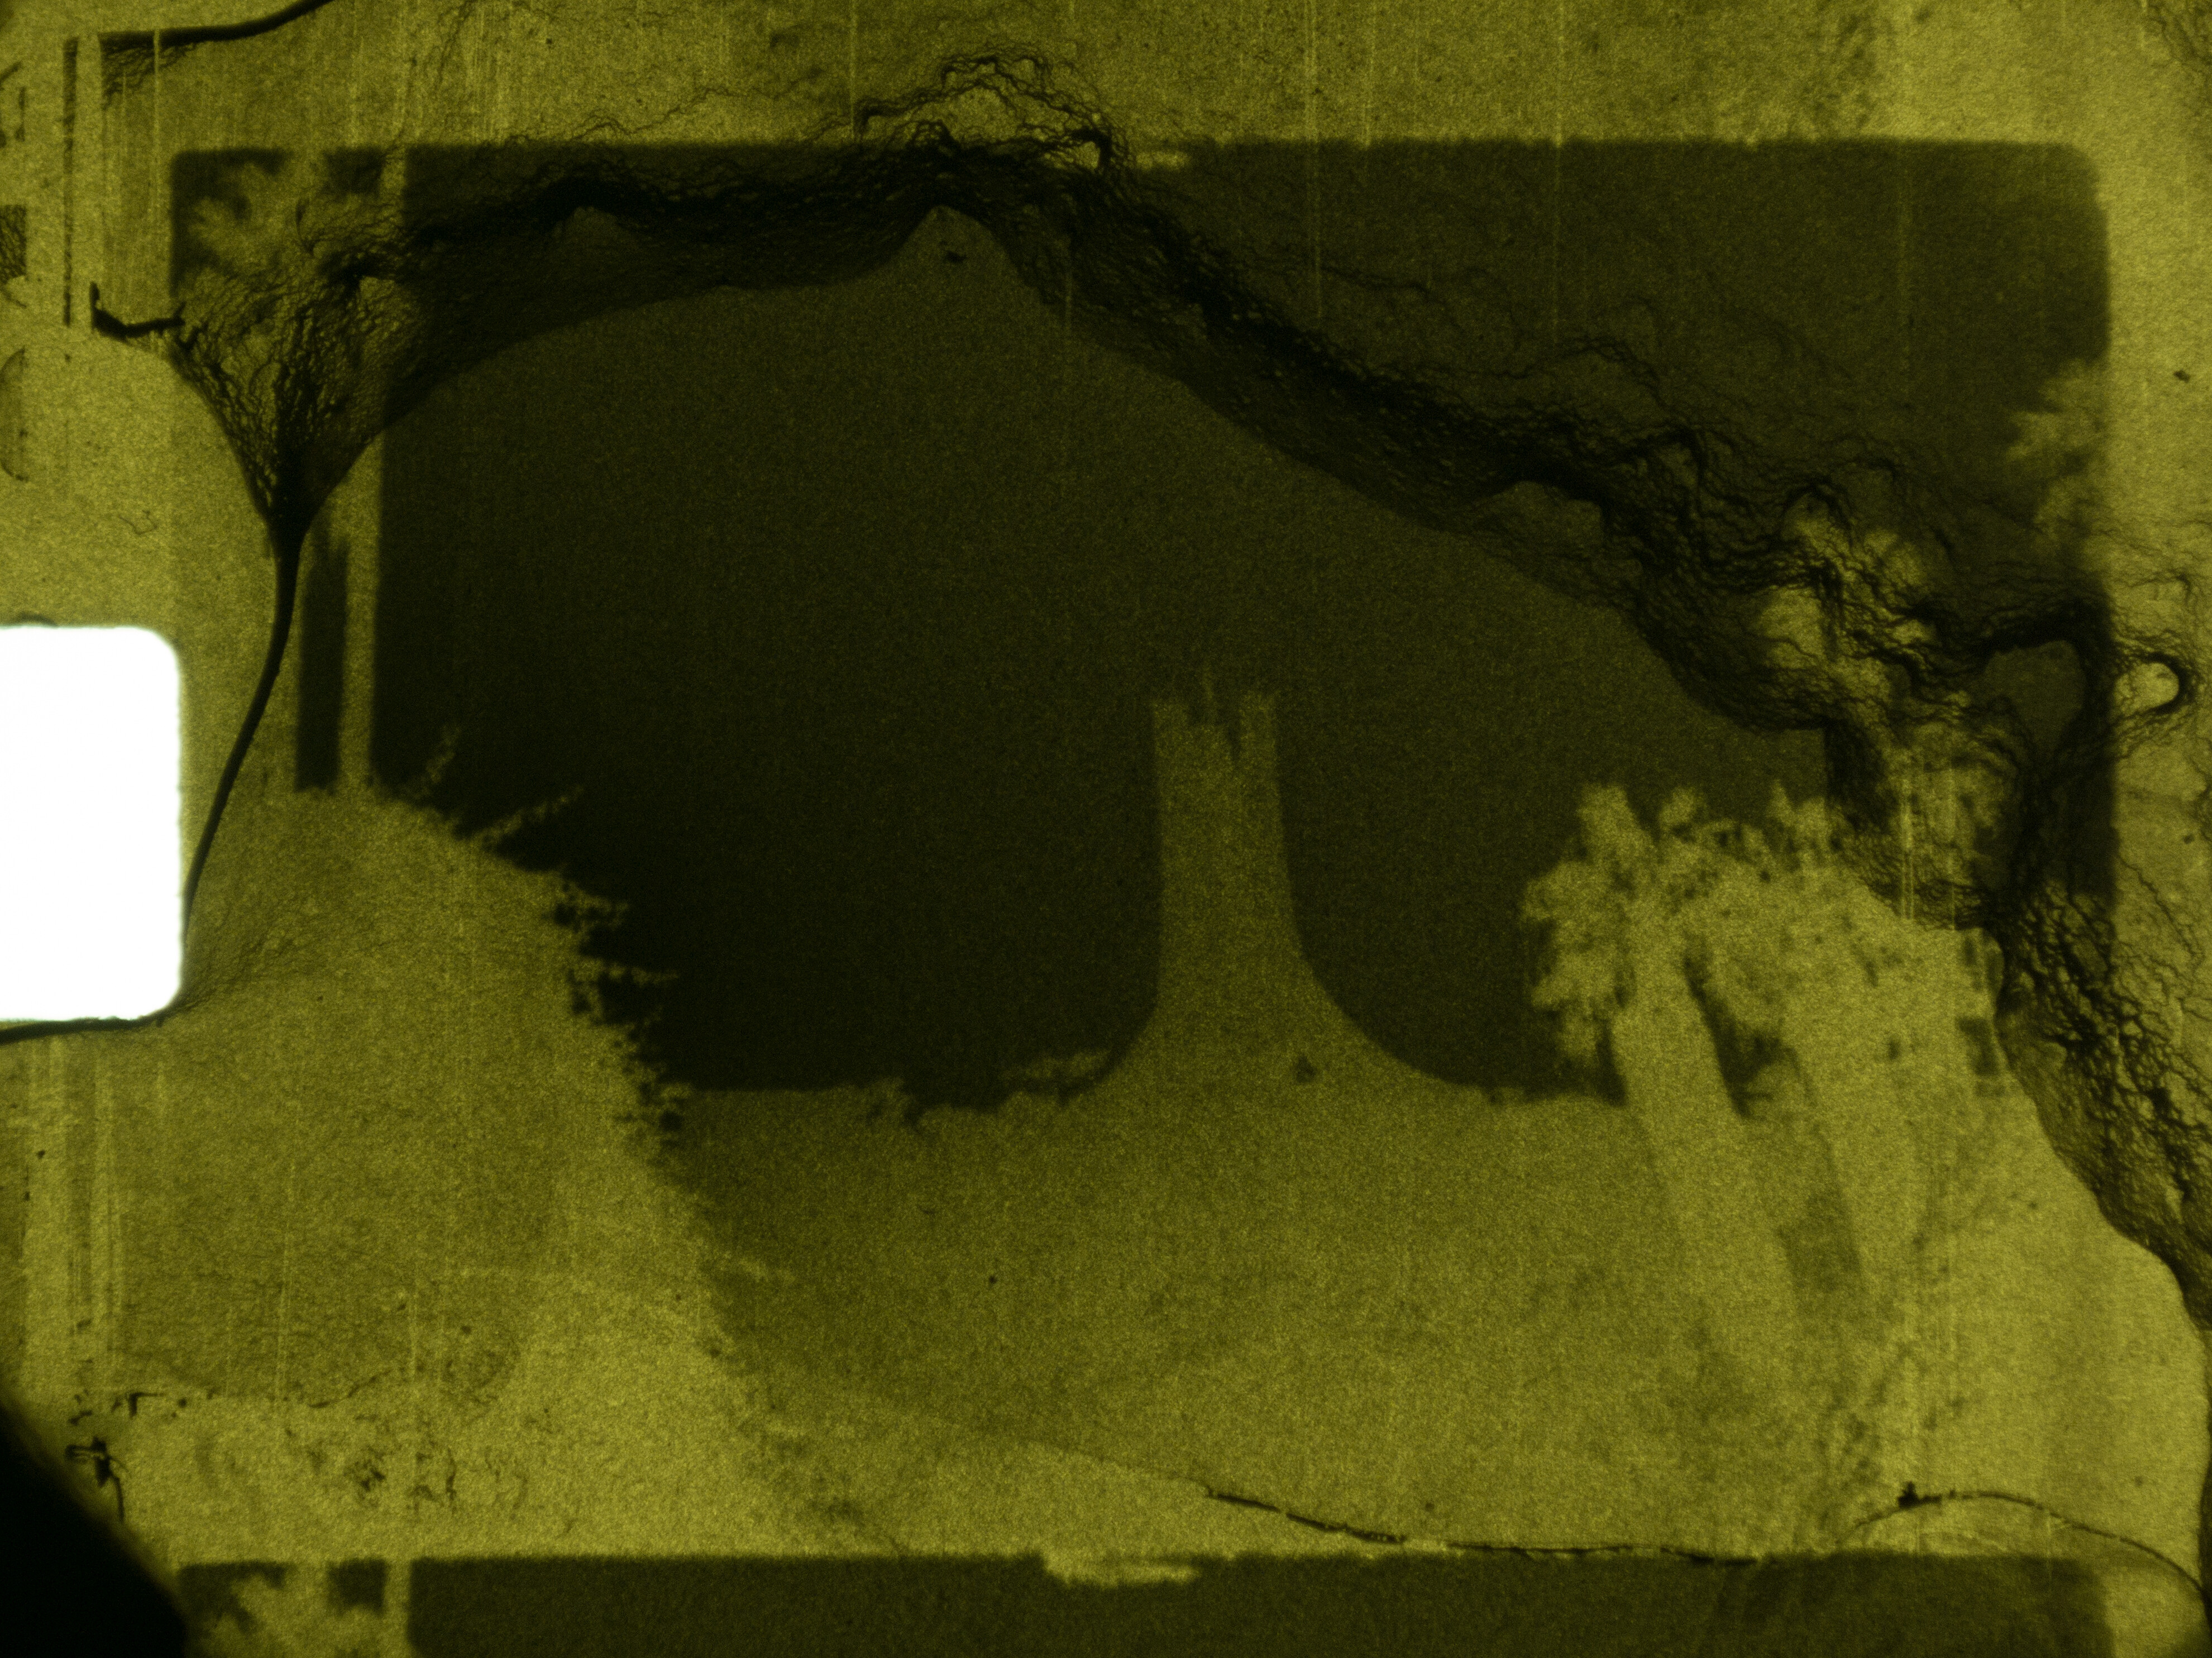
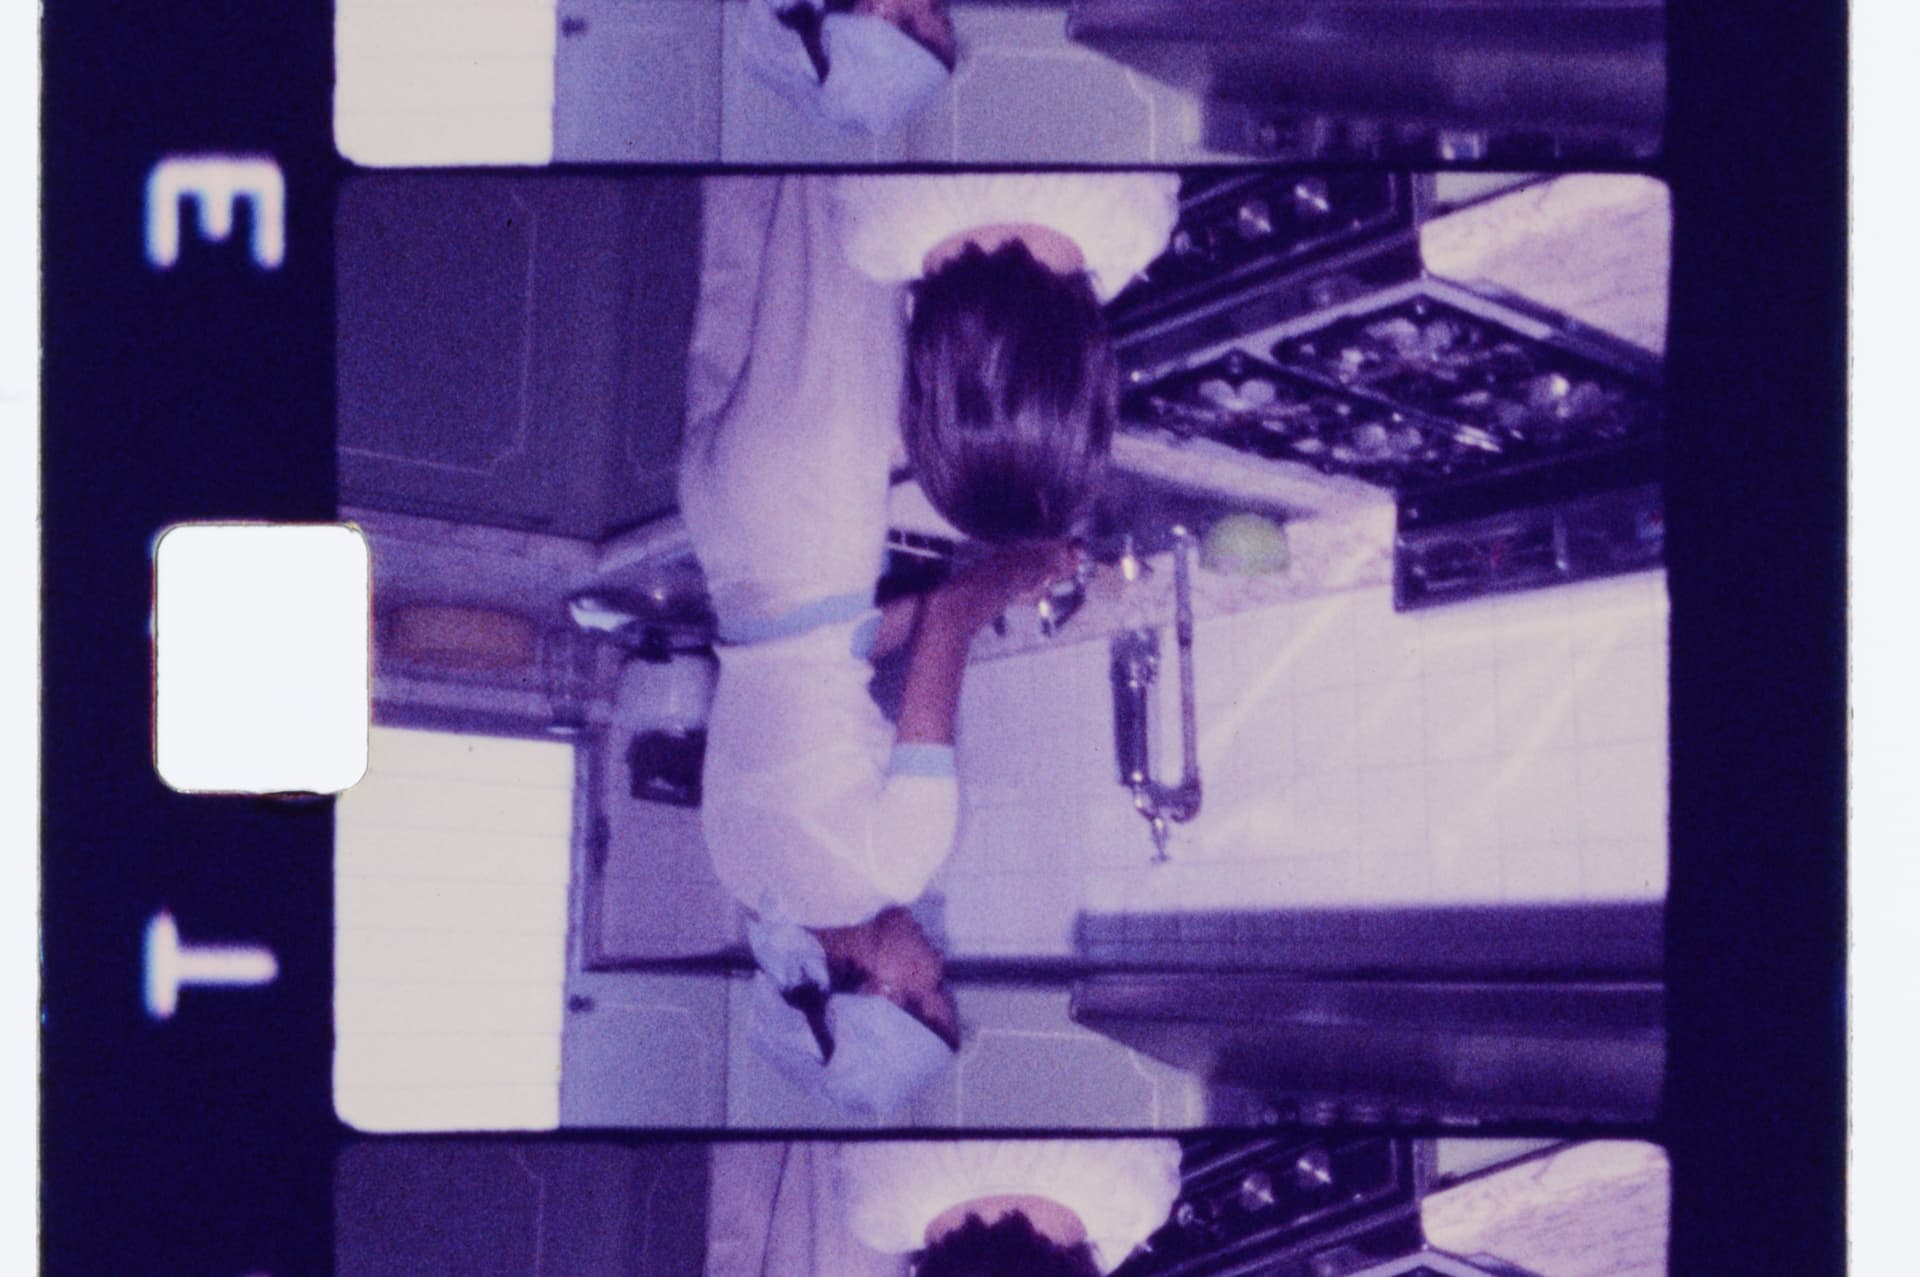
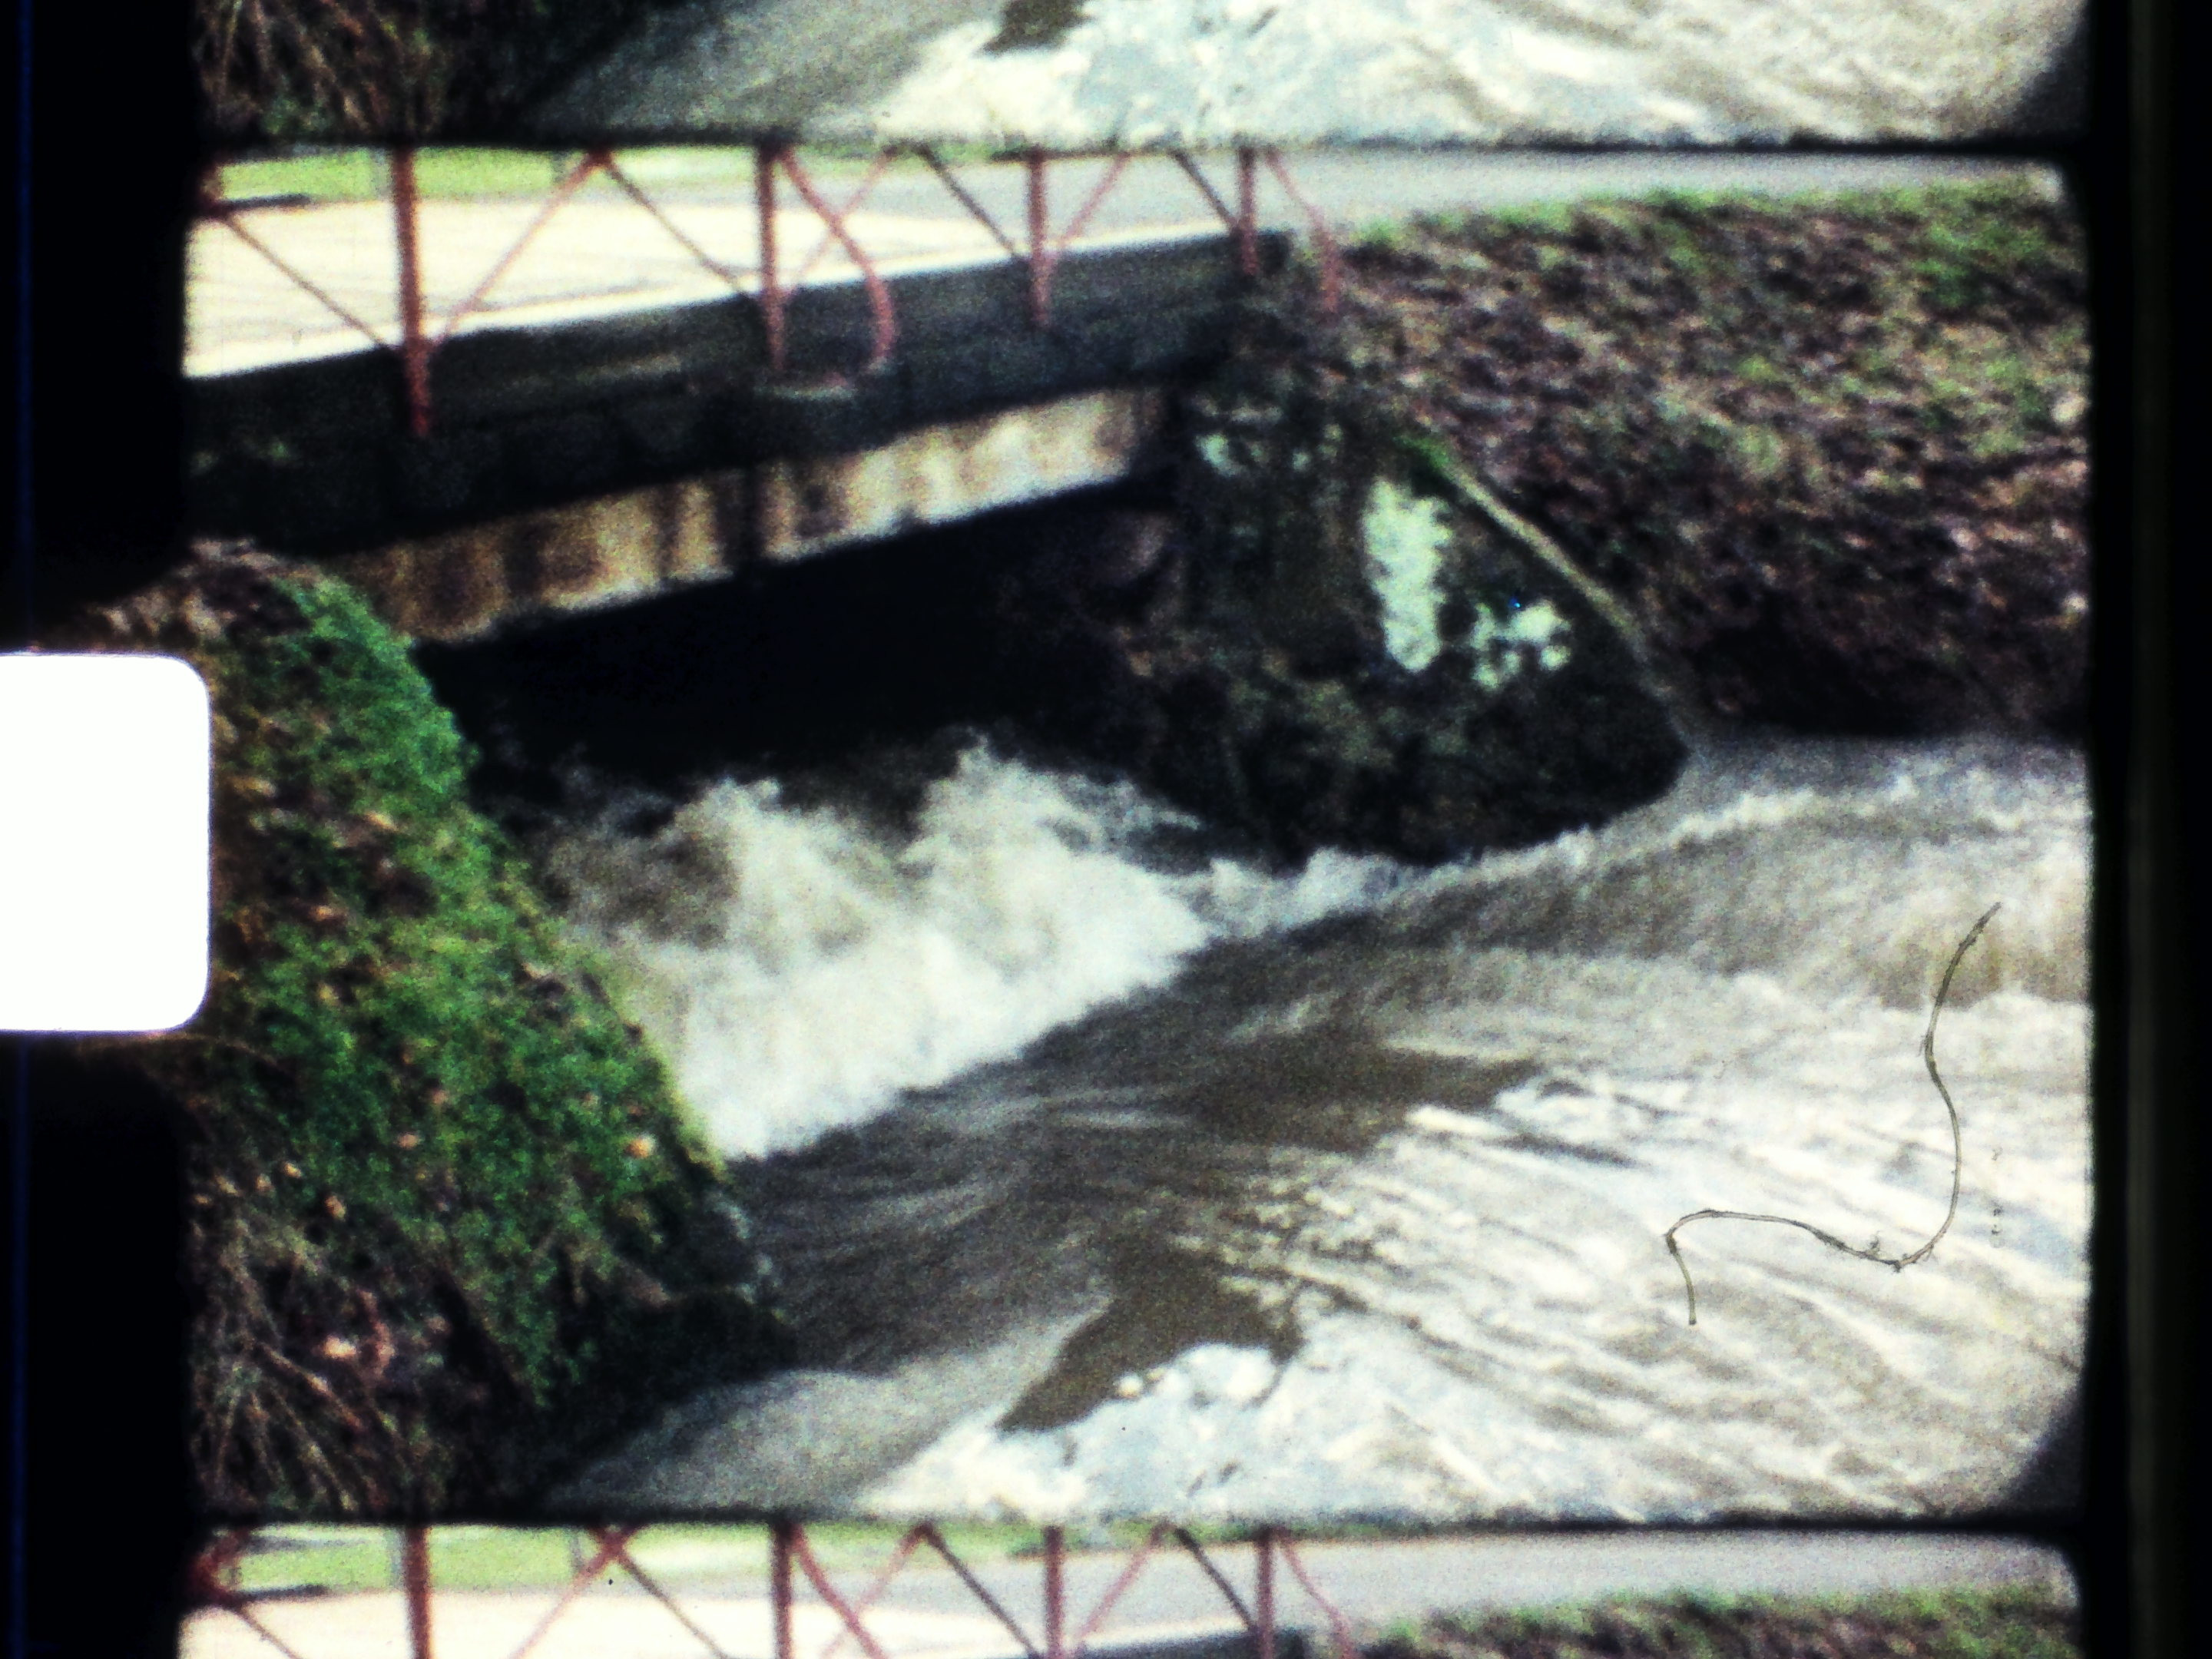
Now here’s a scan comparision without that luxury (simply could not find a frame with dirt). It’s between two different scan sensors, namely a Raspi HQ sensor vs. a lens-shading compensated Raspi v1-sensor. Both scans used the trusted Schneider Componon-S 50 mm, film stock is Agfachrome, camera the Revue/Chinon one. Here’s the scan result of the v1-sensor (original scan resolution only 1292x972 px):

Here, for comparison, the same frame, but scanned with the Raspi HQ sensor. The scan resolution is much higher (2028x1520 px)

so we start to see the film grain, but the visual resolution seems to be worse. So what happened?

Well, let’s enlarge a part of the frame. Here’s the v1-version

Nice, relative sharp image content, only mildly noticable grain - right?

And now for the HQ version at the same resolution level:

What happens here? Highly visible film grain and lousy definition of image borders…

Well, the v1 sensor is a mobile camera sensor, while the HQ sensor is more geared towards cam corders. Like any mobile sensor, the v1 sensor actually employs (either already on the sensor, or during intial image processing) heavy noise cancelation and image sharpening techniques. In our scanning application, this gets rid of not only the sensor noise, but also of the film grain! And of course, the (adaptive) sharpening also helps with the visual appearance of image edges. If you compare both images closely, you will notice the patchy, plastic-like look of the v1 sensor - that is a sure indication of adaptive smoothing/sharpening.

The HQ sensor on the other hand is tuned differently, and shows happily the film grain. Sharpening is also applied here, but it is less noticable.

One point to be mentioned here: this issue here is most probably caused by the pipeline converting the raw sensor files into the jpgs stored on the disk. Most machine vision cameras are usually not designed to deliver “nice looking” images. Also, one can avoid such things by working directly with raw images. But: there is a tendency of utilizing image processing algorithms already on the sensor level. So your raw image migth not be as “raw” as you might image (for fun, just google: “nikon star eater”)

Coming back to the original topic: it would be great to see other examples of Super-8 scans here in this thread. Other film stock, other film cameras, other sensors, other lenses and various scan resolutions, to get an idea what is needed and how much is needed for a great result.

4 Likes

Good idea.
In every frame you’ve post, there is no post processing right?

every example posted is the .jpg or .mjpeg as it came out of the camera. However, from the raw image to the jpg-outputs, usually a lot of image processing is taking place.

Generally, it is hard if impossible to obtain image data without “any processing”. Let’s try to get in incomplete list of things which happen with a normal capture:

  1. Already at the raw sensor level, nowadays some image processing is taken place. This ranges form dark level adjustments to dedicated noise canceling algorithms at the sensor level. A simple example most sensors feature are binning operations. If you think that the raw image your Nikon or Canon stores is just that, a raw image, you are probably mistaken.
  2. The raw sensor images correspond in no way to the images we are used to see. They are processed in an image processing pipeline in various ways. For starters, the raw image (a four channel image, Red/Green1/Green2/Blue) is debayered, lens-shading is applied as well as whitebalance. Most image sensors operate at 10bit (Raspi v1-camera) or 12 bit (Raspi HQ camera) or 14 bit (current highend DSLR). This range has to be reduced for jpeg-storage to 8 bit. So throw in a gamma correction, plus specific filtering to align the intensities of the two green channels, plus specific filtering to reduce the original camera noise, plus a slight sharpening afterwards for good measure… just to name a few. During the first steps of this pipeline the original four channels will be reduced to the three channels we are usually working with - but maybe not RGB. Actually, pipelines may transform between various color spaces during processing.
  3. After all this happened, the image will be in the usual RGB or YUV format ready to be stored onto disk. Obviously, if we use an image format like jpeg as intermediate storage, there will be compression artifacts added right before the disk storage.

Having noted all this, the captures above were taken with all “automatic” image processing steps switched off as much as possible and the processing values for the pipeline set to fixed, carefully chosen values.

Specifically, for the Raspi v1- and v2-camera, the picamera library was used for capturing, by using the video port as output. This port outputs a video stream composed of mjpegs. There is a second output port available with the Raspi cameras, the still port, which can used for still captures. Both ports deliver slightly different results. The documentation of the image processing pipeline used on the Raspberry Pi hardware is sparse - the Raspberry foundation cites routinely non-disclosure arguments. This image processing is happening on the GPU and it is closed source. Currently, there are efforts to introduce an alternative processing pipeline, “libcamera”, which is open source, but it is far from production ready. With my captures, I think I was able to switch off most automatic processes.

The see3cam is a cheap USB-3 machine vision camera, and the frames delivered via the USB-3 port are displayed as they are. The image processing pipeline converting the raw frames to the jpgs displayed is implemented in a secondary processor in the camera itself. This is a typical setup, found in many image processing cameras. Again, a real documentation of what is implemented and how is usually difficult to obtain.

To give you an idea of the difference between a jpg a camera delivers vs the raw image of a camera, here’s an example. This is a scan from a Kodachrome 40 film stock (1988), scanned with the Raspi HQ camera

On the left side, you see the jpg delivered by the camera, on the right side, a visualisation of the raw image data of the same frame. The raw frame itself would have a heavy color cast and would look rather dark, so what is displayed on the right side is the raw image demosaiced, blacklevel adjusted, and white balanced. Finally, a gamma curve of 2.2 is applied to arrive at something which looks similar to the jpg the camera did deliver. But obviously, some additional sharpening and some more color manipulations are happening during jpg-creation.

So, to summarize this long reply to your short question: no, there is no post processing in any frame I posted above. This is how the data came directly out of the camera(s), asked to deliver jpgs with high quality settings.

2 Likes

Here are frames from 1977, Kodachrome 40, don’t know the camera.
Raw to DNG to jpg - no correction in post
Captured with Blackfly bfly u3 13s2c (1288X964_global shutter)
Hall sensor to trigger
Rodagon 50mm 2.8


5 Likes

Hi ! Very Good Idea…

Here are samples, with the direct DNG and just the image desaturated (and with soft leveling). As I’m mostly doing B&W, I put an very expired Kodachrome I’ve shoot and processed in b&w negative, and a color negative home processed too (in 3 stages, DNG, inverted, white balanced (poor white led so no adjustment possible on capture)

My setup is Raspi HQ cam / rodenstock Rodagon 50mm/f2.8. (Normally when I capture, I’m between f.5.6 and f.8) / Cheap White Led / Cheap, fragile and home made focus system (waiting for adaptation ring I’ve bought online since… december…). I’m scanning at 4056x3040 (in color), doing DNG with PyDNG.

Nizo 561 macro / Trix / Home made reversal processed

As the Eye is out of focus, I thought it was interesting to see the grain here.

Nizo 561 Macro / Trix

Nizo 561 Macro / Expired Kodachrome / Processed as a negative / Now that I have a laser for the hole registration I can work on negatives with clear side without any problem…

Nizo / Kodak 50D / Home processed with C41

DNG

Inverted

White balances + black & white levels

Cheers,

Gregory

4 Likes

seems to me that the grain of Kodachrome color-reversal film is comparable between all the different scan setups, rather independent of what sensor/lens or scanning resolution was used.

And: the grain of Kodak negative film is much finer than that of the color-reversal film. Also, the dynamic range of negative film stock is noticably less challenging for a scanner than the dynamic range of color-reversal film.

2 Likes

With the Raspberry HQ camera I just changed my 10MP CCTV lens for a Schneider Componon 50mm. The result is much better without blur in the corners.
I make my captures in mode 1 1920*1080 reduced FOV with a ROI exactly of the ratio of the super8 frame 1500x1080 without any border. This mode assures me a decent 18 fps (Picamera Jpeg Capture on video port).I keep this resolution for all post-processing and final rendering.
I insist on the quality of the focus, it’s really very sensitive (I measure it with a laplacian) a micrometric sliding table seems indispensable to me.
The lens is mounted reverse with extension tubes (about 8cm for the resolution 1920x1080.). In the tubes a helical ring allows to adjust the magnification to obtain exactly the super8 frame.

Raspberry HQ Camera mode 3 full res 4056x3040 Componon S 50 mm

Raspberry HQ Camera mode 1 1920x1080 ROI 1500x1080 Componon S 50mm

Raspberry HQ Camera Mode 1 Componon S 50mm
HDR merge of three exposures
Note the effect of the HDR on the sleeve of the baby, in auto exposure it is burned without any detail.

3 Likes

From the markings this is Ektachrome, it is about 50 years old.
Scanned with DIY using Nikon D3200 Camera and reversed Nikkor EL 50mm/2.4 set at 5.6, RAW NEF 6016x4000 (with that Camera Raw is 24MP @ 12 bit) converted to JPEG without corrections.


Then color corrected with DaVinci Resolve cropped to 3840x2160 exported as a TIFF16 bit sequence. TIFF converted to JPEG for posting.

3 Likes

@cpixip if you haven´t seen it already, thought this would be interesting to you on the topic of color science for faded dyes.
Digital Unfading of Chromogenic Film Informed by Its Spectral Densities

3 Likes

Interesting setup, I use a triggered Bauer T502 with Film-Digital objective and FLIR BFS-U3-50S5C-C. What capture software (and OS) are you using? I use Spinview MacOS (Intel) and save as jpg with image sequence conversion to mov ProRes422 with compressor.

That’s a good camera, but you’re degrading the quality using JPG intermediate. Better to go to camera raw and debayer it.

What’s really needed here is some GOOD independent software for debayering from camera raw, the free options are limited. You can use this Avisynth plugin, but it won’t handle slightly corrupted RAW files from what I hear and of course Avisynth is Windows-only and not that friendly to non-coders.

1 Like

I found this (RawBayer2DNG) that worked well in my tests. It appears to be the same person that made that plugin.

I didn’t test on any film scans just some images of my living room, so I don’t know how fast it would be with a reels worth of images. I was able to get a 12bit DNG file into resolve that looked correct.

1 Like

Yeah sorry that’s the standalone app that also works fine. I forgot it’s also free, it’s only the .CRI branch that’s restricted (.CRI is the format that the Blackmagic Cintel scanners scan to so it doesn’t affect normal RAW or DNG).