Well, I bought the LEDs already mounted on these tiny PCBs. Here’s an old image showing some setups I tried out:
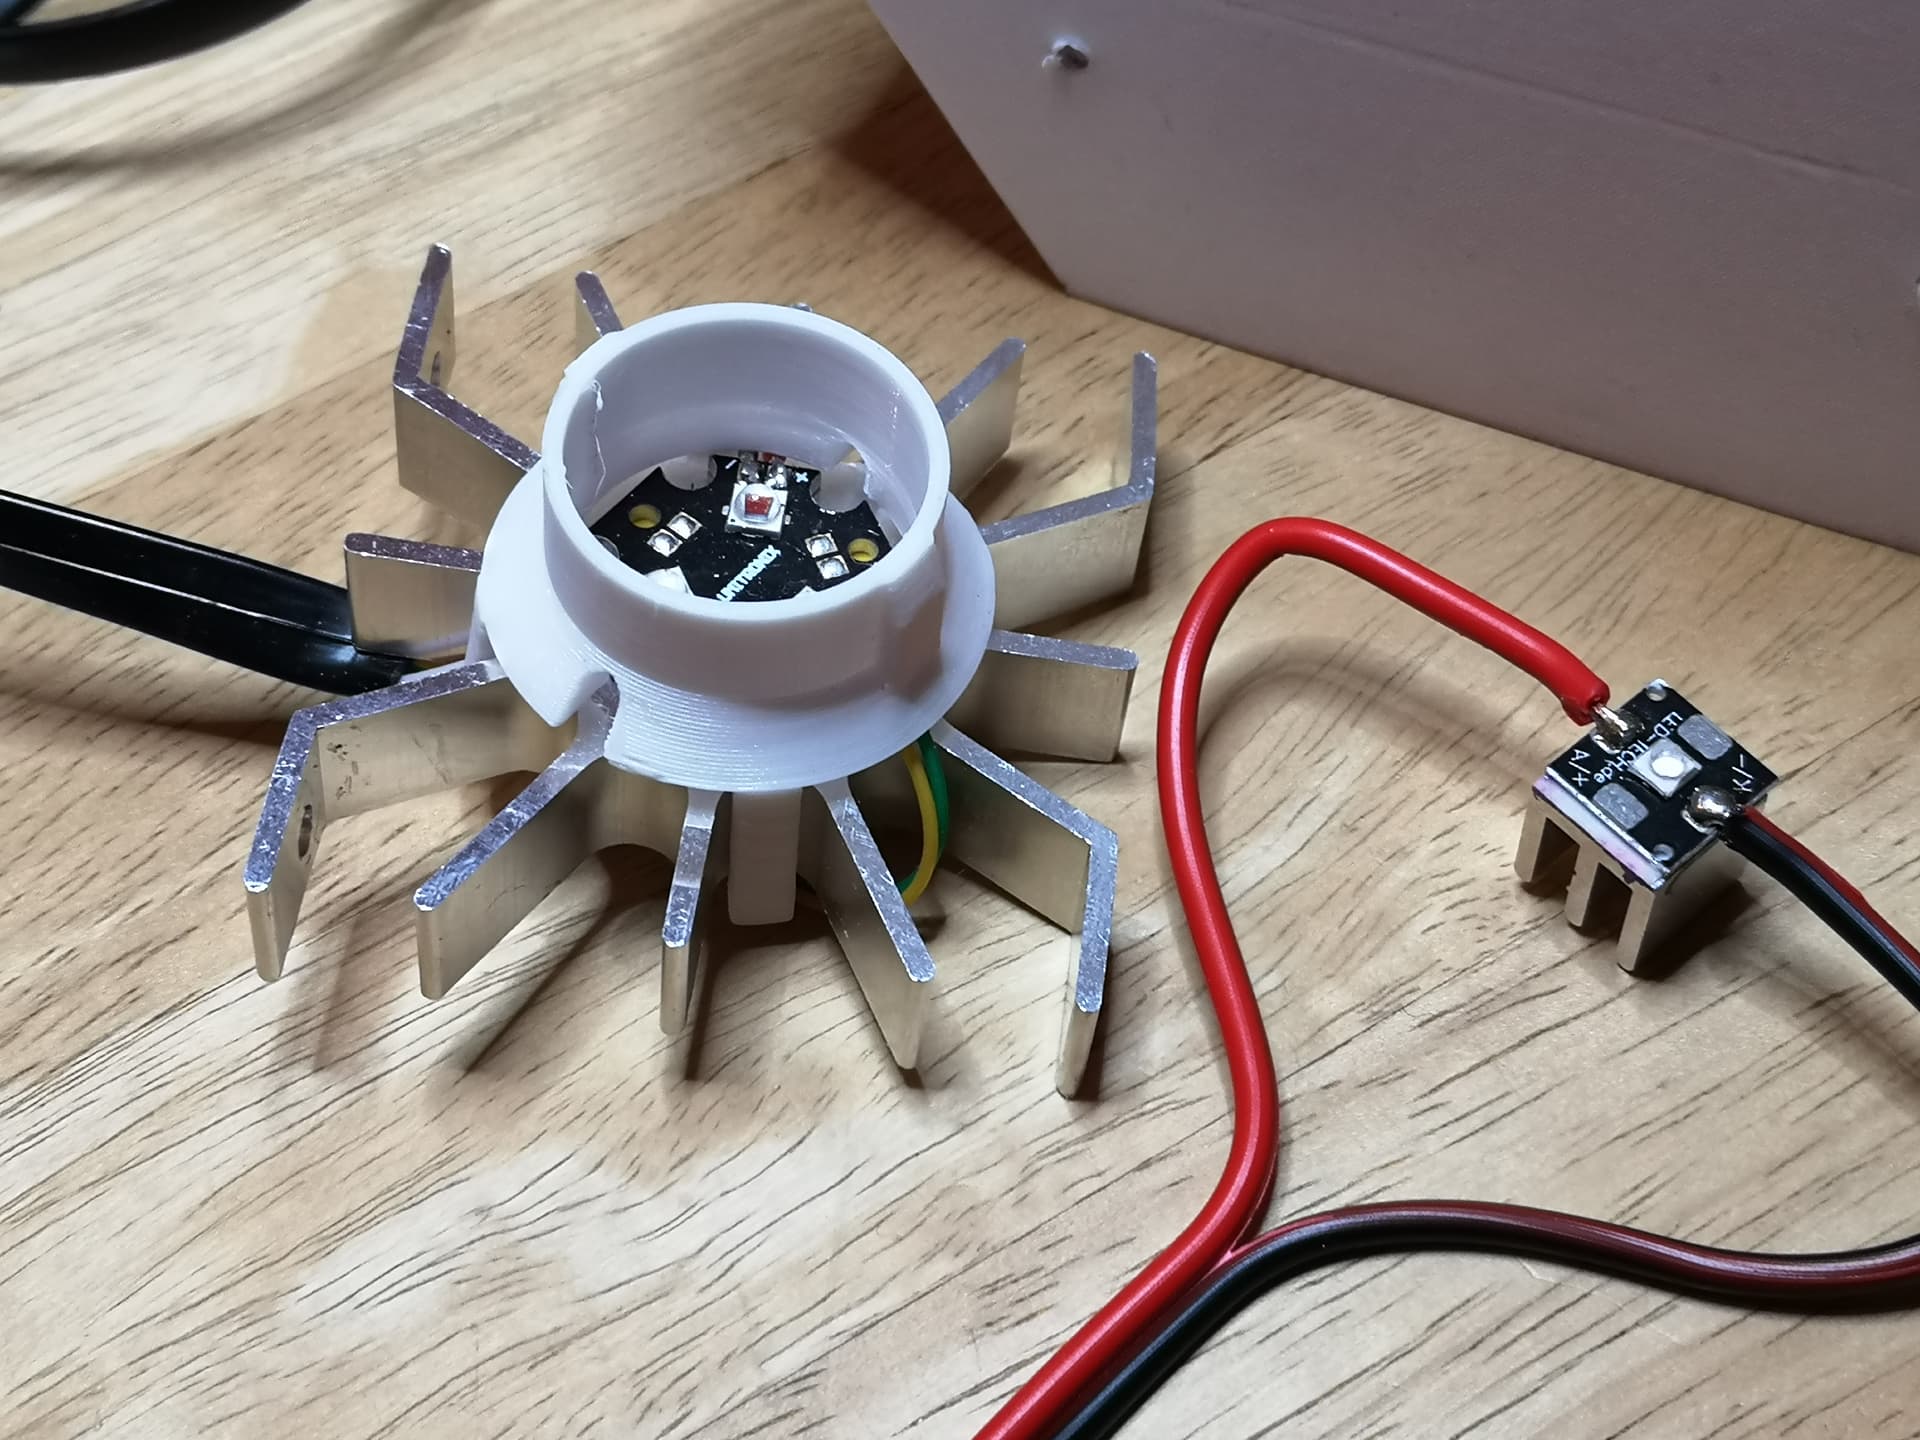
The right one shows the LEDs I am currently using. It’s simply a 10x10 mm PCB with a heat sink attached. At some time, this was one of the standard mounting options of those tiny LEDs
These LEDs are paired with my 3D-printed integrating sphere, described here (including .stl-files). I am considering upgrading the LED illumination, but for this, I have to take apart the whole film scanner.
And: before I start this project, I first want to understand the colorimetry (color science) of various illumination setups - research done years ago and which somehow went out of focus over time. One result of these previous simulations was this here
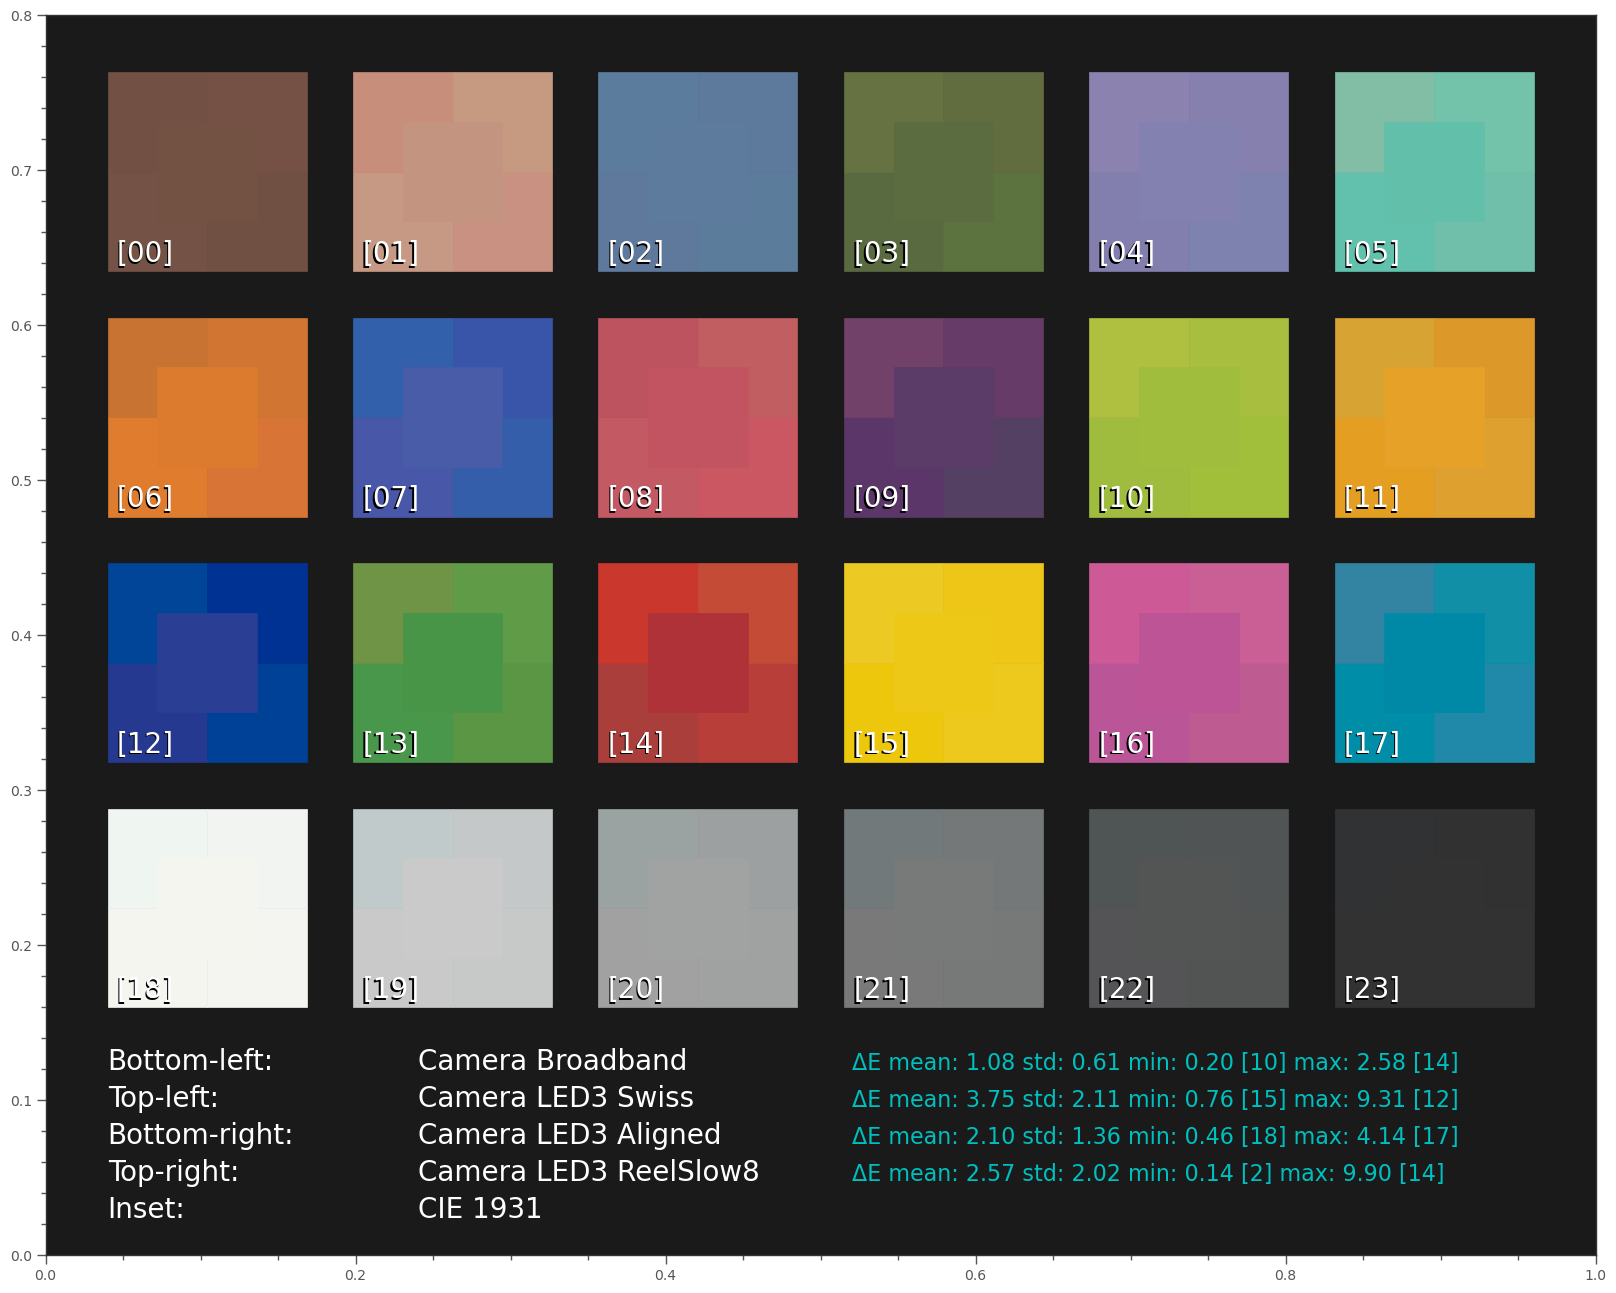
already giving some insight into the situation. The simulation was done the following way: I assumed a color checker being illuminated by various light sources. The color checker was recorded by a standard HQ camera with standard IR-blockfilter. This is not exactly the situation we have in a film scanner (reflective vs. transparent target, print dyes vs. film dyes, for a start), but I thought it would give at least some hint what one could expect.
For each light setup, the color matrix was individually optimized to achieve the best overall result. In the center of each patch, the color is displayed which a human observer would perceive when looking at the color checker in normal daylight.
The bottom-left subpatch shows how the HQ sensor would “see” the colors with the same illumination. Clearly, there are some differences, but the mean ∆E-error is remarkably low, only 1.08. (It would be slightly larger if the color matrix would be directly from the tuning file.)
The other patches show the best results with different narrowband LED illuminations. “Swiss” shows the result with the LEDs quoted in the Diastor-paper, “ReelSlow8” the results with the LED-setup given by @npiegdon quite some time ago in this forum. “Aligned” shows the results of another LED configuration, somewhat hand-optimized for the task at hand.
While this simulation shows certainly the trends one would have expected, the simulation is not really equivalent to our film scanner setup, as mentioned above. I want to get some more insight here before I start considering to change/optimize my scanner’s illumination source. That is: before I fully dismantle/redesign my scanner.