September: First Footage!
Advancing to the next frame was like the tension math but only one variable instead of two, so it boiled down to keeping a simple running average of the last dozen or so estimates and errors. And… that was the last task before hitting minimum viability.
Right now it only uses a single focus point instead of per-channel focus, uses an integration sphere instead of Kohler lighting + wet gate, the software is still rather underdeveloped, and after these three hundred or so frames, a couple nuts loosened themselves to the point of having to stop the capture early, but now it does something! ![]()
This is very early and I haven’t pinned down even half of the processing chain yet, but here is some footage of my grandfather showing off a silly birthday gift back in 1976. The comparison on the left is from the 480i MiniDV camcorder-pointing-in-a-mirror-box transfer that a couple of my uncles did back in 2011.
Notably, this footage was quite faded and I’m excited to see how much of that information was still hiding in there:

Again, this isn’t anywhere near final, but that is motion stabilized, color corrected, temporally denoised, and finally motion interpolated.
Temporal Denoising
The real star of the show here is NeatVideo’s temporal denoising (set to use the maximum of all five frames before/after):
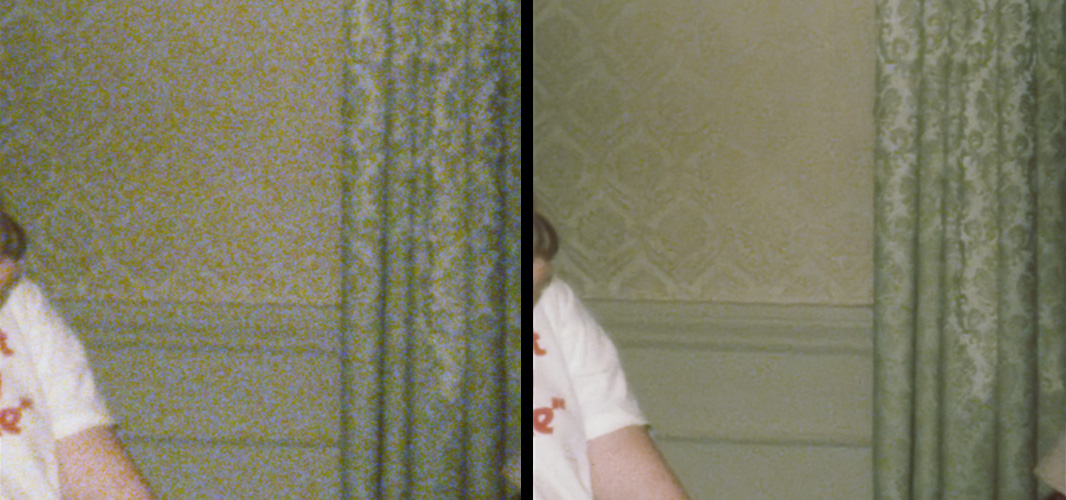
That is pulling out details you never would have known were there! It wasn’t even clear that wall had wallpaper and after denoising, the pattern is perfectly legible. The double-quote on the t-shirt went from a fuzzy square to clearly double tick marks. The curtains went from “I think there is a pattern…” to being able to pick out details in it. So cool!
Color Profile
The color correction is 95% just done by eye right now. But, now that I’ve established good exposure times for each channel, I was finally able to dredge out my old Wolf Faust K3 Ektachrome calibration target and try to capture an ICC profile.
The machine is set up for scanning 8mm but it’s a 35mm calibration slide… so it took thirty four(!) separate captures, meticulously moving the helping hand that the slide was clipped into a little each time. Worse, I couldn’t find anything that didn’t fail to auto-align the images, so I ended up doing that by hand, too. ![]()
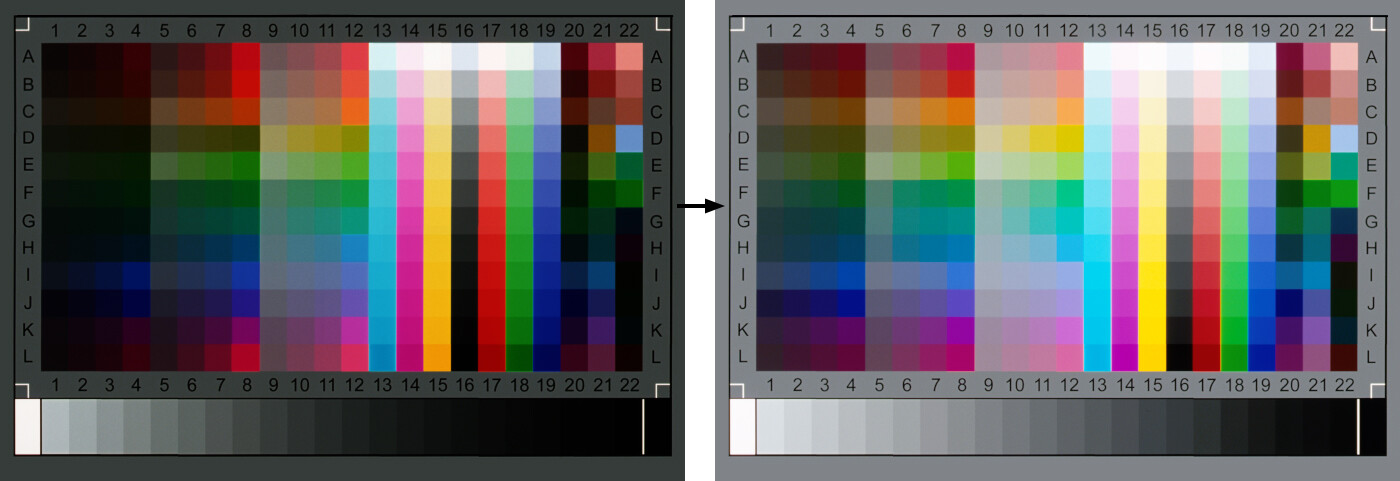
CoCa (alternate link) v1.9.7.4 (using Argyll v2.3.1) is free and can read IT 8.7 targets (and the spectral data file that was included with the target) and generate a profile that can turn raw camera pixels (left) into something calibrated (here, sRGB on the right):
Really, it’s a testament to the Pregius sensor that this isn’t doing a whole lot more than applying the 2.2 gamma ramp I requested at the time of profile creation. The response curves and gamut chart (generated by the also-free DisplayCAL) don’t include any surprises:
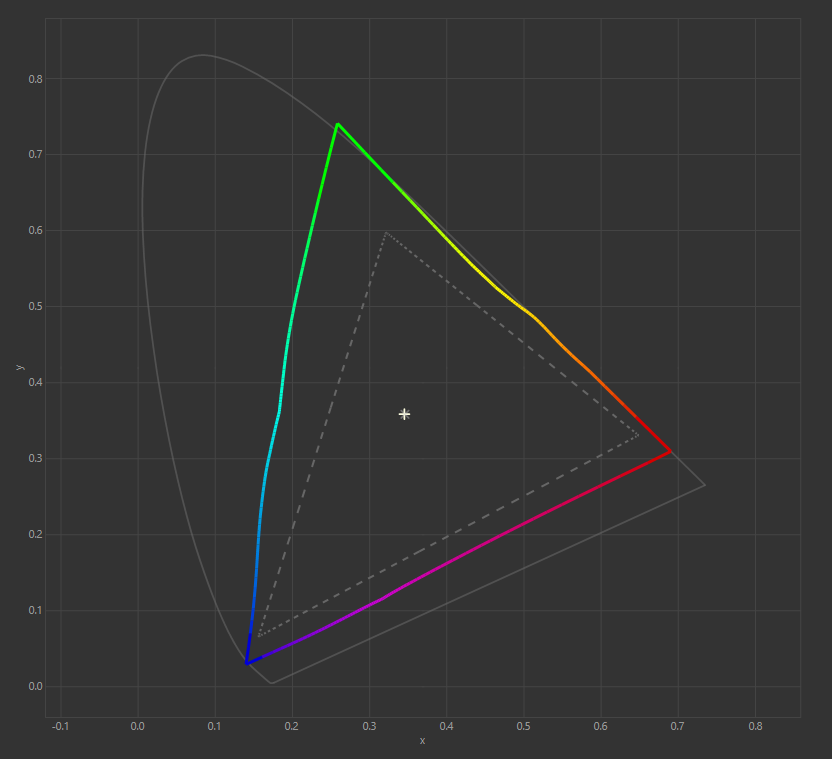
(The inset triangle is sRGB.)
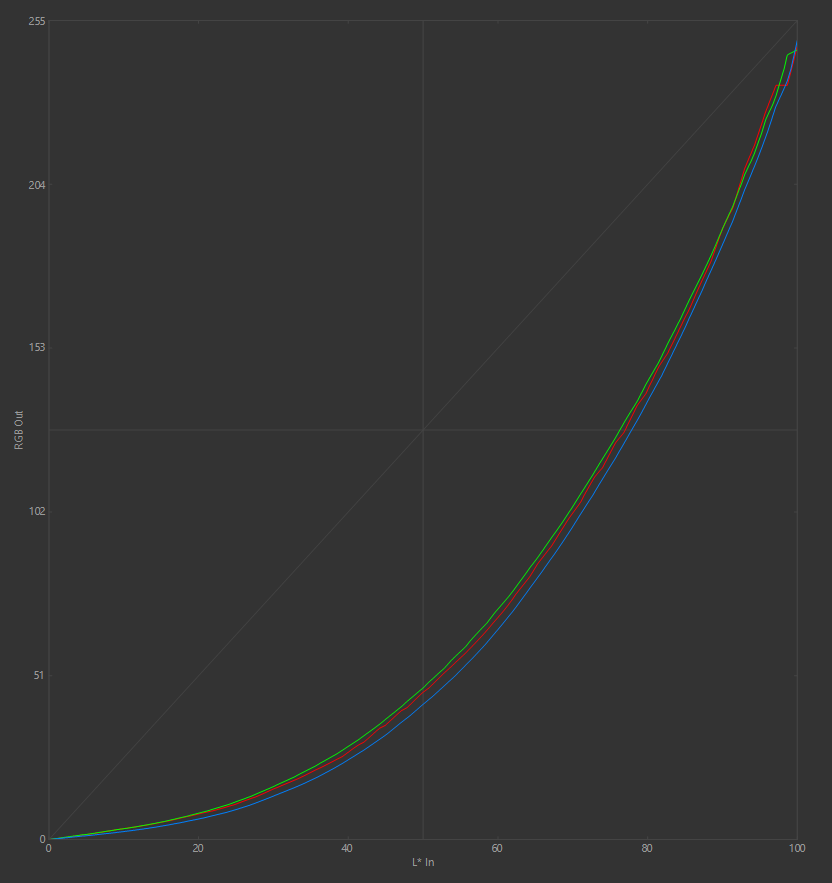
Outside of the tiny wobbles (which I don’t know how to distinguish from measurement error), it’s almost a “perfect” sensor response.
In addition to generating those charts, DisplayCAL can also convert the ICC profile into a .cube LUT file for use with video editing software.
Because the response is so close to just adjusting the gamma by itself, I could probably leave this step of the color correction process out, but I am encouraged that anything my “deep red” LED might be bringing in strangely/non-linearly is getting corrected before the rest of the manual color correction process.
(As it turns out, once I took the time to catalogue my family’s footage into a spreadsheet of all my upcoming work, there was a lot more Ektachrome in there–about 30% of the collection–than I realized. So, even if this profile is only useful for that type of film stock, it was hopefully time well spent.)
Next Up
I’ve taken a slight detour to do better pre-registration before the motion stabilization step. At 0:10 in the video you can see some shaking. That was a place where the motion tracking (Deshaker 3.1 at the moment) couldn’t cope with the raw frames jumping all over the place so it fell back onto how they were captured. Right now if you watch the sprocket holes from the raw capture, the frame-to-frame movement can be upwards of 60px, jittering all over the place. (That’s about what I expected from my frame advance code. There is plenty of over-scan to compensate for the inaccuracy.)
So now I’m thinking I should at least try to make it easier on the stabilization software by getting the sprocket holes within a whole pixel of the same point by simply translating (and cropping most of the over-scan) before writing the TIFF to disk. Translating on whole-pixel boundaries (with no rotation or scale) is lossless, so it should be safe. On top of reducing the demand on the stabilization algorithm, it’ll hopefully save a little disk space, too, without the redundant bits of previous/next frame above and below.
So that will be some more fun computer vision algorithm work to beef up my center-of-mass based sprocket detection into sub-pixel accurate sprocket hole edge-finding. (So far it looks like it’s just going to be a few more applications of robust least-squares again. RANSAC is a powerful tool and a one-liner in OpenCV!)
While I’m tracking down sprocket holes, I also want to build a software tool to help me align/calibrate the angle of the film in the holder. Once those nuts started to loosen, the frames started to tilt more and more, so having a little gauge in the UI to watch for that failure condition will be helpful. The two rebuilt roller assemblies right in front of the light source use springs and Nyloc nuts now and can be adjusted easily with a single turn of a screwdriver instead of trying to hold/tighten two nuts (above and below the bearings) simultaneously. It’s a huge quality of life improvement.
Beyond that, I’ve got some fit-and-finish work to do on the machine and the software before it’ll be ready to endure a longer test. Still, things are as exciting as they’ve ever been right now!