… as indicated above, I continue to experiment with direct RAW-capture. Actually, I have tried RAW-capture for quite some time, but always with mixed results. The raws you could get out of the HQ camera lacked a lot of information necessary for appropriate raw development. This situation has now improved to a point where a picamera2-based raw capture can directly piped into daVinci as well as other software, for example RawTherapee, with good results.
I promoted on this forum for a long time multi-exposure capture and exposure fusion as an easy way to aquire decent captures of old color-reversal film. While exposure fusion gives you quite pleasing results, there are some deficits hiding behind this algorithm. Specifically, the light intensities are modified, as well as the color values. Something you will do in color grading as well. But while you do this in color grading manually, in a guided way, it is done behind the scenes, automatically when utilizing exposure fusion.
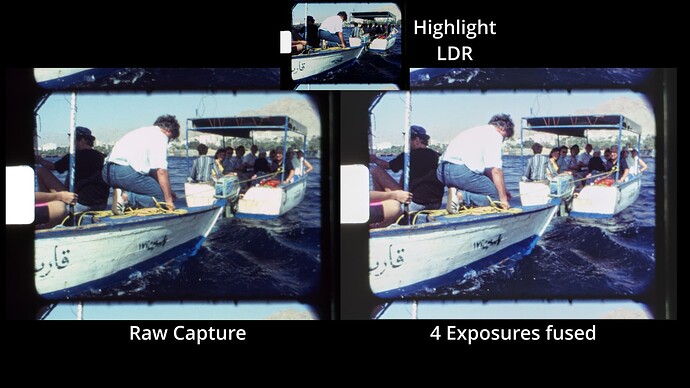
Let’s look at an example of a frame captured simultaniously in RAW and a 4 exposure image stack, exposure-fused via the Mertens algorithm:
Clearly, the outcome of the RAW is different from the exposure fusion, in many ways.
[Technical details: The exposure/illumination was set in the scanner in such a way that the empty film gate was at the 83% level of the full 12-bit dynamic range of the HQ camera sensor. That resulted in a level of about 240 in the darkest jpg output (the “highlight” jpg, pictured above). Burned out image areas in the film frame reach only a level of approximately 70% - so nearly 13% of light are eaten away by the blank emulsion of this Kodachrome. Clearly, that is not an ideal setting for the RAW capture approach; however, I wanted to be sure the be as close as possible to the optimal setting for exposure fusion.
For the whitebalance, the area of the sprocket hole was used as well. The RAW as well as the exposure fused footage was loaded into daVinci. To produce the above example, only lift and gain was adjusted in such a way that visually similar results were obtained.]
The first thing to note in comparing RAW and exposure-fused results is the difference in color. While the RAW results mimics closely the highlight LDR capture, the exposure-fused results drifts into the magenta color. Clearly, the exposure-fused result outperforms the RAW in the shadow areas (see for example the difference in the people’s faces). Note however that no shadow or highlight adjustments are active in the above example. So the full potential of the raw has not yet been unlocked.
Speaking of highlights - comparing the boat’s hull in the left-lower corner of the frame: here the unadjusted RAW outperforms the exposure-fused result! Frankly, I did not expect this outcome. It is reproducable with other capture examples and seems to be connected to high-contrast scenes where the specific exposure-fusion algorithm I am using (it’s not the opencv one) is having difficulties in squashing all the information into an 8-bit per channel image.
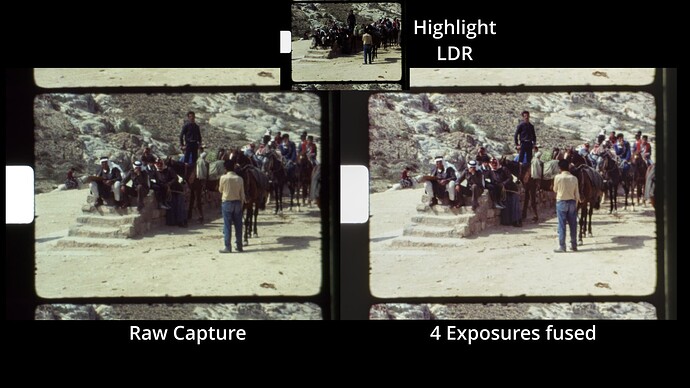
Generally, the exposure-fusion algorithm performs quite well and delivers images which are nice to view. Here’s another example:
Note that the color cast visible in the highlight LDR shows up again in the RAW capture. The exposure-fused results looks better, color-wise. But remember - only lift and gain have been used to align the results of both capture ways.
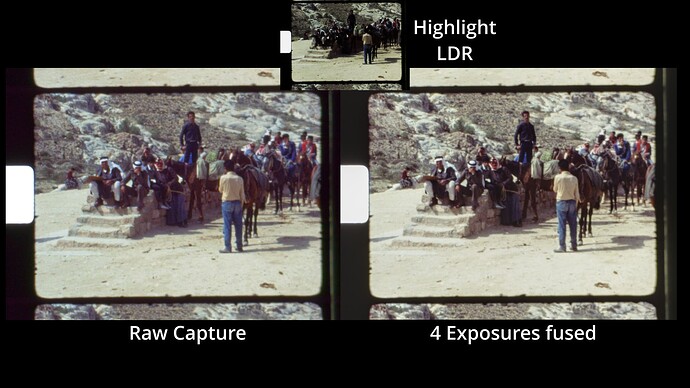
Trying to make both ways more comparable, here’s the result of this effort:
Specifically, the RAW capture has now a shadow and highlight treatment (shadows: 50, highlights -6). Color temperature and tint was also adjusted (Temperature: -390, Tint 22). Saturation was also increased slightly, with setting Sat to 63.
Now RAW and exposure-fused capture become comparable. It seems that the exposure-fused results generally creates per se a slightly more “brilliant” image. This is to be expected from the way exposure fusion works and is a general trend. However, one should be able to handle this with further color grading efforts.
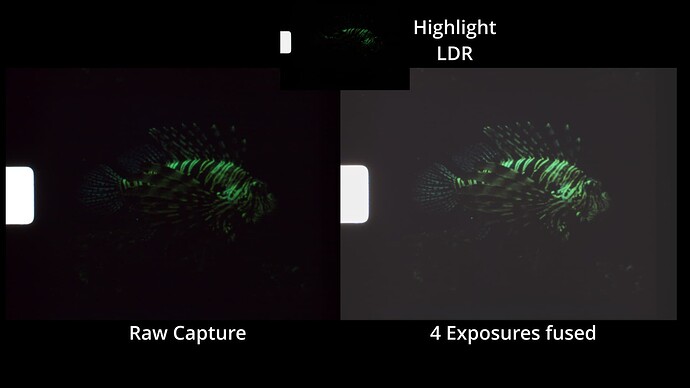
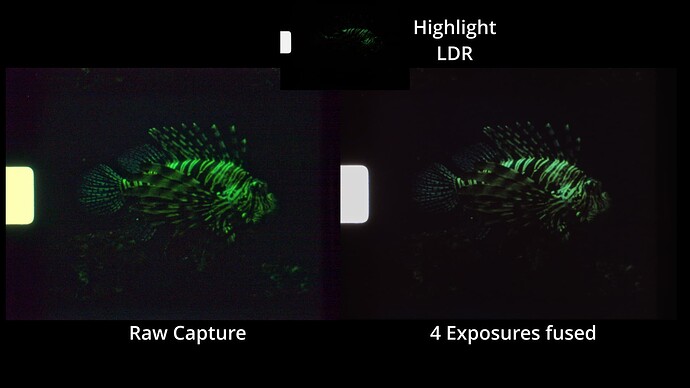
Now turning toward another issue discussed above - severly underexposed images. Here’s the example I selected:
While the highlight LDR shows nearly nothing, the unmodified RAW capture displays already a little bit more image content, the exposure fused result outperforms already the RAW one. This footage is quite difficult to grade, I tried my best and arrived at this result:
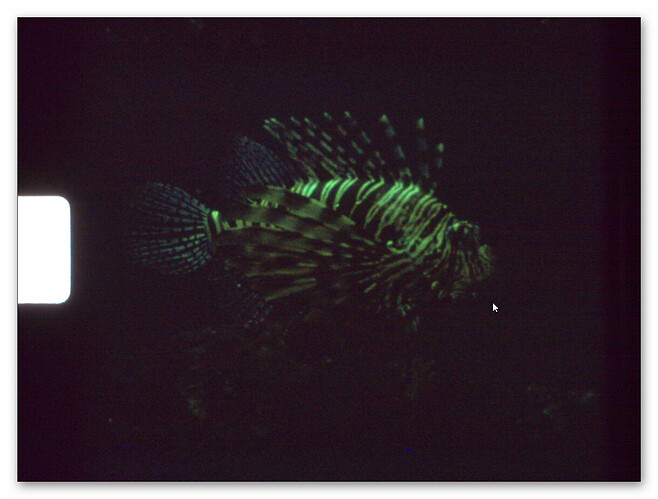
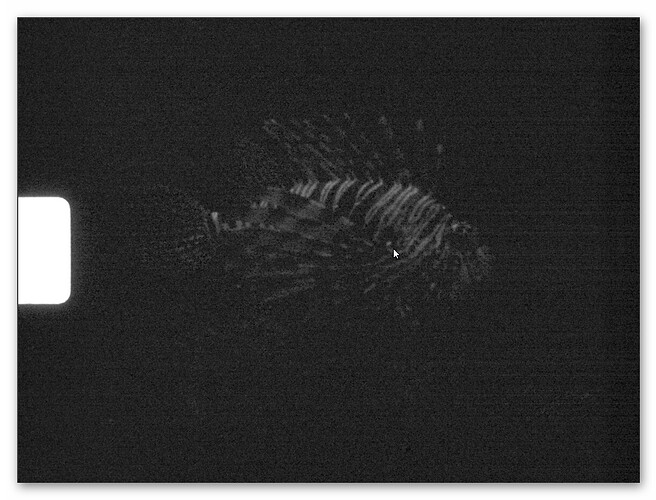
Clearly, the RAW result is more noisy, as it would be expected. The noise is mainly present in the red channel - this channel is traditionally more noisy than the other color channels in HQ footage. Here’s the RAW frame developed not in daVinci, but RawTherapee:
Notice the horizontal banding? To make it obvious, here’s the red channel alone:
So Pablo (@PM490) is somewhat correct in his assessment.But Jan (@jankaiser) as well. One has to take into account that we melting down a raw 4K image to an at most a 2K image output image - and if this is done right, one gains a bit of dynamic depth by the size reduction. Also, you probably would keep footage that dim nearly as dim as it already is - most probably you would not increase brightness so much that you turn night into day…
For my own scanner/workflow, I do see advantages in switching to a raw workflow. I will have to write additional software (for example, a sprocket-alignment procedure for raw files) and I need to look (again) more closely into the color science involved (I have the suspicion that the embedded camera metadata of picamera2 is still not 100% correct).
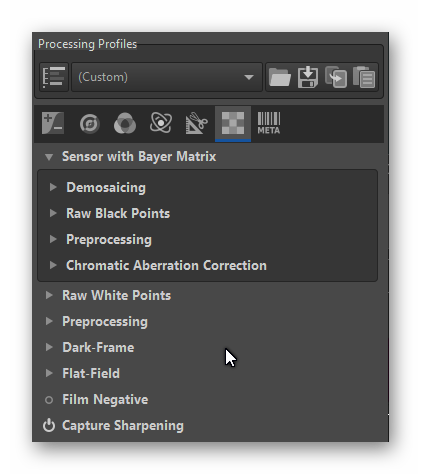
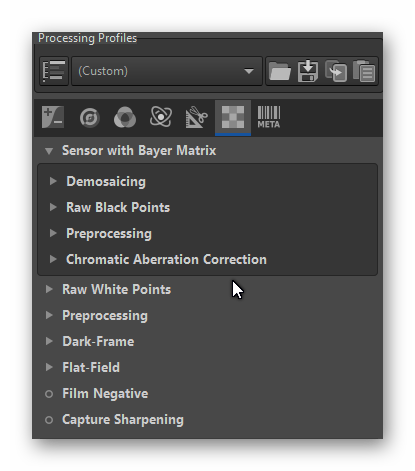
[For people doing their own experiments, maybe using RawTherapee as development tool. At least my program version uses “Capture Sharpening” as default, like here:
Make sure to turn this off, like so:
… that’s all for now ![]() ]
]
