@npiegdon: Extending a little bit my journey with raw files and Davinci:
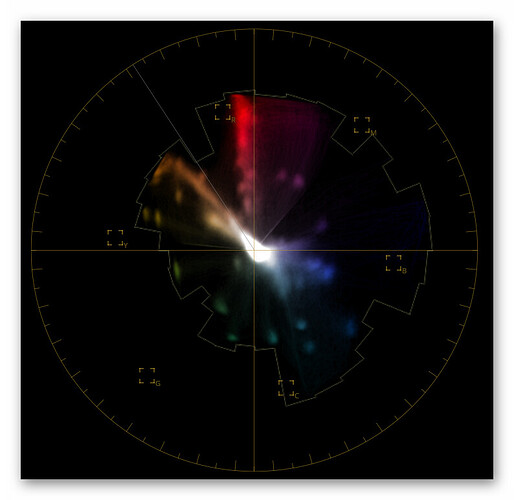
Here’s my current result, first as vectorplot (note: no clipping):
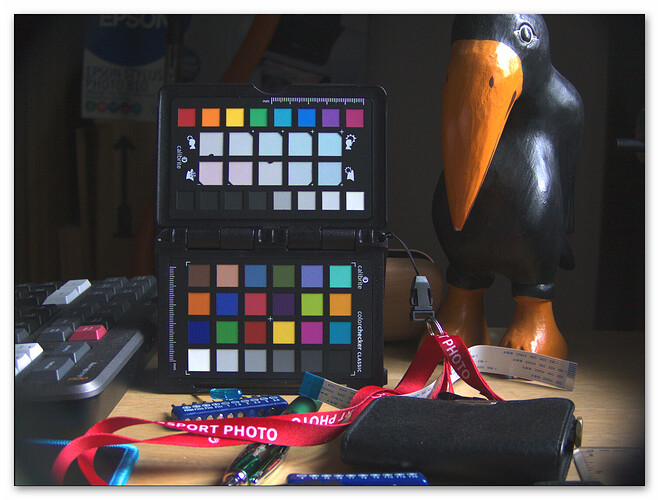
and here as image
(That should be viewed on an sRGB-display)
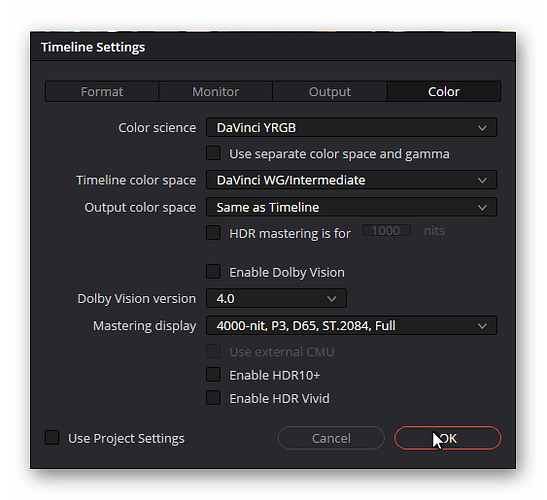
This was achieved by this timeline color setting:
I am using
DaVinci YRGB as basic “Color science”, “Timeline color space” is set to DaVinci WG/Intermediate and “Output color space” is Same as Timeline.
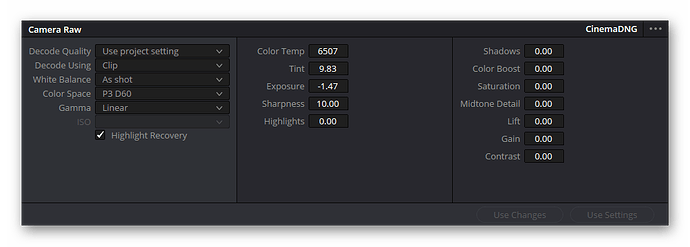
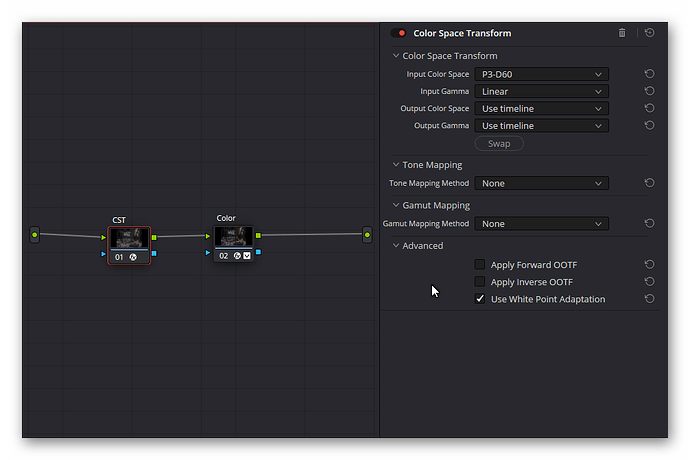
Now the important settings. The largest color space the raw converter of DaVinci can output with a known gamma-function is P3 D60 - and that’s what I am using as setting of the raw converter:
Important: the “Gamma” setting is selected as Linear. We will soon add appropriate processing nodes on the Color page.
The only adjustment I am doing at the raw tab is the “Exposure” value. With my raws, I usually have to dim down the exposure.
Now to the clip node tree. I use here two nodes so I easily can switch on or off the relevant things.
The first one is the important one - a “Color Space Transform” node. The input setting mimics the settings used in the raw converter. Be sure to switch off “Tone Mapping” and “Gamut Mapping” in the CST.
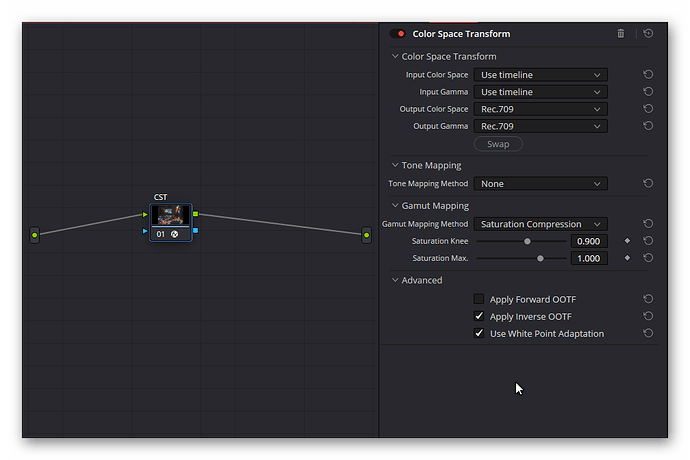
Before we go to the second node, we need to switch to the Timeline processing tree (the bullets/dropdown menues at the top of the node graph window). Here, select the following settings:
This is were our final output space gets defined. Note that I selected here “Gamut Mapping Method” as
Saturation Compensation - this is my favorite, as it dims too saturated colors into the available gamut. Most of the time, the difference to selecting None or Clip is hard to spot. Only very saturated colors are modified by this setting.
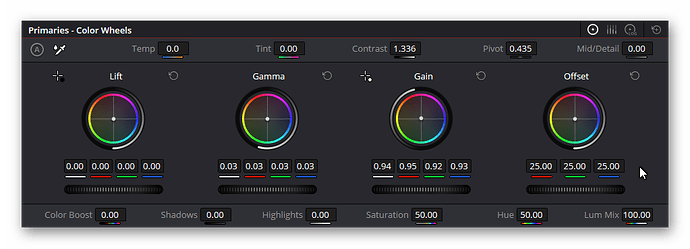
Going back to the clip node tree. The second node of that tree is used for basic color adjustments. In this case, I arrived at the following settings:
Basically some gain adjustments to get the grey patches into my taste of grey, following by some iterative adjustments of the overall gamma and contrast values.
All of that gives me the image (+ vectorscope display) posted above. I have tried this technique with scanned Kodachrome and Agfa Moviechrome footage, and it seems to work for these two types of film stock - sort of. In fact, still experimenting… ![]()
