My Telecine Software

Hi all:

I want to present to the forum the software that I use to scan my Super8 films.

The software is based on the project GitHub - jphfilm/rpi-film-capture: A project to capture 8mm and 16mm films using a raspberry pi & camera, and a modified movie projector. although much improved and adapted to my tastes and needs.

At first I did it for my personal use, in Spanish, my native language, but then I thought that it could be useful for other people interested in the subject of film digitization. For this reason I have prepared an English version.

The software that I have called DSuper8 (Digitize Super8), is especially suitable for the use of a modified projector with a stepper motor together with a Raspberry Pi and a RaspiCam camera. It works with both the old V1 camera and the new HQ camera.

Overall, the system is based on the client-server model.

As a server it uses a Raspberry Pi with a RaspiCam, which performs the following functions:

  • Attend the user’s orders via the GUI of the client program.
  • Lighting control.
  • Control of the movements of the film.
  • Taking and sending the digitized images to the client program.
  • Sending information on the process.
  • Log in the system console.

As a client, it uses a PC that performs the following functions:

  • Maintains the system GUI.
  • Receive the images captured by the server.
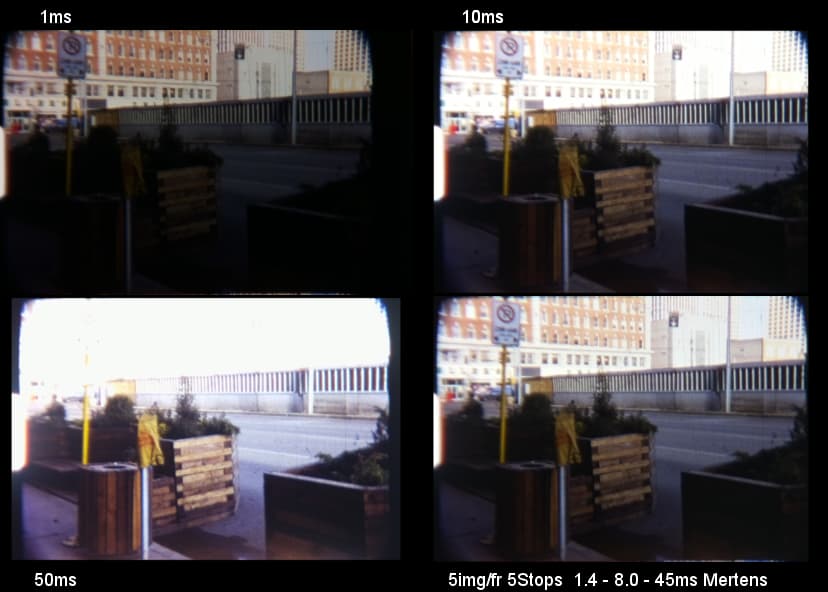
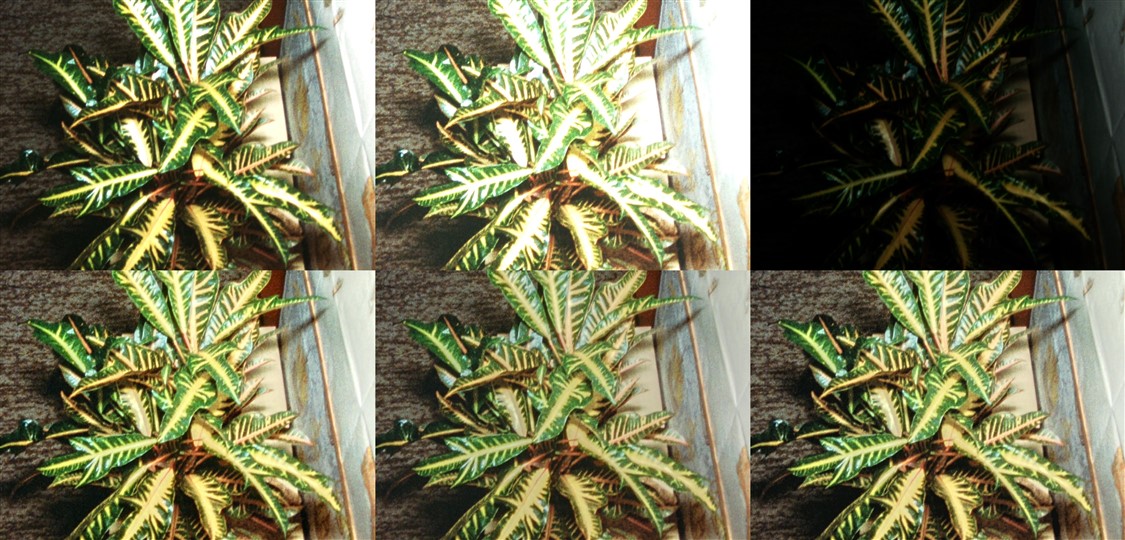
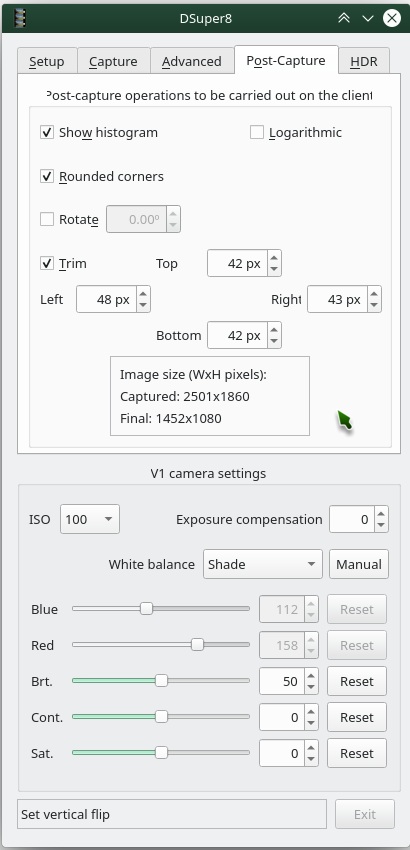
  • Performs post-processing operations: calculation and display of the histogram, corner rounding, image rotation, image edge trimming, image fusion …
  • Save the resulting final image to a file.
  • Updates the GUI with the information received from the server. In particular it permanently maintains the position of the film frame. At any time the user can place the film in the desired frame, forward or backward.
  • Log in the system console.

It should be noted that the system does not use any type of sensor to detect the correct position of the frame to be digitized. From my point of view, this function is already performed mechanically by the projector. Once we have the first frame located, it is a matter of making the main axis of the projector rotate in a controlled way. In my case a complete revolution of the axis advances exactly one frame. This approach greatly facilitates projector modification and software development.

I can say that with this procedure I have digitized many meters of film successfully. The frames are digitized one after the other with total precision.

I attach some images and screenshots.

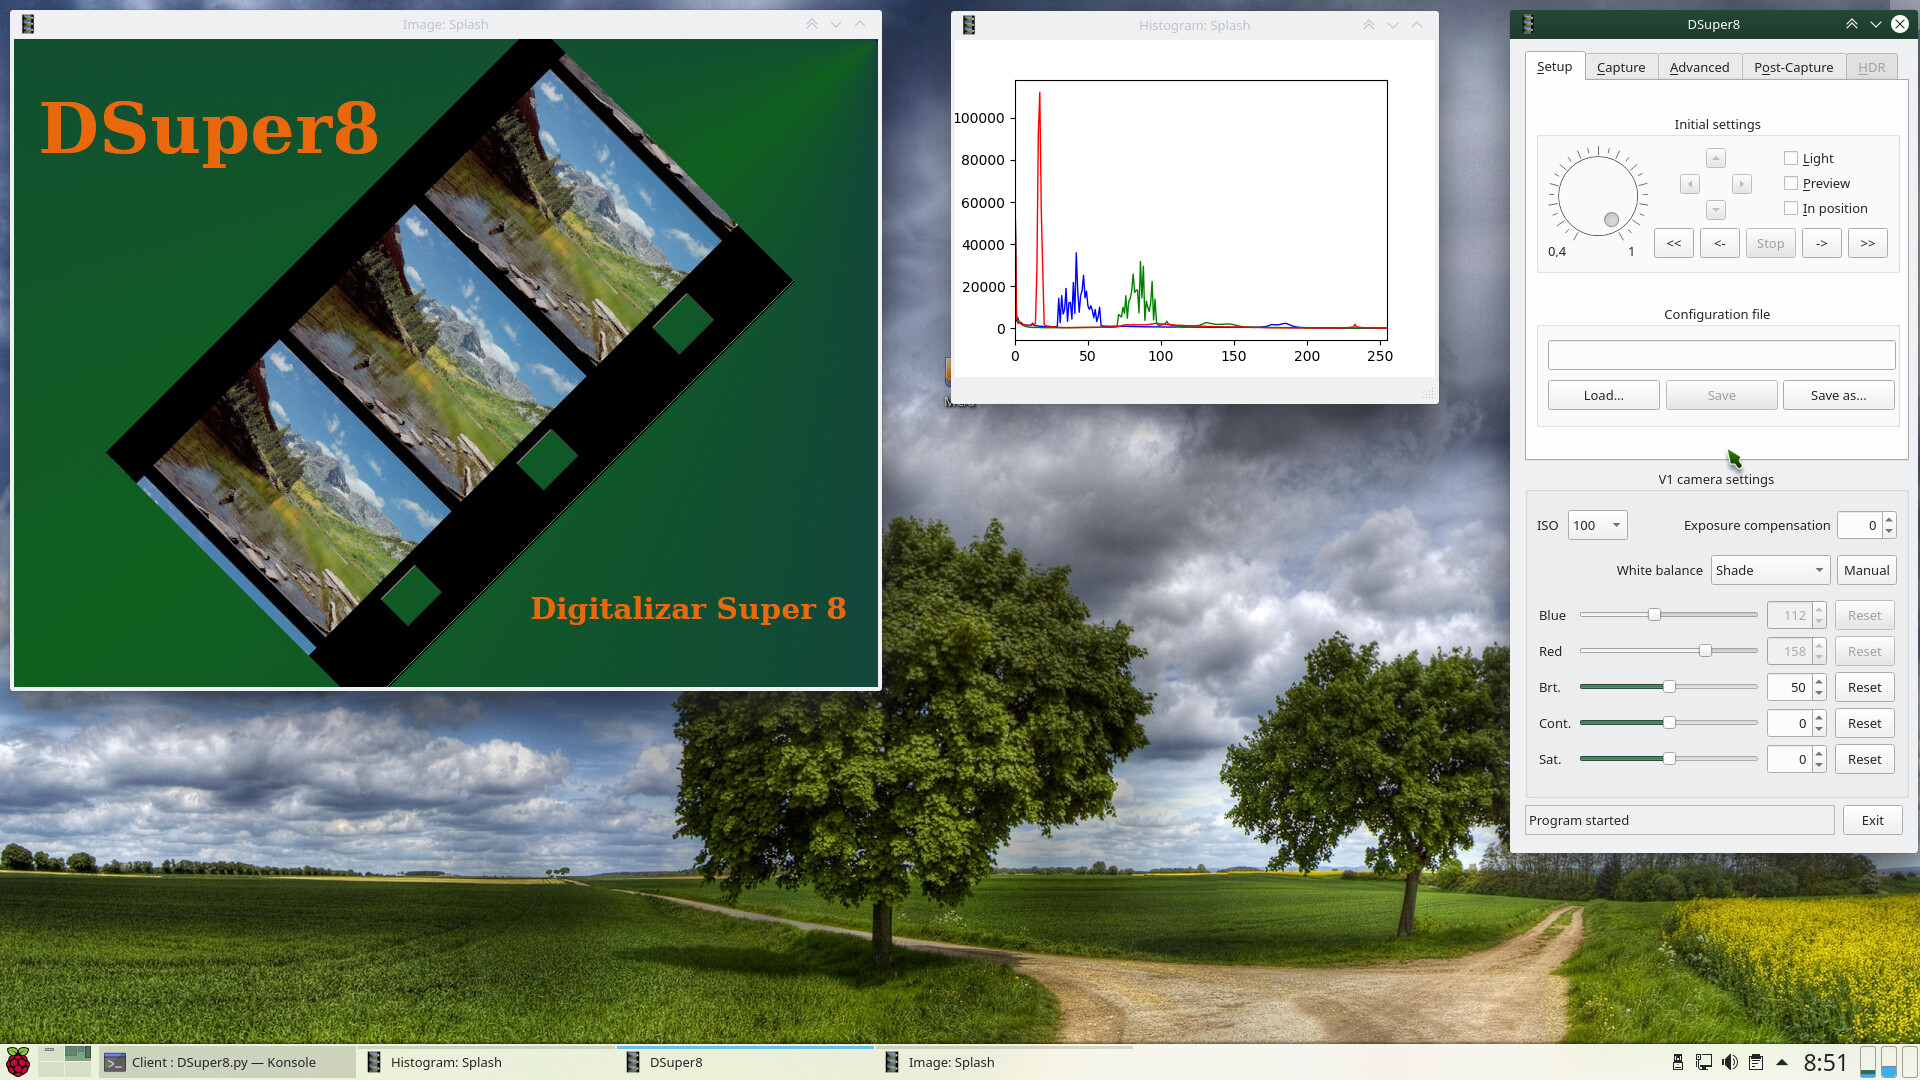
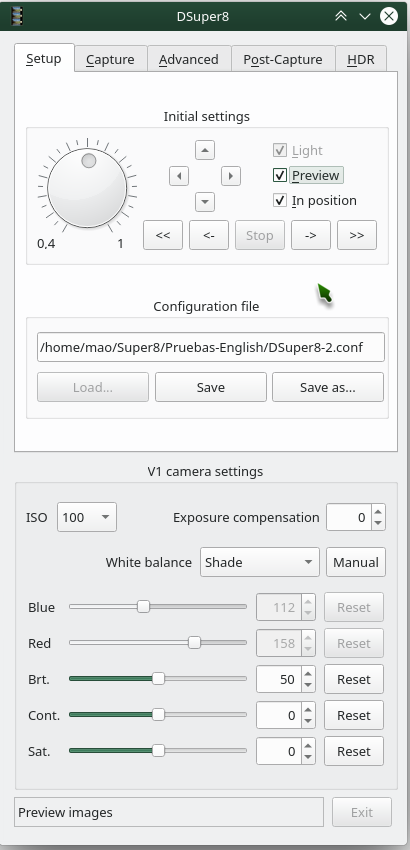
Initial appearance after startup.

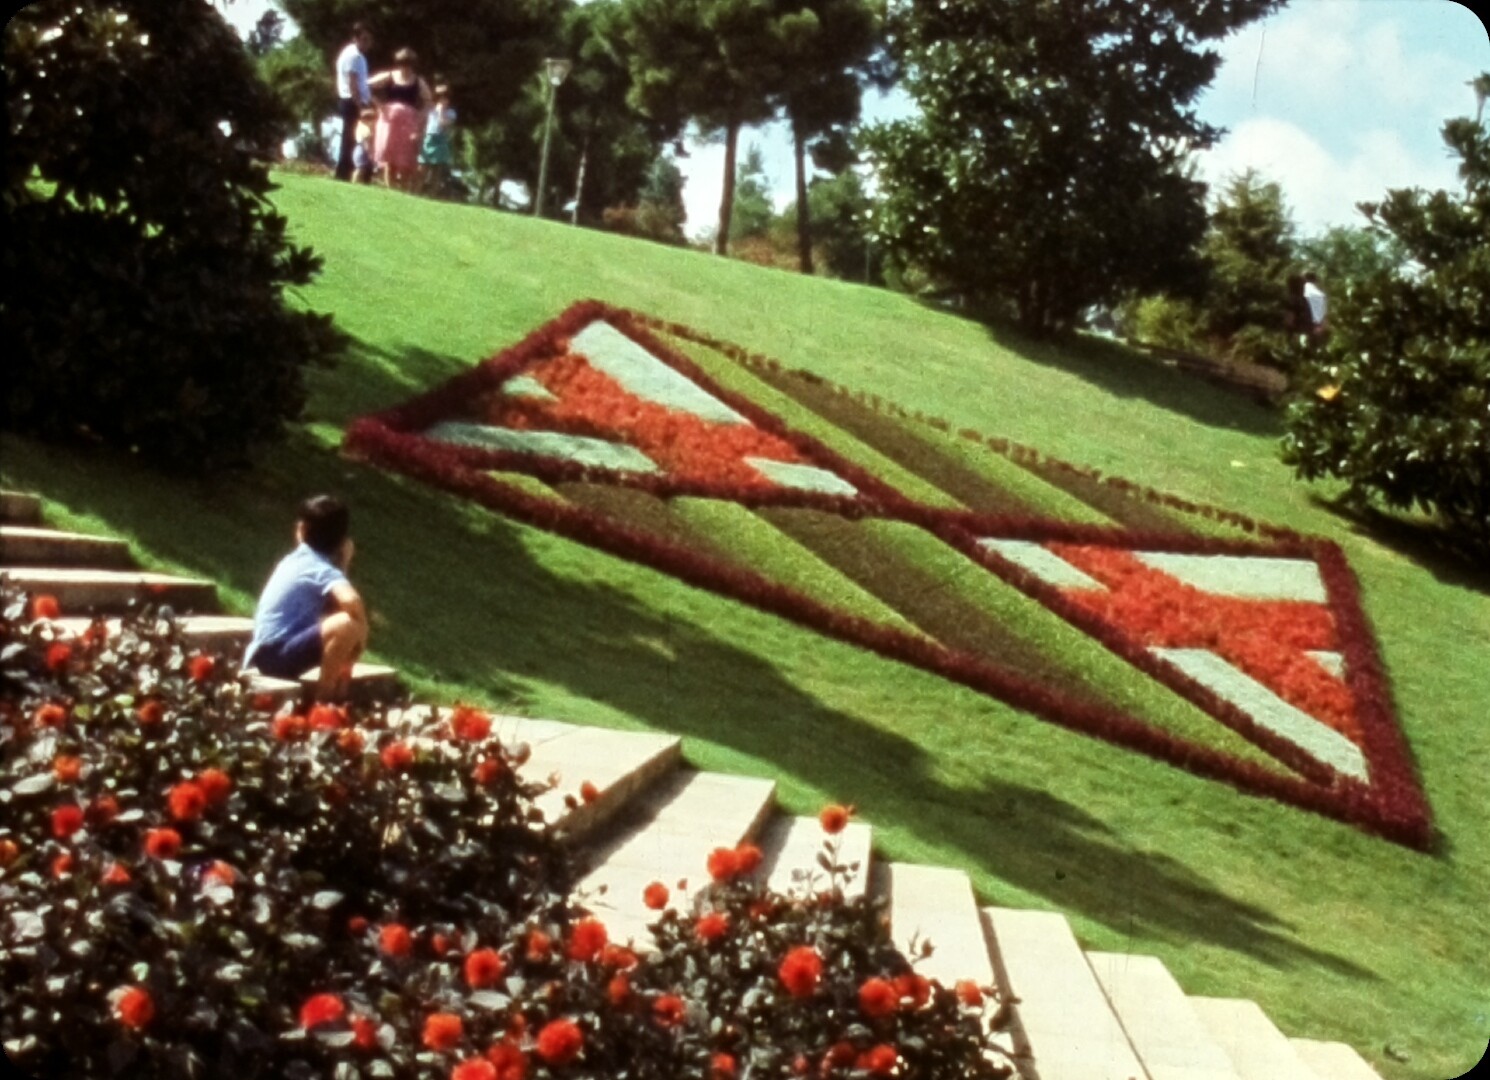
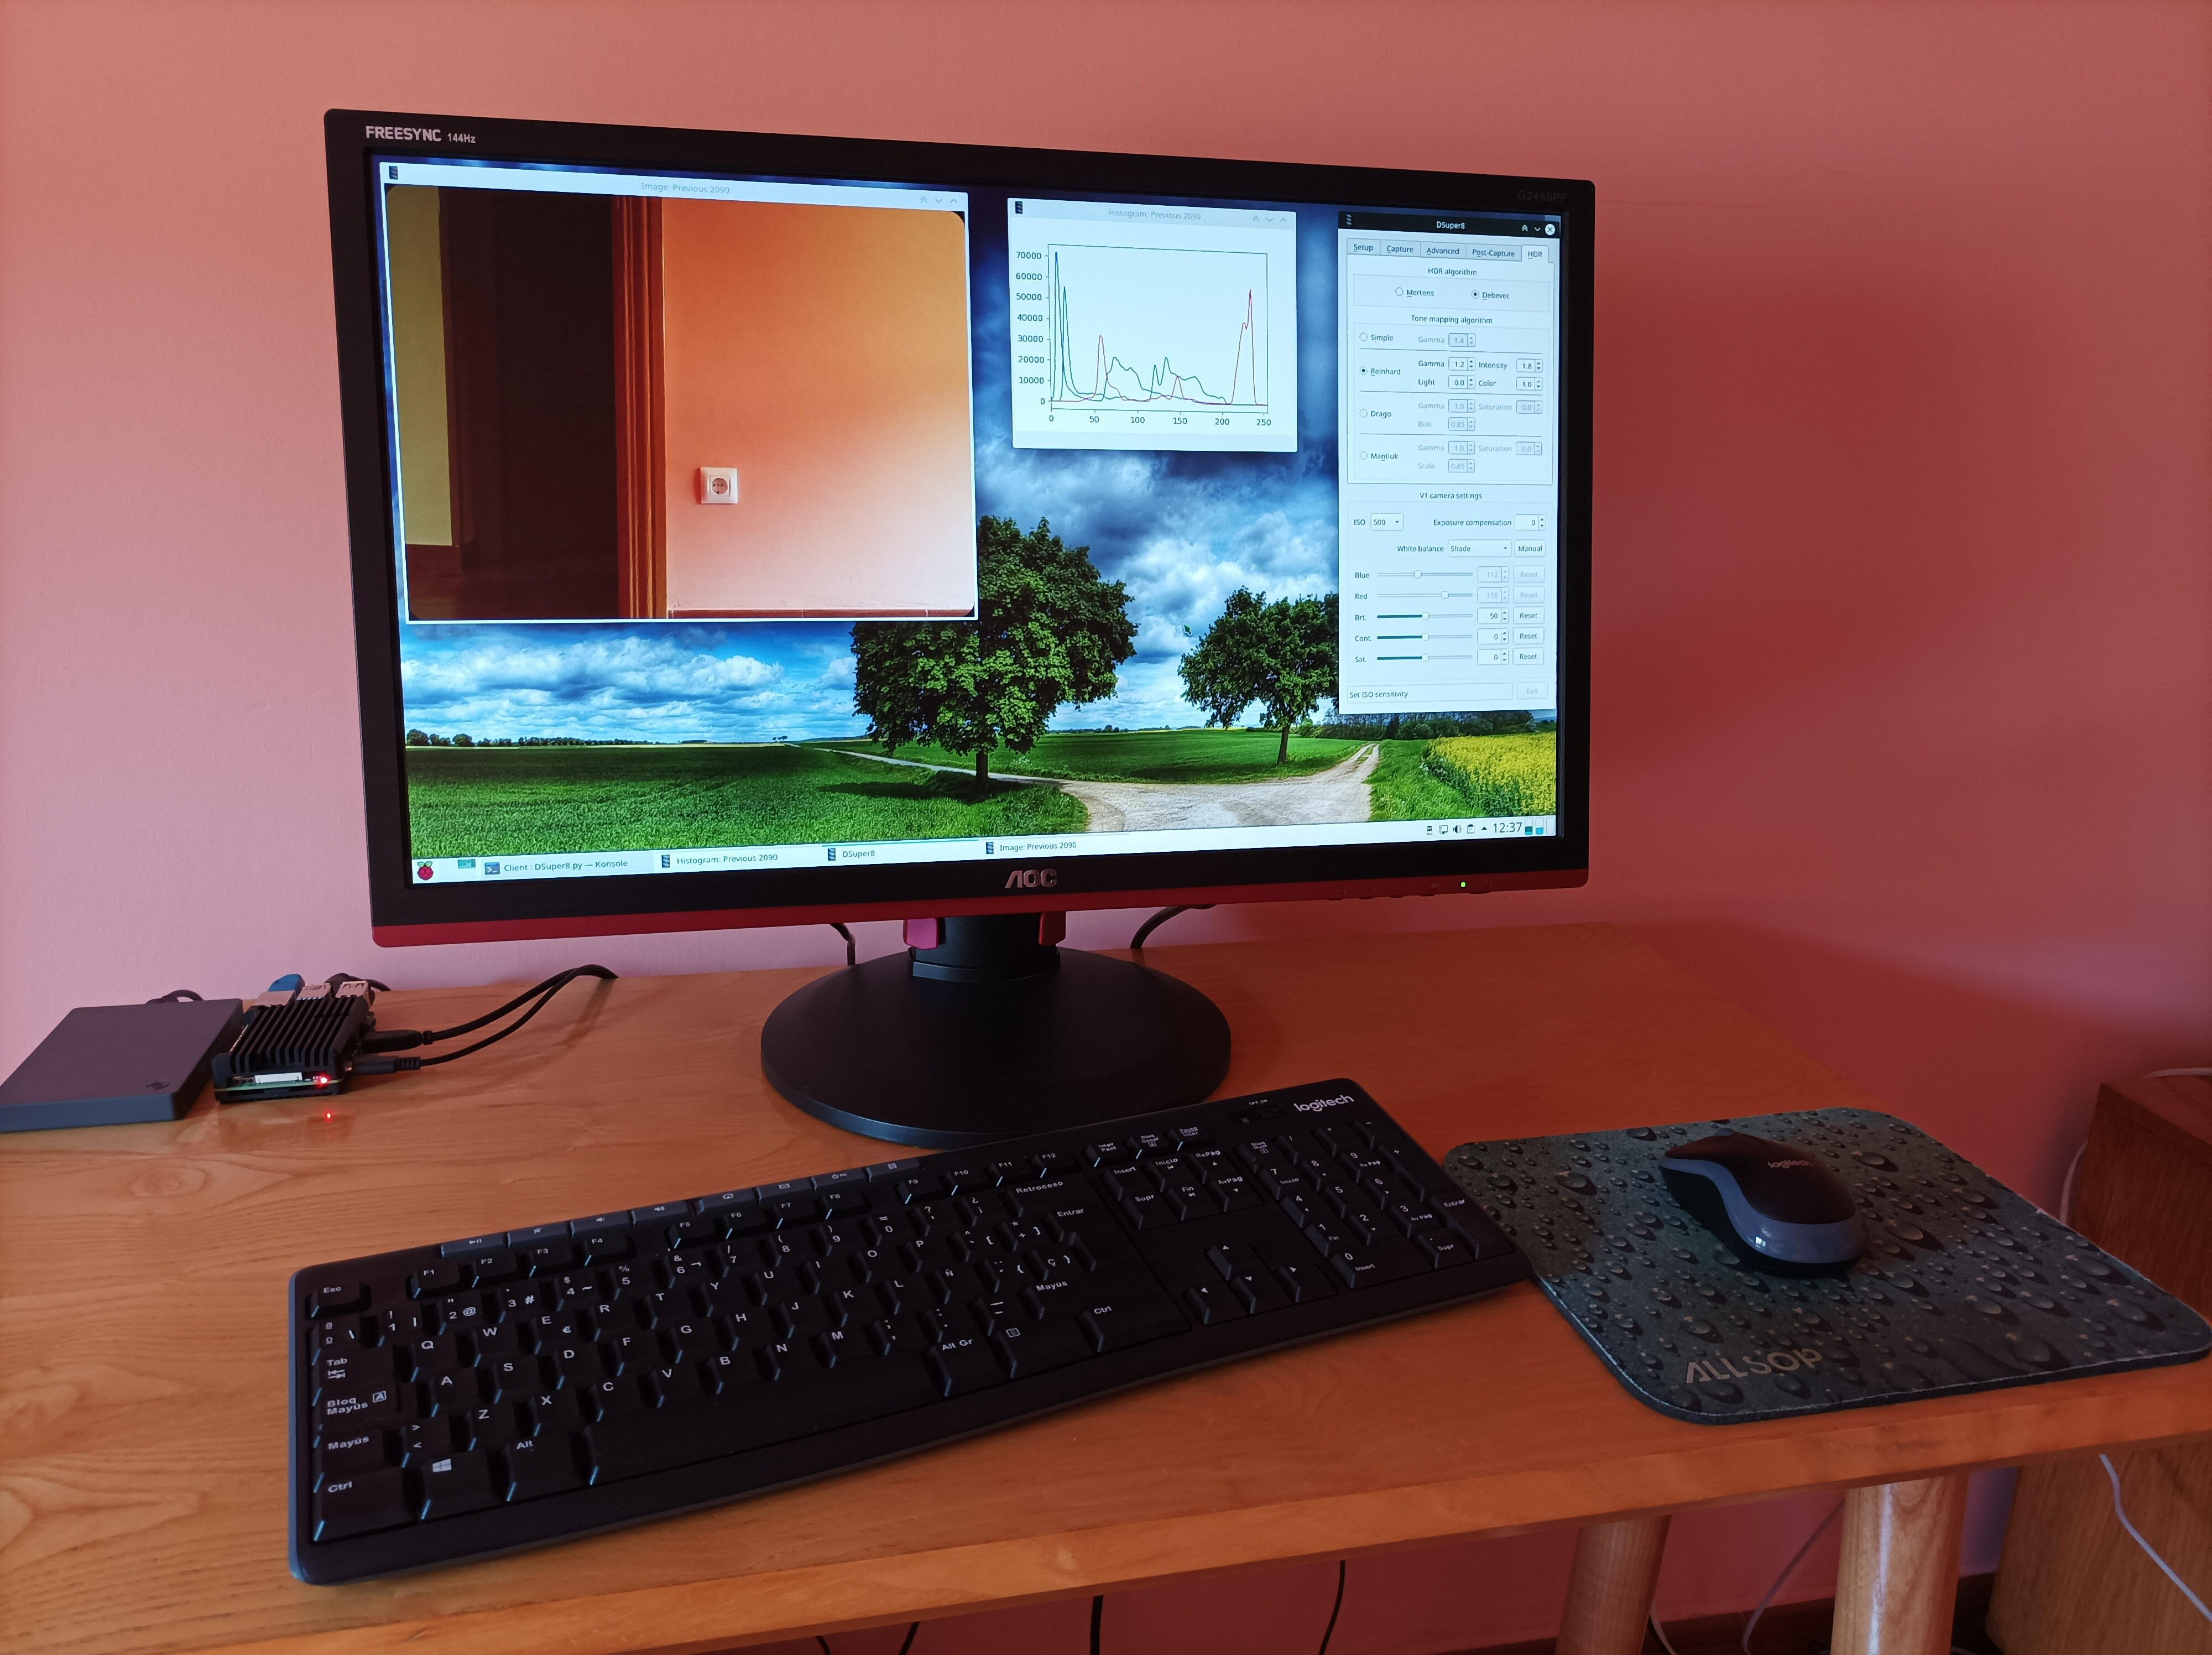
The system previewing images.

It is not a film, but images captured by camera V1 of a simulator that I have prepared to test the English version. We are spending a few days in a house that we have in a small and quiet town and here I do not have the real device.

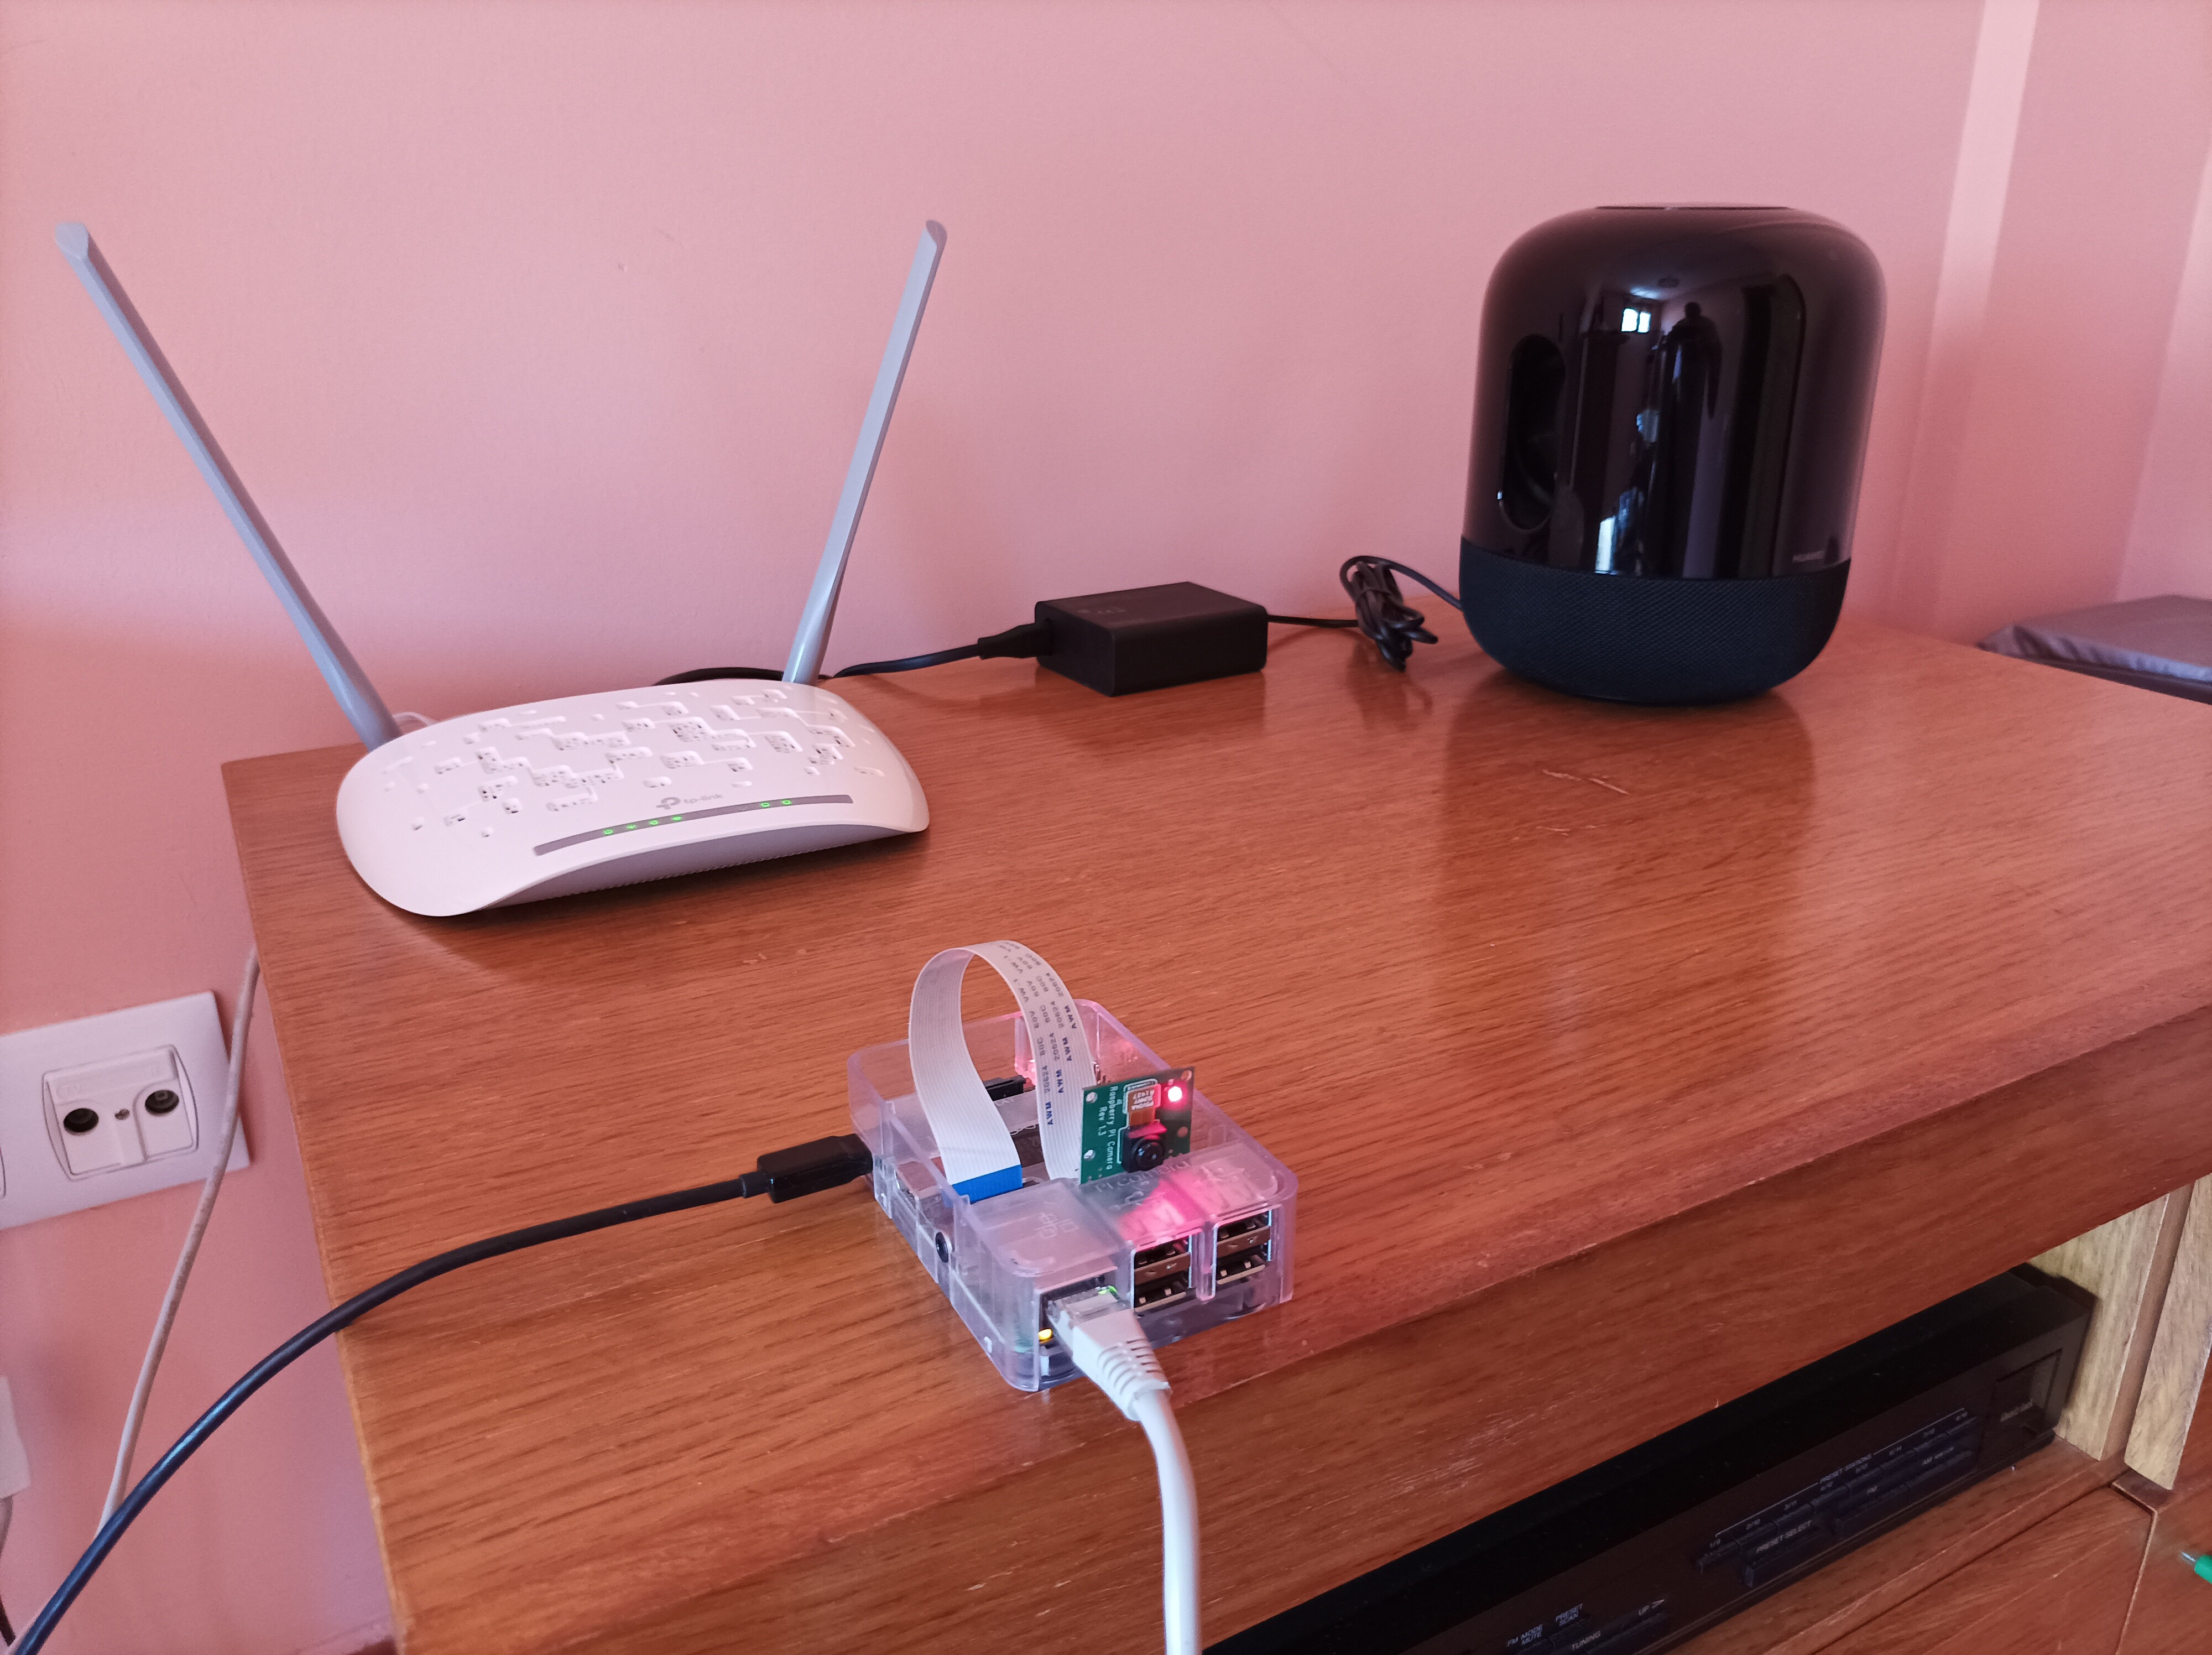
Server simulator (Raspberry Pi 2 + RaspiCam V1)

Client simulator (Raspberry Pi 4)

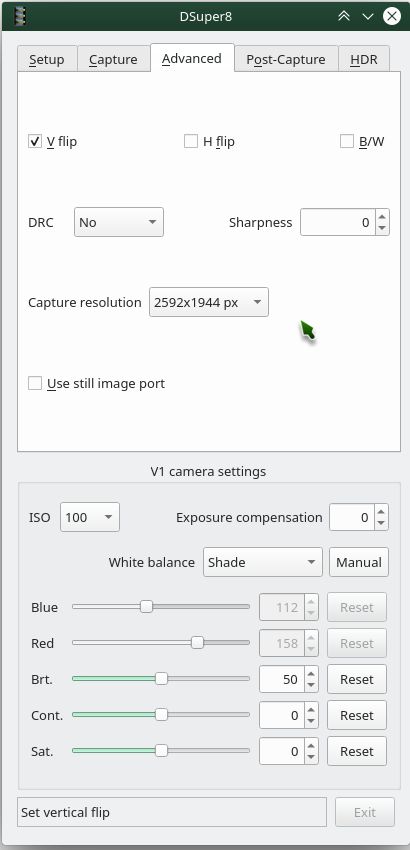
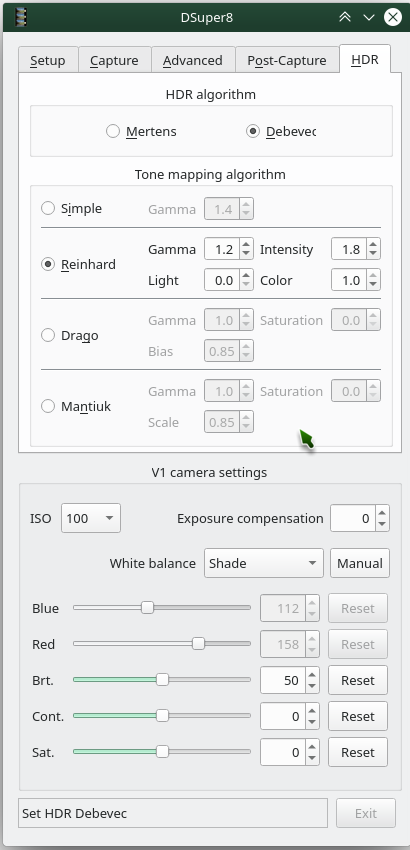
Screenshots of the five GUI tabs.


Instructions.pdf (32.5 KB)
DSuper8-Client.zip (785.6 KB)
DSuper8-Server.zip (14.0 KB)

7 Likes

This looks wonderful! Thank you for doing all this work. Keep us informed on the availability of DSuper8.

Hi @jimrobb44:

I appreciate your interest in my software.

If you are interested in trying it, I can send you a copy along with the installation instructions to your email.

I don’t know how I can make it publicly available to the forum.

Cheers

Thank you!

I sent you a message.

Jim

Hi all:

I have finally seen how to publish the software so that it is available to anyone who wants to try it.

I have edited the original post and added the software and instructions.

I add the wiring diagram, although it is not software so it is all together.

Regards.

DSuper8 Wiring Diagram.pdf (45.5 KB)

2 Likes

This is magnificent work. Thank you for sharing! What framework did you use to create the GUI elements?

Thanks Matthew.
All software is written in Python 3.
The GUI is designed with Qt Designer and later translated into Python.
It uses the PyQt5 library.

Cool. Would this work with a Raspberry Zero?

Hi @bassquake:

I have tested the software with the Raspberry Pi 2 and Raspberry Pi 3. With both it works fine.
I have consulted the characteristics of the Raspberry Pi Zero and I see that it has a GPIO and port for the camera, so in principle it should work.
However, if you plan to use the Raspberry Pi HQ camera, it may be a bit low on memory. The Raspberry Pi Zero has 512MB of RAM and 256MB must be allocated to the GPU for the HQ camera to work.
If you try it, please tell us the results.

Hello Manuel, Hello Jim,

thank you very much for your superb work done.
I have implemented your SW for my “project” and in principle it works great.
I am still experimenting with optical issues and image quality (IQ).
I use a RaspiCam HQ.
Main issue:

  • image dynamics: on some scenes either the sky is burnt out or dark areas are under exposed.
  • w/ bracketing and "Mertens-method I do not see a difference no matter if 2 or up to 5 images being used.
  • Debevec shows processed images, however I do not have a Camera-transfer function.
    So I can not expect proper results.

For troubleshooting purpose I would like to store each bracketing image on my host PC separately, send by the PI.
Unfortunately my programing skills are not adequate to manage this task.
Would you be so kind and give me an idea on how to go about it?

Or do you have any idea why I do not see an response by Mertens-Method.

Any input is very much appreciated - Thank you very much.

Hi @Ral-Film:

After many tests and many meters of digitized film and reels, I will tell you about the procedure that I currently use.

The software has an auto-exposure option, but I don’t recommend using it. In my opinion, the auto-exposure algorithm of the Raspberry Pi camera, although it works, does not give optimal results.

For this reason, I do the following:

At the beginning, during the preview, I set a manual exposure time that gives reasonably well-exposed images. We can help ourselves with the histogram.

Once achieved, I usually adjust the software so that 6 images are taken per frame, with 4 or 5 stop points.

I merge the images with the Mertens method.

In these conditions, good results are usually obtained. If during the digitization we see images that are too dark or too light, we can act on the manual exposure time to improve the results.

I can assure you that the differences are very appreciable by choosing the settings well.

Regarding the Debevec algorithm, I personally think it is a very good algorithm, for this reason when I was researching I decided to implement the Devebec algorithm in the software.

I am not an expert in the matter, but the camera transfer function is calculated by the opencv library, with the createCalibrateDebevec () function, which is implemented in the DSuper8 software (DS8ImgThread.py module).

The problem is that for it to work properly it is necessary to take many images of each frame, at least 16.

There is also the matter of choosing and properly configuring the tone mapping algorithm.

For all this, although it is a good algorithm, it is impractical for our purposes of digitizing films.

Very similar results are achieved with the Mertens algorithm and it is the one I use regularly.

Correct lighting and the quality of the original are also decisive factors in obtaining good final results.

As for the issue of saving bracketed images individually, the software and GUI would have to be modified to have this option.

In a somewhat traditional way, if it is only to observe a specific problem, you can do it by taking test images, with a single image per frame and progressively varying the manual exposure time.

Regards

Hello Manuel,

thank you very much for your speedy reply.
In the meantime I could run a few test according to your suggestions.
The first results have definitely improved IQ but still not to what I had expected.
I am not sure if I have to look into other areas like higher light output.
At ISO 100 I need exposure times over 200ms and I am not getting a descent grayscale in the very dark area. The Sky is totally burnt out than.
With ISO 200 or 320 and brightness set to ~55 , Contrast down (-5 pt.) Things start to look okayisch.
IMHO it would be nice if RaspiCam HQ would offer 10bit or 12bit readout (TIF) and or a log-curve in the front end of camera.
I had experimented with Bayer Raw readout, but also w/o success.
Once I am back home I will do more work and will let you know what I come up with.
Thanks again and best regards.

Hi @Ral-Film,

From what you are commenting, I think there must be some problem with the lighting.
If the lighting is correct, with the HQ camera at 100 iso you should get good images with an exposure time of around 4 ms.
200 ms is clearly too long.
The following capture was taken with the HQ camera with the following settings: lens at f / 5.6, iso 100, 6 images per frame between 0.8 and 12 ms (4 stops), resolution 2028x1520 px, images merged with the Mertens method.

As you can see, the image is correctly exposed. The sky is not burned and in the dark areas detail is appreciated.

You will tell us what type of lighting you use.

Regards.

1 Like

You might want to check the examples in the following post to get an idea what the Mertens algorithm is able of. As long as you do not have a very good HDR-display, stay with Mertens, forget the other algorithms.

1 Like

Hi @Ral-Film

As you can see in other posts my yart project is similar to Manuel’s, both inspired by the original Joe Herman project. https://forums.kinograph.cc/t/super-8-scanner-based-on-dominique-gallands-software/2106

So my experience with HDR is the following.

  • As Manuel says you first need to have the lighting adjusted so that the exposure time for an average image is about 4ms (at ISO 100). The exposure time is limited upwards by the framerate and downwards by the sensor reading. For example if the lighting is too weak the exposure time cannot be increased enough to get the overexposed HDR image.
  • I am dubious about the interest of making 6 exposures, in my opinion 3 are enough and this is especially true since it takes about 4 frames to stabilize an exposure and therefore it reduces the throughput considerably.
  • In my case I do not count in stops but in ratio, my values chosen experimentally are 0.1 for the under exposed image and 2 for the over exposed image.So for example exposures 0.4-4-8 ms (This is quite consistent with Manuel’s values)
  • Amateur films can have large variations in exposure, I think that the automatic exposure for obtaining the middle image is interesting, it gives a starting point. This is usually what I choose. Note that this still reduces the throughput because about 8 frames are needed to stabilize the automatic exposure.In the end with a resolution of 1920x1080 the capture requires about 2s per frame.
  • The Mertens algorithm is simple and effective, I could not get satisfactory results with Debevec.
  • My program has the possibility in preview or in capture to display or save the unmerged images, this is really useful to adjust the exposures.

Thank you all for your valuable input.
For test purpose I have altered my diffusion filter and I get now a much higher light output.
I can get with ISO 100 and under 1ms an image.
Mertens algo is working, however I am not really satisfied with my results.
The post suggested by “cpixip” shows an image of the Petra in Jordan which shows a similar situation I am facing.

The images 1.0, 10.0 and 50ms are manual fixed exposers. For each setting I took several shots to ensure the camera has settled.
The final “Mertens image” are combined images (5 img/frame, 5 Stops)
Please refer to my uploaded image. The result still falls behind my expectations. The garbage can in lower left shows nice wood structures. The combined “mertens” image is not much better than the single exposure with 10ms.
I have ordered a new lens for other reasons and will continue optimizing sharpness and mechanical stability first.
Thanks again for sharing all your knowledge.
Have a nice weekend.

What could happen here is the following: the opencv implementation of the Mertens algorithm does convert your 8 bit per channel images into a fused floating point image. However, this fused image usually ends up with brightness values below zero and above one (which is the normalized brightness range for floating point images). If you simply output this image as a .png, for example, dark and bright image areas become clipped. That is an error I have seen in a lot of implementations. Be sure to rescale the output of the Mertens algorithm with something like

minimum = img.min()
maximum = img.max()
scaler = 1.0/(maximum-minimum+1e-6)

img = scaler*(img-minimum)

Another point to check: you have taken the 1ms/10ms/50ms images manually. That does not assure that the images which you are inputting into the Mertens algorithm are the same, as those are presumably taken during automatic capture. It could be that the camera does not really settle to the exposure time you are requesting. That issue is generic to most cameras (you have to wait for 3-50 frames, depending on the camera) and was the reason in my scanning approach to vary the power of the light source for the different exposures, not the exposure time.

The three input pictures you have posted should give you a better result than the one you obtained. Both highlights and shadows are poorly defined.

Generally, I would advise to store the separate exposures of a frame scan for archival purposes. As the HDR techniques (especially the display technology) progress, you might want to realize a real HDR workflow, which is different from what the Mertens algorithm is aiming at.

While you can do a Mertens with only two appropriately chosen images, you will need to cover at least a range of 5 stops for scanning all the details of a standard Kodak color reversal film (other film stock is less demanding). For most camera sensors, this means you should not go below three different exposures. If you sample more exposures from a given frame, the Mertens algo automatically reduces the noise of the camera sensor. Also, you are better off with more exposures if, at a later stage, you want to produce real HDR footage (that would be than “Debevec”, but without tone-mapping).

1 Like

I want to make a few comments about it.

The Mertens algorithm (from opencv), I apply it as follows:

img = createMergeMertens.process(imglist)
img = numpy.clip(img * 255, 0, 255).astype(‘numpy.uint8’)
return img

I have not made it up. It is what I have seen researching on the Internet.

@cpixip I would beg you to complete it in the way that you think is most appropriate.

As for the subject of automatic exposure. Indeed, several exposures of the same frame are needed to arrive at a stable exposure time.
For this, in the DSuper8 software a loop is implemented that takes one image after another, which is sent directly to a null file until a stable time is observed, and at that moment the real image that is sent to the client is taken.
Anyway, I am not very fond of automatic exposure. My working procedure is very similar to that of @cpixip . I have come to this procedure by intuition and by doing many tests, rather than by technical criteria.

If manual exposure is used, in the logs of both the client program and the server, the real data of the exposure reported by the camera appear.

I take this opportunity to inform that I am preparing a new version of the software in which I will take into account valuable information that appeared in the forum.

I’m going to add the ability to save the images from bracketing.

Thanks to @cpixip for contributing his authoritative opinions.

Regards

1 Like

Hi @Manuel_Angel

I would suggest trying the following approach for a test:

img = createMergeMertens.process(imglist)

minimum = img.min()
maximum = img.max()
scaler = 1.0/(maximum-minimum+1e-6)

img = scaler*(img-minimum)

img = numpy.clip(img * 255, 0, 255).astype(‘numpy.uint8’)
return img

and see whether it makes a noticable difference with respect to highlights and shadows.

It’s been a long time since I went along that way - nowadays I am using my own Mertens implementation. So I am not sure if the current opencv implementation still outputs out-of-range data. You can check this by simply including a single additional line in your code, like in the following code segment:

img = createMergeMertens.process(imglist)

print(img.min(),img.max())   # this is the simple test line

img = numpy.clip(img * 255, 0, 255).astype(‘numpy.uint8’)
return img

If you see in this output numbers below zero or above one, the current implementation of the opencv Mertens still suffers from bad scaling.

I observed out-of-range data mainly in strong contrast scenes with clearly defined shadow areas. Again, haven’t checked this for years, but I assume that this is still the case.

If you are rescaling the Mertens output to a valid range (as suggested above), you might see a noticably reduced contrast, of course depending on your material. As I am doing anyway a color-correction for each scene in postproduction (daVinci Resolve is recommended), that is not too much an issue for my workflow. However, it might not fit your workflow.

In fact, in a production setting, if the above described rescaling is necessary, it is probably better to keep the rescaling fixed (say, the interval [-0.5:1.3] is mapped to the interval [0:1] or at least use some more robust min/max estimator, similar to something like

minimum = np.percentile(img, 1)                                 
maximum = np.percentile(img, 99.5)

Some additional comments:

this is indeed the way to go if you are working with Raspberry Pi hardware/software. As far as I remember (again, ages ago), you would set the exposure time via shutter_speed and query the exposure_speed until both match approximately - that takes usually 3-4 frames (it might be the other way around, can’t remember). For other cameras, you need to find another way to make sure things have settled.

I absolutely agree, as this kills the original dynamic of the movie, at least to a certain extent. If you are taking multiple exposures anyway, you can set up your system in a way that the whole dynamic range of your source material is captured for sure. One way to do this I have described in detail in this and the posts following. Basic idea: the exposure reference is the light source itself, which should be imaged in the darkest frame captured in such a way that it’s not burning out (an 8bit value of 230-250 for example). The other, brighter exposures are used to sample a dynamic range of 5-6 stops. From my experience, this is sufficient for all color-reversal film stocks I encountered (Kodachrome, Agfa, Fuji, etc.)

3 Likes

@Ral-Film and @Manuel_Angel
@cpixip and I were asking how you perform the Mertens merge and we drew your attention to a frequent misunderstanding not well explained in the opencv documentation, you have to normalize the result between 0 and 1. Either as explained by cpixip or like this :
image = cv2.normalize(image, None, 0., 1., cv2.NORM_MINMAX)
and this before changing back as usual to an integer between 0 and 255 :
image = np.clip(image*255, 0, 255).astype(‘uint8’)
Typically the Mertens opencv merge gives a result between -0.05 and 1.2 and without this normalization we lose all the benefit of the merge at the ends of the histogram. This is especially noticeable in the treatment of burnt whites, the main advantage of HDR. On the other hand as @cpixip says the contrast is reduced by this normalization and a histogram equalization can be done in the post.

First row auto exposure 14ms Over with ratio 3 → 42ms Under with ratio 0.05-> 0.7ms
Second row Mertens clipped Mertens Normalized Mertens Normalized and equalized
Sorry, I couldn’t find an image in this reel that better highlights the difference in the white areas
@cpixip
Concerning the auto-exposure or not, I understand your reasoning but an amateur film is often a succession of scenes with very different luminosities and if the auto-exposure of the Pi Camera is not perfect it still gives a good starting point to obtain the median image before implementing the other HDR exposures. I also think it should allow to limit to three exposures. The constraint is that the image must be framed without black bands that would disturb the calculation.

@Manuel_Angel
Concerning the wait for the stabilization of the exposure it is not certain that the stability on two successive images is sufficient. As indicated by cpixip you can compare the requested shutter_speed and the obtained exposure_speed but the equality will not be perfect (the exposure is multiple of the scan time of a pixel line of the sensor). For the Pi camera the most reliable method is to wait 4 frames. And if auto exposure it takes 8 frames to get the result. All this slows down the capture, what is the throughput when you capture in 2028*1520 with 6 exposure per frame?

1 Like